Table of Contents
Advertisement
Quick Links
Service
Manual
This manual is to be used by qualified appliance technicians only.
Viking does not assume any responsibility for property damage
or personal injury for improper service procedures done by an
unqualified person.
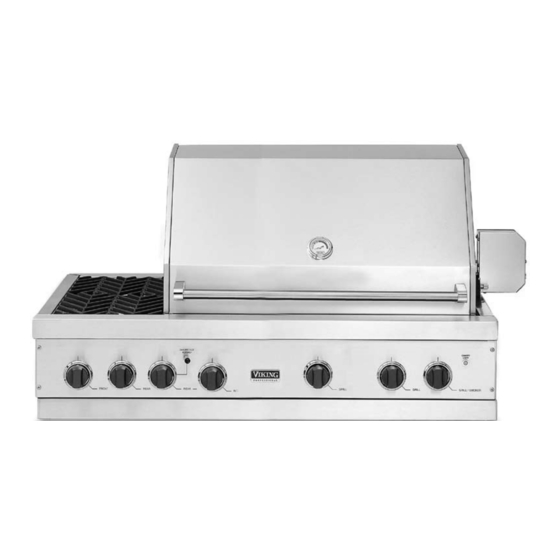
Outdoor Gas Grills
(E-Series)
(VGBQ532-3RE model shown)
Preferred Service
This manual covers general and
specific information including, but not
limited to the following model:
VGBQ300-2RE
VGBQ410-3RE
VGBQ412-2RE
VGIQ410-3RE
VGIQ412-2RE
VGBQ530-4RE
VGBQ532-3RE
VGIQ530-4RE
VGIQ532-3RE
SM0-0002
April 2009
Advertisement
Table of Contents

Related Manuals for Viking VGIQ412-2RE


Summary of Contents for Viking VGIQ412-2RE
- Page 1 Preferred Service Manual This manual is to be used by qualified appliance technicians only. Viking does not assume any responsibility for property damage or personal injury for improper service procedures done by an unqualified person. This manual covers general and specific information including, but not...
-
Page 2: Table Of Contents
Infrared Igniter ............23 Rotisserie Igniter .............24 Light Transformer ...........25 Parts Location–Burners ...........26 Side Burner .............27 Grill Burner .............28 Infrared Rotisserie Burner ........29 Rotisserie Motor .............31 Interior Light ............31 Grill Canopy ............32 Component Testing ..........33 Troubleshooting Guide ...........33 © 2009 Viking Preferred Service... -
Page 3: Important Information
“DANGER”, “WARNING” or “CAUTION”. These words mean: CAUTION DANGER VIKING will not be responsible for any injury or property damage from improper service Immediate hazards which WILL result in severe procedures. If performing service on your personal injury or death. -
Page 4: Warranty Information
Viking Range Corporation service agency or representative. This warranty does not apply to commercial usage. Warrantor is not responsible for consequential or incidental damage whether arising out of breach of warranty, breach of contract, or otherwise. -
Page 5: Warranty Service Information
The return of the Owner Registration Card is not a condition of warranty coverage. You should, however, return the Owner Registration Card so that Viking Range Corporation can contact you should any question of safety arise which could affect you. -
Page 6: General Information
2 ” - 1 3 . 2 c . 9 c / 1 6 ( 8 3 ( 1 0 4 ” 4 . 6 ” - 3 / . 2 c ( 8 3 © 2009 Viking Preferred Service... - Page 7 - 5 / . 9 c ( 4 2 8 ” . 4 c - 3 / ( 1 3 ” 5 . 1 4 ” - 3 / . 2 c ( 8 3 © 2009 Viking Preferred Service...
-
Page 8: Warnings
This outdoor gas grill is not intended to be straightened out. Shake out any debris through installed in or on recreational vehicles and/or the air shutter. boats. © 2009 Viking Preferred Service... - Page 9 DO NOT 2. Any LP cylinder not connected for use shall USE AN OPEN FLAME TO CHECK FOR LEAKS. not be stored in the vicinity of this or any other appliance. © 2009 Viking Preferred Service...
-
Page 10: Model - Serial Number Matrix
V G I Q 5 3 2 3 R E 1 L S S V=Professional Series Stainless Steel L.P. Gas E-Series Infrared Grill Rotisserie 53” 3 Grill Burners 2 Side Burners Serial Numbers 03 11 09 C00009321 Month Serial Number Year of Manufacture © 2009 Viking Preferred Service... -
Page 11: Operation
If the burner does not light in 4 seconds, the outdoor hood may be compromised. turn the knob to “OFF,” wait 5 minutes, and try again. If the burner will not light after several attempts, see the Troubleshooting section. © 2009 Viking Preferred Service... -
Page 12: Using Grill
Press the electronic ignition button which corresponds to the rotisserie control knob. You will hear a clicking sound. After the burner lights, hold the rotisserie control knob in about 5 seconds longer © 2009 Viking Preferred Service... -
Page 13: Smoker Burner And Smoker Box
© 2009 Viking Preferred Service... -
Page 14: Service Diagnostics And Procedures
Grill Tru Sear Grill Switch Switch Front Infrared Ignition Ignition Switch Switch VGIQ412-2RE VGBQ530-4RE Light Light Side Rotisserie Grill Grill Grill Grill Grill Switch Switch Rear Side Tru Sear Rotisserie Rotisserie Grill/Smoker Grill/Smoker Front Infrared © 2009 Viking Preferred Service... - Page 15 Grill Grill Grill Grill Tru Sear Grill Grill Switch Switch Rear Infrared Side Rotisserie Rotisserie Rotisserie Front Grill/Smoker Grill/Smoker Ignition Switch VGIQ532-3RE Light Side Tru Sear Grill Grill Switch Rear Infrared Side Rotisserie Front Grill/Smoker © 2009 Viking Preferred Service...
-
Page 16: Parts Location-Control Panel
Parts Location–Control Access Panel Removed (VGBQ532-3RE model shown) Front Side Rotisserie Light Grill Grill Spark Transformer Burner Valve Lighting Valve Valve Module Valve Grill Spark Rear Side Grill Tru Sear Infrared Igniter Valve Module/ Burner Valve Igniter Burner Valve Terminal Block © 2009 Viking Preferred Service... -
Page 17: Parts Location-Rear View
Service Diagnostics and Procedures Parts Location–Rear View Access Panel Removed (VGBQ532-3RE model shown) Rotisserie Rotisserie Burner Igniter © 2009 Viking Preferred Service... -
Page 18: Control Panel Components Access
Screws 4. Lower the control panel. 3. Reverse procedure to reassemble. Verify the switch reads open in the extended position and 0 in the pressed position. Ω Note: VGBQ532-3RE model shown 5. Reverse to reassemble. © 2009 Viking Preferred Service... -
Page 19: Led Lighting
5. Reverse procedure to reassemble. Verify the switch reads open when the valve is off and 0 when the valve is turned to the light Ω position. Scews 6. Reverse procedure to reassemble. Note: VGBQ532-3RE model shown © 2009 Viking Preferred Service... -
Page 20: Spark Module
4 (orange wire). If voltage is proper and no spark is present at the igniter, check the igniter, spark switch, and wiring. If all check good, replace the module. See wiring diagrams for correct connections. Note: VGBQ532-3RE model shown © 2009 Viking Preferred Service... -
Page 21: Terminal Block
2. Remove screw securing cover and slide out. (from power cord) Neutral (to right side) (to right side) Ground Neutral (from power cord) 6. Remove screws securing terminal block. Neutral (to transformer) Note: VGBQ532-3RE model shown © 2009 Viking Preferred Service... -
Page 22: Igniter
1. Access control panel components replace the igniter. (see Control Panel Components Access section). Disconnect wires and remove control panel. 2. Locate igniter(s). Igniter Test Points 5. Remove screw securing igniter. Screw Note: VGBQ532-3RE model shown © 2009 Viking Preferred Service... -
Page 23: Infrared Igniter
If power is supplied to the igniter and no spark, replace the igniter. 4. Remove two screws securing igniter cover, remove igniter cover. Screws Test Points Note: VGBQ532-3RE model shown © 2009 Viking Preferred Service... -
Page 24: Rotisserie Igniter
Locate and remove screw securing rear of iginter(s). Rear View 2. Locate rotisserie igniter cover(s). Remove two screws securing igniter cover. Screw Igniter Cover 6. Remove igniter. Screws 7. Reverse procedure to reassemble. Note: VGBQ532-3RE model shown © 2009 Viking Preferred Service... -
Page 25: Light Transformer
Verify 120VAC to the transformer. If voltage is not available, verify input to terminal block and output from the terminal block to the transformer. Output Light Transformer Cover voltage from the transformer should be 2.5 VAC. Note: VGBQ532-3RE model shown © 2009 Viking Preferred Service... -
Page 26: Parts Location-Burners
Service Diagnostics and Procedures Parts Location–Burners (VGBQ532-3RE model shown) Rotisserie Side Infrared Single Grill Dual Grill Rotisserie Igniter and Burner Burner Burner Thermocouple © 2009 Viking Preferred Service... -
Page 27: Side Burner
3. Lift burner and separate air shutter from orifice. the supply is available. If supply is proper and still no flow verify gas valve and orifice. If orifice or air shutter is not plugged and still no flow, replace the gas valve. © 2009 Viking Preferred Service... -
Page 28: Grill Burner
1. Open lid and remove grill grates. 5. Remove two nuts from rear of single burner. 2. Remove flavor generator plates. 6. Remove two nuts from front and one nut from rear of dual burner. 3. Remove nuts on drip guards. © 2009 Viking Preferred Service... -
Page 29: Infrared Rotisserie Burner
If orifice or air shutter is not plugged and still not and connections are proper. Replace or repair as flowing, replace the gas valve. needed. To access the Rotisserie Burner: 1. Open lid and remove upper rack. Upper Rack © 2009 Viking Preferred Service... - Page 30 If wiring is good and the voltage is proper at the spark module, replace the spark module. Screws 3. Remove screws and rear access panel. Remove screws securing burner(s). Igniter Cover Screws Note: VGBQ532-3RE model shown © 2009 Viking Preferred Service...
-
Page 31: Rotisserie Motor
Ω open in the off position. Ensure the cord is securely attached. If the switch and cord are proper and the motor still does not turn, replace the motor. Note: VGBQ532-3RE model shown © 2009 Viking Preferred Service... -
Page 32: Grill Canopy
3. With the canopy removed, the spring index, canopy spring, and canopy retainer are accessible. Note the location of the spring in the spring index and canopy top end mount prior to removal. 5. Reverse procedure to reassemble. © 2009 Viking Preferred Service... -
Page 33: Component Testing
Infrared screen Verify no black spots on screen. Grill rotisserie fails to Electrical cord Verify secure connection. operate Circuit breaker Verify breaker is not tripped or fuse is blown. Power supply Verify power is available. © 2009 Viking Preferred Service... - Page 34 TO GRD CNTR GRILL VALVE SWITCH LH SMOKER VALVE SWITCH RH SMOKER VALVE SWITCH REIG 4 REIG 3 REIG 2 REIG 1 SPARK TO GRD CANOPY LIGHT LIGHT SWITCH CANOPY LIGHT LIGHT TRANSFORMER CONTROL PANEL LIGHTS © 2009 Viking Preferred Service...