Table of Contents
Advertisement
Quick Links
weslo.com
Model No. WLCL99617.3
Serial No.
Write the serial number in the space
above for reference.
ACTIVATE YOUR
WARRANTY
To register your product and
activate your warranty today,
go to my.weslo.com.
CUSTOMER CARE
For service at any time, go to
wesloservice.com.
Or call 1-866-699-3756
Mon.–Fri. 6 a.m.–6 p.m. MT
Sat. 8 a.m.–12 p.m. MT
Please do not contact the store.
CAUTION
Read all precautions and
instructions in this manual before
using this equipment. Keep this
manual for future reference.
Serial
Number
Decal
USER'S MANUAL
Advertisement
Table of Contents

Related Manuals for Weslo WLCL99617.3


Summary of Contents for Weslo WLCL99617.3
- Page 1 USER’S MANUAL Model No. WLCL99617.3 Serial No. Write the serial number in the space above for reference. Serial Number Decal ACTIVATE YOUR WARRANTY To register your product and activate your warranty today, go to my.weslo.com. CUSTOMER CARE For service at any time, go to wesloservice.com.
-
Page 2: Table Of Contents
This drawing shows the location(s) of the warning decal(s). If a decal is missing or illegible, see the front cover of this manual and request a free replacement decal. Apply the decal in the location shown. Note: The decal(s) may not be shown at actual size. WESLO is a registered trademark of ICON Health & Fitness, Inc. -
Page 3: Important Precautions
IMPORTANT PRECAUTIONS WARNING: To reduce the risk of serious injury, read all important precautions and instructions in this manual and all warnings on your stepper climber before using your stepper climber. ICON assumes no responsibility for personal injury or property damage sustained by or through the use of this product. - Page 4 STANDARD SERVICE PLANS...
-
Page 5: Before You Begin
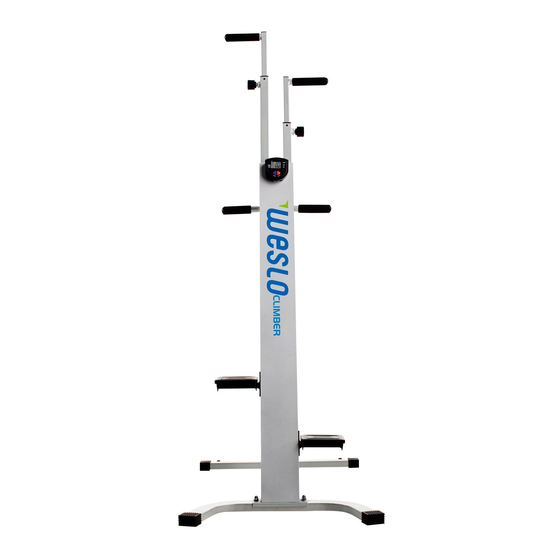
BEFORE YOU BEGIN Thank you for selecting the new WESLO CLIMBER after reading this manual, please see the front cover ® stepper climber. Stepping is one of the most effective of this manual. To help us assist you, note the product exercises for increasing cardiovascular fitness, building model number and serial number before contacting us. -
Page 6: Part Identification Chart
PART IDENTIFICATION CHART Use the drawings below to identify the small parts needed for assembly. The number in parentheses below each drawing is the key number of the part, from the PART LIST near the end of this manual. The number following the key number is the quantity needed for assembly. -
Page 7: Assembly
To avoid damaging parts, do not use power tools. • Left parts are marked “L” or “Left” and right parts are marked “R” or “Right.” 1. Go to my.weslo.com on your computer and register your product. • documents your ownership • activates your warranty •... - Page 8 3. Attach the Rear Stabilizer (10) to the Frame (14) with two M8 x 32mm Carriage Bolts (9), two M8 Washers (7), and two M8 Acorn Nuts (6). Attach the Front Stabilizer (8) to the Stand (24) in the same way. 4.
- Page 9 5. Using a plastic bag to keep your fingers clean, apply a generous amount of the included grease to the Frame Bushings (30) in the top of the Grease Frame (14). Next, identify the Right Handlebar (12). Insert the Right Handlebar into the right side of the Frame (14) as shown, and then attach it with an M8 x 25mm Screw (3).
- Page 10 7. The Console (1) can use one AA battery (not included); an alkaline battery is recommended. IMPORTANT: If the Console has been Avoid pinching exposed to cold temperatures, allow it to the wires warm to room temperature before you insert a battery.
-
Page 11: How To Use The Stepper Climber
HOW TO USE THE STEPPER CLIMBER HOW TO ADJUST THE HANDLEBARS HOW TO EXERCISE ON THE STEPPER CLIMBER To adjust the height Hold the grips or the handles and step onto the pedals. of the handlebars, loosen the adjust- For full-body exercise, hold the handles and move ment knob (A) on both the handlebars and the pedals. - Page 12 FEATURES OF THE CONSOLE HOW TO OPERATE THE CONSOLE The console features five modes that provide instant Note: If there is a sheet of plastic on the console, exercise feedback during your workouts. The modes remove the plastic before operating the console. are described below.
-
Page 13: Maintenance And Troubleshooting
MAINTENANCE AND TROUBLESHOOTING MAINTENANCE CONSOLE TROUBLESHOOTING Regular maintenance is important for optimal Most console problems are the result of a low performance and to reduce wear. Inspect and properly battery; for replacement instructions, see assembly tighten all parts each time the stepper climber is used. step 7 on page 10. -
Page 14: Exercise Guidelines
EXERCISE GUIDELINES Aerobic Exercise—If your goal is to strengthen your WARNING: cardiovascular system, you must perform aerobic Before beginning this exercise, which is activity that requires large amounts or any exercise program, consult your physi- of oxygen for prolonged periods of time. For aerobic cian. -
Page 15: Part List/Exploded Drawing
PART LIST/EXPLODED DRAWING Model No. WLCL99617.3 R0318A Key No. Qty. Description Key No. Qty. Description Console M8 x 45mm Screw Left Handlebar M8 Large Washer M8 x 25mm Screw M8 Locknut Left Pedal – User’s Manual M6 x 20mm Screw –... -
Page 16: Ordering Replacement Parts
ORDERING REPLACEMENT PARTS To order replacement parts, please see the front cover of this manual. To help us assist you, be prepared to provide the following information when contacting us: • the model number and serial number of the product (see the front cover of this manual) •...