Table of Contents
Advertisement
OWNER'S MANUAL
FRIDGE & FREEZER
Before beginning installation, read these instructions
carefully. This will simplify installation and ensure that the
product is installed correctly and safely. Leave these
instructions near the product after installation for future
reference.
ENGLISH
GF-L700MWH / GF-L700PL / GF-L700MBL / GF-LN700MBL / GF-D700BSLC /
GF-D700MBLC / GF-V700BSLC / GF-V900MBLC / GF-V700MBLC / GF-VN700MBL /
GF-LN700PL
MFL71782455
Rev.01_070323
Copyright © 2023 LG Electronics Inc. All Rights Reserved.
www.lg.com
Advertisement
Table of Contents

Related Manuals for LG GF-L700MWH


Summary of Contents for LG GF-L700MWH
- Page 1 Leave these instructions near the product after installation for future reference. ENGLISH GF-L700MWH / GF-L700PL / GF-L700MBL / GF-LN700MBL / GF-D700BSLC / GF-D700MBLC / GF-V700BSLC / GF-V900MBLC / GF-V700MBLC / GF-VN700MBL / GF-LN700PL www.lg.com MFL71782455 Rev.01_070323...
-
Page 2: Table Of Contents
Product Features....................23 Control Panel ....................27 Water Dispenser....................28 Ice and Water Dispenser.................29 Automatic Icemaker ..................30 InstaView......................33 Door in Door .....................34 Extra Space .......................34 Drawer.......................35 Shelf ........................36 Door Basket ......................37 SMART FUNCTIONS LG ThinQ Application ..................38 Smart Diagnosis ....................39 MAINTENANCE Cleaning ......................41... - Page 3 Air Filter ......................42 Water Filter .......................43 TROUBLESHOOTING Before Calling for Service................45...
-
Page 4: Safety Instructions
SAFETY INSTRUCTIONS SAFETY INSTRUCTIONS READ ALL INSTRUCTIONS BEFORE USE The following safety guidelines are intended to prevent unforeseen risks or damage from unsafe or incorrect operation of the appliance. The guidelines are separated into ‘WARNING’ and ‘CAUTION’ as described below. Safety Messages This symbol is displayed to indicate matters and operations that can cause risk. - Page 5 SAFETY INSTRUCTIONS responsible for their safety. Children should be supervised to ensure that they do not play with the appliance. • If the power cord is damaged or the hole of the outlet socket is loose, do not use the power cord and contact an authorized service centre. •...
- Page 6 • Do not clean the appliance with brushes, cloths or sponges with rough surfaces or which are made of metallic material. • Only qualified service personnel from LG Electronics service centre should disassemble, repair, or modify the appliance. Contact an LG Electronics customer information centre if you move and install the appliance in a different location.
- Page 7 • Ensure that the outlet socket is properly grounded, and that the earth pin on the power cord is not damaged or removed from the power plug. For more details on grounding, inquire at an LG Electronics customer information centre.
- Page 8 • Do not bend the power cable excessively or place a heavy object on it. • Immediately unplug the power plug and contact an LG Electronics customer information centre if you detect a strange sound, odour, or smoke coming from the appliance.
- Page 9 SAFETY INSTRUCTIONS • Do not place heavy or fragile objects, containers filled with liquid, combustible substances, flammable objects (such as candles, lamps, etc.), or heating devices (such as stoves, heaters, etc.) on the appliance. • Do not place any electronic appliance (such as heater and mobile phone) inside the appliance.
-
Page 10: Caution
SAFETY INSTRUCTIONS CAUTION CAUTION To reduce the risk of minor injury to persons, malfunction, or damage to the product or property when using this product, follow basic precautions, including the following: Installation • After unpacking, check the appliance for any damage that may have occurred during transit. - Page 11 They may shatter if exposed to sudden temperature changes. • Do not insert the shelves upside down. The shelves may fall. • To remove frost from the appliance, contact an LG Electronics customer information centre. • Dispose of the ice inside the ice bin in the freezer compartment...
-
Page 12: Installation Before Installation
INSTALLATION INSTALLATION Before Installation Ambient Temperature • The appliance is designed to operate within a Dimensions and Clearances limited range of ambient temperatures, depending on the climate zone. Too small of a distance from adjacent items may result in the degradation of freezing capability and •... -
Page 13: Removing The Fridge And Freezer Door
INSTALLATION Accessories at the bottom of the front side of the cover with a flat-head screwdriver. *1 This feature is only available on some models. Removing the Left Fridge Door The water supply line is connected to the top right part at the back of the appliance. Hold the water supply connection and gently push the collet to detach the water supply line then... - Page 14 INSTALLATION Lift the door from the middle hinge pin and NOTE remove the door. • Disassembling/Assembling the Water Lines Collet Tube Insert line Clip CAUTION • Place the door, inside facing up, on a Pull out the water supply lines .
- Page 15 INSTALLATION Rotate the hinge lever clockwise. Lift the top Twist the hinge to raise the pivoting end so that the door can be lifted off. Lift the door off the hinge free of the hinge lever latch lower hinge pin and remove it. CAUTION Remove the door by lifting it off the lower •...
-
Page 16: Connecting The Water Line
INSTALLATION cause damage to appliance parts and can lead to NOTE water leakage or flooding. • Connect to potable water supply only. Correct • Use a new hose when connecting water to the appliance. Do not use old, worn or used hoses. •... -
Page 17: Levelling And Door Alignment
INSTALLATION Levelling and Door should be held firmly whilst the connector is pushed onto the pipe. Alignment Before Beginning When the appliance doors appear to be uneven, follow the instructions below to align the doors. NOTE • The spanner may differ depending on the model. Ensure that the rubber washer is fitted to the You will be provided with either spanner type A inside of the tap connector before screwing it... - Page 18 INSTALLATION Use the spanner to adjust the height by turning Use the spanner to adjust the height by the levelling leg to the left to raise it or to the right turning the adjustment hinge pin to the left or to lower it.
-
Page 19: Turning On The Power
INSTALLATION Door Alignment for Left Fridge • Type B Door Open the fridge door and use the spanner rotate the door hinge bolt. If the door is too low, lift the right door up and insert only one C-Clip with proper thickness. - If a C-Clip is already inserted on the middle hinge, remove the C-Clip before inserting a new C-Clip. -
Page 20: Moving The Appliance For Relocation
INSTALLATION Moving the Appliance for Relocation Moving the Appliance Remove all food from inside the appliance. Pull the power plug out, insert and fix it into the power plug hook at the rear or on top of the appliance. Tape parts such as shelves and the door handle to prevent from falling off while moving the appliance. -
Page 21: Operation
Storing Foods Effectively NOTE • Food may freeze or spoil if stored at the wrong • Contact the LG Electronics customer information temperature. Set the refrigerator to the correct centre if the alarm sound continues even after temperature for the food being stored. - Page 22 OPERATION • Place the refrigerated food or frozen food in • To get better air circulation, insert all inner parts each fridge or freezer compartment like baskets, drawers, and shelves. immediately after purchasing. • Store raw meat and fish in suitable containers in Freezing the Maximum Amount the refrigerator, so that it is not in contact with or drip onto other food.
-
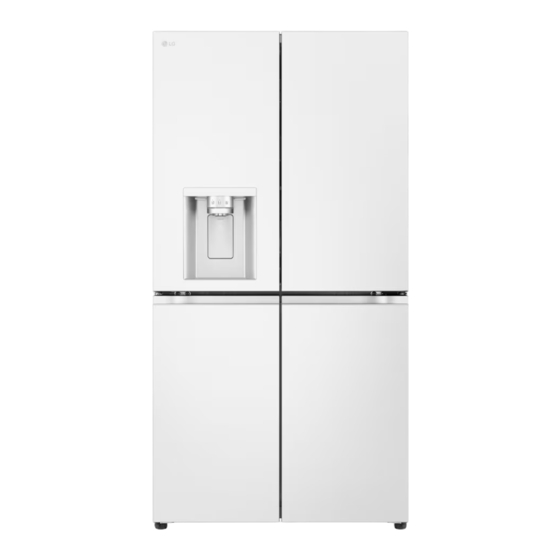
Page 23: Product Features
OPERATION Product Features The appearance or components of the appliance may differ from model to model. Exterior *1 This feature is only available on some models. Filtered Water and Ice Dispenser Dispenses purified water and ice. Door in Door The Door in Door is a double layered door system. It can be opened individually or together with the main door. - Page 24 OPERATION Interior (Two Star *1 This feature is only available on some models. Standard Door Model: Door in Door Model:...
- Page 25 OPERATION InstaView Door in Door Model: Control Panel Sets the fridge temperature and freezer temperature. LED Lamp The LED lamps inside the fridge light up when you open the door. Air Filter Reduces odours inside the fridge compartment. In-Door Icemaker (Fridge) This is where ice is automatically produced and stored.
- Page 26 OPERATION Folding Shelf This is adjustable to meet individual storage needs. Vegetable Box Stores fruits and vegetables to keep fresh for as long as possible. Door in Door Compartment A convenient storage area for frequently-used items that require easy access. Extra Space Stores small food items such as cheese and ham.
-
Page 27: Control Panel
OPERATION Control Panel The actual control panel may differ from model to model. Control Panel and Functions *1 This feature is only available on some models. Craft Ice After pressing and holding the Craft Ice button for three seconds, press the button repeatedly to set to 6 ICE, 3 ICEor OFF. -
Page 28: Water Dispenser
Wi-Fi This button allows the appliance to connect to a home Wi-Fi network. Refer to Smart Functions for information on the initial setup of the LG ThinQ application. Water & Ice Type Select the desired dispenser mode from the buttons on the dispenser control panel. Press the dispenser switch with a glass or other container to dispense cubed ice, water or crushed ice. -
Page 29: Ice And Water Dispenser
• If water dispenses unexpectedly, turn off the • Use a cup with a rim of over 68 mm in diameter water supply and contact an LG Electronics when dispensing water, cubed ice or crushed ice. Customer Information Centre. -
Page 30: Automatic Icemaker
• If discolored ice is dispensed, check the water tank and the water supply for a possible source. If the problem continues, contact the LG Electronics customer information centre. Do not use the ice or water until the problem is... - Page 31 OPERATION • Do not touch the ice outlet or the automatic • Throw away the first few batches of ice after icemaker with your hand or a tool. installation. • Dispense ice into a glass before filling it with • The sound of ice dropping into the ice bin is water or other beverages.
- Page 32 OPERATION • The pad on the bottom of the ice basket is NOTE designed to reduce the sound of the ice dropping. Do not remove the pad. • The ice may look cloudy depending on the water quality in the installation location and the operating conditions.
-
Page 33: Instaview
OPERATION Normal Sounds You May Hear To remove the in-door ice bin, grip the front handle, slightly lift the lower part, and slowly • The icemaker water valve buzzes as the icemaker pull out the bin as shown. fills with water. If the Ice On/Off button is set to On, it will buzz even if it has not yet been hooked up to water. -
Page 34: Door In Door
OPERATION beverages and snacks, without opening the fridge with lukewarm water or a glass cleaner. Do not door. spray glass cleaner directly at the glass door. Door in Door This feature is only available on some models. Using the Door in Door Pull the lever at the bottom of the door upwards until the door in door opens. -
Page 35: Drawer
OPERATION small items you want to keep especially cold. It is • Fruit lets moist air out of the crisper for best also a handy place to defrost meat. storage of fruit. Removing/Refitting the Fridge NOTE Drawer • Be careful when handling and storing larger eggs. -
Page 36: Shelf
OPERATION • Always open the freezer doors completely Mount the fridge drawer in the reverse order of before removing or refitting the drawers. the removal process. Using the Freezer Drawer Shelf The sliding freezer drawers allow easy access and convenience of use. CAUTION •... -
Page 37: Door Basket
OPERATION The door baskets are removable for easy cleaning Tilt up the front of the shelf and then lift the and adjustment. shelf straight up. To remove the baskets, simply lift the basket up and pull straight out. Pull the shelf out. Tilt the front of the shelf up and guide the shelf To assemble the baskets, slide it in above the hooks into the slots at a desired height. -
Page 38: Smart Functions
• Functions may vary by model. from the Google Play Store or Apple App Store on a smartphone. Run the LG ThinQ application and sign in with your existing account or create an LG account to sign in. Touch the add ( ) button on the LG ThinQ application to connect your LG appliance. -
Page 39: Smart Diagnosis
This equipment shall be installed and used at a minimum distance of 20 cm from the human body. • LG ThinQ is not responsible for any network connection problems or any faults, malfunctions, or errors caused by network connection. - Page 40 SMART FUNCTIONS • Launch the LG ThinQ application and select the Smart Diagnosis feature in the menu. Follow the instructions provided in the LG ThinQ application. Using Audible Diagnosis to Diagnose Issues Follow the instructions below to use the audible diagnosis method.
-
Page 41: Maintenance Cleaning
MAINTENANCE MAINTENANCE Cleaning defrosted water cannot evaporate from the rear drain pan. General Cleaning Tips • For the appliance exterior, use a clean sponge or soft cloth and a mild detergent in warm water. • Performing manual defrosting, maintenance or Do not use abrasive or harsh cleaners. - Page 42 - When the air filter indicator lights up. on the fridge wall. • To purchase the air filter: - Visit your local dealer or distributor or contact the LG Electronics Customer Information Centre. For further assistance, visit our website at lg.com Rotate the filter cover counterclockwise to release the tabs, and remove the cover.
- Page 43 - Use replacement cartridge: LT1000P, cysts. LT1000PC, LT1000PCS or ADQ747935** - Visit your local dealer or distributor or contact the LG Electronics Customer Information CAUTION Centre. For further assistance, visit our • Do not install if water pressure exceeds 827 kPa.
- Page 44 Dispense water for approximately 5 minutes to remove trapped air and contaminants from the system. CAUTION • Failure to replace filters when required or using non LG authorised water filters can cause the filter cartridge to leak and result in property damage. Application Guidelines/Water Supply Parameters •...
- Page 45 TROUBLESHOOTING TROUBLESHOOTING Before Calling for Service Cooling Symptoms Possible Cause & Solution There is no Is there a power interruption? refrigeration or • Check the power of other appliances. freezing. Appliance is unplugged. • Plug the power plug in the outlet properly. A fuse in your home may be blown or the circuit breaker tripped.
- Page 46 • Press I on the automatic icemaker switch or set ON for the automatic icemaker button on the control panel. (For more details on how to use, visit LG Electronics website or use your smart device.) Is the temperature of the freezer compartment set too high? •...
- Page 47 TROUBLESHOOTING Symptoms Possible Cause & Solution The automatic Is the appliance door completely closed? icemaker does not • If the appliance door is not completely closed, the temperature of the produce ice or freezer compartment will increase, slowing down the ice production produces a small speed.
- Page 48 TROUBLESHOOTING Symptoms Possible Cause & Solution Water tastes strange. Has the purified water or cold water not been used for an extended period of time? • The taste of old water may change due to bacterial growth. Use the product after dispensing and discharging approximately 5 litres (approximately three minutes) from the water dispenser.
- Page 49 TROUBLESHOOTING Symptoms Possible Cause & Solution Frost or condensation Is the installation environment humid? has formed inside or • Condensation can appear on the exterior of the appliance if the installation outside the appliance. area is too humid or on a humid day such as a rainy day. Wipe off any moisture with a dry cloth.
- Page 50 Lamp failure appliance does not • Close the door and re-open. If the lamp does not turn on, please contact turn on. the LG Electronics customer information centre. Do not attempt removal of the lamp. Noises Symptoms Possible Cause & Solution...
- Page 51 • Find the Wi-Fi network connected to your smartphone and remove it, then not connected to the register your appliance on LG ThinQ. Wi-Fi network. Mobile data for your smartphone is turned on. • Turn off the Mobile data of your smartphone and register the appliance using the Wi-Fi network.