Table of Contents
Advertisement
Quick Links
Advertisement
Table of Contents

Related Manuals for Sanyo SCP-5300


Summary of Contents for Sanyo SCP-5300
- Page 1 Online User’s Guide Dual Band/Tri Mode PCS Phone SCP-5300...
-
Page 2: Table Of Contents
Features of Your SCP-5300 ........ - Page 3 2B. Controlling Your Phone’s Settings ........33 Adjusting the Phone’s Volume Settings .
- Page 4 Entering Characters by Tapping the Keypad ........82 Using Smart Punctuation .
- Page 5 Net Guard ...............143 Browsing the Web .
-
Page 6: Welcome To Sprint
Welcome to Sprint print built the largest all-PCS nationwide network with advanced multimedia services and clear calls, reaching more than 230 million people for clarity you can see and hear. We built our network to give you what we believe you really want from a wireless phone, clear sound, private conversations and time-saving features. -
Page 7: Introduction To This Online User's Guide
Introduction to this Online User’s Guide his Online User’s Guide introduces you to PCS Service and all the features of your new phone. It’s divided into four sections: Getting Started Section 1: Understanding Your Phone Section 2: Using PCS Service Features Section 3: Safety and Warranty Information Section 4:... -
Page 8: Section 1: Getting Started
Section 1 Getting Started Section 1 Getting Started... -
Page 9: Setting Up Service
Section 1A Setting Up Service In This Section Getting Started With PCS Service Setting Up Voicemail Getting Help his section walks you through the basics of setting up service for your PCS Phone, including unlocking and activating your phone, setting up your voicemail and how to contact Sprint for assistance with your PCS Service. -
Page 10: Getting Started With Pcs Service
Getting Started With PCS Service Determine if Your Phone is Already Activated If you received your phone in the mail or purchased it at a Sprint Store, it probably has been activated. All you need to do is unlock your phone. If your phone is not activated, please refer to the Start Here Guide included with your phone. -
Page 11: Getting Help
Getting Help Visiting Our Web Site Stop by and log on to get up-to-date information on www.sprintpcs.com PCS Services, options and more. You can also: Review coverage maps Learn how to use voicemail Access your account information Purchase accessories Add additional options to your service plan Check out frequently asked questions And more PCS Customer Service Solutions... -
Page 12: Section 2: Understanding Your Phone
Section 2 Understanding Your Phone Section 2 Understanding Your Phone... -
Page 13: Your Pcs Phone: The Basics
Section 2A Your PCS Phone: The Basics In This Section Front View of Phone Viewing the Display Screen Features of Your Phone Turning Your Phone On and Off Using the Battery and Charger Displaying Your Phone Number Making and Answering Calls our PCS Phone is packed with features that simplify your life and expand your ability to stay connected to the people and information that are important to you. -
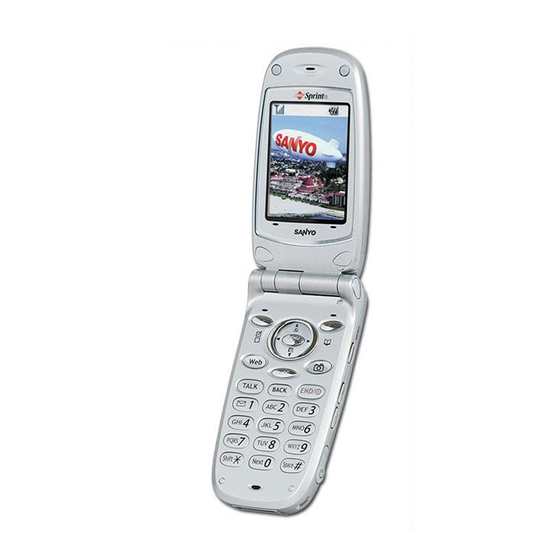
Page 14: Front View Of Phone
Front View of Phone 1. Side Camera 8. Main LCD 2. Volume Key 3. Headset Jack 4. LED 9. Softkey (green/red light) (left) 10. Navigation 11. MENU/OK 5. Camera Lens 12. Web 13. TALK 6. Mini Flash Sprint 1:30p Dec23 7. -
Page 15: Viewing The Display Screen
Section 2: Understanding Your Phone 2A: Your PCS Phone – The Basics Features of Your SCP-5300 Congratulations on the purchase of your PCS Phone SCP-5300. This phone is easy-to-use, reliable and offers many significant features and service options: Dual band/tri mode capability provides access to other PCS digital and analog networks where Sprint has implemented roaming agreements (pages 64-65). -
Page 16: Turning Your Phone On And Off
Turning Your Phone ON and OFF Turning Your Phone ON To turn your phone on, press Once your phone is ON, it displays “Looking for service...” indicating that your phone is searching for a signal. When your phone finds a signal, it automatically enters Standby mode –... -
Page 17: Displaying Your Phone Number
Charging the Battery Your PCS Phone comes with a rechargeable battery. You should charge the battery as soon as possible so you can begin using your phone. Keeping track of your battery’s charge is important. If your battery level becomes too low, your phone automatically turns off and you will lose all the information you were just working on. -
Page 18: Answering Calls
Answering Calls Make sure your phone is on. If your phone is off, incoming calls go to voicemail. When a call comes in, answer the call by pressing Depending on your settings, your PCS Phone notifies you of incoming calls in the following ways: The phone rings or vibrates. -
Page 19: Calling Emergency Numbers
Calling Emergency Numbers You can place calls to 911 (dial even if your phone is locked or your account is restricted. Once the dial is made, you will enter Emergency Mode. The phone tries to dial to 911 automatically until the dial will be connected. While you are in the Emergency Mode, all phone calls can be received. -
Page 20: End-Of-Call Options
End-of-Call Options After receiving a call from or making a call to a phone number that is not in your Internal Phone Book, the phone number and the duration of the call is displayed. You can display the following menu options by pressing within 10 seconds after disconnecting the call. -
Page 21: Dialing And Saving Phone Numbers With Pauses
Dialing and Saving Phone Numbers With Pauses You can dial or save phone numbers with pauses for use with automated systems, such as voicemail or credit card billing numbers. If you select a hard pause, the next set of numbers are sent when you press select a 2-second pause, your phone automatically sends the next set of numbers after two seconds. -
Page 22: Controlling Your Phone's Settings
Section 2B Controlling Your Phone’s Settings In This Section Volume Settings Ringer Types Selecting Tone Length Alert Notification Silent Mode Changing the Greeting Changing the Backlight Settings Changing Display Settings Screen Savers Setting Main Menu Design Changing the Contrast his section describes how you can change your phone’s settings to best suit your requirements. -
Page 23: Adjusting The Phone's Volume Settings
Adjusting the Phone’s Volume Settings To change the ringer/key volume: From the Standby mode, press to display the main menu. Highlight and press Settings Highlight and press Sounds Highlight and press Ringer/Key Vol. Select the menu under each item and press for adjusting Ringer tone volume. -
Page 24: Selecting Ringer Types For Voicemail
Selecting Ringer Types for Voicemail To select a ringer type for voicemail: From the Standby mode, press to display the main menu. Highlight and press Settings Highlight and press Sounds Highlight and press Ringer Type Highlight and press Voicemail Select the menu under and press Voicemail Highlight your desired ringer type and press... -
Page 25: Alert Notification
Alert Notification Your phone comes with several different options to keep you aware of what’s going on by sounding the alert or ringer. sets alert On or Off for network services parameter changes. Service sets alert to notify you of caller’s message(s). Voicemail sets alert to notify you of text message(s). -
Page 26: Changing The Backlight Time Length
Changing the Backlight Time Length The backlight setting lets you select how long the display screen and keypad are backlit after any key is pressed. To change LCD backlight setting: From the Standby mode, press to display the main menu. Highlight and press Settings... -
Page 27: Changing The Display Screen
Changing the Display Screen This feature lets you display the animation as a display for Standby, Outgoing Calls or Service Search. To assign the Animation: From the Standby mode, press to display the main menu. Highlight and press Settings Highlight and press Display Highlight... -
Page 28: Changing The Contrast
Screen Savers Your new PCS Phone offers you the option of displaying a screen saver while in Standby mode. To assign a screen saver: From the Standby mode, press to display the main menu. Highlight and press Settings Highlight and press Display Highlight and press... -
Page 29: Setting Airplane Mode
Setting Airplane Mode This feature shuts all Incoming Calls and Outgoing Calls (except for 911 dialing) to prevent interference with aircraft electronics. To set Airplane mode: From the Standby mode, press to display the main menu. Highlight and press Settings Highlight and press Airplane Mode... -
Page 30: Abbreviated Dialing
Abbreviated Dialing Abbreviated Dialing is another form of speed dialing. If the last four digits you enter do not match any stored phone book entry, the digits are automatically prepended with the digits specified using the following steps. To activate this feature: From the Standby mode, press to display the main menu. -
Page 31: Changing The Menu Language
Changing the Menu Language When you first turn your phone on, the menus are displayed in English. To change the menu language to Spanish, follow these steps. From the Standby mode, press to display the main menu. Highlight and press Settings Highlight and press... -
Page 32: Accessing The Security Menu
Section 2C Setting Your Phone’s Security In This Section Accessing the Security Menu Locking Your Phone Unlocking Your Phone Using Special Numbers Resetting and Locking Your Phone through SMS Security Features for PCS Vision y using the security setting on your PCS Phone, you receive peace of mind without sacrificing flexibility. -
Page 33: Locking Your Phone
Accessing the Security Menu You must enter your lock code to view the Security menu. To access the Security menu: From the Standby mode, press to display the main menu. Highlight and press Settings Highlight and press Security Enter your lock code. Tip: If you can’t recall your lock code, try using the last four digits of either your Social Security number or PCS Phone Number or try 0000. -
Page 34: Restricting Calls
Restricting Calls You can restrict both incoming calls and outgoing calls if necessary. (The Restrict Calls setting does not apply to 911 or Customer Service Solutions.) To restrict calls: From the Security Menu display (See “Accessing the Security Menu” on page 54), highlight and press SecuritySetting... -
Page 35: Erasing The Downloads
Erasing the Downloads To erase all the downloaded data from web: From the Security Menu display (See “Accessing the Security Menu” on page 54), highlight and press Erase Downloads If you’re sure you want to erase all the downloaded data from web, highlight and press If you have assigned downloaded data, returns to default setting. -
Page 36: Security Features For Pcs Vision
Security Features for PCS Vision Automating Your PCS Vision Password Your phone comes equipped with a password that enables it to automatically connect to PCS Vision services automatically. This way, you can access PCS Vision Services without having to type a password. You can change your password by signing in to Then, when you enter your new password on the phone, you can choose whether the phone should ask for that password each time it connects to... -
Page 37: Controlling Your Roaming Experience
Section 2D Controlling Your Roaming Experience In This Section Understanding Roaming Setting Your Phone’s Roam Mode Controlling Roaming Charges Using Call Guard oaming is the ability to make or receive calls while you’re off the Sprint Nationwide PCS Network. Your new dual band/tri mode PCS Phone works anywhere on the enhanced Sprint Nationwide PCS Network and allows you to roam on digital networks virtually anywhere in the U.S. -
Page 38: Understanding Roaming
Understanding Roaming Recognizing Icons on the Display Screen Your phone’s display screen always lets you know when you’re off the Sprint Nationwide PCS Network and whether your phone is operating in analog or digital mode. The following chart indicates what you’ll see depending on where you’re using your phone. -
Page 39: Setting Your Phone's Roam Mode
Setting Your Phone’s Roam Mode Your PCS Phone allows you to control your ability to roam. By using the menu option, you can determine which signals your phone accepts. Roaming Set Mode Choose from three different settings on your dual band/tri mode phone to control your roaming experience: From the Standby mode, press to display the main menu. -
Page 40: Navigating Through Menus
Section 2E Navigating Through Menus In This Section Menu Navigation Menu Structure Viewing Menus his section is a road map to using your PCS Phone. Every function and feature can be accessed through a menu. Take a few moments to learn your way around. -
Page 41: Menu Navigation
Menu Navigation The navigation key on your PCS Phone allows you to scroll through menus quickly and easily. To navigate through a menu, simply press the navigation key up or down. As you navigate through the menu, menu options are highlighted. Select an option by highlighting it and pressing Menu Structure Selecting Menu Items... -
Page 42: Managing Call History
8. Settings 1. Sounds 2. Display 3. Internet 4. Location 5. Roaming 6. Messaging 7. Security 8. Airplane Mode 9. Others 9. Calendar 10. VoiceService 1. Voice Memo 2. Screen Call 3. Voice Dial 11. Tools/Extras 1. PC Sync 2. Calculator 3. -
Page 43: Viewing History
Viewing History You’ll find your Call History invaluable. It is a list of the last 20 phone numbers or Internal Phone Book entries for calls you placed, accepted or missed. Call History makes redialing a number fast and easy. It is continually updated as new numbers are added to the beginning of the list and the oldest entries are removed from the bottom of the list. -
Page 44: Saving A Phone Number From Call History
Saving a Phone Number From Call History Your PCS Phone can store up to 300 Internal Phone Book entries. Phone Book entries can store up to a total of 500 phone numbers and each entry’s name can contain sixteen characters. To save a phone number from Call History: Highlight the call history entry you want to save. -
Page 45: Using The Internal Phone Book
Section 2G Using the Internal Phone Book In This Section Internal Phone Book Entry Options Adding a New Internal Phone Book Entry Finding Internal Phone Book Entries Selecting a Ringer Type Dialing PCS Services ow you know the basics that help make it easier to stay in touch with people and information. -
Page 46: Internal Phone Book Entry Options
Internal Phone Book Entry Options When you display an Internal Phone Book list, highlight your desired entry and press , then select the box under your desired label and press (right softkey). Options to dial the phone number. (If you are roaming and have the Call Call Guard feature activated, you are required to take an extra step to proceed. -
Page 47: Entering Characters By Tapping The Keypad
Entering Characters by Tapping the Keypad To enter characters by tapping the keypad, select the “Selecting a Character Input Mode” on pages 80-81). Press the corresponding key until the desired character appears. By default, the first letter of a word is capitalized and following letters are lowercase. Characters scroll in the following order: In Spanish mode, characters scroll in the following order. -
Page 48: Adding A New Internal Phone Book Entry
Entering SMILEYS To enter smile picture, select the SMILEYS Character Input Mode” on pages 80-81). In a text entry field, press right softkey. Highlight and press SMILEYS Highlight the line that includes your desired smiley. Press the corresponding key (1~4) with each smiley. Highlight your desired smiley by using the Navigation key, and press Adding a New Internal Phone Book Entry Your PCS Phone can store up to 300 Internal Phone Book entries. -
Page 49: Adding A Phone Number Or Address To An Internal Phone Book Entry
Finding Entries To find an Internal Phone Book entry by entrying first letters: Press of the Navigation key. Enter the first letter of the name or part of the name using multi-tap method. Highlight your desired entry by scrolling through the phone book entry and press If you enter a single letter, the display shows the list that begins with that letter. -
Page 50: Editing An Internal Phone Book Entry
Editing an Internal Phone Book Entry To make changes to an entry: Display an Internal Phone Book entry. Highlight your desired entry and press Select the box under following options, and press to change the entry’s name. Enter the new name. (See “Entering Name Characters by Tapping the Keypad”... -
Page 51: Secret Internal Phone Book Entries
Secret Internal Phone Book Entries You can hide an entry’s phone number(s) and require your lock code to edit the entry by making it secret. The entry name is still displayed, but the entry’s phone numbers are replaced by “(Secret)”. To make an entry secret: Press of the Navigation key. -
Page 52: Using Different Dialing Methods
Using Different Dialing Methods Prepend Dialing Prepend dialing allows you to alter a phone number in your Phone Book by adding additional numbers. For example, if your Internal Phone Book entry was entered without an area code and you are out of town, you can prepend that entry with the appropriate area code. -
Page 53: Managing Schedules
Section 2H Personal Organizer In This Section Managing Schedules Adding an Event to the Scheduler Event Alerts Viewing Events and Event Options Personal Information Management Using the Calculator Games our PCS Phone has been equipped with several personal information management features to help you manage your busy lifestyle. These features turn your phone into a time management planner that helps you keep up with your contacts, schedules and commitments. -
Page 54: Managing Schedules
Managing Schedules Calendar Use the Calendar to remind you of events or important calls you need to make. You can schedule up to 100 events, 15 Call Alarms and 20 To-Do Items. Setting the Time/Date In no service area or Analog service area, it’s necessary to set actual time and date to use Calendar function. -
Page 55: Event Alert Menu
Event Alerts There are several ways your PCS Phone alerts you of scheduled events: By playing the alert tone. (Depends on the Ringer Volume.) By blinking the LED. By displaying event’s description on the Main LCD when the clamshell is open. By displaying event’s description on the Sub LCD when the clamshell is closed. -
Page 56: Call Alarm Menu
Call Alarm Menu When your phone is turned on and you have scheduled a call alarm, your phone alerts you and displays the following options. To select an option, highlight it and press Press (left softkey). View Highlight the unchecked event and press details. -
Page 57: Adding To Do Items
Adding To Do Items Your phone can store and manage 20 To Do items. To add an entry to your To Do List: From the Event list display, press Options Highlight and press To Do List Press (right softkey). Options Highlight and press Add Item... -
Page 58: Purging All Events, Call Alarms Or To Do List
Purging All Events, Call Alarms or To Do List To delete all scheduled events, call alarms or To Do List : From Event list display, press Options Highlight and press Erase Memory Highlight one item from the Options and press Options: deletes the old events, call alarms and To Do that is done. -
Page 59: Displaying The Version Information
Multimedia Master (you should purchase separately). Also the PCS Wireless Connection Kit (you should purchase separately) are required to connect SCP-5300 and your PC. You have to prepare the status to accept the download by using PC Sync menu of your SCP-5300. See the Multimedia Master User guide for detailed information. - Page 60 Confirming the downloaded data The downloaded data via Multimedia Master will be classified as ringer or image file automatically. To confirm the downloaded ringer file: From the Standby mode, press to display the main menu. Highlight and press Tools/Extras Highlight and press PC Sync Highlight...
-
Page 61: Viewing The Downloaded Ringer Data Size
Viewing the Downloaded Ringer Data Size Your phone lets you download 6 files of 20 KB and 1 file of 100 KB ringer data via Multimedia Master. You can confirm the downloaded data size by the following instructions. To view the data size: From the Standby mode, press to display the main menu. - Page 62 Select your desired image or ringer file, and follow the system prompts. Press left softkey to start downloading. Wait for the download to complete. Press to end, or press left or right softkey for further operation. functions the downloaded data. (See “To confirm the Left softkey downloaded ringers folder”...
-
Page 63: Confirming The Downloaded Data
Confirming the Downloaded Data The downloaded data will be classified as games, ringers, images (screen savers) or application folder automatically. However, if a data has a different category as above, they are classified as Dynamic folder. If a data doesn’t belong to any of the above, it is classified as Others folder. You can also confirm the downloaded data as following when you have just finished downloading by pressing left softkey. - Page 64 To confirm the downloaded applications folder: From the Standby mode, press to display the main menu. Highlight and press Downloads Highlight and press Applications Highlight the downloaded data you want to confirm and press Select from the options and press Options to play the downloaded application.
-
Page 65: Viewing The Downloaded Data Size
Icon Indication Type Item Icon (appears at the left side of the downloaded data) Note: Sorting the downloaded data in memory size order The downloaded files via Web site are stored in alphabetical order. If you want to store the data in memory size order, follow these instructions. From the Standby mode, press to display the main menu. -
Page 66: Using Your Phone's Voice Services
Erasing an old downloaded data for getting new download data If you try to download new data when the downloaded data’s memory is full, the warning message appears. And you will be prompted to erase some old downloaded data. To get new download data: When the warning message appears, press make a space for new download data. -
Page 67: Using Voice-Activated Dialing
Using Voice-Activated Dialing In addition to PCS Voice Command (see pages 175-177), you can use a Voice Dial tag to automatically dial a phone number in your Internal Phone Book. Your phone can store up to 30 Voice Dial tags. (To create a Voice Dial tag, see “Programming Voice Dial Tag to Your Phone”... -
Page 68: Memo Options
To end the recording of your memo: Wait for 18 seconds or press Press when recording in Standby mode. To record a conversation during a phone call: Press to see the options. Highlight and press Voice Services Highlight and press Voice Memo Highlight and press... -
Page 69: Erasing All Memos
Erasing All Memos To erase all memos: From the Standby mode, press to display the main menu. Highlight and press VoiceService Highlight and press Voice Memo Highlight and press Play Display the memo list, highlight and press Highlight and press Erase All Highlight and press... - Page 70 Selecting Announcement for Screen Call From the Standby mode, press to display the main menu. Highlight and press VoiceService Highlight and press Screen Call Highlight and press Announcement Depending on your preference, highlight Press Recording Name for Pre-Recorded Announcement From the Standby mode, press to display the main menu.
-
Page 71: Section 3: Using Pcs Service Features
Section 3 Using PCS Service Features Section 3 Using PCS Service Features 131... -
Page 72: Pcs Service Features: The Basics
Section 3A PCS Service Features: The Basics In This Section Using Voicemail Using Caller ID Responding to Call Waiting Three-Way Calling Forwarding Your Calls ow that you’ve mastered your phone’s fundamentals, it’s time to explore the calling features that enhance your PCS Service. Section 3: Using PCS Service Features 3A: The Basics 133... -
Page 73: Using Voicemail
Using Voicemail Setting Up Your Voicemail All unanswered calls to your PCS Phone are automatically transferred to voicemail, even if your phone is in use or turned off. Therefore, you will want to set up your PCS Voicemail and personal greeting as soon as your PCS Phone is activated. -
Page 74: Voicemail Options
Voicemail Options Your PCS Phone offers several options for organizing and accessing your voicemail. Setting Up Group Distribution Lists Create up to 20 separate group lists, each with up to 20 customers. Press and hold to access your voicemail. Following the system prompts, press Personal Options. -
Page 75: Clearing The Message Icon
Clearing the Message Icon Your phone may temporarily continue to display the icon after you have checked your voice and text messages. To clear the icon from the display screen: From the Standby mode, press to display the main menu. Highlight and press Voicemail... -
Page 76: Using Call Forwarding
Using Call Forwarding Call Forwarding lets you forward all your incoming calls to another phone number – even when your phone is turned off. You can continue to make calls from your phone with Call Forwarding activated. To Activate Call Forwarding Press Enter the area code and phone number to which your future calls should be forwarded. -
Page 77: Browsing The Web On Your Phone
Browsing the Web on Your Phone Launching the Web To launch the Web: From the Standby mode, press From the Standby mode, press to display the main menu. Highlight and press You are automatically signed in to PCS Vision Services, when you sign-in manually, see page 61 for instructions. -
Page 78: Browsing The Web
Browsing the Web Browsing the Web is easy once you’ve learned a few basics. Here are some tips for browsing the Web with PCS Vision: Softkeys The bottom line of the browser contains a row of softkeys. These are your main controls for getting around. -
Page 79: Setting Up A Web Connection
Deleting a Bookmark From the bookmark list, select the bookmark you want to delete and press right softkey. Highlight and press left softkey. Delete Highlight and press left softkey. If you want to delete all bookmarks, highlight above. Reloading a Web Page To reload (refresh) the current Web page, press right softkey and select and press left softkey. -
Page 80: Messaging
Messaging Now you can send and receive email as well as chat on select PCS Phones. With chat, you can have a conversation without talking. Join in a Web- based chat room to exchange information on a specific topic or read conversations that others have posted -- even launch a one-on-one chat for a more in-depth conversation. -
Page 81: Extracting Phone Numbers From A Message
Message Options After you display a Message, press to display message options. To select an option, highlight it and press to dial the phone number of the sender (if applicable). Call Back to save the sender’s phone number if it is not already in Save Phone# your Internal Phone Book (if applicable). -
Page 82: Extracting E-Mail Addresses From A Message
Extracting E-Mail Addresses From a Message To extract an email address contained in a message: When the Message options are displayed, highlight press Highlight and press Email Address All the email addresses contained in the message are displayed. (If there are no appropriate email addresses to extract from the message, the addresses are not displayed.) Highlight the address you wish to extract. -
Page 83: Adding A Folder For Messages
Adding a Folder for Messages When the message contains any word of 3 to 14 letters, you can classify the message to your defined folder. If 10 user defined folders exist, “Add Folder” menu disappears. After you display a message, press Highlight by scrolling and press Add Folder... -
Page 84: Erasing All Messages
Erasing All Messages To erase all messages: From the folder list display, press Options menu options. Highlight and press Erase All Msgs Highlight In This Folder In All Folders Highlight and press To erase all Messages already read: From the folder list display, press Options menu options. -
Page 85: Email
To read a PCS Short Mail message: When you receive a short mail message, you will see a text message and “New ‘Short Mail’. View it now?” on your display screen. Launch the browser and select the Messaging Scroll to the new short mail message and press left softkey. Unread short mail messages will be marked with an asterisk (*). -
Page 86: Chat
Chat PCS Vision gives you the ability to join wireless chatrooms from your PCS Phone. Send messages including text and icons to many chatroom participants or launch one-on-one (private) chatrooms. To access a chatroom from the browser: Launch the browser. Select the folder. -
Page 87: Ringers
When the clamshell is closed: Press and hold Side Camera key to activate Camera mode. Check your desired object with Sub LCD. Press and hold Side Camera key to take a picture. When you see your desired object with Sub LCD, the image is shown as mirror reversed. - Page 88 Setting Self-timer From Camera mode with the clamshell open, see “Taking a picture” on page 161, press (right softkey). Options Highlight , and press Self-timer Highlight either 10 seconds 5 seconds Press (left softkey) when you are ready to take a picture. Then Start appears at the left bottom of the LCD.
-
Page 89: Screen Savers
Displaying the picture in the Picture Wallet To display the captured pictures in the Picture Wallet: From the Standby display, press to display the main menu. Highlight and press Pictures Press for the shortcut (steps 1 and 2). Highlight and press Picture Wallet Viewing Captured Pictures in the Picture Wallet From the Picture Wallet display (See page 166 for displaying.), press... - Page 90 Ringers Downloading Ringers To download an available ringer to your phone: From the Standby mode, press to display the main menu. Highlight and press Downloads Highlight and press Ringers Highlight and press . The browser will launch. Get New Select an item to download, and press downloaded to your phone.
- Page 91 Screen Savers Downloading Screen Savers (Images) To download an available screen saver (Image) to your phone: From the Standby mode, press to display the main menu. Highlight and press Downloads Highlight and press Screen Savers Highlight and press . The browser will launch. Get New Select an item to download, and press will be downloaded to your phone.
-
Page 92: Games
Games You can play a variety of entertaining and graphically-rich games on your PCS Phone. New games are easy to download and play. Accessing Games You can access games on your phone or through (For details on purchasing options, consult your PCS Service Plan.) To access a game from your phone: Highlight a game in the menu. -
Page 93: Pcs Vision Faqs
PCS Vision FAQs How will I know when my phone is ready for PCS Vision Service? Your user name (for example, bsmith001@sprintpcs.com) will display on your phone’s display screen. How do I sign-in for the first time? You are automatically signed in to PCS Vision Services when you access web first time. -
Page 94: Getting Started With Pcs Voice Command
Getting Started With PCS Voice Command With PCS Voice Command: You can store all your contact’s phone numbers, so you can simply say the name of the person you want to call. There’s no need to punch in a lot of numbers, memorize voicemail passwords or try to dial while you’re driving. -
Page 95: Section 4: Safety Guidelines And Warranty Information
Section 4 Safety Guidelines and Warranty Information Section 4 Safety Guidelines and Warranty Information 179... -
Page 96: Safety
Section 4A Safety In This Section Getting the Most Out of Your Reception Maintaining Safe Use of and Access to Your Phone Caring for the Battery Acknowledging Special Precautions and the FCC Notice Consumer Information on Wireless Phones art of getting the most out of your PCS Phone is knowing where and how it works at optimum efficiency. -
Page 97: Getting The Most Out Of Your Reception
Getting the Most Out of Your Reception Keeping Tabs on Signal Strength The quality of each call you make or receive depends on the signal strength in your area. Your phone informs you of the current signal strength by displaying a number of bars next to the signal strength icon. The more bars displayed, the stronger the signal. - Page 98 Dial sensibly and assess the traffic; if possible, place calls when stationary or before pulling into traffic. Do not engage in stressful or emotional conversations that may divert your attention from the road. Dial to report serious emergencies. It’s free from your wireless phone.
-
Page 99: Caring For The Battery
Caring for the Battery Protecting Your Battery The guidelines listed below help you get the most out of your battery’s performance. Use only Sprint-approved batteries and desktop chargers. These chargers are designed to maximize battery life. Using other batteries or chargers voids your warranty and may cause damage. In order to avoid damage, charge the battery only in temperatures that range from 32º... - Page 100 1.6 W/kg are considered safe for use by the public. The highest reported SAR values of the SCP-5300 are: AMPS/CDMA modes (Part 22) - Head: 1.41W/kg; Body-worn: 0.858W/kg PCS CDMA mode (Part 24) - Head: 0.694W/kg; Body-worn: 1.25W/kg FCC Radiofrequency Emission This phone meets the FCC Radiofrequency Emission Guidelines.
-
Page 101: Owner's Record
Record the serial number in the space provided below. This will be helpful if you need to contact us about your phone in the future. Model: PCS Phone SCP-5300 Serial No.: User Guide Proprietary Notice... -
Page 102: Manufacturer's Warranty
Manufacturer’s Warranty Customer Limited Warranty SPRINT SPECTRUM, L.P., (Sprint) offers you a limited warranty that the enclosed subscriber unit (Product), including accessories in the product package, will be free from defects in material or workmanship as follows: SUBSCRIBER UNIT: A. SPRINT ONE (1) YEAR LIMITED WARRANTY: For a period of one (1) year from the date of purchase, Sprint will, at its option, either pay the parts and labor charges to any authorized PCS ®... -
Page 103: Index
Copyright(c) 2002 ACCESS Systems America Inc. ACCESS, NetFront are registered trademarks or trademarks owned by ACCESS Co., Ltd. in Japan and selected countries worldwide. NetFront is a registered trademark of NetFront Communications, Inc. in the United States and is used under a license. - Page 104 Screen Savers 170-171 Security Menu 54 Silent Mode 39 Smile Pictures 84 Special Numbers 57 T9 Text Input 81 Unlocking Your Phone 8, 55 Voicemail Clearing 138 Notification 134 Options 136-137 Retrieving 135 Setting Up 9, 134 196 Index...