Table of Contents
Advertisement
Quick Links
Advertisement
Table of Contents

Related Manuals for Beko WTL 8019 GLS2


Summary of Contents for Beko WTL 8019 GLS2
- Page 1 WTL 8019 GLS2 Washing Machine User’s Manual...
- Page 2 Please read this user manual first! Dear Customer, Thank you for prefering an Beko product. We hope that you get the best results from your product which has been manufactured with high quality and state-of-the-art technology. Therefore, please read this entire user manual and all other accompanying documents carefully before using the product and keep it as a reference for future use.
-
Page 3: Table Of Contents
TABLE OF CONTENTS 1 Important instructions for safety and 5 Operating the product environment 5.1 Control panel ..... . .18 1.1 General safety . -
Page 4: Important Instructions For Safety And Environment
Important instructions for safety and environment This section contains safety instructions that will help protect from risk of personal injury or property damage. Failure to follow these instructions shall void any warranty. 1.1 General safety • This product can be used by children at and above 8 years old and by persons whose physical, sensory or mental capabilities were not fully developed or who lack experience and knowledge provided that they are supervised or trained on the safe usage of the product and the risks it brings out. -
Page 5: Intended Use
Important instructions for safety and environment • Always have the installation and repairing procedures carried out by the Authorized Service Agent. Manufacturer shall not be held liable for damages that may arise from procedures carried out by unauthorized persons. • If the supply cord is damaged, it must be replaced by the manufacturer, its service agent or similary qualified persons in order to avoid a hazard. -
Page 6: Package Information
Important instructions for safety and environment • Do not forget to close the lid when leaving the room where the product is located. • Store all detergents and additives in a safe place away from the reach of the children by closing the cover of the detergent container or sealing the detergent package. -
Page 7: Your Washing Machine
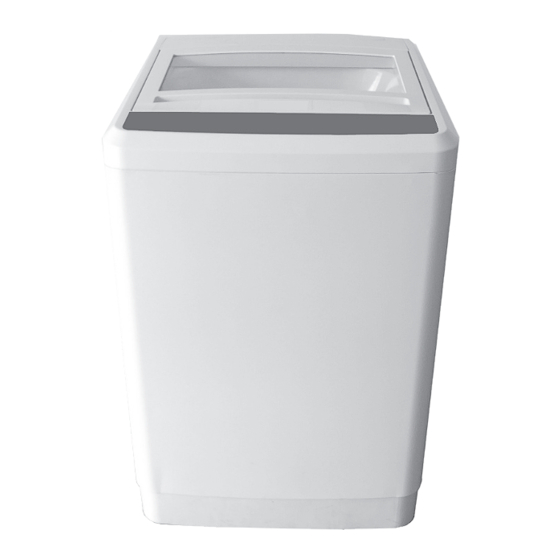
Your washing machine 2.1 Overview 1- Power cable 5- Drain hose 2- Loading door 6- Adjustable feet 3- Detergent drawer 4- Control panel 7 / EN 7 / EN Washing Machine /User’s Manual Washing Machine /User’s Manual... -
Page 8: Technical Specifications
Your washing machine 2.2 Technical specifications Models (EN) WTL 8019 GLS2 Maximum dry laundry capacity (kg) Height (cm) 56.5 Width (cm) Depth (cm) Net weight (±4 kg.) 220 V ~/ 60Hz Electrical input (V/Hz) Total power (W) Spin speed (rpm/ min., max.) -
Page 9: Installation
Installation 3.2 Connecting water supply Refer to the nearest Authorised Service Agent for installation of the product. To make the product The water supply pressure required to run ready for use, review the information in the user the product is between 1 to 10 bars (0.1 manual and make sure that the electricity, tap –... -
Page 10: Connecting To The Drain
Installation 3.3 Connecting to the drain • The end of the drain hose must be directly connected to the wastewater drain or to the washbasin. WARNING: Your house will be flooded if the hose comes out of its housing during water discharge. Moreover, there is risk of scalding due to high washing temperatures! To prevent such situations and to ensure smooth water intake and... -
Page 11: Connecting To The Drain Without Pump
Installation 3.4 Adjusting the feet 3.3.1 Connecting to the drain without pump • The two front feet of washing machine can • Connect the pipe on the washing machine’s adjust the positive, when the washing machine drain. push the pipe into the body first , and is not level, you can up the front of washing then with a spring. -
Page 12: Electrical Connection
Installation 3.5 Electrical connection 3.6 Connection of inlet hose connector and tap Connect the product to a grounded outlet protected by a 6 A fuse. Our company shall not 1. Tighten all hose nuts by hand. Never use a tool be liable for any damages that will arise when the when tightening the nuts. -
Page 13: Connecting To The Water Supply
Installation 3.7 Connecting to the water supply 3.9 Put rat guard into the machine Important: If you want to put rat guard into the machine , • The water supply pressure required to run the you should take the screw out ,then assemble rat machine must be 1-10 bar (0,1 –... -
Page 14: Preparation
Preparation 4.1 Sorting the laundry • Sort laundry according to type of fabric, colour, and degree of soiling and allowable water temperature. • Always obey the instructions given on the garment tags. LAUNDRY WASH SYMBOLS Machine Wash Symbols WASH Maximum Water Temperatures ... -
Page 15: Preparing Laundry For Washing
Preparation 4.2 Preparing laundry for washing 4.3 Things to be done for energy saving • Laundry items with metal attachments such as, underwired bras, belt buckles or metal buttons Following information will help you use the will damage the machine. Remove the metal product in an ecological and energy-efficient pieces or wash the clothes by putting them in a manner. -
Page 16: Correct Load Capacity
Preparation 4.4 Correct load capacity 4.6 Using detergent and softener Detergent, softener and other cleaning agents The maximum load capacity depends on the type of laundry, the degree of soiling and the washing • Add detergent and softener before starting the programme desired. -
Page 17: Advanced Detergent Drawer
Preparation Using softeners Using bleaches Pour the softener into the softener compartment • Add the bleaching agent to the dedicated of the detergent drawer. If your machine is without compartment on the top cover. detergent drawer or with simple detergent drawer •... -
Page 18: Operating The Product
Operating the product 5.1 Control panel 1 - On / Off button 2 - Start / Pause button 3 - Air Turbo button 4 - Auxiliary Function button 5 - Water Level button 6 - Delayed Start Time button 7 - Function button 8 - Remaining Time / Delay Start Time / Error Display 18 / EN Washing Machine /User’s Manual... -
Page 19: Preparing The Machine
Operating the product 5.2 Preparing the machine • Remaining Time, Delay Start Time, Error Display Figures in this manual are schematic and Displays the remaining may not match the product exactly. wash time. Displays the reserved delay start time. • Power Button Displays the error state if a problem occurs in the Press this button once to... - Page 20 Operating the product • Function Button • Child Lock This is a device to protect With every press of this children from being button, the function accidentally hurt while changes. playing with the washer. How to start the Child- Lock function: - Press the “Water level”...
-
Page 21: Main Programmes
Operating the product High water and 3 min air turbo options are set 5.3 Main programmes automatically in this wash course. Depending on the type of fabric, use the following main programmes. Figures in this manual are schematic and may not match the product exactly. •... -
Page 22: Auxiliary Function Selection
Operating the product 5.4 Auxiliary function selection Figures in this manual are schematic and may not match the product exactly. • Wash • Soaking Select this function if you like to wash your laundry by soaking. Soaking is recommended for heavily soiled laundry items. - Page 23 Operating the product 5.5 Programme and consumption table Functions Air Turbo Duration Program Load(kg) Water Level S/W/R/S W/R/S Spin R/S W/R Wash 15min 30min (min) Blanket ● ● ● ● ● ● ● ● Blanket ● ● ● ● ● ●...
-
Page 24: Maintenance And Cleaning
Maintenance and cleaning 6.2 Cleaning the body Service life of the product extends and frequently faced problems decrease if cleaned at regular and control panel intervals. Wipe the body of the machine with soapy water or non-corrosive mild gel detergents as necessary, 6.1 Cleaning the detergent drawer and dry with a soft cloth. -
Page 25: Draining Remaining Water And Cleaning The Pump Filter. . . . . . . . . . . . . . . . . . . . . . . .24
Maintenance and cleaning 6.4 Draining remaining water b. Loosen pump filter (anticlockwise) until water starts to flow. Fill the flowing water into the and cleaning the pump filter container you have placed in front of the filter. The filter system in your machine prevents solid Always keep a piece of cloth handy to absorb items such as buttons, coins and fabric fibers any spilled water. - Page 26 Troubleshooting Problem Check & Solution - Is the electric voltage normal? The power is cut off. - Is the washer plugged in? Plug in the electric cord. - Is the drain hose down? Put the drain hose down. Water does not drain. - Is the drain hose folded? Unfold the drain hose.
- Page 27 Troubleshooting Error Error Control Message - Is the water tap shut off? - Is the water supply cut off ? - Is the water supply hose punctured ? - Is the tap or water supply hose frozen ? Water intake over time - Is the water pressure low or is the filter of the inlet valve clogged with impurities? - Is the Hot hose connected to cold?