
Related Manuals for Samsung Voice yePP BR-1640

Summary of Contents for Samsung Voice yePP BR-1640
- Page 1 Voice yepp BR-1320 BR-1640 • Pictures shown in this manual are for illustrative purposes only and may be different from actual product.
-
Page 2: Features
Features What is a digital recorder? It is a miniature recorder that stores sound and voice data in an electronic memory chip, without using cassette tapes. Long Recording Function (about) Mode (standard play) Model 8 hours and BR-1320 50 minutes 17 hours and BR-1640 40 minutes... -
Page 3: Table Of Contents
Intro-Scan Function You can search quickly through multiple record- ings to find specific ones by listening to each recording for 10 seconds. Voice Edit and E-mail Send Functions After uploading files to a PC, you can use the Voice Yepp Player program to edit recordings and send e-mails. -
Page 4: Descriptions
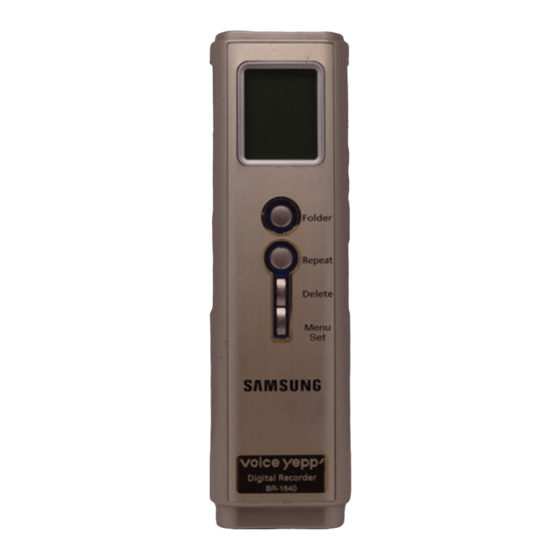
Descriptions Front Panel Folder button Repeat button Delete button Menu Set button Top Panel Accessories External Microphone Program Installation CD for PC Playback Speed indicator Main Information indicator Recording Mode indicator Recording indicator Playback indicator Recording Folder indicator Volume indicator Output jack (for earphone connection) Internal Microphone Input jack... -
Page 5: Rear Panel
While pressing the part indicated by the mark, slide the cover in the direction of the arrow. Battery Life Battery Operating Time (LR03 Alkaline Battery) Voice Recorder mode Speaker Recording playback Type Earphone (Volume (SP mode) -
Page 6: Using Voice Yepp
Using Voice Yepp Turing the Power On/Off To turn on Power Play/Pause Press the button while the recorder is not in lock mode. The power comes on. If you slide the Record switch up while the power is turned off, power will be turned on and recording will start. -
Page 7: Recording
Making a recording You can make a recording using either the internal or external microphone. Play/Pause Press the Folder Press the button to select the folder where recordings will be stored. Each time the button is pressed, the folder switches as follows: A Record Slide the The recording number and time appears on the display and recording begins. -
Page 8: Playing Back
Using Voice Yepp Playing back Play/Pause Press the Folder Press the you want to play. Each time the button is pressed, the folder switches as follows: A Play/Pause Slide the ing number of the file you want to play. Play/Pause Press the The total playback time is displayed and playback starts. -
Page 9: Playback Speed Control Function
Playback speed control function The Playback speed cannot be adjusted during playback. To listen on slow speed While in stop mode Menu Set Press the ‘SLOW’ lights up. Menu Set Press the ‘SLOW’ appears on the display and the recording is played back at slow speed when the Play/Pause button is pressed. -
Page 10: Deleting
Using Voice Yepp Deleting To delete a single recording You can delete a particular recording number. Play/Pause Press the Folder Press the Play/Pause Slide the ing number of the file you want to delete. Delete Press the The selected recording number is deleted and the rest of the recording num- bers are automatically sorted. -
Page 11: Connecting An External Microphone
To delete all recordings You can delete all the recordings stored in the Voice Yepp in one operation. While in the stop mode Menu Set Press the ‘Delete’ lights up. Menu Set Press the ‘DEL All’ appears on the display and all recordings will be deleted. Delete process is cancelled if another button is pressed during 5 seconds while ‘Delete’... -
Page 12: Convenient Functions
Convenient Functions Recording Search Function Because the beginning of each recording in a given folder is played back for 10 seconds, it is easy to search for a specific recording. Menu Set Press the display. ‘INTRO SCAN’ lights up. Menu Set Press the ‘INTRO SCAN’... -
Page 13: Vor Function
VOR Function With the VOR (Voice Operating Record) function enabled, the recorder can record only when it detects a voice or other sound; otherwise it remians in the pause state. To set VOR Vor On Slide the switch up. Mic Mode Select Function You can adjust the microphone’s sensitivity according to its distance from the sound source, and the amount of ambient noise. -
Page 14: Backlight Function
Convenient Functions Backlight Function You can set the recorder so that the LCD display lights each time a button is pressed. Setting the back- light function Canceling the backlight function Bass Control Function Setting the back- light function The Bass control function only works in MP3 mode. Menu Set Press the button until ‘EL ON’... -
Page 15: Repeat Playback Function
Repeat Playback Function During playback, press the button briefly at the start point of the A-B section you want to repeat. ‘RPT A’, the start point of the A-B section, is displayed. To repeat the current playback During playback, press the ‘RPT I’... -
Page 16: Connecting To A Pc
Connecting to a PC By installing the Voice Yepp program and the USB driver, you can transfer the recording from the Voice Yepp to your PC.You can also perform record, edit, play, and voice e-mail send operations. Connecting Voice Yepp to a PC Using a USB cable, connect the Voice Yepp to your PC as shown in the picture. -
Page 17: System Requirements
System Requirements Computer: IBM compatible PC (Pentium or higher) with USB port support Memory: 64MB or higher Operating System: Windows 98/SE/NT5.0/2000/Me/XP Available Hard Disk Space: above 100 MB Microphone (for recording), Speaker (for playing) 16 16... - Page 18 Connecting to a PC Installing the Voice Yepp Software When you insert the installation CD into your CD-ROM drive, the CD starts automatically and a menu appears on the screen as follows. (continued) If the CD does not start automatically Double left click on the My Computer icon in desktop to open it, select the CD-ROM drive, and...
- Page 19 Click Click The Voice Yepp program installation is complete. To uninstall the Voice Yepp program An ‘Uninstall’ window appears when you insert the CD into your CD-ROM drive.
- Page 20 Connecting to a PC Installing USB driver Switch the Voice Yepp on, connect it to your PC, and then install the USB cable as shown below. Caution: The piture below depicts installation in Windows 2000. Caution: Make sure only that this area is selected. (continued) Click Select...
- Page 21 Select a folder appropriate for your operating system Select the ‘Win 98/SE’ folder if your OS is Windows 98/SE; select the ‘Win2K/ME’ fold- er if your OS is Windows 2000/ME/XP. Click If the Browse window closes when you click, click from the number 4 window.
- Page 22 Connecting to a PC Using Voice Yepp Manager First, connect the Voice Yepp to a PC. If you disconnect the cable connecting this device to your PC, ‘Pro-F’ appears on the display and the number increases to show the total number of MP3 music files. This indicates that the Voice Yepp is in the process of encryption.
- Page 23 LCD display information during connecting to PC PC-in: indicates that the Voice Yepp is connected to a PC PC-tr: indicates that data is being transferred Pro-F: indicates that MP3 files are being encrypted When you disconnect the connection between the Voice Yepp and your PC while ‘PC-tr’...
- Page 24 Connecting to a PC Using Voice Yepp Manager File Conversion WAV files can be converted into SC4 files which you can listen to using the Voice Yepp or the Voice Yepp Player, and similarly SC4 files can be converted into WAV files. SC4 files As it only contains the recorded voice, this file can only be listened to using the...
- Page 25 Voice File Download/Upload Notes on voice download/upload When downloading voice files to folders A~D, name the files as Voice00, Voice01,... Voice99. Otherwise the Voice Yepp cannot recognize the files and you won’t be able to locate them. Download only SC4 files to folders A~D and only MP3 files to the MP3 folder. Otherwise the Voice Yepp cannot recognize the files and you won’t be able to locate them.
-
Page 26: Using The Voice Yepp Player
Connecting to a PC Using the Voice Yepp Player You can perform Record, Edit, and Voice E-mail Send operations from your PC using the Voice Yepp pro- gram. Double-click on the Voice Yepp Player icon the Desktop. Voice Recording Recording Time Display To given sound effect Click A window appears, where you can set various sound effects and their levels. - Page 27 Voice File Playback Playback Time indicator To move forward/backward Click at the desired position. Playback restarts from the new position. You can move to the beginning by clicking To adjust sound volume output Click Windows’ Volume Control window appears. Click and then open file you want to play The currently recorded voice can be played back immediately.
- Page 28 Connecting to a PC Using Voice Yepp Player Voice File Edit (continued) (continued) Click and then open the file you want to edit The currently recorded voice can be edited immediately. Using the position shift- ing bar, select the section you want to remove.
- Page 29 Voice File Save SC4 files As they only contain the recorded voice, you can only listen to these files with the Voice Yepp or the Voice Yepp Player. exe files As they contain both the voice (or data) and a player, you can listen to these files without using the Voice Yepp Player.
- Page 30 Connecting to a PC Using Voice Yepp Player Sending recorded voice messages via e-mail To send e-mails with voice file attachments, the user’s mail program must first be set in the Voice Yepp Player. Set the mail program by selecting Option (continued) (continued) Click and then open the...
-
Page 31: Cautions
Cautions Operating Precautions Do not drop or use force on the device. Such actions will damage the Voice Yepp. Do not expose this device to the fol- lowing conditions: places subject to extremely high tem- peratures (60°C); a place exposed to direct sunlight or near a heater;... - Page 32 Cautions Note on the LCD display Wait a moment when any of the following messages is shown on the LCD dis- play. Pro-d: Sorting Memory Pro-F: Encoding MP3 files S-File: Saving Recording Protect the player from moisture(dripping or splashing and that no objects filled with liquids,such as vases, shall be placed on the play- er), and excess heat(e.g.fireplace) or equipment creating strong magnetic or electric fields...
-
Page 33: Troubleshooting
Troubleshooting Are the batteries drained? Check 1 LCD does not work. Is the polarity of the batteries Check 2 correct? Is the memory full, or have all Check 1 Sound available recording umbers been recording does used? not work. Are the batteries drained? Check 2 Is the Voice Yepp set to lock Check 1... - Page 34 Troubleshooting ‘Error’ message The Voice Yepp memory is Check 1 appears on the unstable. LCD display Is the LCD back light turned on? Check 1 Buttons do not - If you press the Play/Pause button to work - This function is reserved for future Is the total memory displayed on Check 2 the LCD?
-
Page 35: Specifications
Specifications Model BR-1320/1640 Dimensions 34(W) X 117(H) X 15(D)mm Weight 61.5g (Batteries included) Power Supply AAA 1.5V X 2EA Recording Medium FLASH MEMORY (32MB/64MB) Maximum number of recordings Total 396 recordings Practical Maximum Output 9mW (SPEAKER) Frequency Range 100Hz ~ 4KHz Internal non-directional electric condenser microphone (mono) Input... - Page 36 AH68-00996B...