Table of Contents
Advertisement
Quick Links
Advertisement
Table of Contents

Related Manuals for LG ROBOKING VR668 V Series


Summary of Contents for LG ROBOKING VR668 V Series
- Page 1 OWNER’S MANUAL ROBOKING Before using, please carefully read the Safety Precautions pages to allow for safe operation of the product. After reading this manual, please keep it in an easily accessible location. VR668**V*N* www.lg.com MFL67680045...
- Page 2 FEATURES Corner Master By having adopted a brand new concept design that is appropriate for walls, the Robot Cleaner's cleaning performance is incredibly efficient. Learning Mode The Robot Cleaner is capable of memorizing the cleaning environment via its Smart Operation feature for smarter cleaning. Turbo Mode In the Turbo mode, the Robot Cleaner operates the suction motor and the brushes at a greater speed giving cleaner results.
-
Page 3: Table Of Contents
CONTENTS BEFORE USING HANDLING METHOD AFTER USE Safety precautions Cleaning the dust bin Included with product Cleaning the dust bin filter Parts description Cleaning the brush 10~11 Button functions Cleaning the sensor/charging terminal Display status information Cleaning the side brush Before you start Cleaning the ultra microfiber mop (option) Overview... -
Page 4: 2~6 Safety Precautions
3. If the supply cord is damaged, it must be replaced by LG Electronics Service Agent in order to avoid a hazard 4. This appliance can be used by children aged from 8 years and above and persons with reduced physical,... - Page 5 Failure to follow this warning can cause electric shock, fire or product failure. If the power cord is broken, do not plug it in. Take the product to an LG Electronics Authorised service repairer. Do not place the home station...
- Page 6 SAFETY PRECAUTIONS WARNING Do not spray or use Turn the power supply off inflammable materials, immediately if any abnormal sound, odor, or smoke is surfactants, or drinking water generated from the Robot in the vicinity of the Robot Cleaner by removing it from the Cleaner.
- Page 7 Doing so can cause product failure. Do not put any water failure. or detergent on the Robot Cleaner. If liquids get inside of the Robot Cleaner, turn off the power supply and contact an LG Electronics sales agent or customer care center.
- Page 8 SAFETY PRECAUTIONS CAUTION If the floor is wet or has wet When the robot cleaner is spots, wipe them up before operating, it may hit the chair leg, desk leg, table leg or other using the Robot Cleaner. Do narrow pieces of furniture. not use the Robot Cleaner on a wet surface.
-
Page 9: Included With Product
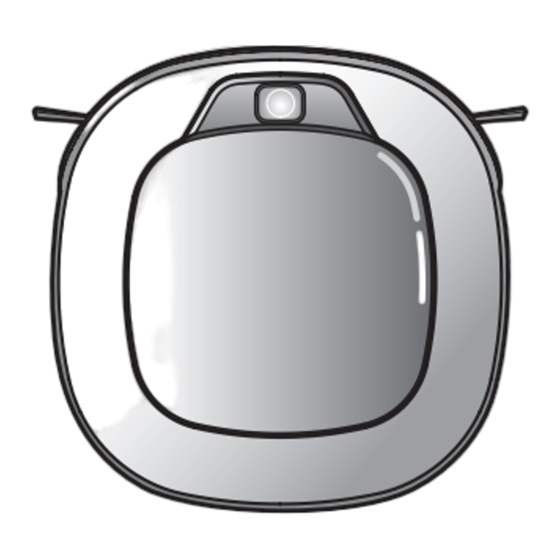
Avant toute utilisation, lisez attentivement la rubrique "Précautions relatives à la sécurité" pour le bon fonctionnement du produit. Après avoir lu le manuel d'utilisation, conservez-le dans un endroit facilement accessible à tout moment. www.lg.com Cleaning Tool Dust bin filter (spare) Quick guide... - Page 10 PARTS DESCRIPTION - ROBOT CLEANER Plan view Upper camera sensor Dust bin cover Display & function buttons Dust bin compartment release button Tag On Front view Ultrasonic sensors Obstacle detecting sensor window Detecting sensors of home station & Receiving sensors of remote controller Front Camera Rear view...
- Page 11 PART DESCRIPTION – HOME STATION / DUST BIN Home station Remote controller holder Charging terminal Power switch Power cord fixing hook Dust bin Dust bin handle Cleaning brush Dust bin cover Suction port flap Sponge filter Dust bin lid opening button EPA Filter Filter cover s Figures can be different from actual objects.
-
Page 12: Button Functions
BUTTON FUNCTIONS – ROBOT CLEANER • If the button is pressed, ‘Turbo Mode’ will be set with a voice confirmation. TURBO • If the button is pressed whilst in ‘Turbo Mode’ , it will be canceled. • Used to turn the power on from Standby, start or stop cleaning. •... - Page 13 BUTTON FUNCTIONS – REMOTE CONTROLLER Home Used to recharge the Robot Start Cleaner by making it return to the Pressing this button will Home Station. (p18) start the cleaning. (p17) Mode Turbo Changes the cleaning Used to activate or deactivate mode.
-
Page 14: Display Status Information
DISPLAY STATUS INFORMATION Mute icon This icon indicates Lock icon whether the Mute is Indicates ON or OFF. whether 'Lock‘ is Battery icon activated or not. This icon indicates Remote the residual battery connection Icon level, it flashes if Is Displayed when the battery needs the smartphone recharging. -
Page 15: Before You Start
BEFORE YOU START Check these items before cleaning • Do not use this device in a room where a child is left alone. The child could be injured. • Remove fragile or unnecessary objects from the room to be cleaned. Especially, remove expensive ceramics and valuables from the floor. -
Page 16: Overview
OVERVIEW Install the home station. (p15) Insert the power cord plug into an outlet and locate the station against a wall. If power is not supplied to the home station, the Robot Cleaner will not charge. Turn on the power supply of the Robot Cleaner. -
Page 17: How To Install The Home Station
Do not operate the Robot Cleaner if the Home Station has a damaged cord or plug, if it is not working properly, or if it has been damaged or dropped. To avoid electrical hazards, the cord must be replaced by LG Electronics, Inc. or a qualified service person. -
Page 18: How To Turn The Robot Cleaner Power Supply On & Off
HOW TO TURN THE ROBOT CLEANER POWER SUPPLY ON & OFF Turning on the main power supply Make sure the Power Switch is on at the rear-left of the Robot Cleaner. If the power is OFF, turn the switch ON. ※... -
Page 19: How To Start And Stop Cleaning
HOW TO START AND STOP CLEANING Using the buttons on the Robot Cleaner After the Robot Cleaner main power switch is turned on, press the START/STOP button to begin cleaning. A melody will sound and cleaning will begin. Press the START/STOP button during the cleaning cycle to stop cleaning. -
Page 20: How To Charge The Battery
HOW TO CHARGE THE BATTERY Automatic charging The Robot Cleaner returns to the home station at the end of a cleaning cycle or when its battery is running low. ※ If 10 minutes elapse without the Robot Cleaner moving or the battery is too low, the power will be automatically turned OFF. - Page 21 HOW TO CHARGE THE BATTERY Remaining Battery Charge Indicator The Battery level is indicated on the Status Display, as follows. • If recharging is in progress, the Battery Level indicator flashes showing the battery charge status level. • If recharging is complete, only the 'Battery' and 'Clean Mode' icons are displayed to save the energy. •...
-
Page 22: Cleaning Modes
CLEANING MODES Zigzag Cleaning In 'Zigzag' mode, Robot Cleaner repeats a zigzag operation to clean each and every spot in the cleaning area. If you need to quickly clean an area choose 'Zigzag' mode. Press ‘Mode’ button on Remote Controller or main unit to select 'Zigzag' mode and press 'Start' button. - Page 23 CLEANING MODES My Space Cleaning Pressing 'My Space' on the Remote Controller will set the My Space cleaning mode with a voice message. For cleaning of particular spaces, select this mode. The 1st stage: Use the Remote Controller to manually set the parameters of each cleaning block.
-
Page 24: Auxiliary Cleaning Modes
AUXILIARY CLEANING MODES Manual Cleaning By pressing a direction key on the Remote Controller, you can move the Robot Cleaner manually. Robot Cleaner will clean the area, by pressing the forward/backward/left/right buttons accordingly on the keypad of the remote control. While in 'Manual' mode, the robot cleaner will run into obstacles placed behind it if the backward key on the remote is pressed or held down. - Page 25 AUXILIARY CLEANING MODES Turbo Mode Pressing the 'Turbo' button on the Remote Controller or main unit will activate 'Turbo' mode, with a voice message. While in 'Turbo' mode, pressing the same button will cancel 'Turbo' mode, with a voice message. In 'Turbo' mode, Robot Cleaner runs more intensely for a powerful clean.
-
Page 26: Time Setting
TIME SETTING You can set or change the current time on the Robot Cleaner. Pressing ‘Clock' button on the Remote Controller, when the Robot Cleaner is in standby mode, will start the clock setting mode. Set the hour by using 'uv' buttons Flickering on Remote Controller. -
Page 27: Scheduled Cleaning
SCHEDULED CLEANING You can schedule cleaning so that the Robot Cleaner starts cleaning at a scheduled time. Pressing 'Schedule' button on Remote Controller, only when the Robot Cleaner is recharging, will start the scheduled cleaning setting. Setting/Cancelling the schedule cleaning is only possible when the unit is recharging on the home station Select ‘Once reservation’... -
Page 28: Mop Cleaning (Option)
MOP CLEANING (OPTION) By attaching the ultra microfiber mop, you can effectively use the Robot Cleaner to remove dust on hard floor surfaces. When the mop plate is attached, the Robot Cleaner will not climb on to carpets or over thresholds, in order to prevent transferring dirt Caution from the mop. -
Page 29: Location Search Function
LOCATION SEARCH FUNCTION The Robot Cleaner remembers its location while cleaning. If the user moves the Robot Cleaner while it is operating, it will search for the location it was moved from by using its navigational location search function before continuing to clean. -
Page 30: Smart Diagnosis
SMART DIAGNOSIS Robot Cleaner uses this Smart Diagnosis feature to run a self-diagnosis. If any irregularity is found from the diagnosis, please contact the local LG Electronics service center. ※ During Smart Diagnosis, the Robot Cleaner will move about within a 50 cm radius. So, make sure no objects are in the way within a 1 m radius around the Home Station, before starting Smart Diagnosis. - Page 31 Smart diagnosis mode will be turned off. Please try smart diagnosis again after turning the main power switch off and on from the back of Robot Cleaner. If the problem continues, please contact LG Electronics customer care. Smart Diagnosis mode cannot be operated with mop plate Run Smart Diagnosis again after removing the Mop being attached.
-
Page 32: Smart Application Function
SMART APPLICATION FUNCTION You can control the Robot Cleaner from your smartphone. The "LG Roboking" application provides the following functions: • HomeView, HomeGuard, Cleaning Diary, Schedule Cleaning, Smart Diagnosis AP with Internet access Smartphone (Android) Robot Cleaner with network access... - Page 33 SMART APPLICATION FUNCTION Signing up for membership You need to subscribe your personal login ID on the server to control the Robot Cleaner from your smartphone. 1. The [Startup Screen] opens when you run the "Smart ThinQ" application. Click "Sign in". 2.
- Page 34 SMART APPLICATION FUNCTION How to register the product (Android) You will need to register the product on the application to control the Robot Cleaner from your smartphone. Add your Robot Cleaner to the app with the Tag On feature to use the Smart function. 1.
- Page 35 SMART APPLICATION FUNCTION Tag On / Register product (Android) The Robot Cleaner can easily be added to the app via the Tag On function. 1. Check the locations of Tag On of Robot Cleaner and NFC of your smartphone. [Location of Tag On of Robot Cleaner] [Product category] [Register product Fig.1] [Register product Fig.2]...
- Page 36 SMART APPLICATION FUNCTION Product network / Register product (Android) 1. After the connection has been successful in the product category type, the [Server connection] screen will open. 2. Select the AP on the network list; automatic connection mode will be enabled to connect to the server.
- Page 37 SMART APPLICATION FUNCTION How to register the product (iOS) You will need to register the product on the application to control the Robot Cleaner from your smartphone. Add your Robot Cleaner to the app with the Wi-Fi feature to use the Smart function. 1.
- Page 38 SMART APPLICATION FUNCTION Product network / Register product (iOS) 1. After checking the network, please enter the network ID and password to connect to the product. 2. Please long-press the “Turbo” button for 3 seconds while the Robot cleaner is turned on. 3.
- Page 39 SMART APPLICATION FUNCTION Startup screen of application The following screen will open when you connect to the Robot Cleaner for the first time from the "Smart ThinQ" application: Displays the product's You can check for any nickname. alert history. Menu The home icon selects Homeguard, Schedule the product list page.
- Page 40 SMART APPLICATION FUNCTION Startup screen of application Menu Homeguard, Schedule Cleaning, Cleaning Diagry, Smart Diagnosis, Setting. HomeView you can use the remote- control function, and monitor the surrounding environment around the robot cleaner through the front camera. Mode Menu Cleaning mode, Repeat mode, Turbo mode.
- Page 41 SMART APPLICATION FUNCTION HomeView (interface configuration) Open HomeView; the following control screen icons will appear: HomeView main menu Each button provides the corresponding function. Status icons Wi-Fi, battery, Reserve Cleaning, cleaning mode, Turbo mode, repeat mode, lighting mode, and cleaning time are displayed here.
- Page 42 SMART APPLICATION FUNCTION HomeView (Cleaning) You can change to the cleaning mode during HomeView and have the Robot Cleaner start cleaning by clicking “Start cleaning." [Waiting to clean] Click “Start cleaning” to engage the cleaning mode. You can select another cleaning mode by clicking the “Mode setting”...
- Page 43 SMART APPLICATION FUNCTION HomeView (Redock for charging) Click “Start Charging” when the Robot Cleaner is not charging to have the Robot Cleaner start searching for the Home station. Click "Stop" to have the Robot Cleaner stop searching. [Moving to Home station] [Charging] HomeView (Manual control) Press the "Manual Control"...
- Page 44 SMART APPLICATION FUNCTION Menu - HomeGuard (Main screen) HomeGuard lets you monitor the house through the Robot Cleaner's camera at its designated location while you are away from home. The Robot Cleaner will take pictures of any activity it detects and sends them to you as Alerts.
- Page 45 SMART APPLICATION FUNCTION Menu - HomeGuard (Location setting) To start HomeGuard, first, you have to set the location where the Robot Cleaner will remain during the HomeGuard mode. Select the location on the virtual map. 1. Click the target location on the map or drag the Robot Cleaner to the desired location within the designated area.
- Page 46 SMART APPLICATION FUNCTION Menu - HomeGuard (Location setting) 3. Check if the location is satisfactory from the video feed and click "Save" to complete location setup. [Saving Location setting] • The Robot Cleaner searches for the saved location with the Home station as the starting point, so you will have to set up the location again if the station has been moved.
- Page 47 SMART APPLICATION FUNCTION Menu - HomeGuard (Alert) Upon detecting any movement while in HomeGuard mode, the Robot Cleaner takes pictures and sends an alert to your smartphone. Press "Confirm" on the alert pop-up to view the picture or use the "Call"...
- Page 48 SMART APPLICATION FUNCTION Menu – Schedule Cleaning You can schedule the time you want the Robot Cleaner to start cleaning. To set up Schedule cleaning, toggle across the Schedule cleaning key to turn it on or off in the Schedule cleaning menu. After enabling Schedule cleaning, set up the time and repetition, and then click "Save"...
- Page 49 SMART APPLICATION FUNCTION Menu – Cleaning Diary You can view the diary to find out when the Robot Cleaner did the cleaning. Cleaning Diary records information such as date, mode, and the start and completion times of each cleaning. Click Play button on the right of the completed cleaning list; an active cleaning map of that particular cleaning event will appear.
- Page 50 Be sure to resolve any issue identified in the diagnosis by taking a corresponding measure. If the symptom persists, contact the customer service center of LG Electronics. • Smart Diagnosis on the application provides the same function as that of the remote control.
- Page 51 SMART APPLICATION FUNCTION Menu – Setting You can check or change the current information set up on Robot Cleaner. Click Voice gender to change the voice of the Robot Cleaner to male or female. Click Product nickname to change the current nickname of the Robot Cleaner; a pop-up where you can enter a new nickname opens (up to 10 characters allowed including English, Korean and numeric).
- Page 52 SMART APPLICATION FUNCTION Misc. 1 - Software update The network-enabled model of the Robot Cleaner can update the software automatically via the application. 1. Make sure that the "Smart ThinQ" application is up to date on the Play Store.(Unless you update the app to the latest version, software update will not be available.) 2.
- Page 53 SMART APPLICATION FUNCTION Misc. 2 - Mode You can order to robot cleaner simply without connection with robot cleaner through Mode function. Mode function has total 4 functions. If you push ‘ A pplied’ button, Robot cleaner will act according to Mode like below.
-
Page 54: Product Info Initialization
3. Pressing "Start/Stop" again will turn Roboking on with a melody. ※ Any dispute between seller and buyer is an issue between the two parties. LG Electronics provides a product initialization function for smooth transaction. • Initialization returns the following information as factory default setting. -
Page 55: Cleaning The Dust Bin
CLEANING THE DUST BIN If the dust bin is full, suction power can be reduced. Clean the dust bin before or after each cleaning session. Clean the dust bin using the following sequence: 1. Open the dust bin compartment cover by pressing the PUSH button on the Robot Cleaner. -
Page 56: Cleaning The Dust Bin Filter
CLEANING THE DUST BIN FILTER The Dust Bin Filter consists of a EPA and Sponge Filter. Clean both the EPA and Sponge filters as per the following sequence. 1. Pull the hook on the left of the EPA Filter module on the rear side of Dust Bin to separate the EPA Filter and the sponge. -
Page 57: Cleaning The Brush
CLEANING THE BRUSH The rotating Brush, located on the bottom of Robot Cleaner, helps collect the dust. Clean the Brush as per the following sequence. ※ Before turning over the main unit, lay a soft cloth on the floor and remove the Dust Bin. Otherwise, the main unit can get scratched and dust will fall from the Dust Bin. -
Page 58: Cleaning The Sensor/Charging Terminal
CLEANING THE SENSORS/CHARGING TERMINALS There are sensors on the Robot Cleaner that detect obstacles, stairways and the home station for charging the battery. In order to maintain the performance of the Robot Cleaner, regularly clean the sensors and charging terminals as follows: 1. -
Page 59: Cleaning The Side Brush
CLEANING THE SIDE BRUSH Foreign objects/materials such as hair can easily adhere to the side brush. Remove such materials at least once a week. If excessive amounts of foreign materials are stuck to the brush, there is the risk of damage to the brushes. If the floor is rough or frequently cleaned, the side brushes may bend or become deformed. -
Page 60: Cleaning The Ultra Microfiber Mop (Option)
※ If the Mop is used in a damp or wet state, it will cause the Robot Cleaner to malfunction. • To avoid product malfunction, only use the ultra microfiber mop provided with the Robot Cleaner. • Additional microfiber mops can be purchased by visiting a nearby LG Electronics service center. -
Page 61: Troubleshooting
TROUBLESHOOTING Upon a voice message, "The wheels are not touching the floor. Please move Robot Cleaner onto flat floor." A warning message will be given if a wheel does not contact the floor surface for any reason. • Is a wheel trapped in the front door, balcony, stairway, etc? s Move the Robot Cleaner on to the flat floor. - Page 62 TROUBLESHOOTING Upon a voice message, "Please check if the dust bin is installed with the filter." A warning message will be given if there is no Dust Bin or Filter housing fitted. • Is the Dust Bin fitted to the Robot Cleaner? s Open the Dust Bin compartment cover and check to ensure the Dust Bin is in place.
- Page 63 TROUBLESHOOTING Upon a voice message, "Please remove foreign material from the brushes on the bottom." A warning message will be given if foreign materials restrict the Brush's rotation. Turn off the main power switch on the rear of the Robot Cleaner. Lay a soft cloth on the floor and put the Robot Cleaner upside down on it.
-
Page 64: Before You Call For Service
BEFORE YOU CALL FOR SERVICE Confirm before reporting the failure of Robot Cleaner. Problem Solutions (Reference page) The power supply cannot be Check that the power switch is turned on. (Page 16) turned on. The power supply This is not a failure. Robot Cleaner has its own power saving automatically turns off. -
Page 65: Product Specifications
Rating DC 14.4 V / 2330 mAh LG Electronics Inc. hereby declares that this Automatical Battery Operated Vacuum Cleaner with Docking Station is in compliance with the essential requirements and other relevant provisions of Directive 1999/5/EC. For consideration of the user, this device should be installed and operated with a minimum distance of 20 cm between... -
Page 66: Reference Items
REFERENCE ITEMS Open source software notice To obtain the source code under GPL, LGPL, MPL and other open source licenses, that is contained in this product, please visit http://opensource.lge.com. In addition to the source code, all referred license terms, warranty disclaimers and copyright notices are available for download. - Page 67 MEMO...
- Page 68 Disposal of waste batteries/accumulators 1. When this crossed-out wheeled bin symbol is attached to batteries/accumulators of Your product it means they are covered by European Directive 2006/66/CE. 2. This symbol may be combined with chemical symbols for mercury(Hg), cadmium(Cd) or lead(Pb) if the battery Contains more that 0.0005% of mercury, 0.002% of cadmium or 0.004% of lead.