Table of Contents
Advertisement
Quick Links
Advertisement
Table of Contents

Related Manuals for Salton MW-2003


Summary of Contents for Salton MW-2003
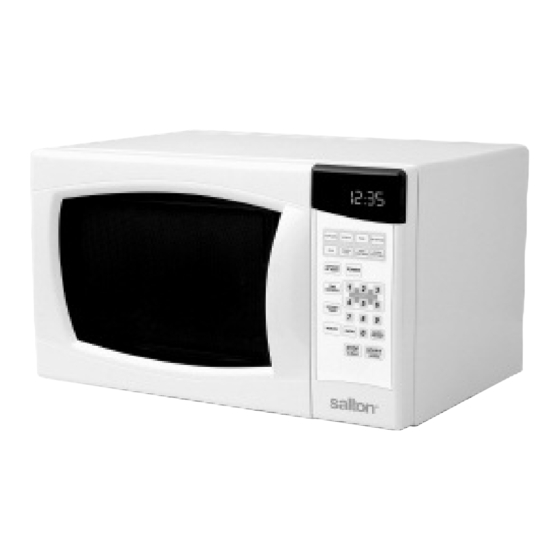
- Page 1 ® Microwave Oven Instruction Booklet Model: MW-2003 & MW-2016...
- Page 2 I I M M P P O O R R T T A A N N T T S S A A F F E E T T Y Y I I N N S S T T R R U U C C T T I I O O N N S S I I M M P P O O R R T T A A N N T T S S A A F F E E G G U U A A R R D D S S When using electrical appliances, basic safety precautions should be followed, including the following:...
- Page 3 14. This appliance should only be serviced by qualified service personnel. See the Warranty section or contact the your nearest service facility for examination, repair or adjustment. 15. DO NOT attempt to tamper with or make any adjustments or repairs to oven door, control panel or any other part of the oven.
- Page 4 20. Pot Holders should always be used when removing items from the oven. Heat is transferred from hot food to the cooking container and from the container to the Glass Tray. The Glass Tray can also be very hot after removing the cooking container from the oven.
-
Page 5: Glass Turntable
GLASS TURNTABLE 1. Do not cook directly on the turntable. It can crack, cause injury or damage to the oven. Always place food in a microwave safe dish. 2. DO not operate the oven without the Glass Turntable in place. Improper cooking or damage to the oven could result. -
Page 6: Grounding Instructions
GROUNDING INSTRUCTIONS This appliance must be grounded. In the event of an electrical short circuit, the grounding plug reduces the risk of electric shock by providing an escape wire for electric current. This appliance is equipped with a cord having a grounding wire with a grounding plug. -
Page 7: Using An Adapter
Using an Adapter Due to potential safety hazards, we strongly recommend against the use of an adapter plug. However, if you choose to use an adapter, where local codes may permit, a temporary connection may be made to a properly grounded two prong wall outlet by the use of a cUL/CSA listed adapter, which is available at most hardware stores. - Page 8 6. Remove plastic store wrap before cooking or defrosting foods in the oven. 7. Avoid inserting nails, wire, etc. through any holes in the unit during operation. Never insert a wire, nail or any other metal objects through the holes on the cavity or any other holes or gaps, because such objects may cause electric shock and microwave leakage.
-
Page 9: Utensil Test
20. DO NOT boil eggs in their shell. Pressure may build up and the eggs may explode. 21. Potatoes, apples, egg yolks, whole acorn squash and sausage are some examples of food with nonporoust skins. These must be pierced before cooking to prevent bursting. - Page 10 Utensils for Use in the Microwave Aluminum foil Use for shielding only. Small smooth pieces can be used to cover thin parts of meat or poultry to prevent overcooking. Arcing can occur if foil is too close to oven walls. The foil should be at least 1 inch (2.5 cm) away from oven walls.
-
Page 11: Installation
Utensils to AVOID in the Microwave DO NOT use the following materials in the microwave: • Metal or aluminum pans/bakeware, utensils • Recycled paper products • Non-heat resistant glass • Food storage bags • Dishes with metallic trim • Brown paper bags •... -
Page 12: Description Of Parts
5. DO NOT install the oven over a range cook-top or other heat-producing appliances or near water taps. Heat and water can damage the microwave and void the warranty. 6. Plug the microwave oven into a standard household grounded outlet. Check the rating label of the microwave to ensure the voltage and frequency are compatible with the rating of the outlet. -
Page 13: Turntable Assembly
g) 1 – 6 Express Cook touch pads h) Kitchen Timer Memory AM/PM k) Clock/Pre-Set Use to set the time of day or recall the time of day Stop/Clear Clears all previous settings pressed before cooking starts. During cooking press once to stop the oven and twice to stop and clear all entries m) Start/+30sec Turntable Assembly 1. -
Page 14: Setting The Clock
OPERATING INSTRUCTIONS Setting the Clock 1. When the microwave oven is plugged into the outlet, the oven will display “0.00” 2. Press “CLOCK/PRE-SET”, and the LED will display 00:00 and the clock indicator icon will light up in the Display Window. The numbers will flash starting with the first hour digit. -
Page 15: Setting The Child Lock
Setting the Child Lock Press STOP/CLEAR and hold for 3 seconds and the child lock icon will appear. The microwave will beep and the time will no longer be displayed in the Display Window. You will not be able to enter any information on the Control Panel or use the Microwave. -
Page 16: Express Start
Express Start To Express Start from 1 to 6 minutes on 100% power: 1. Press any number from 1 to 6 (1 for 1 minute, 2 for 2 minutes, etc.). The cooking icon and the high power icon will be shown in the Display Window The microwave will start automatically. - Page 17 3. Press START/+30SEC if you are ready to cook. The new time will be saved automatically or press MEMORY and the new time will be saved. Potato 1. You can cook 1 to 3 – 8oz. (230g) potatoes at a time. 2.
-
Page 18: Multi-Stage Cooking
Dinner Plate 1. Press DINNER PLATE once for 9 oz.(250g), twice for 12 oz.(340 g) and 3 times for 18 oz. (500g). The icons will appear in the Display Window. 2. Press START/+30 SEC. The time will appear in the Display Window and start to countdown. -
Page 19: Defrost By Weight
NOTE: - Time defrost and auto function cooking cannot be set as one of the 2 stages of cooking -Defrost can be set as the first stage cooking only. Example 2: To cook at 5 minutes on power level 9, then 2 minutes 30 seconds on power level 4: 1. -
Page 20: Defrost By Time
Defrost by Time 1. Press TIME DEFROST. ‘dEF2” and will be shown in the Display Window. 2. Press the number pads to input the defrosting time. NOTE: The time range is between 00:01 and 99:99. 3. The default microwave power is level 3. If you want to change the power level, press POWER once and the Display Window will show PL 3. - Page 21 CARE AND CLEANING PROBLEM POSSIBLE CAUSE POSSIBLE REMEDY Oven will not start a) Electrical cord for a) Plug into the outlet oven is not plugged in b) Close the door and try again b) Door is open c) Check instructions c) Wrong operation is set Arcing or sparking a) Materials to be avoided...
-
Page 22: Limited Warranty
Division of Salton Appliances (1985) Corp. Customer Service Department 81A Brunswick Dollard-des-Ormeaux Quebec, Canada H9B 2J5 Website: www.salton.com E-mail: service@salton.com Fax: 514-685-8300 Tel: 514-685-3660 * Return/exchange policies at each retailer vary and may differ from the Salton Canada 1 year limited warranty period.