
Related Manuals for D-Link DIR-822-US


Summary of Contents for D-Link DIR-822-US
- Page 1 Version 3.01 | June 30, 2017 User Manual Wireless AC1200 Dual Band Router with High-Gain Antennas DIR-822-US...
-
Page 2: Preface
Preface D-Link reserves the right to revise this publication and to make changes in the content hereof without obligation to notify any person or organization of such revisions or changes. Manual Revisions Revision Date Description 3.00 December 9, 2015 • Initial release for revision C1 3.01... -
Page 3: Table Of Contents
QoS Engine ...............52 Home ..................22 Firewall Settings .............53 Internet ................22 IPv4/IPv6 Rules ...............55 DIR-822 ................23 Port Forwarding .............56 Connected Clients ............24 Virtual Server ..............57 Settings ..................25 Website Filter ..............58 Wizard ................25 Static Routes ..............59 Internet ................25 D-Link DIR-822 User Manual... - Page 4 WPS Button ...................70 Windows® 10 ................71 Windows® 8 ...................73 WPA/WPA2 ................73 Windows® 7 ...................75 WPA/WPA2 ................75 WPS ..................78 Windows Vista® ................82 WPA/WPA2 ................83 Troubleshooting ..............85 Wireless Basics ..............89 What is Wireless? .................90 Tips ....................92 Wireless Modes ................93 D-Link DIR-822 User Manual...
-
Page 5: Product Overview
If any of the above items are missing, please contact your reseller. Note: Using a power supply with a different voltage rating than the one included with the DIR-822 will cause damage and void the warranty for this product. D-Link DIR-822 User Manual... -
Page 6: Minimum Requirements
Users: Make sure you have the latest version of Java installed. Visit ® www.java.com to download the latest version. For requirements refer to QRS Mobile page at: QRS Mobile Requirements • iTunes Store (App Store > Utilities > D-Link Systems) • Google Play (Click link to www.dlink.com/qrsmobileapp) D-Link DIR-822 User Manual... -
Page 7: Introduction
* Maximum wireless signal rate derived from IEEE Standard 802.11ac, 802.11a, 802.11g, and 802.11n specifications. Actual data throughput will vary. Network conditions and environmental factors, including volume of network traffic, building materials and construction, and network overhead, lower actual data throughput rate. Environmental conditions will adversely affect wireless signal range. D-Link DIR-822 User Manual... -
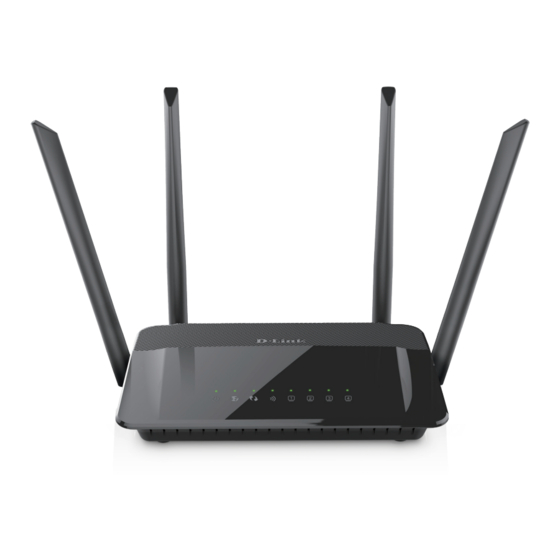
Page 8: Hardware Overview
Press to start the WPS process. The WPS LED will blink during the process. The light will turn solid green when successfully WPS Button connecting to a device. Located on the bottom of the router. Using a paper clip, press and hold for 10 seconds to reset the router back to the factory Reset Button default settings. D-Link DIR-822 User Manual... -
Page 9: Leds
A solid green light indicates the wireless function is working properly. This light will blink during data Wireless LED transmission. A solid green light indicates a connection to a device is working properly. The LED will blink during data LAN LED (1-4) transmission. D-Link DIR-822 User Manual... -
Page 10: Installation
• Advanced Users - If your ISP provided you with a modem/router combo, you will need to set it to “bridge” mode so the DIR-822 can work properly. For details, contact your ISP or refer to the user manual for your modem/router device. D-Link DIR-822 User Manual... -
Page 11: Wireless Installation Considerations
RF (radio frequency) noise in your home or business. The key to maximizing wireless range is to follow these basic guidelines: 1. Keep the number of walls and ceilings between the D-Link router and other network devices to a minimum - each wall or ceiling can reduce your adapter’s range from 3-90 feet (1-30 meters.) Position your devices so that... -
Page 12: Manual Setup
1. Turn off and unplug the power to your cable or DSL modem. This is required. Modem 2. Connect an Ethernet cable from the Internet port of the router to the Ethernet port on your cable or DSL modem. Ethernet Port INTERNET POWER PORT POWER DIR-822 Internet Port (yellow) Modem D-Link DIR-822 User Manual... - Page 13 (SSID) and Wi-Fi password of the router. Complete steps 4 and 5 before attempting to connect. INTERNET POWER PORT POWER DIR-822 Computer 4. Plug the power back into your DSL or cable modem. Please wait about one minute before continuing. DIR-822 INTERNET POWER PORT POWER Modem Computer D-Link DIR-822 User Manual...
- Page 14 * If you are connecting wirelessly, you may now connect to the router using the supplied Wi-Fi Configuration Card for the Wi-Fi network name (SSID) and Wi-Fi password. 6. After the router has powered up, verify that the Power and Internet LEDs are both lit. Proceed with router configuration. D-Link DIR-822 User Manual...
-
Page 15: Configuration
There are several different ways you can configure your router to connect to the Internet and connect to your clients: • D-Link Setup Wizard - This wizard will launch when you log into the router for the first time using your web browser. -
Page 16: Setup Wizard
IP address of the router (192.168.0.1). The wizard will guide you through a step-by-step process to configure your new D-Link router and connect to the Internet. When the welcome screen appears, click Next to continue. Wait a few moments while your router detects your Internet connection type. - Page 17 (PPPoE), enter your PPPoE username and password supplied by your ISP. Click Next to continue. Note: Make sure you remove your PPPoE software from your computer. The software is no longer needed and will not work through a router. D-Link DIR-822 User Manual...
- Page 18 32 characters. Create a Wi-Fi password (between 8-63 characters). Your wireless devices will need to have this passphrase or key entered to be able to connect to your wireless network. Click Next to continue. D-Link DIR-822 User Manual...
- Page 19 The Summary window will display your settings. Click Back if you find it necessary to make changes. When the settings are correct, make a note of the of them so you can configure your Wi-Fi devices. Click Next to continue. D-Link DIR-822 User Manual...
- Page 20 Section 3 - Configuration At the end of the wizard, you will see a final summary of your settings. Click Finish to close the wizard. D-Link DIR-822 User Manual...
-
Page 21: Qrs Mobile App
Wi-Fi password. http://dlinkrouter.local. Or http://192.168.0.1 Username: “Admin” Password:” “ (leave the field blank) Step 3 Once you connect to the router, tap on the QRS Mobile icon to launch the QRS mobile app from your mobile device. D-Link DIR-822 User Manual... - Page 22 Ethernet cable into your DSL or cable modem, and plug the other end into the port marked INTERNET on the DIR-822. Tap Next to automatically detect your Internet connection and proceed to the next step. D-Link DIR-822 User Manual...
- Page 23 Enter the Device Password (Admin Password) of your choice. Unlike the Wi-Fi password, this password is only required when you need to configure the router. Refer to "Web-based Configuration Utility" on page to learn how this password is used. Tap Next to proceed. D-Link DIR-822 User Manual...
- Page 24 You will see a summary of your settings. If you need to make any changes, tap Back to step back through the previous pages. Otherwise, tap Next to complete the setup. Congratulations, your device has been successfully configured! You may now exit the QRS Mobile app. D-Link DIR-822 User Manual...
-
Page 25: Web-Based Configuration Utility
The bar at the top of the page has quick access to Settings, Advanced, and Management functions. You may easily navigate back Home at any time. Note: The system will automatically time-out after a period of inactivity. (You will have to log back in as described above.) D-Link DIR-822 User Manual... -
Page 26: Home
To view details about your Internet connection, click on the Internet icon. Click Release IP Address to disconnect from the Internet. If you do this and wish to reconnect, click Renew. To reconfigure the Internet settings, refer to "Internet" on page D-Link DIR-822 User Manual... - Page 27 To reconfigure the router's wireless settings, either click Go to settings (at the bottom right side of the page), or click Settings (at the top of the page) and then Wireless from the drop-down menu that appears. Refer to page 47. D-Link DIR-822 User Manual...
-
Page 28: Connected Clients
Enable if you would like to reserve this IP address for this client. Every time this device joins the network, it will receive this IP address. Access: Allow or Block access to your router. Click Save when you are done. D-Link DIR-822 User Manual... -
Page 29: Settings
For Dynamic IP (DHCP) refer to page 26. For Static IP refer to page 27. For PPPoE refer to page 28. For PPTP refer to page 29. For L2TP refer to page 31. For DS-Lite refer to page 33. D-Link DIR-822 User Manual... -
Page 30: Dynamic Ip (Dchp)
The default MAC address is set to the Internet port’s physical interface Clone: MAC address on the router. You can use the drop-down menu to replace the Internet port’s MAC address with the MAC address of a connected client. Click Save when you are done. D-Link DIR-822 User Manual... -
Page 31: Static Ip
The default MAC address is set to the Internet port’s physical interface Clone: MAC address on the router. You can use drop-down menu to replace the Internet port’s MAC address with the MAC address of a connected client. Click Save when you are done. D-Link DIR-822 User Manual... -
Page 32: Pppoe
Enter the Secondary DNS Server IP address assigned by your ISP. Secondary DNS Server: MTU: Maximum Transmission Unit - by default this field will be set to Auto. Select Manual if you need to change the MTU for optimal performance. Click Save when you are done. D-Link DIR-822 User Manual... -
Page 33: Pptp
Enter the PPTP Gateway IP Address provided by your ISP (for Static IP Address: IP only). Enter the Primary DNS Server IP address assigned by your ISP. Primary DNS Server: Secondary DNS Enter the Secondary DNS Server IP address assigned by your ISP. Server: D-Link DIR-822 User Manual... - Page 34 Section 3 - Configuration MTU: Maximum Transmission Unit - by default this field will be set to Auto. Select Manual if you need to change the MTU for optimal performance with your ISP. Click Save when you are done. D-Link DIR-822 User Manual...
-
Page 35: L2Tp
Enter the L2TP Gateway IP Address provided by your ISP (for L2TP Gateway IP Address: Static IP only). Primary DNS Enter the Primary DNS Server IP address assigned by your ISP. Server: Enter the Secondary DNS Server IP address assigned by your ISP. Secondary DNS Server: D-Link DIR-822 User Manual... - Page 36 Section 3 - Configuration MTU: Maximum Transmission Unit - by default this field will be set to Auto. Select Manual if you need to change the MTU for optimal performance with your ISP. Click Save when you are done. D-Link DIR-822 User Manual...
-
Page 37: Ds-Lite
Address: WAN IPv6 Once connected, the WAN IPv6 address will be displayed here. Address: IPv6 WAN Once connected, the IPv6 WAN Default Gateway address will be Default displayed here. Gateway: Click Save when you are done. D-Link DIR-822 User Manual... -
Page 38: Ipv6
For PPPoE refer to page 39. For IPv6 in IPv4 Tunnel refer to page 41. For 6 to 4 refer to page 43. For 6rd refer to page 44. For Local Connectivity Only refer to page 46. D-Link DIR-822 User Manual... -
Page 39: Auto Detection
Enable or disable Automatic DHCP-PD in LAN services. DHCP-PD in LAN: Select SLAAC + RDNSS, SLAAC + Stateless DHCP, or Stateful Autoconfiguration Type: DHCPv6. Router Enter the IPv6 address lifetime (in minutes). Advertisement Lifetime: Click Save when you are done. D-Link DIR-822 User Manual... -
Page 40: Static Ipv6
Displays the router’s LAN IPv6 Link-Local Address. Local Address: Enable Automatic Enable or disable the Automatic IPv6 Address Assignment feature. IPv6 Address Assignment: Autoconfiguration Select SLAAC + RDNSS, SLAAC + Stateless DHCP, or Stateful DHCPv6. Type: D-Link DIR-822 User Manual... - Page 41 Section 3 - Configuration Router Enter the IPv6 address lifetime (in minutes). Advertisement Lifetime: Click Save when you are done. D-Link DIR-822 User Manual...
-
Page 42: Auto Configuration
Enable or disable Automatic DHCP-PD in LAN services. Enable Automatic DHCP-PD in LAN: Autoconfiguration Select SLAAC + RDNSS, SLAAC + Stateless DHCP, or Stateful DHCPv6. Type: Router Enter the IPv6 address lifetime (in minutes). Advertisement Lifetime: Click Save when you are done. D-Link DIR-822 User Manual... -
Page 43: Pppoe
Select either Obtain DNS server address or Use the following DNS . DNS Type: If you selected Use the following DNS, enter the Primary DNS Primary DNS Server: Server address. Secondary DNS If you selected Use the following DNS, enter the Secondary DNS Server address. Server: D-Link DIR-822 User Manual... - Page 44 Enable or disable the Automatic IPv6 Address Assignment feature. Automatic IPv6 Address Assignment: Auto Select SLAAC + RDNSS, SLAAC + Stateless DHCP or Stateful DHCPv6. Configuration Type: Router Enter the IPv6 address lifetime (in minutes). Advertisement Lifetime: Click Save when you are done. D-Link DIR-822 User Manual...
-
Page 45: Ipv6 In Ipv4 Tunnel
Enable DHCP- Enable or disable prefix delegation services. LAN IPv6 If you disabled DHCP-PD, enter the LAN (local) IPv6 address for the Address: router. LAN IPv6 Link- Displays the router’s LAN IPv6 Link-Local Address. Local Address: D-Link DIR-822 User Manual... - Page 46 Enable or disable Automatic DHCP-PD in LAN services. DHCP-PD in LAN: Autoconfiguration Select SLAAC + RDNSS, SLAAC + Stateless DHCP, or Stateful Type: DHCPv6. Router Enter the IPv6 address lifetime (in minutes). Advertisement Lifetime: Click Save when you are done. D-Link DIR-822 User Manual...
-
Page 47: To 4
Click to enable the Automatic IPv6 Address Assignment feature. IPv6 Address Assignment: Autoconfiguration Select SLAAC + RDNSS or SLAAC + Stateless DHCP, or Stateful DHCPv6. Type: Router Enter the IPv6 address lifetime (in minutes). Advertisement Lifetime: Click Save when you are done. D-Link DIR-822 User Manual... -
Page 48: 6Rd
Enter the 6rd border relay IPv4 Address supplied by your ISP (for 6rd Border Relay IPv4 manual configuration only). Address: LAN IPv6 Displays the LAN (local) IPv6 address for the router. Address: LAN IPv6 Link- Displays the router’s LAN Link-Local Address. Local Address: D-Link DIR-822 User Manual... - Page 49 Click to enable the Automatic IPv6 Address Assignment feature. IPv6 Address Assignment: Autoconfiguration Select SLAAC + RDNSS, SLAAC + Stateless DHCP, or Stateful Type: DHCPv6. Router Enter the IPv6 address lifetime (in minutes). Advertisement Lifetime: Click Save when you are done. D-Link DIR-822 User Manual...
-
Page 50: Local Connectivity Only
When ULA is enabled, you may also enable automatic configuration ULA Prefix: of the ULA prefix. Current ULA Will display the Current ULA Prefix. Prefix: LAN IPv6 ULA: Will display the LAN IPv6 ULA. Click Save when you are done. D-Link DIR-822 User Manual... -
Page 51: Wireless
802.11n wireless clients. For the 5GHz band: Select Auto 20/40/80 MHz if you are using 802.11ac, 802.11n, and non-802.11n wireless devices, or select Auto 20/40 MHz if you are using both 802.11n and non-802.11n wireless devices. D-Link DIR-822 User Manual... - Page 52 Use the drop-down menu to select a schedule for enabling the rule. The schedule may be set to Always Enable, or you can create your own schedules in the Schedules section (refer to page 64). Click Save when you are done. D-Link DIR-822 User Manual...
-
Page 53: Guest Zone
Internet Access Enabling this option will limit connectivity to the Internet. Guests will not be allowed to access other local network devices. Only: Click Save when you are done. D-Link DIR-822 User Manual... -
Page 54: Network
Disable to transfer the DNS server information from your ISP to your computers. Status: Enable or disable the DHCP server. DHCP IP Enter the starting and ending IP addresses for the DHCP server’s IP Address Range: assignment. D-Link DIR-822 User Manual... - Page 55 Enable to allow IPv4 multicast traffic to pass through the router from Streams: the Internet. IPv6 Multicast Enable to allow IPv6 multicast traffic to pass through the router from Streams: the Internet. Click Save when you are done. D-Link DIR-822 User Manual...
-
Page 56: Advanced
If you want to remove a priority assignment from a device and return it to the Connected Clients list, click the cross icon in the top right corner of the device card. Click Save when you are done. D-Link DIR-822 User Manual... -
Page 57: Firewall Settings
Click to enable IPv6 Ingress Filtering, which is a technique used to IPv6 Ingress Filtering: make sure incoming packets originate from the networks they claim to be from (prevents source address spoofing). Click Advanced Settings... to expand the list and view more options. D-Link DIR-822 User Manual... - Page 58 NAT devices and work around them. This Application Level Gateway (ALG) may interfere with the operation of such devices. If you are having trouble making VoIP calls, try turning this ALG off. Click Save when you are done. D-Link DIR-822 User Manual...
-
Page 59: Ipv4/Ipv6 Rules
Use the drop-down menu to select a Schedule when the rule will be enabled. The schedule may be set to Always Enable, or you can create a schedule from the Schedules section (refer to page 64). Click Apply when you are done. D-Link DIR-822 User Manual... -
Page 60: Port Forwarding
Use the drop-down menu to select a Schedule when the rule will be enabled. The schedule may be set to Always Enable, or you can create a schedules from the Schedules section (refer to page 64). Click Apply when you are done. D-Link DIR-822 User Manual... -
Page 61: Virtual Server
Use the drop-down menu to select a schedule when the rule will be enabled. The schedule may be set to Always Enable, or create your own schedule from the Schedules section (refer to page 64). Click Apply when you are done. D-Link DIR-822 User Manual... -
Page 62: Website Filter
Next, under Website URL/Domain enter the URL or Domain. If you wish to remove a rule, click on its trash icon in the Delete column. To edit a rule, simply replace the URL or Domain. Click Save when you are done. D-Link DIR-822 User Manual... -
Page 63: Static Routes
A value 1 is the lowest cost and 15 is the highest cost. Interface: Select the interface that the IP packet must use to transit out of the router when this route is used. Click Apply when you are done. D-Link DIR-822 User Manual... -
Page 64: Ipv6
A value 1 is the lowest cost and 15 is the highest cost. Interface: Select the interface that the IP packet must use to transit out of the router when this route is used. Click Apply when you are done. D-Link DIR-822 User Manual... -
Page 65: Dynamic Dns
Time Out: Enter a Time Out (in hours). Click Save when you are done. At the bottom of the page are the IPv6 host settings. To configure an IPv6 dynamic DNS host, refer to page 62. D-Link DIR-822 User Manual... -
Page 66: Ipv6 Host
Enter the Host Name that you registered with your dynamic DNS service provider. IPv6 Address: Enter the IPv6 Address of the dynamic DNS server. Or, select the Computer Name from the drop-down menu. Click Apply when you are done. D-Link DIR-822 User Manual... -
Page 67: Management
Update Time Using NTP Server option and use the drop-down menus that appear to input the time and date. Click Save when you are done. To configure and manage your schedules, click Schedule and refer to page 64. D-Link DIR-822 User Manual... -
Page 68: Schedule
You can add multiple days to the schedule, but only one period per day. To remove a time period from the schedule, click on the cross icon at the end of the row. Click Apply when you are done. D-Link DIR-822 User Manual... -
Page 69: System Log
The schedule may be set to Always Enable, or you can create your own schedule from the Schedules section (refer to page 64). Click Save when you are done. D-Link DIR-822 User Manual... -
Page 70: Admin
HTTPS Server, you must enter https:// as part of the URL to access the router remotely. Click Save when you are done. To load, save, or reset the settings, or to reboot the router, click System and refer to page 67. D-Link DIR-822 User Manual... -
Page 71: System
You may select Never, Daily, or Weekly. Day of the Choose the day of the week to automatically reboot the router. Week: Time: Choose the time of day to automatically reboot the router. Click Save when you are done. D-Link DIR-822 User Manual... -
Page 72: Upgrade
*Note: When you click Check for New Firmware you will see a message that says, "Checking". If what you have currently installed is the latest version, you will see a message that says, "This firmware is the latest version". D-Link DIR-822 User Manual... -
Page 73: Statistics
You can view the Internet, LAN, Wi-Fi 2.4GHz, or Wi-Fi 5GHz statistics by clicking on the respective tabs at the top. The graph will update in real time. To clear the information on the graph, click Clear. The traffic counter will reset if the device is rebooted. D-Link DIR-822 User Manual... -
Page 74: Connect A Wireless Client To Your Router
Step 2 - Within two minutes, press the WPS button on your wireless client (or launch the software utility and start the WPS process). Step 3 - Allow up to one minute for your connection to be configured. Once the Power LED stops blinking, you will be connected and your wireless connection will be secure with WPA2. D-Link DIR-822 User Manual... -
Page 75: Windows® 10
To join an existing network, click the wireless network icon in the taskbar, next to the time display. Wireless Icon A list of wireless networks which are within range of your computer will appear. Select the desired network by clicking on the SSID. D-Link DIR-822 User Manual... - Page 76 You can also use Wi-Fi Protected Setup (WPS) to connect to the router. Press the WPS button on your D-Link device and you will be automatically connected. D-Link DIR-822 User Manual...
-
Page 77: Windows® 8
Wireless Icon Clicking on this icon will display a list of wireless networks that are within connecting proximity of your computer. Select the desired network by clicking on the network name. D-Link DIR-822 User Manual... - Page 78 WPS button on your router during this step to enable the WPS function. When you have established a successful connection to a wireless network, the word Connected will appear next to the name of the network to which you are connected to. D-Link DIR-822 User Manual...
-
Page 79: Windows® 7
If you are joining an existing network, you will need to know the security key or passphrase being used. 1. Click on the wireless icon in your system tray (lower-right corner). Wireless Icon 2. The utility will display any available wireless networks in your area. D-Link DIR-822 User Manual... - Page 80 If you get a good signal but cannot access the Internet, check your TCP/ IP settings for your wireless adapter. Refer to the Networking Basics section in this manual for more information. 4. The following window appears while your computer tries to connect to the router. D-Link DIR-822 User Manual...
- Page 81 It may take 20-30 seconds to connect to the wireless network. If the connection fails, please verify that the security settings are correct. The key or passphrase must be exactly the same as the one on the wireless router. D-Link DIR-822 User Manual...
-
Page 82: Wps
The WPS feature of the DIR-822 can be configured using Windows® 7. Carry out the following steps to use Windows® 7 to configure the WPS feature: 1. Click the Start button and select Computer from the Start menu. 2. Click Network on the left side. D-Link DIR-822 User Manual... - Page 83 Section 5 - Connecting to a Wireless Network 3. Double-click the DIR-822. 4. Input the WPS PIN number (on the router label) in the Setup > Wireless Setup menu in the Router’s Web UI) and click Next. D-Link DIR-822 User Manual...
- Page 84 Section 5 - Connecting to a Wireless Network 5. Type a name to identify the network. 6. To configure advanced settings, click the icon. Click Next to continue. D-Link DIR-822 User Manual...
- Page 85 Make a note of the security key as you may need to provide this security key if adding an older wireless device to the network in the future. 9. Click Close to complete WPS setup. D-Link DIR-822 User Manual...
-
Page 86: Windows Vista
(displayed using the SSID) and click the Connect button. If you get a good signal but cannot access the Internet, check you TCP/IP settings for your wireless adapter. Refer to the Networking Basics section in this manual for more information. D-Link DIR-822 User Manual... -
Page 87: Wpa/Wpa2
1. Open the Windows Vista® Wireless Utility by right-clicking on the wireless computer icon in your system tray (lower right corner of screen). Select Connect to a network. 2. Highlight the Wi-Fi name (SSID) you would like to connect to and click Connect. D-Link DIR-822 User Manual... - Page 88 It may take 20-30 seconds to connect to the wireless network. If the connection fails, please verify that the security settings are correct. The key or passphrase must be exactly the same as the one on the wireless router. D-Link DIR-822 User Manual...
-
Page 89: Troubleshooting
1. Why can’t I access the web-based configuration utility? When entering the IP address of the D-Link router (192.168.0.1 for example), you are not connecting to a website, nor do you have to be connected to the Internet. The device has the utility built-in to a ROM chip in the device itself. Your computer must be on the same IP subnet to connect to the web-based utility. - Page 90 Section 6 - Troubleshooting • Access the web management. Open your web browser and enter the IP address of your D-Link router in the address bar. This should open the login page for your web management. • If you still cannot access the configuration, unplug the power to the router for 10 seconds and plug back in. Wait about 30 seconds and try accessing the configuration.
- Page 91 • Windows® 8, 7, and Vista® users type in cmd and press Enter (or click OK). • Once the window opens, you’ll need to do a special ping. Use the following syntax: ping [url] [-f] [-l] [MTU value] Example: ping yahoo.com -f -l 1472 D-Link DIR-822 User Manual...
- Page 92 • To change the MTU, enter the number in the MTU field and click Save Settings to save your settings. • Test your e-mail. If changing the MTU does not resolve the problem, continue changing the MTU in increments of ten. D-Link DIR-822 User Manual...
-
Page 93: Wireless Basics
D-Link wireless products are based on industry standards to provide easy-to-use and compatible high-speed wireless connectivity within your home, business, or public access wireless networks. Strictly adhering to the IEEE standard, the D-Link wireless family of products will allow you to securely access the data you want, when, and where you want it. You will be able to enjoy the freedom that wireless networking delivers. -
Page 94: What Is Wireless
D-Link is the worldwide leader and award winning designer, developer, and manufacturer of networking products. D-Link delivers the performance you need at a price you can afford. D-Link has all the products you need to build your network. How does wireless work? Wireless works similarly to how cordless phones work, through radio signals that transmit data from one point A to point B. - Page 95 Who uses wireless? Wireless technology as become so popular in recent years that almost everyone is using it, whether it’s for home, office, business, D-Link has a wireless solution for it. Home Uses/Benefits • Gives everyone at home broadband access •...
-
Page 96: Tips
The wireless connection in public places is usually called “hotspots”. Using a D-Link Cardbus Adapter with your laptop, you can access the hotspot to connect to the Internet from remote locations like: Airports, Hotels, Coffee Shops, Libraries, Restaurants, and Convention Centers. -
Page 97: Wireless Modes
An Infrastructure network contains an Access Point or wireless router. All the wireless devices, or clients, will connect to the wireless router or access point. An Ad-Hoc network contains only clients, such as laptops with wireless cardbus adapters. All the adapters must be in Ad-Hoc mode to communicate. D-Link DIR-822 User Manual... -
Page 98: Networking Basics
Check your IP address After you install your new D-Link adapter, by default, the TCP/IP settings should be set to obtain an IP address from a DHCP server (i.e., wireless router) automatically. To verify your IP address, please follow the steps below. -
Page 99: Statically Assign An Ip Address
Set Primary DNS the same as the LAN IP address of your router (192.168.0.1). The Secondary DNS is not needed or you may enter a DNS server from your ISP. Step 5 Click OK twice to save your settings. D-Link DIR-822 User Manual... -
Page 100: Wireless Security
WPA/WPA2 incorporates user authentication through the Extensible Authentication Protocol (EAP). EAP is built on a more secure public key encryption system to ensure that only authorized network users can access the network. D-Link DIR-822 User Manual... -
Page 101: Technical Specifications
1 Maximum wireless signal rate derived from IEEE Standard 802.11ac, 802.11g, and 802.11n specifications. Actual data throughput will vary. Network conditions and environmental factors, including volume of network traffic, building materials and construction, and network overhead, lower actual data throughput rate. Environmental factors will adversely affect wireless signal range. 2 Frequency Range varies depending on country’s regulation. D-Link DIR-822 User Manual... -
Page 102: Contacting Technical Support
• Hardware Revision (located on the label on the bottom of the router [e.g., rev C1]) • Serial Number (s/n number located on the label on the bottom of the router). You can find software updates and user documentation on the D-Link website as well as frequently asked questions and answers to technical issues. -
Page 103: Gpl Code Statement
WRITTEN OFFER FOR GPL AND LGPL SOURCE CODE Where such specific license terms entitle you to the source code of such software, D-Link will provide upon written request via email and/or traditional paper mail the applicable GPL and LGPLsource code files via CD-ROM for a nominal cost to cover shipping and media charges as allowed under the GPL and LGPL. - Page 104 To prevent this, the GPL assures that patents cannot be used to render the program non-free. The precise terms and conditions for copying, distribution and modification follow. D-Link DIR-822 User Manual...
- Page 105 A “Standard Interface” means an interface that either is an official standard defined by a recognized standards body, or, in the case of interfaces specified for a particular programming language, one that is widely used among developers working in that language. D-Link DIR-822 User Manual...
- Page 106 Conveying under any other circumstances is permitted solely under the conditions stated below. Sublicensing is not allowed; section 10 makes it unnecessary. D-Link DIR-822 User Manual...
- Page 107 If the work has interactive user interfaces, each must display Appropriate Legal Notices; however, if the Program has interactive interfaces that do not display Appropriate Legal Notices, your work need not make them do so. D-Link DIR-822 User Manual...
- Page 108 Corresponding Source of the work are being offered to the general public at no charge under subsection 6d. A separable portion of the object code, whose source code is excluded from the Corresponding Source as a System Library, need not be included in conveying the object code work. D-Link DIR-822 User Manual...
- Page 109 If additional permissions apply only to part of the Program, that part may be used separately under those permissions, but the entire Program remains governed by this License without regard to the additional permissions. D-Link DIR-822 User Manual...
- Page 110 Additional terms, permissive or non-permissive, may be stated in the form of a separately written license, or stated as exceptions; the above requirements apply either way. D-Link DIR-822 User Manual...
- Page 111 Corresponding Source of the work from the predecessor in interest, if the predecessor has it or can get it with reasonable efforts. D-Link DIR-822 User Manual...
- Page 112 D-Link DIR-822 User Manual...
- Page 113 Free Software Foundation. If the Program specifies that a proxy can decide which future versions of the GNU General Public License can be used, that proxy’s public statement of acceptance of a version permanently authorizes you to choose that version for the Program. D-Link DIR-822 User Manual...
- Page 114 Program, unless a warranty or assumption of liability accompanies a copy of the Program in return for a fee. D-Link DIR-822 User Manual...
-
Page 115: Warranty
Any repair or replacement will be rendered by D-Link at an Authorized D-Link Service Office. The replacement hardware need not be new or have an identical make, model or part. D-Link may, at its option, replace the defective Hardware or any part thereof with any reconditioned product that D-Link reasonably determines is substantially equivalent (or superior) in all material respects to the defective Hardware. - Page 116 Software or to refund the portion of the actual purchase price paid that is attributable to the Software. Except as otherwise agreed by D-Link in writing, the replacement Software is provided only to the original licensee, and is subject to the terms and conditions of the license granted by D-Link for the Software.
- Page 117 • The customer must submit with the product as part of the claim a written description of the Hardware defect or Software nonconformance in sufficient detail to allow D-Link to confirm the same, along with proof of purchase of the product (such as a copy of the dated purchase invoice for the product) if the product is not registered.
- Page 118 Purolator Canada or any common carrier selected by D-Link. Return shipping charges shall be prepaid by D-Link if you use an address in Canada, otherwise we will ship the product to you freight collect. Expedited shipping is available upon request and provided shipping charges are prepaid by the customer.
- Page 119 FOR WARRANTY SERVICE) RESULTING FROM THE USE OF THE PRODUCT, RELATING TO WARRANTY SERVICE, OR ARISING OUT OF ANY BREACH OF THIS LIMITED WARRANTY, EVEN IF D-LINK HAS BEEN ADVISED OF THE POSSIBILITY OF SUCH DAMAGES. THE SOLE REMEDY FOR A BREACH OF THE FOREGOING LIMITED WARRANTY IS REPAIR, REPLACEMENT OR REFUND OF THE DEFECTIVE OR NONCONFORMING PRODUCT.
- Page 120 The availability of some specific channels and/or operational frequency bands are country dependent and are firmware programmed at the factory to match the intended destination. The firmware setting is not accessible by the end user. D-Link DIR-822 User Manual...
- Page 121 Les conditions de fonctionnement sont sujettes à deux conditions: (1) Ce périphérique ne doit pas causer d’interférence et. (2) Ce périphérique doit accepter toute interférence, y compris les interférences pouvant perturber le bon fonctionnement de ce périphérique. D-Link DIR-822 User Manual...
-
Page 122: Registration
Appendix G - Registration Registration Product registration is entirely voluntary and failure to complete or return this form will not diminish your warranty rights. Version 3.01 (US) June 30, 2017 D-Link DIR-822 User Manual...