Table of Contents
Advertisement
Quick Links
Advertisement
Table of Contents

Related Manuals for Beko WCC 8604BW1


Summary of Contents for Beko WCC 8604BW1
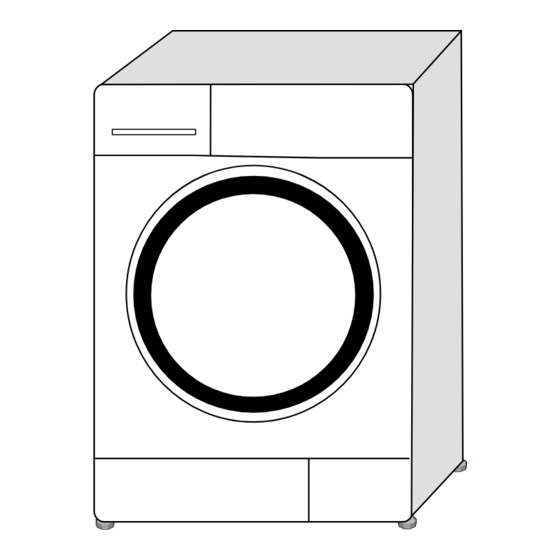
- Page 1 Washing Machine Use Manual WCC 8604BW1 2302061013_HE/ 101015.1243...
-
Page 2: Important Safety Instructions
1 Important safety instructions • Use detergents, softeners and supplements suitable for automatic washing machines only. This section contains safety instructions that will • Follow the instructions on the textile tags and help protect from risk of personal injury or property on the detergent package. damage. Failure to follow these instructions shall • The product must be unplugged during void any warranty. installation, maintenance, cleaning and General safety repairing procedures. -
Page 3: Appropriate Installation Location
the product into its place after installation or the hot water valve. (Applies for the products cleaning procedures. supplied with a blind stopper group.) Appropriate installation location Models with a single water inlet should not be connected to the hot water tap. In such • Place the machine on a rigid floor. Do not a case the laundry will get damaged or the place it on a long pile rug or similar surfaces. -
Page 4: Adjusting The Feet
come out. 1. Loosen the lock nuts on the feet by hand. • The hose should be attached to a height of at Adjust the feet until the product stands level least 40 cm, and 100 cm at most. and balanced. • In case the hose is elevated after laying it on 3. Tighten all lock nuts again by hand. the floor level or close to the ground (less than 40 cm above the ground), water discharge becomes more difficult and the laundry may come out excessively wet. Therefore, follow the heights described in the figure. - Page 5 3 Preparation Things to be done for energy saving Following information will help you use the product in an ecological and energy-efficient manner. • Operate the product in the highest capacity allowed by the programme you have selected, but do not overload; see, "Programme and consumption table". • Always follow the instructions on the detergent packaging. Use an anti-limescale suitable for the washing • Wash slightly soiled laundry at low machines. temperatures. Some water might have remained in the • Use faster programmes for small quantities of product due to the quality control processes lightly soiled laundry.
-
Page 6: Correct Load Capacity
This will reduce pilling. compartment (compartment nr. I). • Laundry that are subjected to materials such • Do not select a programme with prewash if as flour, lime dust, milk powder, etc. intensely you are using a detergent bag or dispensing must be shaken off before placing into the ball. Place the detergent bag or the machine. Such dusts and powders on the dispensing ball directly among the laundry in laundry may build up on the inner parts of the the machine. machine in time and can cause damage. • If you are using liquid detergent, do not forget Correct load capacity to place the liquid detergent cup into the main wash compartment (compartment nr. II). - Page 7 • Do not use bleaching agent and detergent by mixing them. • Use just a little amount (approx. 50 ml) of bleaching agent and rinse the clothes very well as it causes skin irritation. Do not pour the bleaching agent onto the clothes and do not use it for coloured clothes. • When using oxygen based bleaches, If the product does not contain a liquid follow the instructions on the package and detergent cup: select a programme that washes at a lower •...
-
Page 8: Tips For Efficient Washing
Tips for efficient washing Clothes Light colours and Delicates/ Colors Dark colors whites Woolens/Silks (Recommended (Recommended (Recommended (Recommended temperature range temperature range temperature range temperature range based based on soiling level: based on soiling based on soiling on soiling level: cold-40C) 40-90C) level: cold-40C) level: cold-30C) It may be necessary to pre-treat the Powder and stains of perform liquid detergents prewash. -
Page 9: Operating The Product Control Panel
4 Operating the product Control panel Spin Speed Adjustment button Delayed Start buttons (+ / -) Display Auxiliary Function buttons Temperature Adjustment button Start / Pause / Cancel button Programme Selection knob On / Off button Display symbols Preparing the machine Make sure that the hoses are connected tightly. Plug in your machine. Turn the tap on completely. Place the laundry in the machine. Add detergent and fabric softener. -
Page 10: Main Programmes
provide a higher level of hygiene. When selecting a programme, always • Hand wash consider the type of fabric, colour, degree of Use this programme to wash your woolen/delicate soiling and permissible water temperature. clothes that bear “not machine- washable” tags Always select the lowest required and for which hand wash is recommended. It temperature. Higher temperature means washes laundry with a very gentle washing action higher power consumption. to not to damage clothes. For further programme details, see •... -
Page 11: Temperature Selection
• Spin + Drain Use this programme to apply an additional spin cycle for your laundry or to drain the water in the machine. Before selecting this programme, select the desired spin speed and press Start / Pause / Cancel button. The machine will spin the laundry with the set spin speed and drain the water coming out of them. If you wish to drain only the water without spinning your laundry, select the Pump+Spin programme and then select the No Spin... -
Page 12: Programme And Consumption Table
Programme and consumption table Auxiliary functions Temperature Program (°C) Cotton 2.40 • • • • • • 90-Cold Cotton 1.70 • • • • • • 90-Cold Cotton 0.95 • • • • • • 90-Cold BabyProtect 2.10 • 90-30 Cotton Eco 60** 8 1.12... -
Page 13: Auxiliary Function Selection
Auxiliary function selection • Rinse Hold If you are not going to unload your clothes Select the desired auxiliary functions before immediately after the programme completes, you starting the programme. Furthermore, you may may use rinse hold function to keep your laundry also select or cancel auxiliary functions that are in the final rinsing water in order to prevent them suitable to the running programme by pressing the from getting wrinkled when there is no water in the Start / Pause / Cancel button when the machine is... -
Page 14: Starting The Programme
programmes. Additional laundry may be loaded during If the machine does not pass to the spinning the delayed start period. At the end of the step, Rinse Hold function might be active countdown, Delayed Start symbol disappears, or the automatic unbalanced load detection washing cycle starts and the time of the system might be activated due to the selected programme appears on the display. unbalanced distribution of the laundry in the Changing the delayed start period machine. If you want to change the time during countdown: Loading door lock Press Start / Pause / Cancel button. “:” sign in There is a locking system on the loading door of the middle of the delayed start time on the display... -
Page 15: Canceling The Programme
Press and hold 2 and 4 Auxiliary Function 2 minutes after the programme you selected buttons for 3 seconds. “Con” appears on the has come to an end,your machine will display. automatically switch to energy saving mode. Same phrase will appear on the display if Display brightness will decrease. -
Page 16: Maintenance And Cleaning
5 Maintenance and cleaning Draining remaining water and cleaning the pump filter Service life of the product extends and frequently faced problems decrease if cleaned at regular The filter system in your machine prevents solid intervals. items such as buttons, coins and fabric fibers Cleaning the detergent drawer clogging the pump impeller during discharge of washing water. Thus, the water will be discharged Clean the detergent drawer at regular intervals without any problem and the service life of the (every 4-5 washing cycles) as shown below pump will extend. - Page 17 plug. After the container is emptied, repeat the above procedure to drain the water in the machine completely. When draining of water is finished, close the end by the plug again and fix the hose in its place. Turn the pump filter to take it out. Discharging the water when the product does not have an emergency draining hose: Place a large container in front of the filter to catch water from the filter.
- Page 18 56.5 2000 1200...
-
Page 19: Troubleshooting
7 Troubleshooting Programme cannot be started or selected. • Washing machine has switched to self protection mode due to a supply problem (line voltage, water pressure, etc.). >>> Press and hold Start / Pause button for 3 seconds to reset the machine to factory settings. (See “Canceling the programme”) Water in the machine. • Some water might have remained in the product due to the quality control processes in the production. >>> This is not a failure; water is not harmful to the machine. Machine vibrates or makes noise.