
Related Manuals for Philips 40B1U5601H


Summary of Contents for Philips 40B1U5601H
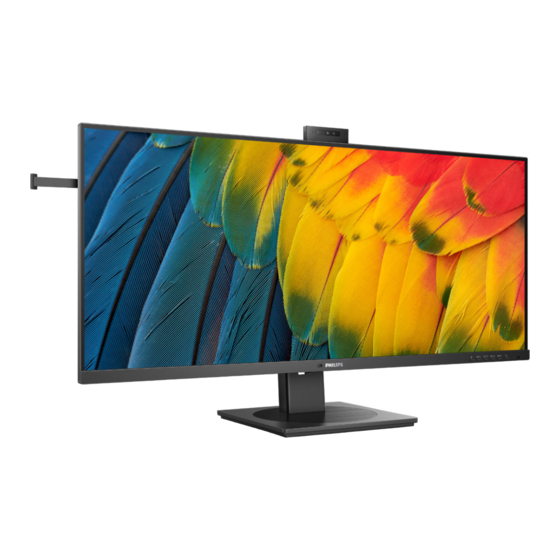
- Page 1 Business Monitor 5000 Series 40B1U5601H User manual Customer care and warranty Troubleshooting and FAQs Register your product and get support at www.philips.com/welcome...
-
Page 2: Table Of Contents
7. Technical Specifications ������������ 30 7.1 Resolution & Preset Modes ..34 8� Power Management ������������������ 35 9� Customer care and warranty ��� 36 9.1 Philips’ Flat Panel Displays Pixel Defect Policy ........36 9.2 Customer Care & Warranty ..39... -
Page 3: Important
1. Important may damage the plastic cover of the display and void the warranty. This electronic user’s guide is intended for anyone who uses the Philips monitor. • Remove any object that could fall Take time to read this user manual into ventilation holes or prevent before you use your monitor. - Page 4 degrees. If the -5 degree downward Maintenance tilt angle maximum is exceeded, the • To protect your monitor from monitor damage will not be covered possible damage, do not put under warranty. excessive pressure on the LCD panel. • Do not knock or drop the monitor When moving your monitor, grasp during operation or transportation.
-
Page 5: Notational Descriptions
• Temperature: 0-40°C 32-104°F • Do not leave your monitor in a car/ trunk under direct sun light. • Humidity: 20-80% RH Note Important information for Burn-in/ Consult a service technician if the Ghost image monitor does not operate normally, or •... -
Page 6: Disposal Of Product And Packing Material
From the planning, design and production stages, Philips emphasizes the important of making products that can easily be recycled. At Philips, end-of-life management primarily This marking on the product or on entails participation in national take-... -
Page 7: 2� Setting Up The Monitor
Business Monitor 5000 Series 40B1U5601H Quick start Register your product and get support at www.philips.com/welcome 2. Hold the stand with both hands. (1) Use a screwdriver to tighten the Screw and screwdriver assembly screws, and secure the M4 x 4 Power stand to the monitor tightly. - Page 8 6. Remove the rubber plug when using DP out connector. RJ45 driver installation You can find the “LAN Drivers” from USB Type-A Philips website support page. Please follow the steps for the installation: 1. Install the LAN driver that matches Power Switch your system.
- Page 9 driver. Note Please contact Philips service hotline for Mac address clone tool as necessary. USB hub Note To comply with International energy If you Turn OFF your monitor via the...
-
Page 10: Operating The Monitor
2.2 Operating the monitor Description of the control buttons Switch monitor’s power ON or OFF. Access the OSD menu. Confirm the OSD adjustment. Adjust the OSD menu. User preference key. Customize your own preference function from OSD to become the “user key”. Change the signal input source. - Page 11 Webcam Microphone Webcam activity light 5.0 Megapixel Webcam IR of Face identification Webcam light "mute" hot key OSD Menu Teams app Lync app Zoom app Other communication (skype for business) softwares (Line, WeChat, Google meeting, Blue Jeans, Cisco Webex, Goto meeting, FaceTime, Slack�) Microphone ■...
- Page 12 This hot key allows you to setup your What is On-Screen Display (OSD)? favorite function key. On-Screen Display (OSD) is a feature in all Philips LCD monitors. It allows an end 1. Press button on the front bezel user to adjust screen performance or to enter OSD Menu Screen.
- Page 13 Resolution notification Main menu Sub menu PowerSensor 0, 1, 2, 3, 4 This monitor is designed for optimal LightSensor performance at its native resolution, LowBlue Mode 1, 2, 3, 4 3440 x 1440. When the monitor is Input HDMI 2.0 powered on at a different resolution, DisplayPort USB C1...
- Page 14 Slant Adjust Physical Function Tilt 30° -5° 0° 0° -2° 2° Warning • To avoid potential screen damage, Swivel such as panel peeling, ensure that the monitor does not tilt downward by more than -5 degrees. • Do not press the screen while adjusting the angle of the monitor.
-
Page 15: Built-In Windows Hello™ Pop-Up Webcam
1. Press the built-in webcam on the top of this monitor, and turn it to the What is it? front. Philips' innovative and secure webcam pops up when you need it and securely tucks back into the monitor when you are not using it. The webcam is... - Page 16 3. Setting in Windows11 for Windows Hello e. Click on "Get started." The setting is complete. 4. If you connect the USB cable from “USB C1 ” port of this monitor, please enter OSD menu to make a appropriate selection of “USB C1” a.
- Page 17 on-screen display menu, under Webcam>Webcam light, to adjust the brightness level. 4. The webcam microphone mute function must be enabled through the Team, Skype Apps.
-
Page 18: Multiclient Integrated Kvm
2.4 Multiclient Integrated KVM What is it? With the Multiclient Integrated Keyboard Video Mouse (KVM) switch feature, it is possible to control two separate PCs with a one monitor/keyboard/mouse setup. How to Enable Multiclient Integrated KVM With the built-in Multiclient Integrated KVM feature, it’s easy to switch between each connected device via the On-Screen Display (OSD) menu setting. - Page 19 If you would like to use a DP and/or HDMI cord to input into your device, use the USB- C1 and USB-C2 ports with the USB cord being in direction USB upstream. Please check out the following steps for adjusting the settings for HDMI/DP usage: 1.
-
Page 20: Noise Cancelling
2.5 Noise Cancelling This monitor has Noise Cancelling functionality. When connected via USBC1/USBC2 during video conferencing, the monitor will automatically filter for human sounds. This function can be turned off in the OSD menu, under Noise Cancelling (default=ON). Volume Mute Off... -
Page 21: Multiview
Why do I need it? 5. Now you can move backward to set the [PIP / PBP Input], [PIP Size], [PIP With the ultra high resolution Philips Position], or [Swap]. MultiView display, you can experience a world of connectivity in a comfortable 6. - Page 22 • PIP Position: When PIP is activated, [PBP]: Picture by Picture there are four sub-window positions Open up a sub-window to choose. side-by-side of another (main) Top-Left Top-Right signal source. When the sub source is (main) (main) not detected: (main) Bottom-Left Bottom-Right Note...
-
Page 23: Remove The Base Assembly For Vesa Mounting
2.7 Remove the Base Assembly for VESA Mounting Before you start disassembling the monitor base, please follow the instructions below to avoid any possible damage or injury. 0° 90° 1. Place the monitor face down on a -5° smooth surface. Pay attention not to * Display design may differ from those scratch or damage the screen. -
Page 24: 3� Image Optimization
Whether you're working with text applications, displaying images There are multiple modes to select: or watching a video, Philips SmartImage EasyRead, Office, Photo, Movie, delivers great optimized display Game, Economy, LowBlue Mode, performance. - Page 25 Typical uniformity is measured office applications. around 75-80%. By enabling Philips SmartUniformity feature, display • Photo: This profile combines color uniformity is increased to above saturation, dynamic contrast and 95%. This produces more consistent sharpness enhancement to display and true images.
-
Page 26: Smartcontrast
3.3 LightSensor • Off: No optimization by SmartImage HDR. What is it? Note Light Sensor is a unique and intelligent To switch off HDR function, please way of optimizing picture quality by disable from Input device and its measuring and analyzing the incoming content. -
Page 27: Hdr
3.4 HDR HDR Settings in Windows 11/10 system. Steps 1. Right click on the desktop, enter to Display settings. 2. Select the display/monitor. 3. Select an HDR-capable display under Rearrange your displays. 4. Select Windows HD Color settings. 5. Adjust Brightness for SDR content. Note Windows 11/10 edition is required;... -
Page 28: 4� Daisy-Chain Function
4. Daisy-chain function DisplayPort multi-streaming over USBC1/USBC2 DisplayPort Multi-Stream feature enables multiple monitor connections. This Philips display is equipped with DisplayPort interface and DisplayPort over USBC1/USBC2 which enables daisy- chaining to multiple displays. Now you can daisy chain and use... -
Page 29: 5� Designs To Prevent Computer
• Reposition your screen to appropriate height and angle syndrome (CVS) according to your height. 4. Choose Philips monitor for easy-on- Philips monitor is designed to prevent eyes. eye strain caused by prolonged • Anti-glare screen: Anti-glare computer use. -
Page 30: 6� Powersensor
6. PowerSensor™ detection signal for distances up to 120 cm or 47 inches. (Setting 4) • Since some dark colored clothing How does it work? tends to absorb infrared signals even • PowerSensor works on principle when the user is within 100 cm or 40 of transmission and reception of inches of the display, step up signal strength when wearing black or... - Page 31 it will automatically turn ON if monitor is returned to its default Landscape position. Note A manually selected PowerSensor mode will remain operational unless and until it is readjusted or the default mode is recalled. If you find that the PowerSensor is excessively sensitive to nearby motion for some reason, please adjust to a lower signal strength.
-
Page 32: Technical Specifications
7. Technical Specifications Picture/Display Display Panel Type IPS Technology Backlight W-LED Panel Size 39.5" W (100.4 cm) Aspect Ratio 21:9 Pixel Pitch 0.26925 (W) x 0.26925 (H) Contrast ratio(typical) 1200:1 Native Resolution 3440 x 1440 @ 60 Hz 3440 x 1440 @ 100 Hz (HDMI) Maximum Resolution 3440 x 1440 @ 120 Hz (DP/USBC) Viewing Angle... - Page 33 USBC: USB PD version 3.0, 15W (5V/3A) USBC1: USB PD version 3.0, typical 96W (5V/3A, 7V/3A, 9V/3A, 10V/3A, 12V/3A, 15V/3A, 20V/4.8A) Power Delivery USBC2: USB PD version 3.0, typical 96W (5V/3A, 7V/3A, 9V/3A, 10V/3A, 12V/3A, 15V/3A, 20V/4.8A) USB-A: x1 fast charge B.C 1.2, up to 7.5W (5V/1.5A) Super Speed USB-C/USB-A: USB 3.2 Gen2, 10 Gbps Convenience...
- Page 34 On mode: White, Standby/Sleep mode: White Power LED indicator (blinking) Power Supply Built-in, 100-240V AC, 50/60Hz Dimensions Product with stand 944 x 628 x 280 mm (WxHxD) Product without stand 944 x 419 x 54 mm (WxHxD) Product with packaging 1070 x 507 x 226 mm (WxHxD) Weight...
- Page 35 Note 1. This data is subject to change without notice. For updated information, head to www.philips.com/support to download the latest version of leaflet. 2. The Power delivery function is also based on the PCs capabilities. 3. SmartUniformity and Delta E information are included in the sheets located in the...
-
Page 36: Resolution & Preset Modes
7.1 Resolution & Preset Modes Note 1. Please notice that your display works best at native resolution of 3440 H. freq Resolution V. freq (Hz) x 1440 @ 60Hz. For best display (kHz) quality, please follow this resolution 31.47 720 x 400 70.09 recommendation. -
Page 37: 8� Power Management
8. Power Management If you have VESA DPM compliance display card or software installed in your PC, the display can automatically reduce its power consumption when not in use. If an input from a keyboard, mouse or other input device is detected, the display will 'wake up' automatically. -
Page 38: 9� Customer Care And Warranty
Other combinations of Pixel Defect Policy lit and dark sub pixels appear as single pixels of other colors. Philips strives to deliver the highest quality products. We use some of the Types of Pixel Defects industry's most advanced manufacturing... - Page 39 Black Dot Defects the warranty period, a TFT Display panel Black dot defects appear as pixels or sub in a Philips flat panel display must have pixels that are always dark or 'off'. That pixel or sub pixel defects exceeding the is, a dark dot is a sub-pixel that stands tolerances listed in the following tables.
- Page 40 BRIGHT DOT DEFECTS ACCEPTABLE LEVEL 1 lit subpixel 2 adjacent lit subpixels 3 adjacent lit subpixels (one white pixel) Distance between two bright dot defects* >15mm Total bright dot defects of all types BLACK DOT DEFECTS ACCEPTABLE LEVEL 1 dark subpixel 3 or fewer 2 adjacent dark subpixels 2 or fewer...
-
Page 41: Customer Care & Warranty
Please contact our Philips Customer Service Representative or local contact center (by Consumer care number) for more details. Philips Customer Care Center number listed below. - Page 42 • Disconnect the display from mains solutions, contact Philips customer power source immediately for safety service representative. • Contact with Philips customer service Common Problems representative immediately. No Picture (Power LED not lit) Imaging Problems • Make sure the power cord is...
- Page 43 For further assistance, refer to the Service set at 3440 x 1440. contact information listed in Important • Shut down your computer, information manual and contact Philips disconnect your old display and customer service representative. reconnect your Philips LCD display. * Functionality different according to •...
- Page 44 6504K. hexane, etc. Can I connect my LCD display to any PC, workstation or Mac? Ans.: Yes. All Philips LCD displays are fully compatible with standard PCs, Macs and workstations. You may need a cable adapter...
- Page 45 Philips sales representative for jagged characters? more information. Ans.: Your LCD display works best at its native resolution of 3440 x 1440. Q10: Are Philips LCD displays Plug-and- For best display, please use this Play? resolution. Ans.: Yes, the displays are Plug-and-...
- Page 46 change Auto to OFF and then select DP (DisplayPort) input. This will allow the signal to pass through to the next monitor. Both monitors should begin displaying properly. 2) Disconnect the video cable between the first and second monitor, then connect the second monitor directly to the computer.
- Page 47 10.3 Multiview FAQs Can I enlarge the PIP sub window? Ans.: Yes, there are 3 sizes to select: [Small], [Middle], [Large]. You can press to enter OSD menu. Select your preferred [PIP Size] option from the [PIP / PBP] main menu.
- Page 48 This product has been manufactured by and is sold under the responsibility of Top Victory Investments Ltd., and Top Victory Investments Ltd. is the warrantor in relation to this product. Philips and the Philips Shield Emblem are registered trademarks of Koninklijke Philips N.V. and are used under license.