Table of Contents
Advertisement
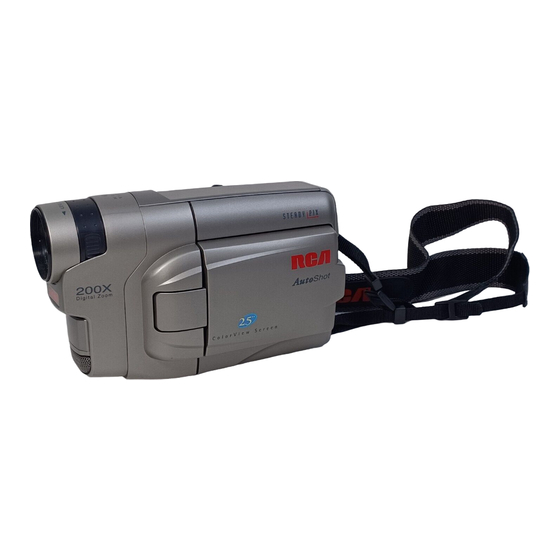
USER'S
GUIDE
camcordercamcordercamcor
dercamcordercamcordercam
cordercamcordercamcorder
camcordercamcordercamcor
dercamcordercamcordercam
cordercamcordercamcorder
camcordercamcordercamcor
dercamcordercamcordercam
cordercamcordercamcorder
camcordercamcordercamcor
dercamcordercamcordercam
cordercamcordercamcorder
camcordercamcordercamcor
dercamcordercamcordercam
cordercamcordercamcorder
camcordercamcordercamcor
dercamcordercamcordercam
cordercamcordercamcorder
camcordercamcordercamcor
dercamcordercamcordercam
cordercamcordercamcorder
camcordercamcordercamcor
dercamcordercamcordercam
cordercamcordercamcorder
camcordercamcordercamcor
dercamcordercamcordercam
cordercamcordercamcorder
camcordercamcordercamcor
dercamcordercamcordercam
cordercamcordercamcorder
camcordercamcordercamcor
dercamcordercamcordercam
CC6363
Advertisement
Table of Contents

Related Manuals for RCA CC6363


Summary of Contents for RCA CC6363
- Page 1 USER’S GUIDE camcordercamcordercamcor dercamcordercamcordercam cordercamcordercamcorder camcordercamcordercamcor dercamcordercamcordercam cordercamcordercamcorder camcordercamcordercamcor dercamcordercamcordercam cordercamcordercamcorder camcordercamcordercamcor dercamcordercamcordercam cordercamcordercamcorder camcordercamcordercamcor dercamcordercamcordercam cordercamcordercamcorder camcordercamcordercamcor dercamcordercamcordercam cordercamcordercamcorder camcordercamcordercamcor dercamcordercamcordercam cordercamcordercamcorder camcordercamcordercamcor dercamcordercamcordercam cordercamcordercamcorder camcordercamcordercamcor dercamcordercamcordercam cordercamcordercamcorder camcordercamcordercamcor dercamcordercamcordercam cordercamcordercamcorder camcordercamcordercamcor dercamcordercamcordercam CC6363...
-
Page 2: Important Safety Information
Important Safety Information Be sure to read all the safety information before you begin to use this product. WARNING: CAUTION RISK OF ELECTRIC SHOCK DO NOT OPEN ATTENTION RISQUE DE CHOC ELECTRIQUE NE PAS OUVRIR Cautions CAUTION ATTENTION: Product Registration CC6363... -
Page 3: Table Of Contents
Assistance Camcorder Exchange Warranty...800-283-6503 (pages 75-76 ) Customer Service...800-336-1900 (page 74) Accessories... 800-338-0376 (pages 61-66) Table of Contents First-Time Operation ... 3 Assistance ... 3 Power Your Camcorder ... 12 Date and Time Display ... 17 AUTO DATE Videocassettes ... 22 Recording ... - Page 4 Table of Contents Playback ... 54 Recording Tips ... 60 Traveling Tips ... 60 Optional Accessories ... 61 Trouble Checks ... 67 Specifications ... 71 Customer Assistance and Service ... 74 Limited Warranty ... 75 Index ... 77 Information to User ... 81...
-
Page 5: First-Time Operation
First-Time Operation Assistance 1. Unpack the camcorder and accessories. Model CC6363 Caution: AC Adapter/Charger -- Part No. 242740 and DC Cable -- Part No. 244268 Clock Cell 3-Volt Micro Lithium Cell – such as CR2025 – available from most local drug stores and camera shops. - Page 6 First-Time Operation 2. Attach the adapter/charger. DC OUT 3. Adjust the handstrap to fit your hand. 4. Rotate LENS COVER control to open lens cover. To AC 100-240, 50/60 Hz DC In Jack DC Cable LENS COVER Control Handstrap Handstrap Velcro Strip (Under Flap) Adapter/ Charger...
- Page 7 First-Time Operation 5. Set POWER (CAMERA MAN/CAMERA AUTO/OFF/VCR) switch to CAMERA AUTO. CAMERA MAN CAMERA AUTO) CAMERA AUTO POWER Switch and Indicator Details on page 32. • CAMERA MAN POWER CAMERA Continued on next page...
-
Page 8: Insert A Tape
First-Time Operation 6. Insert a tape. WARNING Press Here to Close Cassette Compartment EJECT 7. Select a recording speed. and hold SP/SLP SP/SLP Button Tape Wheel Tape Window EJECT Switch shown above PAUSE... - Page 9 First-Time Operation 8. Use the Monitor or Viewfinder to See What You Record Use the LCD Monitor PUSH Use the Viewfinder Electronic Viewfinder LCD Monitor Eyepiece Focus Control 180 ° 180 ° Electronic Viewfinder Eyepiece Focus Control Menu PUSH Dial (Also Bright Control) (Continued on next page)
-
Page 10: Select A Tape Length
First-Time Operation 9. Select a tape length. MENU/DISPLAY Button PUSH – Menu PUSH Dial (Rotate or Push In) POWER CAMERA MAN PUSH FOCUS EXPOSURE M. W. B. 16 X 9 TAPE LENGTH TITLE DATE/TIME DISP. RETURN PUSH TAPE LENGTH FOCUS EXPOSURE M. - Page 11 First-Time Operation Button STOP Button PLAY/PAUSE Button 10. Start and stop recording. POWER CAMERA AUTO P AUSE 11. Play back what you have recorded. POWER Thumb Trigger 12. Set the POWER switch to OFF to turn off the camcorder. 13. Close the LCD monitor and lens cover.
- Page 12 First-Time Operation 14. Review camcorder operating controls. FADES Button P. (Program) AE Button SEARCH R and F Buttons (Also REW and FF Buttons) STOP Button PLAY/PAUSE Button Menu PUSH Dial (Also Bright Control) EJECT Switch LCD Monitor MENU/DISPLAY Button SP/SLP Button Shoulder (Also COUNTER R/M Button) Strap...
- Page 13 First-Time Operation 14. Review camcorder’s operating controls. Speaker for Playback Service Port (Located Under Cover) This connector is for use by qualified service personnel only. Attach Adapter/Charger’s DC Cord (DC In Jack Located Under Battery) or Rechargeable Battery Here Clock Cell Battery Compartment 5SEC.
-
Page 14: Power Your Camcorder
Power the Camcorder Adapter/Charger Attach Adapter/Charger DC OUT shown above. CAUTION: To AC 100-240, 50/60 Hz DC In Jack DC Cable Remove Adapter/Charger Using an Optional Plug Adapter Optional AC Plug Adapter Adapter/ Charger DC OUT Jack AC 100-240V... -
Page 15: Rechargeable Battery
Power the Camcorder Rechargeable Battery as described on the next page Note Battery Safety Precautions Marker Switch BATTERY RELEASE Lever Attach the Charged Battery POWER CAMERA Details are on page 17. Remove the Battery BATTERY RELEASE as shown above. ATTENTION:... - Page 16 Power the Camcorder Use the Battery to Power Your Camcorder Hold Battery Flush and Slide (Charge) Indicator REFRESH Indicator REFRESH Button Caution Charge the Battery Note: (Continued) Reference Marks Adapter/Charger DC OUT Use the REFRESH Button REFRESH REFRESH To AC Wall Outlet 100- 240 Volts, 50/60 Hz.
- Page 17 Power the Camcorder Use the Battery to Power Your Camcorder (Continued) Battery Care and Storage Battery Level Indicator POWER...
-
Page 18: Optional Car Cord Adapter
Power the Camcorder Optional Car Cord Adapter shown on Cautions: page 61 Note: Use the DCC08 Car Cord Adapter To Cigarette Lighter Socket Power Connector Optional DCC08 Car Cord Adapter POWER POWER CAMERA Caution: as shown above... -
Page 19: Date And Time Display
Date and Time Display Install the Clock Lithium Cell Clock Cell Compartment Clock Cell Holder Cautions: Insert Object Here to Remove Cell Clock Cell (+ Side Facing Out) To Remove Lithium Cell... -
Page 20: Set The Date And Time
Date and Time Display Set the Date and Time page PUSH — Menu PUSH Dial (Rotate or Press In) POWER MENU/DISPLAY D. ZOOM TELE MACRO REC TIME INT. TIME DATE/TIME TITLE LANG. ENGLISH DEMO MODE RETURN as shown on the previous MENU/DISPLAY Button CAMERA... - Page 21 Date and Time Display Set the Date and Time DATE/TIME YEAR 2000 MONTH TIME AM 12:00 EXIT PUSH YEAR PUSH PUSH TIME. DATE/TIME 2000 YEAR MONTH TIME PM 11:00 EXIT PUSH PUSH PUSH PUSH (Continued) EXIT YEAR MONTH TIME EXIT PUSH PUSH MONTH...
- Page 22 Date and Time Display Record AUTO DATE, Date, Time, and Title Displays pages PUSH — Menu PUSH Dial (Rotate or Press In) Select AUTO DATE, Date, Time, or Date and Time to Record on Your Tape POWER CAMERA MAN Note: AUTO DATE POWER CAMERA AUTO PUSH...
-
Page 23: Auto Date
Date and Time Display Record AUTO DATE, Date, Time, and Title Displays LCD Monitor or Viewfinder Displays Select the Display on the DATE/TIME DISP. Menu AUTO DATE AUTO DATE Display OFF: No Display PUSH AUTO DATE: DATE POWER CAMERA AUTO. DATE Display: DATE Display TIME Display... -
Page 24: Videocassettes
Videocassettes Erase Protection – Safety Tab Safety Recording and Playback Speeds and Times A. Remove B. Cover hole safety tab or with vinyl tape or slide tab to slide tab to REC ON to REC OFF. record over tape. and holding Cassette SP/SLP Recording Time... - Page 25 Videocassettes Insert and Remove Cassettes Push Here to Close Cassette Compartment Tape Wheel Cassette Care and Storage Tape Wheel Tape SP/SLP Window Button EJECT Button EJECT CAUTIONS shown above...
- Page 26 Recording Time-Remaining Display TAPE LENGTH PUSH — Menu PUSH Dial (Rotate or Press In) Select a Tape Length POWER and hold SP/SLP PUSH FOCUS AUTO AUTO EXPOSURE AUTO M. W. B. 16 X 9 TAPE LENGTH TITLE DATE/TIME DISP. RETURN CAMERA FOCUS EXPOSURE...
- Page 27 Recording Time-Remaining Display --MIN (Calculating) 29MIN 3MIN 2MIN (Flashing) 1MIN (Flashing) 0MIN (Flashing) TAPE LENGTH EXIT PUSH (Continued) --MIN TAPE END Time-Remaining Display in Viewfinder or on LCD Monitor Tape Length Indicator Tape Speed Indicator PUSH twice...
- Page 28 Recording Use the LCD Monitor or Viewfinder to See What You Record Use the LCD Monitor Cautions: 90° 180° Menu PUSH Dial (Also Bright Control) Notes: PUSH...
- Page 29 Recording Use the LCD Monitor or Viewfinder to See What You Record (Continued) Use the Viewfinder Eyepiece Focus Control 180 ° 180 ° Adjust Viewfinder for Convenient Viewing Eyepiece Focus Control Cautions Viewfinder...
- Page 30 Recording LCD Monitor and Viewfinder Displays NOV 18.00 Battery Level Indicator ( • Cassette Warning POWER POWER REC OFF and hold SEPIA P AUSE HAPPY BIRTHDAY PM 8:30:03 AUTO DATE, Date, Time, or Date and Time CAMERA Details are on pages 20-21. P.
-
Page 31: Lcd Monitor And Viewfinder Displays
Recording LCD Monitor and Viewfinder Displays • SPORTS SPORTS • SD:SHADOW SD:SHADOW • HZ: HAZE HZ:HAZE • TWILIGHT TWILIGHT • 2 S 1/2000 1/2000 SPORTS • NEGA POSI NEGA POSI Details are on page 44. Preset Titles Details are on pages 46-47. M. -
Page 32: Lens Cover
Recording LCD Monitor and Viewfinder Displays 5MIN FADER BRIGHT – - - - - - - - - - - - - - - - - + BRIGHT (or VOLUME) Indicator BRIGHT PUSH VOLUME Exposure Indicators (+03) EXPOSURE POWER CAMERA MAN Details are on pages 40-41. -
Page 33: Lcd Monitor And Viewfinder Displays
Recording LCD Monitor and Viewfinder Displays Lithium Cell ( • Details are on page 17. Animation, Time-Lapse, and Five- Second Recording Indicators ( 5S ) 5SEC. REC Details are on page 33. 15S, 30S, 1MIN, 5MIN pages 50-51. 1/4S, 1/2S, 1S Details are on pages 48-50 and 50-51. - Page 34 Recording SEARCH R Button SEARCH F Button MENU/ DISPLAY Button SP/SLP POWER Button Switch AutoShot™ Mode POWER To Turn on the AutoShot™ Mode POWER AUTO P AUSE 5SEC. REC Button Thumb Trigger CAMERA AUTO DATE To Turn Off the AutoShot™ Mode Microphone MENU DISPLAY PUSH...
- Page 35 Recording Five-Second Record Feature POWER CAMERA AUTO CAMERA MAN SP/SLP and hold 5SEC. REC To Turn Off the Five-Second Record Mode 5SEC. REC Quick Review Feature SEARCH R POWER CAMERA AUTO CAMERA MAN Camera Edit Feature CAMERA AUTO Flying Erase Head MENU/DISPLAY Button and hold POWER...
-
Page 36: Digital Zooming
Recording Zooming MACRO PUSH — Menu PUSH Dial (Rotate or Press In) MENU/DISPLAY Button Use the Zoom Lever (W and T) Zoom Lever (T and W) Digital Zooming POWER MENU/DISPLAY PUSH D. ZOOM TELE MACRO REC TIME INT. TIME DATE/TIME TITLE LANG. - Page 37 Recording Zooming Continued PUSH D. ZOOM D. ZOOM EXIT PUSH Tele Macro Zooming POWER MENU/DISPLAY TELE MACRO D. ZOOM TELE MACRO REC TIME INT. TIME DATE/TIME ENGLISH TITLE LANG. DEMO MODE RETURN PUSH TELE MACRO Notes: CAMERA PUSH EXIT D. ZOOM PUSH twice TELE MACRO...
- Page 38 Recording Focusing PUSH — Menu PUSH Dial (Rotate or Press In) Auto Focus POWER AUTO Notes: CAMERA POWER Switch in CAMERA MAN...
- Page 39 Recording Focusing (Continued) Manual Focus POWER PUSH FOCUS AUTO EXPOSURE AUTO AUTO M. W. B. 16 X 9 TAPE LENGTH TITLE DATE/TIME DISP. RETURN PUSH FOCUS FOCUS AUTO MANU EXIT PUSH MANU CAMERA FOCUS Note: AUTO POWER Conditions Requiring Manual Focus PUSH PUSH PUSH...
-
Page 40: White Balance
Recording White Balance PUSH — Menu PUSH Dial (Rotate or Press In) Auto White Balance POWER AUTO Zoom Lever (T and W) MENU/DISPLAY Button Manual White Balance MAN. CAMERA POWER Switch in CAMERA MAN POWER CAMERA PUSH FOCUS... - Page 41 Recording White Balance (Continued) AUTO FOCUS EXPOSURE AUTO AUTO M. W. B. 16 X 9 TAPE LENGTH TITLE DATE/TIME DISP. RETURN PUSH M. W. B. M.W.B. M.W.B. AUTO :FINE :CLOUD :HALOGEN EXIT PUSH AUTO :FINE :CLOUD :HALOGEN AUTO :FINE :CLOUD :HALOGEN EXIT Note:...
-
Page 42: Exposure Control
Recording Exposure Control CAMERA AUTO PUSH — Menu PUSH Dial (Rotate or Press In) Auto Exposure POWER AUTO Manual Exposure on the next page. POWER MENU/DISPLAY Button MAN. CAMERA FOCUS EXPOSURE M. W. B. 16 X 9 TAPE LENGTH TITLE DATE/TIME DISP. - Page 43 Recording Exposure Control (Continued) PUSH EXPOSURE, EXPOSURE EXPOSURE AUTO MANU EXIT PUSH MANU PUSH PUSH PUSH Note: AUTO EXPOSURE POWER CAMERA AUTO Conditions Requiring Manual Exposure Steady Pix™ Feature To Use the Steady Pix™ Feature Notes: – 06 twice STEADY PIX STEADY PIX...
- Page 44 Recording Fade or Wipe In or Out FADES Button To Fade or Wipe In or Out POWER MAN. FADES FADER FADER MOSAIC CAMERA Notes: SCROLL SLIDE DOOR CW:CORNER WW:WINDOW FADER...
-
Page 45: Lcd Monitor Or Viewfinder Displays
Recording Fade or Wipe In or Out LCD Monitor or Viewfinder Displays Repeatedly Press the FADES Button FADER Black Fade Normal Picture (No Fade) WW:WINDOW Window Wipe CW:CORNER Corner Wipe Fade or Wipe In FADES Note: FADES (Continued) Fade or Wipe Out FADES Note: FADES... - Page 46 Recording P. (Program) AE Button P. (Program) AE Button Indicator and Name SEPIA SPORTS SD:SHADOW HZ:HAZE TWILIGHT 2 S 1/2000 NEGA POSI Uses...
- Page 47 Recording 16X9 Mode PUSH — Menu PUSH Dial (Rotate or POWER Switch in Press In) CAMERA MAN POWER PUSH FOCUS AUTO AUTO EXPOSURE M. W. B. AUTO 16 X 9 TAPE LENGTH TITLE DATE/TIME DISP. RETURN PUSH 16X9 16X9 16X9 EXIT Caution: CAMERA...
-
Page 48: Preset Titles
Recording Preset Titles PUSH — Menu PUSH Dial (Rotate or Press In) Select a Language for the Title POWER MENU/DISPLAY D. ZOOM TELE MACRO REC TIME INT. TIME DATE/TIME ENGLISH TITLE LANG. DEMO MODE RETURN PUSH TITLE LANG MENU/DISPLAY Button TITLE LANG. - Page 49 Recording Preset Titles (Continued) Record a Preset Title POWER PUSH FOCUS AUTO EXPOSURE AUTO AUTO M. W. B. 16 X 9 TAPE LENGTH TITLE DATE/TIME DISP. RETURN PUSH TITLE. AUTO FOCUS AUTO EXPOSURE AUTO M. W. B. 16 X 9 TAPE LENGTH TITLE DATE/TIME DISP.
-
Page 50: Animation Recording
Recording Animation Recording PUSH — Menu PUSH Dial (Rotate or Press In) To Record Using Animation POWER and hold SP/SLP MENU/DISPLAY MENU/DISPLAY Button CAMERA D. ZOOM POWER Switch in CAMERA MAN D. ZOOM TELE MACRO REC TIME INT. TIME DATE/TIME ENGLISH TITLE LANG. - Page 51 Recording Animation Recording PUSH REC TIME REC TIME REC TIME 1/4 S 1/2 S EXIT PUSH 1/4S 1/2S PUSH (Continued) Note Note: To Stop Animation Recording REC TIME twice OFF.
- Page 52 Recording Time-Lapse Recording PUSH — Menu PUSH Dial (Rotate or Press In) To Record Using Time Lapse POWER and hold SP/SLP MENU/DISPLAY MENU/DISPLAY Button CAMERA D. ZOOM TELE MACRO REC TIME INT. TIME DATE/TIME TITLE LANG. DEMO MODE D. ZOOM POWER Switch in CAMERA MAN ENGLISH...
- Page 53 Recording Time-Lapse Recording REC TIME 1/4 S 1/2 S EXIT PUSH 1/4S 1/2S PUSH PUSH INT. TIME INT. TIME Note: REC TIME INT. TIME 15 S 30 S 1 MIN 5 MIN EXIT PUSH 15S, 30S, 1 MIN, 5 MIN (Continued) INT.
-
Page 54: Demo Mode
Recording Demo Mode DEMO PUSH — Menu PUSH Dial (Rotate or Press In) To Turn the Demo Mode On POWER REC OFF MENU/DISPLAY D. ZOOM TELE MACRO REC TIME INT. TIME DATE/TIME TITLE LANG. ENGLISH DEMO MODE RETURN PUSH DEMO MODE DEMO MENU POWER Switch in... - Page 55 Recording Attach the Shoulder Strap To Attach the Shoulder Strap shown. Keeper Buckle Attachment Rings Cautions: Keeper...
-
Page 56: Playback
Playback Playback Use the LCD Monitor or Viewfinder for Playback LCD Monitor TBC Button (Also STEADY PIX Button) VOL (Volume) Control (Also Zoom Lever) Press here to close. Eyepiece Focus Control Viewfinder Speaker Button Button PLAY/PAUSE Button STOP Button EJECT Switch Menu PUSH Dial (Also Bright Control) - Page 57 Playback Use the LCD Monitor or Viewfinder for Playback To Play Back a Tape 1. Attach a power supply. 2. Insert a tape. EJECT area shown 3. Set the POWER switch to VCR. 4. Use the LCD monitor or viewfinder to see what you are playing back.
-
Page 58: Playback Features
Playback Playback Features P.AE and FADES Buttons (Also Tracking Buttons) REW (Rewind) Button FF (Fast Forward) Button STOP Button PLAY/PAUSE Button EJECT Switch COUNTER R/M Button Position the Tape POWER STOP STOP Visual Search PLAY/PAUSE • Eyepiece Focus Control Viewfinder Stop-Action Pause Caution: TBC Button... - Page 59 Playback Playback Features (Continued) Time Counter M 0:00:00 To Use the Memory-Stop Feature POWER COUNTER R/M 0:00:00 COUNTER R/M M 0:00:00 STOP M 0:00:00. Tracking P.AE FADES Note: TBC (Time Base Corrector) Notes: STEADY PIX...
- Page 60 Playback Playback on TV (or VCR) with Audio/Video Inputs Back of Mono VCR or White TV Monitor Audio Plug AUDIO VIDEO Yellow Video Plug Back of Y-Adapter Stereo VCR or (Optional) TV Monitor AUDIO VIDEO Installation MONO. page 62 Audio/Video Output Cable (Included) V (Video)
- Page 61 Playback Playback on TV (or VCR) with Audio/Video Inputs Playback Operation and How to Copy Tapes on the VCR POWER PLAY/PAUSE Viewing What the Camcorder is Seeing (or Recording) Note: STOP Caution: Note: (Continued) on pages 56-57. RECORD COUNTER R/M M 0:00:00.
-
Page 62: Recording Tips
Recording and Traveling Tips Traveling Tips Recording Tips Traveling Tips See the next page... -
Page 63: Optional Accessories
Optional Accessories Optional Accessories To order accessories, contact your local Dealer. on page 65. AC201A Soft Carrying Case DCC08 Car Cord Adapter Do not use any other car cord with this camcorder. - Page 64 Optional Accessories FB1260 Rechargeable Battery BB99L Rechargeable Battery CPS91 AC Battery Charger 244270 Cassette Adapter AH25 Y-Adapter...
- Page 65 Optional Accessories Using the Optional AC088 Tripod Cautions:...
-
Page 66: Accessory Order Form
Accessory Order Form To order accessories, contact your local Dealer. United States and Canada Orders Use this number only to place an order for accessory items listed on this order form. 1-800-338-0376... - Page 67 Accessory Order Form Order Form for Camcorder Model CC6363 Description Total Amount Enclosed ... Part No. Please complete other side also Price Qty. Total _________ _________ 5.00...
- Page 68 Accessory Order Form USE YOUR CREDIT CARD IMPORTANT: IMPORTANT: IMPORTANT: Please make sure that both sides of this form have been filled out completely. • Allow 4 weeks for delivery. • All accessories are subject to availability. AUTHORIZED SIGNATURE ®...
-
Page 69: Trouble Checks
Trouble Checks Trouble Checks and Adjustments POWER CAMERA CONDENSATION OPERATION PAUSED PLEASE WAIT POWER POWER See page 22.) POWER CAMERA POWER CAMERA... - Page 70 Trouble Checks Trouble Checks and Adjustments M 0:00:00 PLAY/PAUSE CONDENSATION OPERATION PAUSED PLEASE WAIT CAMERA MAN • CAMERA MAN P AE See page 44. POWER See pages 40-41. POWER COUNTER R/M POWER See pages 36-37. POWER See pages 36-37. SPORTS 1/2000 CAMERA MAN CAMERA AUTO.
- Page 71 Trouble Checks Trouble Checks and Adjustments • INT. TIME E01, E02, See pages 20-21. AUTO DATE CAMERA AUTO See pages 20-21. See page 17. POWER AUTO P.AE page 57. POWER See pages 18-19. CAMERA See pages 48-51. FADES...
- Page 72 Trouble Checks Trouble Checks and Adjustments...
-
Page 73: Specifications
Specifications General Dimensions – Including Viewfinder: Video Recorder Section Viewfinder LCD Monitor Camera Section Tripod Mount AC Adapter/Charger Service Port... -
Page 74: Care And Maintenance
Care and Maintenance Clean the Camcorder Clean the Camcorder’s Lens Clean the Camcorder’s LCD Monitor Monitor Clean the Camcorder’s Viewfinder Caution: Caution: Lens... - Page 75 Care and Maintenance Proper Care and Storage Things to Avoid...
-
Page 76: Customer Assistance And Service
Customer Assistance and Service 800-283-6503 Returning equipment to Thomson for repair or exchange Important information to customers who ship defective equipment to Thomson Consumer Electronics Always consult Thomson and get a Service Request number before returning anything For your protection, insure all shipments for full replacement value and use a reliable shipper. -
Page 77: Limited Warranty
Limited Warranty What your warranty covers: For how long after your purchase: What we will do: During the initial 90 days After the 90 days and within one year • How you get service: To receive a replacement Camcorder before you return yours: Option I IF YOUR UNIT IS NOT RECEIVED... - Page 78 Make sure you insure your shipment in case of damage or loss. To have your Camcorder repaired by an Authorized RCA Camcorder Service Center: What your warranty does not cover: Product Registration: How State Law relates to warranty:...
-
Page 79: Index
Index... - Page 80 Index...
- Page 81 Index...
- Page 82 Index...
-
Page 83: Information To User
Information to User... - Page 84 10330 N Meridian Street Indianapolis, IN 46290 TOCOM 15562920 Part No. LYT0594-001A...