Table of Contents
Advertisement
Quick Links
Advertisement
Table of Contents

Summary of Contents for Westinghouse WHG639BD
- Page 1 USER MANUAL GAS COOKTOP WHG639BD WHG959BD WHG635BCA WHG955BCA...
-
Page 2: Table Of Contents
IMPORTANT INSTRUCTIONS CONGRATULATIONS CONTENTS BEFORE USING YOUR APPLIANCE CAUTION Important Instructions _________________________ 3 Read the following carefully to avoid an electric Dear customer, Before you use the appliance, we recommend that shock or fire. you read through the relevant sections of this manual, Part names __________________________________ 4 Congratulations and thank you for choosing our cooktop. -
Page 3: Part Names
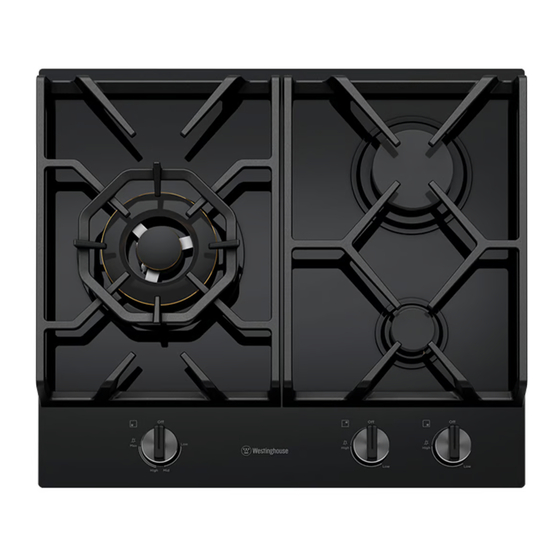
Removable cast iron trivet (left) Removable cast iron trivet (mid and right) Wok trivet WHG639BD Burners – this unit has small, large and dual wok burner Ceramic Glass hob – the glass hob is resistant to heat, cold and rapid temperature changes, but is vulnerable to impact. - Page 4 PART NAMES (CONTINUES)4 Figure 2c Figure 2d WHG955BCA Burners – this unit has small, medium and wok burner WHG635BCA Ceramic Glass hob – the glass hob is resistant to heat, cold and rapid temperature changes, but is vulnerable Burners – this unit has small, medium and wok burner to impact.
-
Page 5: Before First Use
BEFORE FIRST USE USING YOUR COOKTOP BURNERS INSTALLATION CONTROLS Choice of burner Figure 3 For your convenience there is a choice of burners: Standard burner • An authorised person must install this appliance and Each burner is controlled by a control knob. The markings MUST provide a Certificate of Compliance. -
Page 6: Cleaning And Care
If the ceramic glass surface is cracked, switch off the appliance immediately to avoid the possibility of electric shock. Trivets and burners Available at the following web shops. https://shop.westinghouse.com.au These can all be lifted off and removed for separate cleaning. NOTE! When refitting the burners, ensure that they are correctly seated. -
Page 7: Troubleshooting
• Clean or dry flame ports to lift • Burner incorrectly fitted • Ensure this component is fitted correctly Figure 5a – WHG639BD Flames not staying on when • Knob not held down long enough • Repeat lighting procedure and hold knob down for knob released in ‘High’... - Page 8 Figure 5c - WHG635BCA gas supply connection location Minimum clearance (Refer to below table) Non-Combustible surface(mm) Combustible surface(mm) Model (Minimum clearance) (Minimum clearance) WHG639BD WHG959BD WHG635BCA WHG955BCA * to combustible surface (dimension is not relevant if the adjacent surface is non-combustible).
-
Page 9: Technical Data
Adjacent walls, cupboards and protection for loosening of the gas connection through movement of the combustible materials: Ensure that the appliance cooktop and a gas leak may result. features WHG639BD WHG959BD WHG635BCA WHG955BCA is installed in accordance with AS/NZS 5601.1, or AS/NZS 5601.2 with regard to clearances... - Page 10 INSTALLATION PROCEDURE (CONTINUED) Figure 6c – WHG635BCA Figure 6a – WHG639BD combustible surface combustible surface Figure 6d – WHG955BCA Figure 6b – WHG959BD combustible surface combustible surface NOTE: Distances shown to adjacent walls/surfaces are for the distance to a combustible surface. If the surface is not NOTE: Distances shown to adjacent walls/surfaces are for the distance to a combustible surface.
-
Page 11: Gas Connection
INSTALLATION PROCEDURE GAS CONNECTION (CONTINUED) OPERATION ON N.G./S.N.G ELBOW POSITIONING This appliance is supplied for use with Natural Gas. It is possible to reposition the elbow if required by However, it can be converted for use with LPG. loosening the locking nut and elbow by using two Refer to LP conversion on page 23. - Page 12 GAS CONNECTION (CONTINUED) CHECKING THE GAS SUPPLY LPG CONVERSION Assembly of the regulator supply line in the correct orientation, the arrow on the base of the body indicates the direction of gas flow. The assembly of the regulator to the cooktop manifold is Check the manometer zero point is correct.
-
Page 13: Electrical Connection
ELECTRICAL CONNECTION (220-240 VOLTS) TESTING APPLIANCE OPERATION The appliance is supplied with a standard 7.5 Amp service After installation, test the appliance and ensure that it CAUTION cord terminated by a 3-pin plug for connection to a standard operates correctly before handing it over to the customer. household socket. -
Page 14: Warranty
(c) ‘ASC’ means Electrolux’s authorised serviced centres; the Appliance; (d) ‘Westinghouse’ is the brand controlled by Electrolux Home Products In addition, Electrolux is not liable under this warranty if: Pty Ltd of 163 O’Riordan Street, Mascot NSW 2020, ABN 51 004... - Page 15 For more information on all Westinghouse appliances, or for dimension and installation information, call into your retailer, phone or email our customer care team or visit our website: AUSTRALIA phone: 13 13 49 email: customercare@electrolux.com.au web: westinghouse.com.au NEW ZEALAND phone: 0800 436 245 email: customercare@electrolux.co.nz...


