Table of Contents
Advertisement
Available languages
Available languages
Quick Links
Flex-Force Power System™ 60V MAX 21in Recycler®
Lawn Mower with SmartStow®
21326, 21326T
Cortacésped Recycler® 60V MAX de 53 cm (21") con
Flex-Force Power System™ y SmartStow®
21326, 21326T
Tondeuse Recycler® 60 V MAX 53 cm (21 po)
Flex-Force Power System™ avec SmartStow®
21326, 21326T
www.Toro.com.
Form No. 3457-926 Rev A
*3457-926*
Advertisement
Chapters
Table of Contents

Related Manuals for Toro Flex-Force Power System Recycler 21326


Summary of Contents for Toro Flex-Force Power System Recycler 21326
- Page 1 Lawn Mower with SmartStow® 21326, 21326T Cortacésped Recycler® 60V MAX de 53 cm (21") con Flex-Force Power System™ y SmartStow® 21326, 21326T Tondeuse Recycler® 60 V MAX 53 cm (21 po) Flex-Force Power System™ avec SmartStow® 21326, 21326T *3457-926* www.Toro.com.
- Page 3 Form No. 3457-923 Rev A Flex-Force Power System ™ MAX 21in Recycler ® Lawn Mower with SmartStow ® Model No. 21326—Serial No. 400000000 and Up Model No. 21326T—Serial No. 400000000 and Up *3457-923* Register at www.Toro.com. Original Instructions (EN)
-
Page 4: Safety-Alert Symbol
It is not designed for cutting brush or for agricultural uses. g000502 Figure 2 It is designed to use Toro 60V lithium-ion battery packs. These battery packs are designed to be Safety-alert symbol charged only by Toro 60V lithium-ion battery chargers. -
Page 5: Table Of Contents
Replace any damaged or unreadable labels. Use only the battery pack specified by Toro. Using other accessories and attachments may increase the risk of injury and fire. Plugging the battery charger into an outlet that is... - Page 6 Do not use a battery-operated lawn mower in Charge the battery pack with only the battery rain. charger specified by Toro. A charger suitable for Operate the machine only in good visibility and 1 type of battery pack may create a risk of fire appropriate weather conditions.
- Page 7 Replace the battery pack with a genuine Sharpen a dull blade on both edges to maintain Toro battery pack only; using another type of balance. Clean the blade and ensure that it is battery pack may cause a fire or risk of injury.
-
Page 8: Safety And Instructional Decals
Safety and Instructional Decals Safety decals and instructions are easily visible to the operator and are located near any area of potential danger. Replace any decal that is damaged or missing. Model 88650 decal140-3811 140-3811 1. Warning—read the 4. Cutting/dismember Operator's Manual. - Page 9 decal144-3096 144-3096 decal133-8061 133-8061 decal94-8072 94-8072 decal137-9461 decal139-8986 137-9461 139-8986 1. Battery charge status decal144-3098 144-3098...
- Page 10 decal144-3175 144-3175 1. Read the Operator’s 3. To shut off the machine, Manual. release the bar. 2. To start the machine, squeeze the bar to the handle and press the button.
-
Page 11: Setup
Setup Important: The battery pack is not fully charged when it is purchased. Before using the machine for the first time, refer to Charging the Battery Pack (page 16). Assembling the Grass Bag No Parts Required Procedure g407949 Figure 3 Unfolding the Handle No Parts Required Procedure... - Page 12 Ensure that the cables are routed to the outside of the handle (D of Figure Engage the handle locks until the pin clicks in place to lock the handle into the operating position (E of Figure Note: You may adjust the height of the handle by changing the hole for the handle lock. Secure the knobs to the handle bolts to secure the handle (F of Figure g413061...
-
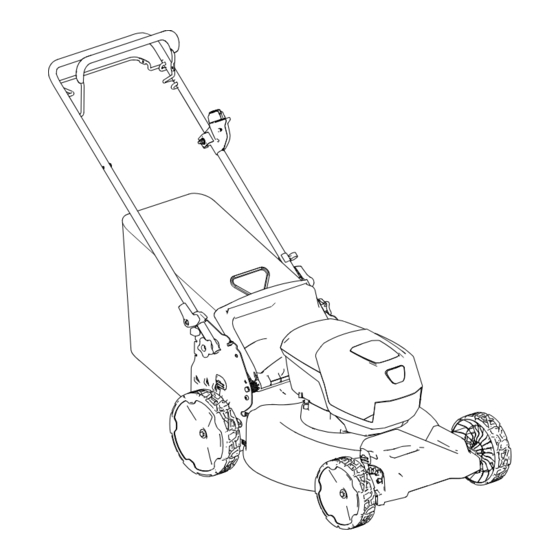
Page 13: Product Overview
Contact your Authorized Service Dealer or authorized Toro distributor or go to www.Toro.com for a list of all approved attachments and accessories. To ensure optimum performance and continued safety certification of the machine, use only genuine Toro replacement parts and accessories. -
Page 14: Before Operation
Operation Note: Determine the left and right sides of the machine from the normal operating position. Before Operation Installing the Battery Pack Important: Use the battery pack only in temperatures that are within the appropriate range; refer Specifications (page 11). Make sure that the vents on the battery are clear of any dust and debris. -
Page 15: Adjusting The Cutting Height
Adjusting the Cutting Height DANGER Adjusting the height-of-cut could bring your hands into contact with a moving blade and result in serious injury. • Shut off the motor, remove the battery, and wait for all moving parts to stop before adjusting the cutting height. -
Page 16: During Operation
During Operation Starting the Machine Ensure that the battery pack is charged and installed in the machine; refer to Installing the Battery Pack (page 12). Insert the electric-start button into the electric starter switch (A of Figure Squeeze the blade-control bar and hold it to the handle (B of Figure Press the electric-start button and keep it pressed until the motor starts (C of Figure... -
Page 17: Bagging The Clippings
If the machine strikes an object or starts to vibrate, immediately shut off the motor, wait for all moving g332151 Figure 12 parts to stop, and examine the machine for damage. • For best performance, install a new Toro blade before the cutting season begins or when necessary. -
Page 18: After Operation
Cutting Grass After Operation • Cut only about a third of the grass blade at a time. For improved quality of cut, runtime, and bagging, Charging the Battery Pack cut grass at a higher height of cut. Important: • The battery pack is not fully charged Do not cut below 51 mm (2 inches) unless the when you purchase it. -
Page 19: Cleaning The Machine
Green Battery pack is charged Battery pack and/or battery charger is over or under the appropriate temperature range Battery pack charging fault* blinking *Refer to Troubleshooting (page 22) for more information. Important: The battery can be left on the charger for short periods between uses. -
Page 20: Folding The Handle
Folding the Handle WARNING Unfolding the handle improperly can damage the cables, causing an unsafe operating condition. • Do not damage the cable(s) when folding or unfolding the handle. • Ensure that the cable(s) are routed to the outside of the handle. •... -
Page 21: Maintenance
Maintenance Remove the electric-start button and battery pack from the machine before maintaining or cleaning the machine. Always shut off the machine, wait for all moving parts to stop, and allow the machine to cool before adjusting, servicing, cleaning, or storing it. Use only the manufacturer’s recommended replacement parts and accessories. -
Page 22: Adjusting The Self-Propel Drive
If you are located outside of the US and Canada, please contact your authorized Toro distributor. g009692 Figure 19 1. 25 to 38 mm (1 to 1-1/2 4. -
Page 23: Storage
Storage Important: Store the machine, battery pack, and charger only in temperatures that are within the appropriate range; refer to Specifications (page 11). Important: If you are storing the battery pack for the off-season, charge it until 2 or 3 LED indicators turn green on the battery. -
Page 24: Troubleshooting
Troubleshooting Perform only the steps described in these instructions. All further inspection, maintenance, and repair work must be performed by an authorized service center or a similarly qualified specialist if you cannot solve the problem yourself. Problem Possible Cause Corrective Action The machine does not start. - Page 25 Problem Possible Cause Corrective Action The LED indicator light on the battery 1. There is an error in the communication 1. Remove the battery pack from the charger is blinking red. between the battery pack and the battery charger, unplug the battery charger.
- Page 26 California Proposition 65 Warning Information What is this warning? You may see a product for sale that has a warning label like the following: WARNING: Cancer and Reproductive Harm—www.p65Warnings.ca.gov. What is Prop 65? Prop 65 applies to any company operating in California, selling products in California, or manufacturing products that may be sold in or brought into California.
- Page 27 53 cm (21") con Flex-Force Power System ™ y SmartStow ® Nº de modelo 21326—Nº de serie 400000000 y superiores Nº de modelo 21326T—Nº de serie 400000000 y superiores *3457-924* Registre su producto en www.Toro.com. Traducción del original (ES)
- Page 28 V de Toro. Estas baterías están diseñadas para ser cargadas únicamente con cargadores de batería de ion litio de 60 V de Toro. El uso de estos productos para propósitos diferentes a los previstos puede ser peligroso para usted y para otras personas. El uso g000502 de estos productos para propósitos diferentes a los...
- Page 29 Seguridad ADVERTENCIA indica una situación potencialmente peligrosa que si no se evita, podría causar la muerte o lesiones graves. INSTRUCCIONES DE CUIDADO: Indica una situación potencialmente SEGURIDAD peligrosa que si no se evita, podría causar lesiones menores o moderadas. IMPORTANTES Este manual utiliza dos palabras más para resaltar información.
- Page 30 Utilice únicamente la batería especificada conectar la batería y manejar la máquina. por Toro. El uso de otros accesorios puede Dedique toda su atención al manejo de la aumentar el riesgo de incendio y lesiones.
- Page 31 • Sustituya la batería únicamente por una fuente de alimentación está apagada. batería Toro genuina; el uso de otro tipo de Compruebe frecuentemente la bolsa de recogida batería podría provocar un incendio o un de recortes en busca de deterioros o desgaste, riesgo de lesión.
-
Page 32: Pegatinas De Seguridad E Instrucciones
Pegatinas de seguridad e instrucciones Las pegatinas de seguridad e instrucciones están a la vista del operador y están ubicadas cerca de cualquier zona de peligro potencial. Sustituya cualquier pegatina que esté dañada o que falte. Modelo 88650 decal140-3811 140-3811 1. - Page 33 decal144-3096 144-3096 decal133-8061 133-8061 decal94-8072 94-8072 decal137-9461 decal139-8986 137-9461 139-8986 1. Estado de carga de la batería decal144-3098 144-3098...
- Page 34 decal144-3175 144-3175 1. Lea el Manual del 3. Para apagar la máquina, operador. suelte la barra. 2. Para arrancar la máquina, apriete la barra contra el manillar y pulse el botón.
-
Page 35: Montaje
Montaje Importante: En el momento de la compra la batería no está totalmente cargada. Antes de utilizar la máquina por primera vez, consulte Carga de la batería (página 16). Ensamblaje de la bolsa de recogida No se necesitan piezas Procedimiento g407949 Figura 3 Despliegue del manillar... - Page 36 Usando los orificios de los extremos del manillar, sujete el manillar a la máquina (Figura 4, B). Mueva el manillar hacia atrás a la posición de uso (Figura 4, C). Asegúrese de colocar los cables en el exterior del manillar (Figura 4, D).
-
Page 37: El Producto
(2) Puede estar disponible una selección de aperos 4. Deflector trasero 8. Barra de control y accesorios homologados por Toro para su uso de la transmisión con la máquina a fin de potenciar y aumentar sus autopropulsada prestaciones. Póngase en contacto con su Servicio Técnico Autorizado o distribuidor autorizado Toro o... -
Page 38: Antes Del Funcionamiento
Operación Nota: Los lados derecho e izquierdo de la máquina se determinan desde la posición normal del operador. Antes del funcionamiento Instalación de la batería Importante: Utilice la batería solo a temperaturas que estén dentro del intervalo apropiado; consulte Especificaciones (página 11). -
Page 39: Ajuste De La Altura De Corte
Ajuste de la altura de corte PELIGRO Al ajustar la altura de corte, podría tocar una cuchilla en movimiento con las manos, lo que podría causarle graves lesiones. • Apague el motor, retire la batería, y espere a que se detengan todas las piezas en movimiento antes de ajustar la altura de corte. -
Page 40: Durante El Funcionamiento
Durante el funcionamiento Cómo arrancar la máquina Asegúrese de que la batería está cargada e instalada en la máquina; consulte Instalación de la batería (página 12). Introduzca el botón de arranque eléctrico en el interruptor de arranque eléctrico (Figura 9, A). Apriete la barra de control de la cuchilla contra el manillar (Figura 9, B). -
Page 41: Ensacado De Los Recortes
Figura 12 • Para obtener el mejor rendimiento, instale una cuchilla nueva Toro antes de que empiece la temporada de siega, o cuando sea necesario. -
Page 42: Después Del Funcionamiento
Cómo cortar la hierba Después del • Corte solamente un tercio de la hoja de hierba funcionamiento cada vez. Para mejorar la calidad de corte, la autonomía y el ensacado, siegue a una altura de corte mayor. Carga de la batería •... -
Page 43: Limpieza De La Máquina
Cómo plegar el manillar Indica- Indica: Apagada No hay batería insertada ADVERTENCIA Verde La batería se está cargando Si despliega el manillar de forma incorrecta, intermi- tente pueden dañarse los cables, creando condiciones de operación inseguras. Verde La batería está cargada •... -
Page 44: Almacenamiento De La Máquina En Posición Vertical
Almacenamiento de la máquina en posición vertical Puede almacenar la máquina en posición vertical para aprovechar al máximo el espacio de almacenamiento. PELIGRO La posición de almacenamiento vertical deja expuesta la parte inferior de la máquina. • Retire la batería y el botón de arranque eléctrico antes de mover la máquina a la posición de almacenamiento vertical. -
Page 45: Mantenimiento
Mantenimiento Retire el botón de arranque eléctrico y la batería de la máquina antes de realizar tareas de mantenimiento o limpieza en la máquina. Siempre apague la máquina, espere a que se detengan todas las piezas en movimiento, y deje que la máquina se enfríe antes de hacer trabajos de ajuste, revisión, limpieza o almacenamiento. -
Page 46: Ajuste De La Transmisión Autopropulsada
Si se encuentra fuera de EE. UU. o Canadá, póngase en contacto con su distribuidor Toro autorizado. g009692 Figura 19 1. 25 a 38 mm (1" a 1½") 4. -
Page 47: Almacenamiento
Almacenamiento Importante: Almacene la máquina, la batería y el cargador solo a temperaturas que estén dentro del intervalo apropiado; consulte Especificaciones (página 11). Importante: Si va a almacenar la herramienta hasta la temporada siguiente, cárguela hasta que 2 o 3 de los indicadores LED de la batería cambien a verde. -
Page 48: Solución De Problemas
Solución de problemas Realice solo los pasos descritos en estas instrucciones. Cualquier otro trabajo de inspección, mantenimiento o reparación debe ser realizado por un Servicio Técnico Autorizado o por un especialista autorizado si no puede solucionar el problema usted mismo. Problema Posible causa Acción correctora... - Page 49 Problema Posible causa Acción correctora El indicador LED del cargador de la 1. Hay un error de comunicaciones entre 1. Retire la batería del cargador, batería parpadea en rojo. la batería y el cargador. desconecte el cargador de la toma de corriente y espere 10 segundos.
- Page 50 Información sobre las Advertencias de la Proposición 65 de California ¿Qué significa esta advertencia? Puede ver un producto a la venta que lleva una etiqueta de advertencia como la siguiente: ADVERTENCIA: Cáncer y daños reproductivos – www.p65Warnings.ca.gov. ¿Qué es la Proposición 65? La Proposición 65 afecta a cualquier empresa que tenga presencia en California, que venda productos en California, o que fabrique productos que podrían ser introducidos o vendidos en California.
- Page 51 53 cm (21 po) Flex-Force Power System ™ avec SmartStow ® N° de modèle 21326—N° de série 400000000 et suivants N° de modèle 21326T—N° de série 400000000 et suivants *3457-925* Enregistrez votre produit à www.Toro.com. Traduction du texte d'origine (FR)
- Page 52 Elle est conçue pour utiliser les batteries ion-lithium pour éviter des accidents. Toro de 60 V. Ces batteries sont conçues pour être chargées uniquement avec les chargeurs de batteries ion-lithium Toro de 60 V. L'utilisation de ces produits à...
- Page 53 Sécurité DANGER : Signale un danger immédiat qui, s'il n'est pas évité, entraînera obligatoirement des blessures graves ou mortelles. IMPORTANTES CONSIGNES ATTENTION : Signale un danger potentiel qui, s'il n'est pas évité, risque d'entraîner des blessures graves ou mortelles. DE SÉCURITÉ PRUDENCE : Signale un danger potentiel qui, s'il n'est pas évité, peut éventuellement entraîner des ATTENTION...
- Page 54 à la vitesse pour laquelle elle est Chargez la batterie uniquement avec le chargeur prévue. spécifié par Toro. Un chargeur convenant à un Restez alerte – concentrez-vous sur votre tâche certain type de batterie peut créer un risque et faites preuve de bon sens lorsque vous d'incendie s'il est utilisé...
- Page 55 Une lame mal équilibrée provoque des • Remplacez toujours la batterie par une vibrations qui risquent d'endommager le moteur batterie Toro d'origine; l'utilisation de tout ou de causer des blessures. autre type de batterie peut entraîner un Quand vous faites l'entretien de la lame, incendie ou un risque de de blessure.
-
Page 56: Autocollants De Sécurité Et D'instruction
Autocollants de sécurité et d'instruction Des autocollants de sécurité et des instructions bien visibles par l'opérateur sont placés près de tous les endroits potentiellement dangereux. Remplacez tout autocollant endommagé ou manquant. Modèle 88650 decal140-3811 140-3811 1. Attention – lisez le Manuel 4. - Page 57 decal144-3096 144-3096 decal133-8061 133-8061 decal94-8072 94-8072 decal137-9461 decal139-8986 137-9461 139-8986 1. État de charge de la batterie decal144-3098 144-3098...
- Page 58 decal144-3175 144-3175 1. Lisez le Manuel de 3. Relâchez la barre pour l'utilisateur. arrêter la machine. 2. Pour démarrer le moteur, serrez la barre contre le guidon et appuyez sur le bouton d'allumage.
-
Page 59: Mise En Service
Mise en service Important: La batterie n'est pas complètement chargée à l'achat. Avant la toute première utilisation de la machine, voir Charge de la batterie (page 16). Montage du bac à herbe Aucune pièce requise Procédure g407949 Figure 3 Dépliage du guidon Aucune pièce requise Procédure Important:... - Page 60 Ramenez la poignée en arrière à la position d'utilisation (C de Figure Vérifiez que les câbles passent bien à l'extérieur du guidon (D de Figure Engagez les verrous du guidon jusqu'à ce que la goupille s'enclenche en place et bloque le guidon à la position d'utilisation (E de Figure Remarque:...
-
Page 61: Vue D'ensemble Du Produit
Outils et accessoires 3. Dispositif de verrouillage 7. Bac à herbe du guidon (2) Une sélection d'outils et accessoires agréés par Toro 4. Déflecteur arrière 8. Barre d'autopropulsion peut être disponible pour augmenter et améliorer les capacités de la machine. Pour obtenir la liste de tous les accessoires et outils agréés, contactez... -
Page 62: Avant L'utilisation
Utilisation Remarque: Les côtés gauche et droit de la machine sont déterminés d'après la position d'utilisation normale. Avant l'utilisation Installation de la batterie Important: Utilisez la batterie uniquement à des températures comprises dans la plage adéquate; voir Caractéristiques techniques (page 11). -
Page 63: Réglage De La Hauteur De Coupe
Réglage de la hauteur de coupe DANGER Lors du réglage de la hauteur de coupe, vous risquez de vous blesser gravement si vos mains touchent une lame en mouvement. • Coupez le moteur, retirez la batterie et attendez l'arrêt complet de toutes les pièces mobiles avant de régler la hauteur de coupe. -
Page 64: Pendant L'utilisation
Pendant l'utilisation Démarrage de la machine Vérifiez que la batterie est chargée et installée dans la machine; voir Installation de la batterie (page 12). Insérez le bouton de démarrage électrique dans l'interrupteur du démarreur électrique (A de la Figure Serrez et maintenez la barre de commande de la lame contre le guidon (B de la Figure Maintenez le bouton de démarrage électrique enfoncé... -
Page 65: Ramassage De L'herbe Coupée
Figure 12 l'arrêt complet de toutes les pièces mobiles et vérifiez que la machine n'est pas endommagée. • Pour obtenir des résultats optimaux, installez une lame Toro au début de la saison de tonte ou quand cela est nécessaire. -
Page 66: Après L'utilisation
La tonte Après l'utilisation • Ne tondez l'herbe que sur un tiers de sa hauteur à chaque fois. Pour une meilleure qualité de Charge de la batterie coupe, une plus grande autonomie et de meilleurs résultats de ramassage, tondez l'herbe à une Important: La batterie n'est pas complètement hauteur de coupe plus élevée. -
Page 67: Nettoyage De La Machine
Pliage du guidon Verte Batterie chargée Rouge La température du chargeur et/ou de la batterie est supérieure ou inférieure à la plage appropriée. ATTENTION Cligno- Anomalie de charge de la batterie* Vous risquez d'endommager les câbles et de tement rouge rendre l'utilisation de la machine dangereuse si vous ne dépliez pas le guidon correctement. -
Page 68: Remisage De La Machine En Position Verticale
Remisage de la machine en position verticale Vous pouvez ranger votre machine en position verticale pour minimiser l'encombrement. DANGER La position verticale expose le dessous de la machine. • Retirez la batterie et le bouton de démarrage électrique avant de placer la machine en position verticale. -
Page 69: Entretien
Entretien Enlevez le bouton de démarrage électrique et la batterie de la machine avant d'en faire l'entretien ou de la nettoyer. Coupez toujours le moteur, attendez l'arrêt complet de toutes les pièces en mouvement et faites refroidir la machine avant de la régler, de la réparer, de la nettoyer ou de la remiser. -
Page 70: Réglage De L'autopropulsion
Call2Recycle, contactez votre municipalité pour vous renseigner sur le recyclage responsable de la batterie. Hors des États-Unis et du Canada, veuillez contacter votre dépositaire Toro agréé. g009692 Figure 19 1. 25 à 38 mm (1 à 1½ po) 4. -
Page 71: Remisage
Remisage Important: Remisez la machine, la batterie et le chargeur uniquement à des températures comprises dans la plage adéquate; voir Caractéristiques techniques (page 11). Important: Si vous remisez la batterie à la fin de la saison, chargez-la jusqu'à ce que 2 ou 3 de ses diodes deviennent vertes. -
Page 72: Dépistage Des Défauts
Dépistage des défauts Effectuez uniquement les opérations décrites dans ces instructions. Tout autre contrôle, entretien ou réparation doit être réalisé par un centre d'entretien agréé ou un spécialiste qualifié si vous n'arrivez pas à résoudre le problème vous-même. Problème Cause possible Mesure corrective La machine ne démarre pas. - Page 73 Problème Cause possible Mesure corrective La machine émet un bip sonore. 1. La batterie n'est pas chargée. 1. Retirez la batterie de la machine et chargez-la. 2. La machine est dans une position 2. Assurez-vous que l'angle de d’utilisation dangereuse. fonctionnement de la machine n'est pas trop extrême.
- Page 74 Proposition 65 de Californie – Information concernant cet avertissement En quoi consiste cet avertissement? Certains produits commercialisés présentent une étiquette d'avertissement semblable à ce qui suit : AVERTISSEMENT : Cancer et troubles de la reproduction – www.p65Warnings.ca.gov. Qu'est-ce que la Proposition 65? La Proposition 65 s'applique à...