Table of Contents
Advertisement
Available languages
Available languages
Quick Links
TM
SML363
INSTRUCTION MANUAL / MANUAL DE INSTRUCCIONES
/ MODE D'EMPLOI
www.singingmachine.com
The Singing Machine® is a registered trademark of The Singing Machine Co., Inc.
The Singing Machine® es marca registrada de The Singing Machine Co., Inc.
The Singing Machine® est une marque déposée de The Singing Machine Co., Inc.
Advertisement
Table of Contents

Related Manuals for The Singing Machine SML363


Summary of Contents for The Singing Machine SML363
- Page 1 / MODE D’EMPLOI www.singingmachine.com The Singing Machine® is a registered trademark of The Singing Machine Co., Inc. The Singing Machine® es marca registrada de The Singing Machine Co., Inc. The Singing Machine® est une marque déposée de The Singing Machine Co., Inc.
-
Page 2: Important Safety Information
Warnings WARNING: TO PREVENT FIRE OR SHOCK HAZARD, DO NOT EXPOSE CAUTION THIS UNIT TO RAIN OR MOISTURE. RISK OF ELECTRIC SHOCK FCC WARNING: This equipment may generate or use radio frequency DO NOT OPEN energy. Changes or modifications to this equipment may cause harmful interference unless the modifications are expressly approved in the CAUTION: TO REDUCE THE RISK OF ELECTRIC SHOCK, DO NOT instruction manual. - Page 3 Included What’s in the box. Main Unit AC Adapter Wired Microphone Manual Welcome Kit Audio/Video Cables — E2 —...
-
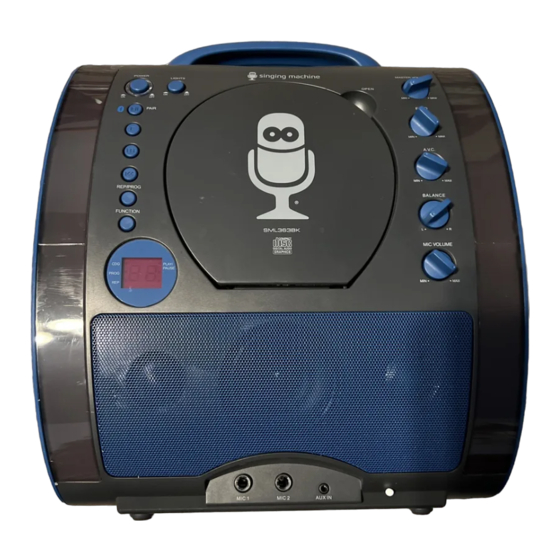
Page 4: Location Of Controls (Front)
Location of Controls (Front) 1. Handle 11. FUNCTION button 22. MIC VOLUME control 2. LIGHTS button 12. Display 23. CDG indicator 3. ON/OFF indicator 13. Speaker 24. PLAY/PAUSE indicator 4. ON/OFF button 14. AUX IN jack 25. PROGRAM indicator 5. Lights 15. -
Page 5: Location Of Controls (Rear)
Location of Controls (Rear) 27. VIDEO OUT jack 28. AUDIO OUT jack (R) 29. AUDIO OUT jack (L) 30. DC IN Jack 31. Battery Door Connection Installation of Batteries DC OPERATION 1. Slide the battery door in the direction of the arrow to reveal the battery compartment. Insert eight (8) “C”... - Page 6 Connection Connecting the Microphone(s) Microphones: Connect a microphone into Mic jack 1 as well as Mic jack 2 (when desired). Note: Do not drop or tap the Mic as damage to the Mic or speakers may occur. Do not twirl the microphone cord as it will cause damage to the encased wiring.
- Page 7 Connection Connecting to AC Power REAR VIEW OF TV VIDEO AUDIO INPUT INPUT Insert the AC power cord into an AC outlet having 120V AC, 60Hz. Note: Make all connections before RCA cables connecting to AC power. Connecting to AUX In Jack Connect an external device by using an appropriate cable (3.5mm audio cable not included) as shown.
-
Page 8: Operation
Operation Playing a CDG Connect the unit as described previously; if using a CD+G, it is recommended to connect to a TV. Press the power ON/OFF button to turn the unit on. Lift open the CD door and insert a CD or a CD+G by gently pressing it on the center spindle. - Page 9 Operation Playing a CDG (Continued) Adjust the volume to a comfortable level using the MASTER VOLUME control. Connect microphone(s) and slide the ON/OFF switch on the microphone to the ON position. Adjust the MIC VOLUME control as desired. Increasing this control will increase the volume of both microphones.
- Page 10 Operation Playing a CDG (Continued) SKIP: Advance or go back one track by pressing the Skip 9 /Skip : buttons. REPEAT: During playback, press the PROGRAM/REPEAT button once to repeatedly play the selected song; the REPEAT indicator will blink. Press the PROGRAM/ REPEAT button a second time to repeatedly play the whole CD;...
- Page 11 Operation Playing a CDG (Continued) press the PLAY/PAUSE/PAIR button; the PLAY/PAUSE indicator will blink. Press again to resume normal playback. Press the STOP button to stop playback. Press the power ON/OFF button to turn the unit off. — E10 —...
- Page 12 Operation Using a Bluetooth Device Connect the unit as described previously. Press the power ON/OFF button to turn the unit on. Please connect your Music Device Please connect your Music Device Repeatedly press the FUNCTION button to select the Bluetooth mode; Your Music Device is connected Your Music Device is connected “bt”...
- Page 13 Operation Using a Bluetooth Device (Continued) To control your Bluetooth device from this unit, press the PLAY/PAUSE/ PAIR button to start playback. Press the PLAY/PAUSE/PAIR button during playback to pause the song. Adjust the volume to a comfortable level using the MASTER VOLUME control on this unit as well as the volume on your Bluetooth device.
- Page 14 Operation Using the AUX IN Jack Connect the unit as described previously. Press the power ON/OFF button to turn the unit on. Repeatedly press the FUNCTION button to select the AUX IN mode; “AU” will appear on the display. Connect the external unit to the AUX IN Jack on the front of this unit.
- Page 15 Operation Using the AUX IN Jack (Continued) Adjust the MIC VOLUME control as desired. Increasing this control will increase the volume of both microphones. Rotate the ECHO control to add an echo effect to your voice. Rotate towards MAX to increase the echo effect.
-
Page 16: Troubleshooting Guide
• Make sure the MIC VOLUME setting is not set too low. • MASTER VOLUME is set to minimum; raise volume. • Adjust the ECHO control past the mid point on the Singing Machine. The Bluetooth device cannot be paired or connected with the unit •... -
Page 17: Specifications
The Bluetooth® word mark and logos are registered trademarks owned by Bluetooth SIG, Inc. and any use of such marks and logos by The Singing Machine Company, Inc. is under license. Other trademarks and trade names are those of their respective owners. - Page 18 Advertencias ADVERTENCIA: PARA EVITAR INCENDIOS O PELIGROS DE DESCARGA, PRECAUCIÓN NO EXPONGA ESTA UNIDAD A LA LLUVIA O HUMEDAD. RIESGO DE DESCARGA ELÉCTRICA VISO DE LA FCC: Este equipo puede generar o usar energía de radio frecuencia. Los NO ABRIR cambios o modificaciones realizados en el aparato pueden provocar interferencia perjudicial, a menos que dichas modificaciones estén autorizadas en el manual de PRECAUCIÓN: PARA REDUCIR EL RIESGO DE DESCARGAS ELÉCTRICAS, NO...
- Page 19 Se incluyen Asegúrese de que estén incluidos los siguientes elementos. Unidad principal Micrófono con cable Adaptador de CA Manual Kit de bienvenida Cables de Audio/Video — S2 —...
- Page 20 Ubicación de controles (Delantero) 1. Manija REPEAT) 20. Control de voz automático (Auto 2. Botón Luz (Light) 11. Botón de FUNCIÓN Voice) (FUNCTION) 3. Indicador de 21. Control de BALANCE ENCENDIDO/APAGADO 12. Pantalla (ON/OFF) 22. Control de VOLUMEN 13. Altavoz DEL MICRÓFONO (MIC 4.
- Page 21 Ubicación de los controles (reverso) 27. Conector de SALIDA DE VIDEO (VIDEO OUT) 28. SALIDA DE AUDIO (AUDIO OUT) derecha (R) 29. SALIDA DE AUDIO (AUDIO OUT) izquierda (L) 30. Conector de entrada de CC 31. Compartimiento para pilas CONEXION INSTALACIÓN DE LAS PILAS FUNCIONAMIENTO DE CC 1.
- Page 22 CONEXION Conexión de micrófono(s) Micrófonos: Inserte el enchufe de un micrófono en la entrada para micrófono 1 u y el otro enchufe de micrófono en la entrada para micrófono v (si lo desea). Nota: No arroje o dé golpecitos al micrófono, puede dañar el micrófono o los parlantes.
- Page 23 Conexió Conexión a alimentación de corriente alterna REAR VIEW OF TV VIDEO AUDIO INPUT INPUT Introduzca el cable de alimentación de CA en un tomacorriente de CA con 120 V de CA, 60 Hz. Nota: Haga todas las conexiones antes de RCA cables enchufar a la alimentación de CA.
- Page 24 Funcionamiento Reproducción de un CDG Conecte la unidad como se describió antes; si utiliza CD+G, se recomienda que conecte un televisor. Oprima el botón de ENCENDIDO/APAGADO (ON/OFF) para encender la unidad. Abra el compartimiento de CD e introduzca un CD o un CD+G presionándolo cuidadosamente en el husillo central.
- Page 25 Funcionamiento Reproducción de un CDG (Continuó) Ajuste el volumen a un nivel conveniente, usando el control de VOLUMEN PRINCIPAL. Conecte el/los micrófono/s como se muestra. Ubique el interruptor de ENCENDIDO/ESPERA (ON/ STANDBY) del Control remoto/ Micrófono en la posición de ENCENDIDO (ON).
- Page 26 Funcionamiento Reproducción de un CDG (Continuó) SALTO: Avance o retroceda una pista oprimiendo los botones de Salto 9 / FUNCIÓN REPETIR: Durante la reproducción, presione REPETIR/ PROGRAMAR (REPEAT/ PROGRAM) una vez para que se reproduzca varias veces la canción seleccionada; el indicador Repetir (Repeat) parpadeará.
- Page 27 Funcionamiento Reproducción de un CDG (Continuó) PAUSAR (PAUSE): Durante la reproducción, si desea pausar momentáneamente el disco, oprima REPRODUCIR/PAUSAR/ SINCRONIZAR (PLAY/PAUSE/ PAIR); el indicador REPRODUCIR/ PAUSAR (PLAY/PAUSE) parpadeará. Oprima nuevamente para reanudar la reproducción normal. Oprima DETENER < para detener la reproducción.
- Page 28 Funcionamiento Utilizar un dispositivo Bluetooth Conecte la unidad como se describió previamente. Oprima ENCENDIDO/ APAGADO (ON/OFF) para encender la unidad. Please connect your Music Device Please connect your Music Device Oprima varias veces FUNCIÓN (FUNCTION) para seleccionar Bluetooth; Your Music Device is connected Your Music Device is connected “bt”...
- Page 29 Funcionamiento Utilizar un dispositivo Bluetooth (Continuó) Para controlar su dispositivo Bluetooth desde esta unidad, oprima REPRODUCIR/PAUSAR/ SINCRONIZAR (PLAY/PAUSE/ PAIR) para comenzar la reproducción. Presione REPRODUCIR/PAUSAR/ SINCRONIZAR (PLAY/PAUSE/PAIR) durante la reproducción para pausar la canción. Ajuste el volumen a un nivel conveniente usando el control de VOLUMEN PRINCIPAL (MASTER VOLUME) de esta unidad, así...
- Page 30 Funcionamiento Uso del conector de ENTRADA AUX Conecte la unidad como se describió antes. Oprima el botón de ENCENDIDO/APAGADO (ON/OFF) para encender la unidad. Oprima el botón FUNCIÓN (FUNCTION) varias veces para seleccionar el modo ENTRADA AUXILIAR (AUX IN); aparecerá “AUXILIAR”...
- Page 31 Funcionamiento Uso del conector de ENTRADA AUX (Continuó) Ajuste el control de VOLUMEN DEL MICRÓFONO (MIC VOLUME) hasta el nivel deseado. Al aumentar el nivel de este control se incrementará el volumen de los dos micrófonos. Gire el control de ECO (ECHO) para darle un efecto de eco a su voz.
-
Page 32: Guía De Resolución De Problemas
Guía de Resolución de Problemas Si esta unidad presentara un problema, lea el siguiente cuadro antes de llamar al servicio técnico: No hay energía • La unidad no está encendida; oprima ENCENDIDO/APAGADO (ON/OFF) para encenderla. • Verifique que el adaptador de CA esté conectado de forma segura en la parte trasera de la unidad. -
Page 33: Especificaciones
El nombre de la marca Bluetooth® y los logotipos son marcas registradas propiedad de Bluetooth SIG, Inc., y todo uso que The Singing Machine Company, Inc haga de dichas marcases en virtud de una licencia. Otras marcas registradas y comerciales pertenecen a sus respectivos titulares. -
Page 34: Renseignements Importants De Sécurité
Mises en Garde MISE EN GARDE: AFIN D’ÉVITER TOUT RISQUE D’ÉLECTROCUTION, MISE EN GARDE JUMELER LA LARGEBROCHE DE LA FICHE À LA FENTE LA PLUS LARGE RISQUE DE CHOC ÉLECTRIQUE ET L’INSÉRER COMPLÈTEMENT. NE PAS OUVRIR MISE EN GARDE DE LA FCC: Cet appareil peut générer ou utiliser des fréquences radio. - Page 35 Contenu Contenu de la boîte. Unité Principal Microphone avec câble Adapteur CA Manual D’Emploi Ensemble de bienvenue Câble Audio/Vidéo — F2 —...
- Page 36 Emplacement des commandes (dessus) 1. Poignée 10. Touche PROGRAMME/ 20. COMMANDE VOCALE RÉPÉTER AUTOMATIQUE 2. Bouton pour la Lumière 11. Touche FONCTION 21. Commande BALANCE 3. Indicateur d’alimentation ON/OFF 12. Affichage 22. Commande VOLUME MICRO 4. Touche MARCHE/ 13. Haut-parleur ARRÊT 23.
- Page 37 Emplacement des commandes (arrière) 27. Prise VIDÉO OUT 28. Prise AUDIO OUT (droit) 29. Prise AUDIO OUT (gauche) 30. Prise DC IN 31. Compartiment de pile Branchement Insertion des piles 1. Poussez la porte du compartiment à piles dans le sens des flèches afin d’ouvrir le compartiment à...
- Page 38 Branchement Connexion des microphones Microphones: Connectez le microphone à une prise MIC 1 et à une prise MIC jack 2 (lorsque souhaité). Remarque: Ne pas échapper le microphone car cela peut causer des dommages ainsi qu’aux haut-parleurs. Ne pas faire virevolter le microphone par la cordon car cela peut endommager le câblage encastré.
- Page 39 Branchement Raccordement à l’alimentation CA REAR VIEW OF TV VIDEO AUDIO INPUT INPUT Branchez le cordon d’alimentation CA dans une prise de courant 120 V CA, 60 Hz située à proximité. Remarque: RCA cables Effectuer toutes les connexions avant de brancher le cordon d’alimentation. Connecte à...
- Page 40 Utilisation Lecture d’un CDG Connectez-vous à l’appareil tel que décrit précédemment; si vous utilisez un disque CD+G, il devrait être branché à un téléviseur. Appuyez sur la touche d’alimentation MARCHE/ARRÊT (ON/ OFF) pour allumer l’appareil. Soulevez la porte de CD et insérez un CD ou un CD+G en appuyant doucement sur l’axe central.
- Page 41 Utilisation Lecture d’un CDG (suite) Ajustez le volume à un niveau confortable en utilisant la commande de VOLUME PRINCIPAL (MASTER VOLUME). Connectez le(s) micro(s), puis glissez l’interrupteur MARCHE/ARRÊT (ON/OFF) sur le micro à la position MARCHE. Tournez la commande VOLUME MICRO (MIC VOLUME) au niveau souhaité.
- Page 42 Utilisation Lecture d’un CDG (suite) PASSER: Avancer ou retourner d’une piste à l’autre en appuyant sur les touches de PASSER 9 ou PASSER : . REPEAT (RÉPÉTITION): Au cours de la lecture, appuyez sur la touche PROGRAMME/RÉPÉTER (PROGRAM/REPEAT) une fois pour une lecture répétée de la chanson sélectionnée;...
- Page 43 Utilisation Lecture d’un CDG (suite) Remarque: • Appuyez sur la touche ARRÊT < (STOP) DEUX FOIS pour arrêter et supprimer le programme. PAUSE: Durant la lecture, si vous désirez arrêter le disque momentanément, appuyez sur LECTURE/PAUSE/ JUMELAGE (PLAY/PAUSE/PAIR) ; l’indicateur clignote.
- Page 44 Utilisation Utilisation d’un appareil Bluetooth Connectez-vous à l’appareil tel que décrit précédemment. Appuyez sur la touche d’alimentation MARCHE/ARRÊT (ON/OFF) pour allumer l’appareil. Please connect your Music Device Please connect your Music Device Appuyez plusieurs fois sur le bouton FONCTION (FUNCTION) pour sélectionner Your Music Device is connected Your Music Device is connected le mode Bluetooth ;...
- Page 45 Utilisation Utilisation d’un appareil Bluetooth (suite) Pour contrôler le dispositif Bluetooth à partir de cet appareil, appuyez sur la touche LECTURE/PAUSE/ JUMELAGE (PLAY/PAUSE/PAIR) pour débuter la lecture (l’application de musique doit être allumée). Appuyez sur la touche LLECTURE/PAUSE/ JUMELAGE (PLAY/PAUSE/PAIR);au cours de la lecture pour interrompre la chanson.
- Page 46 Utilisation Utilisation du jack AUX IN Connectez-vous à l’appareil tel que décrit précédemment. Appuyez sur la touche d’alimentation MARCHE/ ARRÊT (ON/OFF) pour allumer l’appareil. Appuyez plusieurs fois sur le bouton FONCTION (FUNCTION) pour sélectionner le mode AUX IN ; “AU” apparait alors sur l’écran.
- Page 47 Utilisation Utilisation du jack AUX IN (suite) Réglez le Commande VOLUME MICRO (MIC VOLUME) au niveau souhaité. Le fait de monter ce réglage augmente le volume du micro. Réglez la commande ÉCHO (ECHO) pour appliquer un effet d’écho à votre voix.
-
Page 48: Guide De Dépannage
Guide de dépannage En cas de problème avec cet appareil, vérifiez les points suivants avant de le faire réparer: Aucune alimentation • L’appareil n’est pas sous tension; appuyez sur la touche MARCHE/ARRÊT (ON\OFF) pour allumer l’appareil. • Assurez-vous que l’adaptateur AC est bien connecté à l’arrière de l’appareil. •... -
Page 49: Caractéristiques Techniques
Le nom de marque et les logos Bluetooth® sont des marques déposées de Bluetooth SIG. Inc. et toute utilisation de ces marques et logos par The Singing Machine Company, Inc. s’effectue sous licence. Les autres marques de commerce et noms de commerce appartiennent à... - Page 50 Responsible Party Information as follow: Company Name?The Singing Machine Company, Inc. Company Name The Singing Machine Company, Inc. Address?6301 NW 5th Way, Suite 2900, Fort Lauderdale, FL 33309, USA Address 6301 NW 5th Way, Suite 2900, Fort Lauderdale, FL 33309, USA...