Table of Contents
Advertisement
Quick Links
OPERATION AND MAINTENANCE INSTRUCTIONS
SPACE HEATER
KS-27A
MODEL
MODEL
IMPORTANT
READ AND UNDERSTAND INSTRUCTIONS BEFORE USING HEATER.
RETAIN INSTRUCTIONS FOR FUTURE REFERENCE.
This heater is designed to be used at altitudes up to 1,300m above sea level. Consult with your dealer otherwise.
SAFETY TIPS . . . . . . . . . . . . . . . . . . . . . . . . . . . . .
FUEL GUIDE . . . . . . . . . . . . . . . . . . . . . . . . . . . . . .
OPERATING CONTROLS AND FEATURES . . . . .
SPECIFICATIONS . . . . . . . . . . . . . . . . . . . . . . . . .
COMPONENT PARTS . . . . . . . . . . . . . . . . . . . . . .
PORTABLE KEROSENE HEATER
RB-250
CONTENTS
1
ASSEMBLY AND OPERATION . . . . . . . . . . . . . . .
3
CARE AND MAINTENANCE . . . . . . . . . . . . . . . . .
4
REPLACEMENT OF PARTS . . . . . . . . . . . . . . . . . .
5
STORAGE . . . . . . . . . . . . . . . . . . . . . . . . . . . . . . .
5
TROUBLESHOOTING . . . . . . . . . . . . . . . . . . . . . .
6
10
11
14
13
15
14
Advertisement
Table of Contents

Related Manuals for Toyotomi RB-250


Summary of Contents for Toyotomi RB-250
- Page 1 PORTABLE KEROSENE HEATER OPERATION AND MAINTENANCE INSTRUCTIONS SPACE HEATER KS-27A RB-250 MODEL MODEL IMPORTANT READ AND UNDERSTAND INSTRUCTIONS BEFORE USING HEATER. RETAIN INSTRUCTIONS FOR FUTURE REFERENCE. This heater is designed to be used at altitudes up to 1,300m above sea level. Consult with your dealer otherwise.
-
Page 2: Safety Tips
TOYOTOMI, the leader in kerosene (paraffin) heater techonlogy, has tested and refined the RB-250 to assure you of long-term safety and satisfaction. Please study the following instructions, use and care for your heater carefully, and it will serve you well for many years. - Page 3 3. DO NOT operate heater without protective guards completely attached. 4. DO NOT use heater to heat or boil water or as a cooking appliance. DO NOT place cooking utensils, tea kettles or any other object on top of heater while in operation. 5.
-
Page 4: Fuel Guide
FUEL GUIDE The RB-250 is designed for use with high-quality kerosene (paraffin) only. Use of low-quality kerosene (paraffin) will cause wick performance to drop, leading to “Iow flame” and “odor problem” conditions. Purchase only kerosene (paraffin) in non-red cans reserved exclusively for kerosene (paraffin) and marked accordingly with the word “KEROSENE (PARAFFIN)”. -
Page 5: Operating Controls And Features
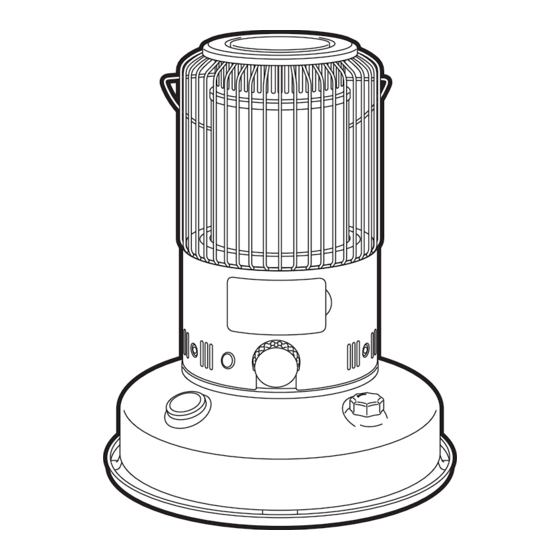
OPERATING CONTROLS AND FEATURES 2. Safety Guard 7 Heat Chamber Handle (Inside) 1. Heat Plus Light 6 Manual Shutt-off 3. Wick Adjuster Knob 4. Fuel Tank Cap 5 Fuel Gauge 1. Heat Plus Light: Especially useful during power failures or other emergencies. 2. -
Page 6: Component Parts
SPECIFlCATlONS TOYOTOMI Portable Kerosene (paraffin) Heater Model RB-250 Heat rating 8,500 BTU/h (2,150 kcal/h) Fuel tank capacity 6.0 L Burning time/tank* 24 Hours Size (W x H x D) 388 x 475 x 388 mm Weight 6.2 kg Igniter Automatic, powered by four (4) “C” size batteries * Depending on wick setting, condition and fuel quality. - Page 7 ASSEMBLY AND OPERATlON lNSPECTlON AND ASSEMBLY NOTE: Save the shipping carton and packing materials for future storage of your heater. 1. REMOVE PACKING MATERIALS Remove all packing materials from your heater and install the guard as follows: CAUTION: Risk of fire. The packing materials are flammable. a) Remove the carrying handle, top plate and packing materials.
- Page 8 FUELING WARNING: Use only clean Kerosene (paraffin). NEVER use gasoline (petrol) or other flammable liquids. ALWAYS extinguish heater before refill heater fuel tank. Fuel heater outside the living area. 1. lnsert the straight tube of the manual fuel siphon into the kerosene (paraffin) container.
- Page 9 LIGHTING NOTE: When you first use your new heater, ignite it out of the living area of your house, either in a garage or an outside area protected from strong drafts. Burn it for about 15 minutes to remove all of the protective oil present on the burner parts.
-
Page 10: Adjusting The Flame
ADJUSTING THE FLAME 1. After lighting, wait for the heat chamber to reach operating temperature. This will take ten-fifteen minutes, after which the flame will be visible through the mica window. 2. CHECK THE FLAME LENGTH Look at the flame and check its length. Flame length is not necessarily even or uniform around the circumference of the center disk. -
Page 11: Care And Maintenance
CARE AND MAINTENANCE As with any good appliance, preventive as well as corrective maintenance is occasionally required. Please read the following section carefully in order to enjoy the greatest benefits from your heater. INSPECTlON OF THE WlCK NOTE: One of the simplest but also the most important components of your heater is the wick. With proper attention, the wick will last at least one heating season and, depending on the quality of the fuel used, possibly longer, it helps to perform routine maintenance operations of the wick. -
Page 12: Cleaning The Heater
3. Repeat step 1 and then shake the heater and make sure the automatic extinguisher worked. REPLACEMENT OF PARTS REPLACING THE WlCK USE ONLY GENUINE TOYOTOMI REPLACEMENT WlCK. SUBSTITUTE WICKS CAN SEVERELY REDUCE PERFORMANCE AND SAFETY. WARNING: Before disassembling your heater, allow it to cool completely. - Page 13 3. Remove the three (3) wing nuts around the wick adjuster. Lift the wick adjuster off the heater while moving it slightly back and forth. 4. Slide two fingers between the wick and the wick adjuster. Lift the pins in the wick off the slots.
- Page 14 9. Tighten the three (3) wing nuts around the wick adjuster. 10. Turn the wick adjuster knob to be sure the wick moves smoothly up and down. AFTER REPLACING THE WICK, CHECK THE OPERATlON OF THE AUTOMATlC EXTINGUISHER. Wick height on position should be 8 mm (5/16 in.) when wick adjuster knob is turned fully cIockwise.
- Page 15 STORAGE At the end of each heating season, or when you do not plan to use your heater for an extended period of time, the following procedures are recommended. 1. CLEAN WlCK AND HEATER Follow directions in item 2 under “INSPECTlON OF THE WlCK”. 2.
-
Page 16: Troubleshooting
TROUBLESHOOTING TROUBLESHOOTING PROBLEM CAUSE SOLUTlON PAGE Wick fails to ignite Out of fuel Check fuel gauge; add fuel if necessary. PROBLEM CAUSE SOLUTlON PAGE Electrode does not spark Check wire connections. Replace batteries. Wick fails to ignite Out of fuel Check fuel gauge;... - Page 17 TOYOTOMI CO., LTD. 5-17, Momozono-cho Mizuho-ku, Nagoya, Japan Printed in Japan www.toyotomi.jp New 10/14 New 06/19 8498000903 1349000902 1349000903...
-
Page 18: Space Heater
كتيب تعليمات التي يمكن نقله كيروسين ال مدفأة التي يمكن نقله كيروسين ال مدفأة SPACE HEATER نموذج أومني RB-250 نموذج أومني (C )نوع (C )نوع نموذج أومني نموذج أومني نموذج أومني نموذج أومني MODEL Omni 230 (C )نوع (C )نوع... - Page 19 ost popular kerosene (paraffin) نصائح السالمة ogy, has tested and refined the نصائح السالمة نصائح السالمة نصائح السالمة نصائح السالمة owing instructions, use and care مراجعة نصائح السالمة هذه مراجعة نصائح السالمة هذه مراجعة نصائح السالمة هذه قبل إيقاد مدفأتكم، يرجى قبل...
- Page 20 .لغرض تنظيم توزيع الحرارة خالل هذه الفترة من بدء عملية التدفئة . األطفال والمالبس واألثاث . األطفال والمالبس واألثاث .وضبط اللهب وهج الت بعناية تعليمات و تبع أ :مالحظة بالنظرالى شدة درجة حرارة سطح المدفأة يجب إبقائه في مكان بعيد عن التماس مع .
- Page 21 تم تصميم المدفأة من نوع .عالي الجودة ال )ستخدام مع الكيروسين(البارافين لإل تم تصميم المدفأة من نوع RCA-37WX RB-250 نخفاض في مستوى أداء الفتيلة إ ن) منخفضة الجودة سوف يؤدي إلى وفي حالة إستخدام الكيروسين (البارافي RCA-37WX نخفاض في مستوى أداء الفتيلة...
- Page 23 نافذة الفتيل ا ر MODEL Omni 230 (TYPE C) MODEL Omni 230 (TYPE C) )كيلو كالوري / ساعة 5820 ( حرارية بريطانية / ساعة المايكا نافذة RB-250 المواصفات المواصفات Igniter لتر لتر المايكا نافذة الوقود زان من أربعة بطاريات جافة...
- Page 24 lNSPECT ATlON NOTE: Save the واإليقاد تجميع ال واإليقاد تجميع ال واإليقاد تجميع ال واإليقاد تجميع ال واإليقاد تجميع ال واإليقاد تجميع ال الفحص والتجميع الفحص والتجميع الفحص والتجميع الفحص والتجميع الفحص والتجميع الفحص والتجميع ter. .نتهاء الموسم أو إنتفاء الحاجة إ...
- Page 25 :تحذير .)الكيروسين نظيفة فقط (البارافين إستخدام .أو السوائل القابلة لالشتعال أخرى ستخدام البنزين ال تقم أبدا بإ دائما يجب إطفاء المدفأة قبل كل إعادة تعبئة خزان الوقود تعبئة الوقود تعبئة الوقود تعبئة الوقود تعبئة الوقود تعبئة الوقود تعبئة الوقود تعبئة الوقود .الوقود...
- Page 26 إيقاد المدفأة وبعيدا عن ومفتوحة جيدة التهوية مالحظة: عند إيقاد المدفأة ألول مرة يجب إيقادها خارج مكان المعيشة في المرآب أو أية منطقة أخرى your house, either in a garage your house, either in a garage your house, either in a garage الة...
- Page 27 ADJUSTING THE FLAME take ten (10) minutes, take ten (10) minutes, ضبط اللهب ضبط اللهب ط اللهب اللهب هب ط اللهب اللهب هب 1. After lighting, wait for the heat chamber to reach operating temperature. This will take ten-fifteen minutes which the flame will be visible through the mica window.
- Page 28 التنظيف والصيانة التنظيف والصيانة التنظيف والصيانة التنظيف والصيانة كما هو الحال مع أي جهاز جيد، المطلوب أحيانا الوقائية وكذلك التنظ يرجى قراءة المقطع الت يرجى قراءة يرجى قراءة المقطع التالي ومن أجل الحصول على أكبر قدرممكن ومن أجل الحصول على أكبر قدرممكن ومن...
- Page 29 ناع قماش بقطعة الوقود وخزان الخارجي الغطاء سطح يتم مسح تست . ال بإستخدام محلول منظف قماش بقطعة البقع إزالة ويمكن حماية بدن المدفأة المصنوع من الكروم Omni 230 Type C_ تنظيف المدفأة تنظيف المدفأة تنظيف المدفأة تنظيف المدفأة تنظيف المدفأة لتلم...
- Page 30 the wick adjuster. Lift the wick adjuster off عن الى األعلى وقم بسحبها ) من جناح مثبت الفتيل ( فل الصواميل األربعة قم ب عن الى األعلى وقم بسحبها ) من جناح مثبت الفتيل ( فل الصواميل األربعة قم ب and forth.
- Page 31 ) األربعة في أماكنهاوشدها بصورة جيدة ( قم بتثبيت الصاموالت ) األربعة في أماكنهاوشدها بصورة جيدة ( قم بتثبيت الصاموالت بعد استبدال الفتيل قم بتدوير مقبض منظم إرتفاع الفتيل للتأكد من أن الفتيل ، يتحرك بسالسة إلى األعلى واألسفل und the wick adjuster. بعد...
- Page 32 التخزين التالية اإلجراءات بتنفيذ ينصح ،الزمن من طويلة لفترة المدفأة ستخدام إل تخطط ال عندما أو ،التدفئة موسم كل نهاية في التخزين أة تنظيف الفتيل والمدف أعٞ اٛغضء ٞٓاٛش التخزين التالية اإلجراءات بتنفيذ ينصح ،الزمن من طويلة لفترة المدفأة ستخدام إل...
- Page 33 الصفحة الحل السبب الخطأ أو المشكلة وإصالحها األخطاء استكشاف .التحقق قياس الوقود. إضافة الوقود إذا لزم األمر إنتهاء الوقود الصفحة الحل السبب الخطأ أو المشكلة .تحقق من الوصالت السلكية. استبدال البطاريات القطب الطهربائي اليقدح وإصالحها األخطاء استكشاف .التحقق قياس الوقود. إضافة الوقود إذا لزم األمر إنتهاء...
- Page 34 شركة تويوتومي المحدودة المحدودة تويوتومي شركة تشو مونوزونو ، اليابان ناغويا ،كو ميزوهو ،تشو موموزونو ، كو، ناغويا، اليابان ميزوهو www.toyotomi.jp اليابان في طبع www.toyotomi.jp نشرة 0538000902 06/19 1349000903...