
Related Manuals for Pyle Home P16LCDD

Summary of Contents for Pyle Home P16LCDD
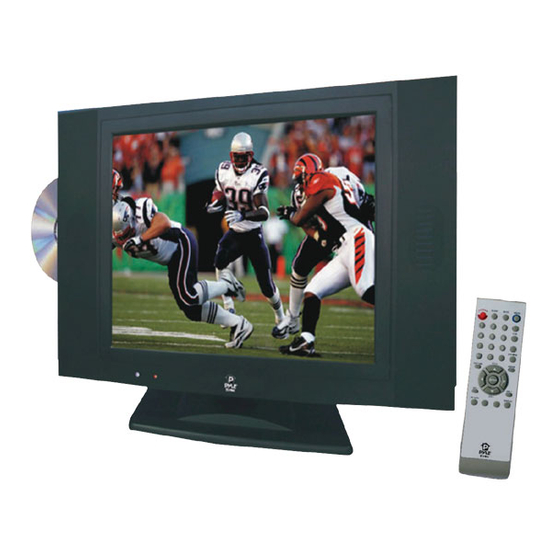
- Page 1 Model:P16LCDD 4:3 DIGITAL LCD-TV-Monitor 15” LCD TELEVISION BUILT-IN DVD PLAYER OPERATING MANUAL www.pyleaudio.com...
-
Page 2: Table Of Contents
...…………………………………………………...…... 5.1 PICTURE SETTING 5.2 AUDIO SETTING…………………………………………………………………………………… 5.3 SOURCE SETTING…………………………………………………………………………………. 5.4 TV PROGRAMMER SEARCH 6. TV / DVD COMBO REMOTE CONTROL...……………………………………… A.Remote control instructions in TV mode………………………………….. B. Remote control instructions in DVD mode………………………………… 7. REMOTE CONTROLS SETUP...………………………………….. Usage Caution:...…..……………..….….. - Page 3 9.2.3 ...………………………………………………………….. VIDEO SETUP ...……………………………………………… 9.2.4 SPEAKER SETUP DIGITAL SETUP ……………………………………………………………………. 9.2.5 10 PLAYING MP3 AND JPEG DISCS………………………………………………………. 11 TROUBLESHOOTING AND ADVICE ...…...…...………………... 12 SPECIFICATIONS...…………………………………….. - 2 -...
-
Page 4: Preface
1 PREFACE Thank you for buying this TV ! Please read this manual thoroughly before operating the monitor. Make sure the monitor was not damaged in transit. Should the monitor is damaged, do no install it and contact your dealer. Check that you have all the accessories according to the model. - Page 5 Heating sources and humidity Keep the monitor dry and away from humidity. Keep the monitor away from heat sources Cleaning and maintenance Unplug the monitor before cleaning it. Do not use solvents or liquids to clean the monitor. Only clean the monitor with a soft and dry cloth. In case of troubleshooting, do not use spare parts other than those suggested by the manufacturer.
-
Page 6: Front, Back, Connections Of Lcd
3 Front , Back , Connexions of LCD Front View Back View and Control Connections - 5 -... - Page 7 Side View DVD Player Control Disc Slot inside (Label side toward user) DVD Function Keys : PLAY / PAUSE : STOP : NEXT TRACK : PREVIOUS TRACK : EJECT DISK BUTTON - 6 -...
-
Page 8: Tv Installation Guide
4. TV INSTALLTION DRAWINGS 4.1 CONNECTION ANTENNAS To ensure good picture and sound, TV antenna system needs to be installed. The antenna system as shown can be sourced from TV equipment shops, which will provide service for correct installation and connection. After installation, insert the 75-ohm antenna plug into the antenna jack as shown.In case of signal of closed circuit TV,... -
Page 9: Pc (Vga) Connexion Drawing
4.4 PC INPUT connection VG A PC Audio - 8 -... -
Page 10: Configuration Of The Lcd
5 CONFIGURATION OF THE LCD 5.1 PICTURE SETTING Press <SYS MENU> key until the screen displays as below. a) Press ► key to access image adjusting programmer. Press ▲ or ▼ key to select Picture Mode, Brightness, Contrast, Saturation ,Sharpness and Hue for required adjusting option. -
Page 11: Source Setting
Press ▲ or ▼ key to select exact menu setting. c) Press ▲ or ▼ key to select <Auto Scan> or <Fine Tune > menu to adjust the TV. d) Press ▲ or ▼ key to access <add/Erase> to add or Erase the channel. -
Page 12: Tv / Dvd Combo Remote Control
6 TV / DVD COMBO REMOTE CONTROL - 11 -... -
Page 13: A.remote Control Instructions In Tv Mode
A. Remote control instructions in TV mode Automatic Switch off Sound switch off Standby button TV- CVBS -SVIDEO- DVD- PC Number Buttons Access to one / two-Digit channel selection System setting menu button Previous CHANNEL Picture mode selection Audio mode selection... -
Page 14: Remote Controls Setup
7 REMOTE CONTROLS SETUP Open the cover AA size batteries, When inserting the batteries, make sure correct polarities as per”+“and ”-“marks on the batteries and within the battery compartment Replace the battery cover 7.1 Battery Usage Caution: To prevent battery leakage which may result in bodily injury or damage to the remote: 1. -
Page 15: The Dvd Setup Menu System
9. THE DVD SETUP MENU SYSTEM 9.1 General Steps of Setup Menu Press the Setup button, the main setup menu appears. When the main menu displayed, the DVD system will auto pause. Press the Left and Right arrow buttons to highlight the icon of the desired page, then press the Down or Right arrow button to activate that page;... -
Page 16: Setup Items Introduction
The system setup options are illustrated below: TV SYSTEM According to the Color System of the TV, you can choose the TV System. AUTO: Choose this settings if your DVD player is connected to a multi-system TV. NTSC: Choose this settings if your DVD player is connected to a NTSC TV. - Page 17 16 : 9 (Wide Screen): Choose this setting if your DVD player is connected to a wide screen TV. If you choose this setting and you don’t have a wide screen TV, the images on the screen may appear distorted due to vertical compression.
- Page 18 If you play a disc recorded in 4:3 format on a wide screen TV, black bars will appear on the left and right side of the screen. You must adjust the screen setting depending on the type of the television you have.
- Page 19 Highlight the AUDIO LANG option, and press the Arrow buttons to choose the audio language you prefer. Press Enter to confirm. If the disc you are playing has that language available, it will output audio in that language; There are multi- optional audio languages: Chinese, English, Japan, French, Spanish, Portuguese, German and Latin.
-
Page 20: Audio Setup
Highlight the MENU LANG option, and press the Arrow buttons to choose the menu language you prefer. Press Enter to confirm. If the disc you are playing has that language available, it will displays menu in that language; There are multi- optional menu languages: Chinese, English, Japan, French, Spanish, Portuguese, German, and Latin. -
Page 21: Video Setup
9.2.3 VIDEO SETUP The video setup options are illustrated below: BRIGHTNESS Use the Up and Down arrow button to move the scroll and adjust the brightness. CONTRAST Use the Up and Down arrow button to move the scroll and adjust the contrast. - 20 -... -
Page 22: Speaker Setup
Use the Up and Down arrow button to move the scroll and adjust the hue. SATURATION Use the Up and Down arrow button to move the scroll and adjust the saturation. 9.2.4 SPEAKER SETUP The speaker setup options are illustrated below DOWNMIX Use the Up and Down arrow button to move the scroll and adjust the saturation. -
Page 23: Digital Setup
9.2.5 DIGITAL SETUP The digital setup options are illustrated below: DUAL MONO (LEFT + RIGHT) Choose this option to setup the L and R mono output mode; There are four modes in this option: STEREO, MONO L, MONO R, and MIX MONO; It is mainly used in karaoke mode. - 22 -... -
Page 24: Playing Mp3 And Jpeg Discs
10 . Playing MP3 AND JPEG DISCS Place a MP3 / JPEG disc into the tray, and the player will auto search the directories saved MP3 / JPEG files. After searching, it will auto go to the first directory saved MP3 files (to the disc containing both mp3 and jpeg files; To the disc containing single type of files, it will auto go to the first directory) and play the first song in the directory (“01:”... - Page 25 VI. When playing JPEG pictures, press the Program button to choose the pictures switched mode. There are 17 switch modes; Press Program repeatedly to activate the function and choose the required switch mode: Spread from Up to Down, Spread from Down to Left, Spread from Left to Right, Spread from Right to Left, Spread from Left Up to Right Down, Spread from Right Up to Left Down, Spread Left Down to Right Up, Spread from Right Down to Left Up, Spread from Center to Up / Down, Fold from Up / Down to Center, Fold from Left / Right to Center,...
- Page 26 CARD READER FUNCTION On DVD mode, plug in your U drive, SD, MS, MMC into the slot show in fiqure1. Fiqure 1. SD/MS/MMC The unit will detect the files automatically and show the result on the screen as figure 2. Figure 2.
-
Page 27: Troubleshooting And Advice
May be the result of an electrical wave disturb from other TV, Computer and Game machine or Radio The cables of the antenna are not correctly plugged in. Please check the batteries order and alignment. -
Page 28: Specifications
12. SPECIFICATIONS Screen Size Display Type Resolution(Pixel) Brightness Color Contrast Ratio View Angle(H/V) Aspect Ratio Power Source TV System Video Input Format Antenna Input Audio Output Video S-Video Input Audio (Videos-Video-PC) Disc Physical Format DVD Video Output Format Video Decompression...