Advertisement
- 1 Scope of delivery
- 2 Position of the rating label
- 3 Important safety instructions
- 4 Remote control
- 5 Main unit components
- 6 Placement
- 7 Connecting the soundbar
- 8 Multiroom audio
- 9 Basic Operation
- 10 External speakers
- 11 Bluetooth Operation
- 12 USB Operation
- 13 12V Trigger
- 14 Chromecast built-in
- 15 Dolby Atmos
- 16 Spotify
- 17 Software update
- 18 Apps
- 19 Troubleshooting
- 20 Technical data
- 21 Disposal
- 22 Documents / Resources
Scope of delivery
Carefully unpack the device and make sure all accessories are present:
- Soundbar
- Power cable
- HDMI cable
- Remote control (incl. 2 x CR2032 batteries)
- Quick start guide
- Safety instructions
- Technical data sheet
Position of the rating label
Label with model number and operating voltage can be found on the bottom of the product.
Important safety instructions
Attention: Read this page carefully to ensure safe operation of the device.
Follow all safety and operating instructions when using this product.
You should keep the safety and operating instructions for future reference.
You should strictly follow all warnings provided on the product and listed in the operating instructions.
Explanation of symbols
 Double Insulated (Class II) Equipment. This electrical appliance has been designed in such a way that it does not require a safety connection to electrical earth (ground).
 This symbol indicates risks caused by high voltages.
 This symbol is to alert the user to other, more specific risks.
 This symbol indicates dangers caused by the development of fire.
Installation
Placement
Place the unit on a stable, even surface.
Do not place this unit close to strong magnetic fields.
Cables
Lay the power cables so that they cannot be damaged. The power cable may not be kinked or laid over sharp edges, stood on or exposed to chemicals; the latter also applies to the system as a whole. A power cable with damaged insulation can cause electric shocks and poses a fire risk. As such, it must be changed before the unit is used again.
Do not use this device near water
The device should never be exposed to water droplets or water splashes, such as those found near a bathtub, wash basin, kitchen sink, washing machine, wet basement or swimming pool. Never place containers filled with liquids, such as e.g. flower vases, on the device.
Ventilation
Slots and openings in the housing are used to ventilate the device to ensure reliable operation of the device and to protect the device from overheating. Do not block the ventilation holes. Install the device according to the manufacturer's instructions. Never block the ventilation holes by placing the device on a bed, sofa, rug, or similar soft surfaces. This device should not be installed in a bookshelf or built-in wardrobe unless adequate ventilation is ensured.
Heat
Do not install the device near hot surfaces, such as radiators, fan heaters, stoves or other devices (including amplifiers) that can be hot. Never place objects with open flame, such as candles or lanterns, on or near the device. The installed batteries should not be exposed to excessive heat such as direct sunlight, fire or the like.
Accessories
Use only the accessories specified by the manufacturer.
Network connection
Please make sure that the firewall function is activated at your network access point (router). Consult your router's instruction manual.
Usage
Intended use
This device is intended exclusively for the reception and playback of sound signals.
Remote control
Exposing the remote control sensor to direct sunlight or high-frequency fluorescent light may cause malfunction. In such cases, you should move the system to a different location to avoid such malfunction.
The supplied batteries are intended for functional testing and may have a limited lifetime. If the range of the remote control decreases, replace the old batteries with new ones.
Overload
Never overload mains sockets, extension cords or multiple sockets, otherwise there is a risk of fire or electric shock.
Thunderstorm
The device should be disconnected from the mains during thunderstorms and if it is not used for a long time.
Penetration of foreign material and liquid
Be careful not to allow foreign material or liquid to enter this device through ventilation holes, otherwise it may come into contact with high voltage components or short circuit resulting in a fire or electric shock. Never spill liquids of any kind on this device.
Risks associated with high volume
The device is not designed for listening with headphones. To prevent possible hearing damage, do not listen at high volume for long periods.
Disconnection from power supply
The power button does not completely disconnect the power supply in any position. To completely disconnect the device from the mains, unplug the mains cable from the socket.
The mains plug must be easily accessible so that the unit can be disconnected from the mains at any time.
Maintenance
Device maintenance
Never attempt to carry out the maintenance of this device yourself, because live parts can be exposed through the openings or by removing covers, contacting which can be hazardous. Leave all maintenance to qualified service personnel.
Clean only with a dry cloth!
Unplug the mains adapter of this device from the mains socket before cleaning this product. Never use liquid cleaning detergents or cleaning sprays. Use only a damp cloth for cleaning.
Batteries

Do not ingest battery!
The remote control supplied with this product contains a coin cell battery. If the coin cell battery is swallowed, it can cause severe internal burns in just 2 hours and can lead to death.
Keep new and used batteries away from children.
If the battery compartment does not close securely, stop using the product and keep it away from children.
If you think batteries might have been swallowed or placed inside any part of the body, seek immediate medical attention.
Risk of explosion if the batteries are replaced with the wrong type.
Do not heat or disassemble batteries. Never throw batteries into fire or water.
Do not carry or store batteries with other metallic objects. The batteries could short circuit, leak or explode.
Never recharge a battery unless it is confirmed to be a rechargeable type.
When the Remote Control is not to be used for a long time (more than a month), remove the battery from the Remote Control to prevent it from leaking.
If the batteries leak, wipe away the leakage inside the battery compartment and replace the batteries with new ones.
Do not use any batteries other than those specified.
Repair
Damages requiring repair
Maintenance and repair work should only be carried out by a qualified customer service. Maintenance/repair is required if the device has been damaged (e.g. the mains adapter) if liquid has entered the device, if objects have entered the device, if the device has been exposed to rain or moisture, when it stops working properly or has fallen down.
To minimize the risk of electric shock, fire, etc.
Do not remove screws, covers or body parts.
Automatic energy saving function
The device is equipped with an automatic energy saving function. This switches the device to standby mode within 15 minutes if it is played at a very low volume or if the device is muted. Please note that the setting can´t be changed.
EU Declaration of Conformity
Hereby, Loewe Technology GmbH declares that the radio equipment type Loewe klang bar3 mr complies with Directive 2014/53/EU. The full text of the EU declaration of conformity is available at the following Internet address: https://www.loewe.tv/int/support
This product can be used across all EU member states.
Due to the 5 GHz frequency range of the built-in WLAN module, use in the following countries is only permitted inside buildings:
| AT | BE | BG | CZ | DK | EE | FR | DE | IS | IE | IT |
| EL | ES | CY | LV | LI | LT | LU | HU | MT | NL | NO |
| PL | PT | RO | SL | SK | TR | FI | SE | CH | UK | HR |
Remote control


Sound Mute / Unmute.

Switches the soundbar on or switches to standby mode.

Turns on/off the night mode.
Press and hold to turn the display on / off (off by default). This feature displays additional information on the front panel display in certain situations.

Switches between surround sound modes.
Press and hold to open the speaker level adjustment.

Press to change input source.
Press and hold to switch on/off DTS® Virtual: X™ and DTS® Neural: X™.
Press and hold in standby mode to show the software version on the display.

Sound presets - choose from preset audio modes:
OFF, SPEECH, CLASSIC, POP, FILM, MUSIC.
Press and hold in standby mode to adjust distance between listening position and speakers.

Skip to the previous audio track in USB / Bluetooth / PLAY-Fi mode.

Skip to the next audio track in USB / Bluetooth / PLAY-Fi mode.

Play/pause audio track in USB / Bluetooth / PLAY-Fi mode.
Press and hold to activate the pairing function in the Bluetooth mode or disconnect the existing paired Bluetooth device.
Press and hold for 8 seconds in standby mode to restore the factory settings.

Reduce the volume level.

Increase the volume level.

Increase / decrease the treble level.

Increase / decrease the bass level.
First time use
The unit has a pre-installed lithium 2 x CR2032 battery. Remove the protective tape to activate the remote control battery.

- Press and slide the back cover to open the battery compartment of the remote control.
- Remove the protective tape.
- Push the battery cover back into place.
Replacing the remote control batteries
The remote control requires 2 pcs of CR2032, 3V Lithium batteries. Press and slide the back cover to open the battery compartment of the remote control.

- Use a tool (such as the battery compartment cover) to pry up the groove between the two batteries to remove the old batteries.
- Insert the new batteries from the side and push them firmly into the original battery position. Make sure the (+) side of the battery is facing up.
- Push the battery cover back into place
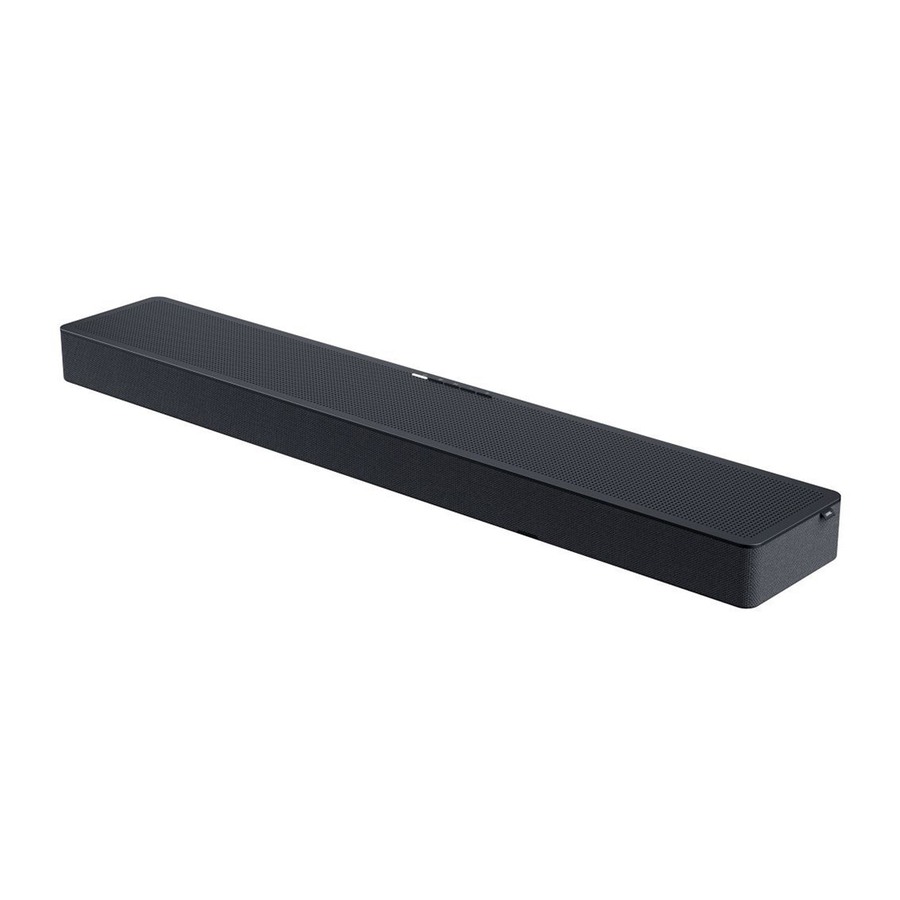
Main unit components
Main unit front panel

![]() (Standby) button/indicator – Switches the soundbar on or switches to standby mode.
(Standby) button/indicator – Switches the soundbar on or switches to standby mode.
LED indicator colour informationLED colour Status ![]()
WhiteStandby mode ![]()
GreenReceiving PCM / AUX source ![]()
BlueBluetooth mode ![]()
TurquoiseDecoding Dolby Audio ![]()
PurpleDecoding Dolby Atmos ![]()
RedDecoding DTS/DTS:X ![]()
YellowUSB mode / MP3 playback ![]()
OrangePlay-Fi / Multiroom mode ![]() (Source) button - Press to change input source.
(Source) button - Press to change input source.
Press and hold in standby mode to show the software version on the display.![]() (Play/Pause) button - Play/pause audio track from USB / Bluetooth / Play-Fi sources.
(Play/Pause) button - Play/pause audio track from USB / Bluetooth / Play-Fi sources.
Press and hold to activate the pairing function in Bluetooth mode or disconnect the existing paired Bluetooth device.
Press and hold for 8 seconds in standby mode to restore the factory settings.- /+ (Volume) button – Reduces/increases the volume level.
Press both buttons simultaneously to mute / unmute the soundbar. - Front panel display.
- Remote control sensor - Point the remote control at the remote control sensor to operate the system.


Main unit rear panel

- Rear flap – You will need to remove the rear flap of your soundbar before using external speaker switches.
- External speaker switches - Use these switches to connect additional external speakers as SUB / REAR / FRONT / CENTRE channel. Set the switch to SMALL for small speakers, LARGE for large speakers. To disable the speaker for a specific channel, set the switch to OFF.
- PAIRING button - for pairing with external wireless speakers.
- WPS (Wi-Fi Protected Setup) button/indicator – triggers Wi-Fi setup for Play-Fi. Press and hold the button for 3 seconds to activate the WPS mode.
LED indicator state Status LED slowly pulsing Wi-Fi Access Point (AP) mode LED flashes twice Wi-Fi Protected Setup (WPS) mode LED is on Connected / Pairing successful
Press and hold the button for 8 seconds to activate the AP mode. - 6x cinch output – for external amplifier or active speakers.
- AUX IN – connect to the audio source via 3.5mm audio cable.
- OPTICAL – connect to the digital (optical) output of an external device.
- USB – connect a USB storage device.
- HDMI OUT (TV eARC/ARC) – connect to the HDMI ARC/eARC jack on a TV.
- HDMI-IN 1 / HDMI-IN 2 – connect to the HDMI output of an external devices (e.g. game consoles, DVD and Blu-ray players).
- 12V trigger - wake up a connected AVR/amplifier or active speaker system from standby when the soundbar is turned on.
![]()
Do not connect the headphones to the 12V trigger! Do not connect any external device that does not support the 12V trigger function, otherwise you may damage or destroy the device! - AC IN – connect to the power supply.
Placement
Place the soundbar on a stable even surface.
Place the soundbar on a table underneath the TV. For best experience place the soundbar as close as possible to the screen.
Below is an example of the correct placement.

You may also buy one of available setup solutions from your Loewe dealer:
- Loewe wall mount klang bar
- Loewe spacer
Connecting the soundbar
Before you make or change any connections, make sure that all devices are disconnected from the power outlet.
Connecting with HDMI
Option 1 - eARC/ARC (enhanced / Audio Return Channel)
Your klang bar supports HDMI with enhanced Audio Return Channel (eARC/ARC). If your TV is HDMI ARC compliant, you can control your klang bar via HDMI CEC and transmit TV sound to your klang bar by using a single HDMI cable.

- On your TV, turn on HDMI-CEC operations.
- Using a High Speed HDMI cable (included), connect the HDMI OUT (TV eARC/ARC) connector on your Soundbar to the HDMI ARC connector on the TV. The HDMI ARC connector on the TV might be labeled differently. For details, see the TV user manual.
- "eARC/ARC" appears on the display of the soundbar and the soundbar plays the TV sound. When the TV sound is not output, press the
![]() (Source) button repeatedly until you see eARC or ARC on the display and TV sound is played.
(Source) button repeatedly until you see eARC or ARC on the display and TV sound is played.
When HDMI ARC connection is properly set up, you can enjoy these features:
- The soundbar turns on automatically when you turn on the TV.
- The soundbar turns off automatically when you turn off the TV.
- You can mute/unmute or adjust the volume of the soundbar using the TV remote control.
Note
- Your TV must support the HDMI-CEC and ARC function. HDMI-CEC and ARC must be set to On.
- The setting method of HDMI-CEC and ARC may differ depending on the TV. For details about ARC function, please refer to your TV operating instructions.
- Only cables compatible with HDMI version 1.4 or higher can support the ARC function. We recommend using the included HDMI cable.
- For the eARC function, use the HDMI cable that came with the soundbar or look for a cable marked "with Ethernet".
- Some 4K HDR TVs require the HDMI input or picture settings to be set for HDR content reception. For further setup details on HDR display, please refer to the operating instructions of your TV.
Option 2 - Standard HDMI
If your TV is not HDMI ARC-compliant, connect your Soundbar to the TV through a standard HDMI connection.

- Use an HDMI cable to connect the soundbar's HDMI IN (1 or 2) connector to your external devices (e.g. game consoles, DVD players and blu-ray).
- Use an HDMI cable to connect the soundbar's HDMI OUT (TV eARC/ARC) connector to the TV's HDMI IN connector.
Note
If your TV does not support HDMI ARC and you wish to play sound from TV on the soundbar, you will need to use alternative connection (e.g. Optical or Analogue).
Connecting with an optical cable
Using an optical cable (not included), connect the OPTICAL connector on your soundbar to the OPTICAL OUT connector on the TV or other device.

- The digital optical connector might be labeled SPDIF or SPDIF OUT.
- This connection method only supports up to 5.1 channels of audio. Dolby Atmos is not supported.
- The soundbar will not turn on automatically when the TV is switched on.
- Volume must be adjusted manually using the soundbar remote control/buttons.
Connecting with an analogue audio cable
Option 1

Use a 3.5mm to 3.5mm audio cable (not included) to connect the TV's or external audio device headphone socket to the AUX IN socket on the unit.
Option 2

Use an RCA to 3.5mm audio cable (not included) to connect the TV's audio output sockets to the AUX IN socket on the unit.
- The soundbar will not turn on automatically when the TV is switched on.
- Set the TV to adjusted/variable volume for analogue output. Please refer to the TV manual.
Connecting the power
Note
- Before connecting the AC power cord, ensure you have completed all other connections.
- Risk of product damage! Ensure that the power supply voltage corresponds to the voltage printed on the underside of the unit.
- Connect the mains cable to the AC IN Socket of the soundbar and then into a mains socket.
![]()

Multiroom audio
This soundbar can be used as part of multiroom speaker setup. This means that the same music can be played from your soundbar and other compatible speakers simultaneously throughout your home.
To use this feature, make sure the soundbar and your smartphone / tablet are on the same network. You can use Chromecast, Airplay 2 or DTS Play-Fi app to control compatible multiroom speakers. You can then play the music on multiple speakers at the same time, assign speakers to different groups, control the volume individually, or use master volume to change the volume on all speakers at the same time.
Connecting to Wi-Fi
Wi-Fi setup via WPS
If your router has Wi-Fi Protected Setup (WPS), you can set up the connection without entering a password.
- Press and hold the WPS button until you hear a tone and the Wi-Fi indicator will flash twice continuously.
- Press the WPS button on the router. The button is usually marked with the WPS logo.
Note
- WPS is not a standard feature of all routers. If your router does not have WPS, follow AirPlay or Google Home setup.
- Press the WPS button once if you want to exit the WPS mode or it will automatically exit after 2 minutes.
AirPlay setup
Use AirPlay to set up the Wi-Fi connection of iOS device (iOS7 or later) and soundbar.
- Press and hold the WPS button located at the rear side of soundbar for 8 seconds to trigger the Wi-Fi connection until the speaker makes a second tone, and then release the button.
- Wait until the Wi-Fi light indicator turns from a fast blink to a slow pulse. A slow pulse indicates that the speaker is entering the AirPlay setup mode.
- On your iOS device go to Settings > Wi-Fi > Setup new AirPlay speaker [Play-Fi device (xxxxxx)]
- Soundbar will be automatically recognized as Airplay device. Tap on [Set up new AirPlay speaker].
- Tap on [Show Other Networks...] and select your home network to which you want soundbar to connect.
- Give soundbar a proper name. Press "next" to connect klang bar with the selected network.
- After a successful Wi-Fi connection, the Wi-Fi light indicator stops pulsing and stays on. After setting up this product on your Wi-Fi network, you can control it from any smartphone or tablet on the same network.
- If you're having trouble setting up Wi-Fi, check out the myLoewe app for more detailed information on the setup process. Use the QR code from the "Apps" chapter.
Google Home setup
- Download the Google Home app on your mobile device.
- iPhone/iPad only: Turn on your mobile device's Bluetooth.
- Press and hold the WPS button located at the rear side of soundbar for 8 seconds to trigger the Wi-Fi connection until the speaker makes a second tone, and then release the button.
- Wait until the Wi-Fi light indicator turns from a fast blink to a slow pulse. A slow pulse indicates that the speaker is entering the Wi-Fi setup mode.
- Open the Google Home app.
- Follow the steps to set up your device.
If you can't find the steps to set up your soundbar:
- At the top left of the Google Home app home screen, tap Add + > Set up device > New device.
- Follow the setup steps.
Multiroom mode
By pressing (Standby) on the soundbar or remote control while soundbar is on, it will enter default standby mode. In this standby mode all network functions will be turned off.
It is possible to activate the multiroom mode, where Wi-Fi is always on and DTS Play-Fi and AirPlay2 are also available. This mode is recommended if you want to use the soundbar as a multiroom device that can be woken up remotely at any time.
Please note that multiroom mode has higher power consumption than standard standby.
To activate / deactivate multiroom mode, press -> -> on the remote control.
Basic Operation
Turn ON and OFF
When you first connect the unit to the mains socket, the unit will be in standby mode. The indicator will light up white.
Auto Standby
The unit will automatically switch to standby mode after about 15 minutes if the TV or the external device is disconnected (or USB, Bluetooth, multiroom function playback is paused) or turned off.
Automatic Wake up
If the unit is connected to the TV or external device with an HDMI cable, the unit turns on automatically when the TV or external device is turned on.
Note
- For automatic wake up, the TV or external device must support HDMI CEC function and must be activated. Read the operating instructions of your TV/external device.
Input source
Press the (Source) button repeatedly on the unit or on the remote control to select BT (Bluetooth), HDMI 1, HDMI 2, ARC, OPT (Optical), AUX, USB mode. The display shows the selected source.
Volume control
Press +/- (Volume) to increase or decrease a volume level. To mute the sound, press (Mute). To restore the sound, press (Mute) again or press +/- (Volume).
Sound presets
Press the (Sound presets) button on the remote control to select the desired pre-set sound effect: OFF, SPEECH, CLASSIC, POP, FILM, MUSIC.
Equalizer (Bass/Treble)
Press the bass +/- buttons on the remote control to adjust bass level (BAS -12 ~ BAS +12).
Press the treble +/- buttons on the remote control to adjust treble level (TRB -12 ~ TRB +12).
All settings (bass/treble levels) will be stored individually for every sound preset.
Surround Sound Mode
Experience immersive audio in surround mode.
Press the (Surround) button on the remote control to change the surround mode.
STEREO - only the left and right channels are used.
DUAL STEREO - stereo sound will be played on front and rear speakers. With the dual stereo function, you can use the rear speakers by duplicating a content of the front channels to the rear speakers.
Note: Only available when rear channels are configured.
PANORAMA - only the left, right and centre channels are used.
SURROUND - all channels are used, including virtualization.
Night Mode
Press the (Night) button on the remote control to turn on/off night mode. This function ensures that there is less dynamic between quiet and loud sounds in movies. Recommended for late night listening.
Display
Press and hold (Night) for 3 seconds to turn the display on / off (off by default). This feature displays additional information on the front panel display in certain situations.
Factory Reset
Resets the device to the default settings. In standby mode, press and hold the button for 8 seconds. "RESET" appears on the display and the device returns to the original settings.
Software version
To display the current klang bar software version, press and hold the (Source) button in standby mode. The software version will appear on the display.
External speakers
External speaker switches
Remove the rear flap of your soundbar before using the switches.
Use these switches to configure additional external speakers as SUB / REAR / FRONT / CENTRE channel. Set the switch to SMALL for small speakers (120Hz - 20kHz), LARGE for large speakers (20Hz - 20kHz). Setting SUB to LARGE will add +6dB more sound pressure than SMALL. To disable the speaker for a specific channel, set the switch to OFF.

Connecting Loewe Wireless Digital Audiolink (WDAL 2.0) speakers
You can wirelessly connect up to 6 additional speakers that support WDAL 2.0 to the soundbar. To connect a WDAL 2.0 compatible speaker to the soundbar, you must:
- Remove the rear flap on the soundbar and press and hold the PAIRING button on the soundbar.
- Press and hold the PAIRING button on the WDAL 2.0 speaker. After successful pairing, "P-OK" will appear on the display of the soundbar.
- After successful pairing, configuration of the reproduced channel is to be selected on the speaker: Front left, Front right, Centre, Rear left, Rear right. Please refer to the speaker manual.
- Depending on the type of speaker, set the switch on the back of soundbar corresponding to the selected speaker to SMALL or LARGE.
Recommended setup for Loewe speakers:
klang mr1: SMALL
klang mr3: LARGE
klang mr5: LARGE
For details on setting the external speaker to pairing mode, changing its role, and whether to select SMALL or LARGE on the soundbar switch, please refer to the user manual of the speaker.
Connecting wired speakers
Aside from wireless speakers, analogue amplifiers or active speakers can be connected to the soundbar via the 6 cinch outputs on the rear. Only active speakers or external analogue AVRs/amplifiers can be connected to the soundbar. The soundbar is not able to power passive speakers by itself. Please refer to the user manual of the amplifier for more information about connecting passive speakers.
Please connect the speakers to the correct soundbar outputs according to the speakers position in your room.

- REAR LEFT (white coloured connector) – connect rear left speaker
- FRONT LEFT (white coloured connector) – connect front left speaker
- SUB – connect a subwoofer
- CENTER – connect front centre speaker
- REAR RIGHT (red coloured connector) – connect rear right speaker
- FRONT RIGHT (red coloured connector) – connect front right speaker
Depending on the type of speaker, set the switch on the back of soundbar corresponding to the selected speaker to SMALL or LARGE.
Volume offset
If you're experiencing speaker level mismatch, the soundbar supports different volume offsets for each channel. You can adjust the overall volume of each speaker individually:
- To enter the menu, press and hold
![]() (Surround) button on the remote control. FL appears on the soundbar display and the corresponding channel starts to play reference noise.
(Surround) button on the remote control. FL appears on the soundbar display and the corresponding channel starts to play reference noise. - Use + / - button to change the volume offset of the selected channel.
- Use
![]() /
/ ![]() buttons to select a channel.
buttons to select a channel. - Switch between all channels and adjust the volume until all channels are equally loud.
Display abbreviations explained:
FL – front left speaker
FR – front right speaker
SL – rear left speaker
SR – rear right speaker
SUB – subwoofer
CEN – centre speaker
Distance adjustment
External speakers are usually not evenly spaced around the listener. For example, the front speakers may be further away than the rear speakers. Due to a relatively slow speed of sound, an audio output from different speakers may reach the listener out of sync.
To avoid this, you can synchronise the speakers by specifying the distance of each speaker from the listening position.
Follow these steps to set the distance:
- Press and hold
![]() (Equalizer) button for 3 seconds on the remote control. FL appears on the soundbar display.
(Equalizer) button for 3 seconds on the remote control. FL appears on the soundbar display. - Use the + / - button to change the distance of the selected speaker from the listening position.
- Use
![]() /
/ ![]() buttons to select a speaker.
buttons to select a speaker.
Example: when the display shows "FL3,0", it means that the current set distance for the left front speaker is 3 meter. You should now measure the distance from this speaker to the listening position and adjust it.
For example, if the distance is 2,5 meters, press the + button until "FL2,5" is displayed. When you have finished adjusting this speaker, press the button and adjust the distance for the next speaker.
Note: In this way, you can also make a correction if there are echo problems due to different signal processing times of the connected devices.
Bluetooth Operation
Connect the soundbar to a Bluetooth device (such as an iPad, iPhone, iPod touch, Android phone, or laptop) via Bluetooth, and then you can listen to audio files stored on the device through the soundbar.
- Press the
![]() (Source) button on the unit or remote control repeatedly to switch the soundbar to BT (Bluetooth) mode.
(Source) button on the unit or remote control repeatedly to switch the soundbar to BT (Bluetooth) mode. - Turn on Bluetooth on the smartphone, search for and select "klang bar3 mr" to connect. For information on enabling Bluetooth, see the user guide of the Bluetooth device.
- Wait until you hear the sound from the soundbar.
Select and play audio files or music on your Bluetooth device.
Depending on your device, you can press![]() /
/ ![]() on the remote control to skip a track or press
on the remote control to skip a track or press ![]() to pause/resume playback.
to pause/resume playback. - To exit Bluetooth, select another source.
When you switch back to Bluetooth mode, the Bluetooth connection is re-established.
To connect the soundbar to another Bluetooth device, press and hold the![]() button on the remote control to disconnect the currently connected Bluetooth device.
button on the remote control to disconnect the currently connected Bluetooth device.
Note
- The minimum requirements for a Bluetooth device are: Bluetooth profile A2DP, AVRCP and Bluetooth version 4.2 + EDR
- The maximum operating range between the soundbar and a Bluetooth device is approximately 10 meters.
- Compatibility with all Bluetooth devices is not guaranteed.
- The music streaming may be interrupted by obstacles between the device and soundbar, such as wall, a metal case covering the device, or other devices in the vicinity that operate on the same frequency.
USB Operation
- Insert the USB device.
![]()
- Press
![]() (Source) on the unit or remote control repeatedly to select the USB mode.
(Source) on the unit or remote control repeatedly to select the USB mode. - During playback, press
![]() to start / pause / resume playback. Press
to start / pause / resume playback. Press ![]() /
/ ![]() to skip to the previous or next track.
to skip to the previous or next track.

Note
This product may not be compatible with certain types of USB storage devices.
- If you use a USB extension cable, USB hub or USB multifunctional card reader, the USB storage device may not be recognized.
- Do not remove the USB storage device while reading files.
- The unit can support USB devices with up to 32 GB of memory.
- This unit can only play MP3.
12V Trigger

The 12V trigger is a soundbar output that can wake up a connected AVR/amplifier or active speaker system from standby when the soundbar is turned on. To connect the soundbar and an external device, use only a mono TS (tip/sleeve) cable with 3.5mm jack.


Do not connect the headphones to the 12V trigger! Do not connect any external device that does not support the 12V trigger function, otherwise you may damage or destroy the device!
Only connect external devices that have a 12V trigger input and their user manual explicitly states that waking via the 12V trigger is supported. Please refer to the user manual of the external device for more information on connecting via the 12V trigger.
Chromecast built-in
This soundbar supports Chromecast built-in feature that allows you to cast music from Chromecast compatible apps to your soundbar. To use this feature, make sure the soundbar and your smartphone / tablet are on the same network. Start playing music on a Chromecast-enabled app and cast it to your soundbar simply by tapping the ![]() (cast) button and selecting the soundbar from the list.
(cast) button and selecting the soundbar from the list.
Dolby Atmos®
Dolby Atmos® gives you immersive listening experience by delivering sound in three dimensional space, and all the richness, clarity, and power of Dolby sound.
For more information, please visit dolby.com/technologies/dolby-atmos
For using Dolby Atmos®
Dolby Atmos® is available only in HDMI and eARC mode.
For the details of the connection, please refer to "Connecting with HDMI" chapter.
- To use Dolby Atmos® in HDMI ARC mode, your TV has to support Dolby Atmos® and eARC.
- Make sure that "No Encoding" or "Passtrough" is selected for bitstream in the digital audio output of the connected external device (e.g. Blu-ray, TV etc.).
Note
The full Dolby Atmos® experience is only available when the klang bar is connected to the source via a High Speed HDMI cable. You can also use provided cable.
Dolby formats appear on the front panel display only when the display function is turned on. Press and hold to turn on / off the display function.
The klang bar will still function when connected via other methods (such as a Digital Optical cable) but these are unable to support all of the Dolby features. Given this, our recommendation is to connect via HDMI, in order to ensure full Dolby support.
Spotify
Use your phone, tablet or computer as a remote control for Spotify. Go to spotify.com/connect to learn how.
The Spotify Software is subject to third party licenses found here: www.spotify.com/connect/third-party-licenses
Software update
To upgrade soundbar firmware
- Download the latest software from the website www.loewe.de.
- Extract the file to the USB root folder.
- Connect USB to the soundbar while in power-on mode.
- Switch to USB source on the soundbar.
- The installation starts and the display shows the update progress.
- Warning: It may take a few minutes for the software to update. Do not unplug your speaker, turn off the device, or disconnect the USB stick or network during the update. These actions can potentially destroy your soundbar.
- When the update is complete, the display turns off.
- Disconnect the soundbar from the mains and remove the USB.
- After one minute, connect the soundbar back to the mains.
The soundbar is now updated to the new software version.
To upgrade the multiroom function of your soundbar
- Download and install the DTS Play-Fi app on your mobile device.
- Connect the soundbar to the Wi-Fi.
- If new Play-Fi software is available, the application notifies you.
- Follow the instructions in the application to run the multi-room feature update.
It may take a few minutes for the software to update. Do not unplug your speaker, turn off the device, or disconnect the USB stick or network during the update. These actions can potentially destroy your soundbar.
Apps
Scan the QR code below with your phone and download the recommended app.

The "my Loewe" app is an entry point to the Loewe world and gives you access to all user manuals for your Loewe products.
Troubleshooting
In the event of a device failure, we recommend that you check the list below before calling the helpline.
| Problem | Possible cause | Remedy/notes | ||
| The system does not respond to any button press | A software error may have caused the device to stop receiving commands from the buttons, and the device must be restarted by unplugging it. | Unplug the unit from the power supply for a few minutes, then plug it in again. | ||
| No sound from the soundbar. |
|
| ||
| Echo between external speakers | Uneven placement of speakers around the listener or different signal processing times of the connected devices. | Adjust the distance settings of the speakers. See the chapter "Distance adjustment". | ||
| A Bluetooth device cannot connect to the soundbar. |
|
| ||
| The audio playback quality of the connected Bluetooth device is poor. | Bluetooth reception is poor. | Move the device closer to the soundbar or remove obstacles between the device and the soundbar. | ||
| Wi-Fi connection cannot be established. |
|
| ||
| Cannot achieve outstanding Dolby Atmos® effects. |
|
| ||
| Cannnot discover the Soundbar from the app. |
|
| ||
Technical data
| Loewe device type: | klang bar3 mr |
| Part number: | 60614D10 |
| Power supply: | AC 100 V – 240 V ~ 50/60 Hz |
| Audio output power: | 180 W (RMS) |
| Power consumption in standby mode: | < 0,5 W |
| Frequency response: | 60Hz – 20kHz |
| WLAN supported Standards: | IEEE 802.11a/b/g/n/ac |
| WLAN power/frequency range: | Maximum power <100 mW at 2400 – 2483,5 MHz Maximum power <100 mW at 5150 – 5350 MHz Maximum power <100 mW at 5470 – 5725 MHz Maximum power <100 mW at 5725 – 5850 MHz |
| Bluetooth Version: | 5.0 + EDR |
| Bluetooth power/frequency range: | Maximum power <10 mW at 2402 – 2483 MHz |
| USB playable files: | MP3 |
| Device dimensions (W x H x D): | 950 x 68 x 160 mm |
| Device weight: | 5,9 kg |
| Remote control battery: | 2 x CR2032 |
| Ambient temperature: | 5°C – 35°C |
| Relative humidity (non-condensing): | 20 – 80% |
| Video passthrough: | 4K Video Pass-through, Dolby Vision, HDR10, HDR10+ |
| Supported Audio formats: | HDMI: DTS, DTS-HD, DTS:X, DTS Virtual: X™, Dolby Digital, Dolby Digital plus, Dolby True HD, Dolby Atmos®, LPCM 2ch/Mch, Dolby MAT OPTICAL: DTS, Dolby Digital, LPCM 2ch |
Disposal
Disposal of used electrical and electronic equipment and batteries.

The crossed-out wheeled bin symbol on the product or its packaging indicates that this product must not be treated as normal household waste, but must be returned to a collection point for the recycling of electrical and electronic equipment and batteries. By helping to properly dispose of this product, you are protecting the environment and the health of your fellow human beings. Improper or incorrect disposal endangers the environment and health. For more information about the recycling of this product, please contact your local authority or your municipal waste disposal service. Attention: The "Pb" sign under the battery symbol indicates that this battery contains lead.

Documents / Resources
References
Loewe Support - We will be pleased to help you
![dolby.com]() Dolby Atmos - Official Site - Dolby
Dolby Atmos - Official Site - DolbySpotify - Connect
Third Party Licenses | Spotify for Developers
LOEWE - Premium Home Entertainment | TV & Heimkino
Download manual
Here you can download full pdf version of manual, it may contain additional safety instructions, warranty information, FCC rules, etc.
Advertisement
Thank you! Your question has been received!


Need Assistance?
Do you have a question about the klang bar3 mr that isn't answered in the manual? Leave your question here.