Table of Contents
Advertisement
Quick Links
Advertisement
Table of Contents

Related Manuals for Philips MCM1110


Summary of Contents for Philips MCM1110
- Page 1 Register your product and get support at MCM1110 User manual...
-
Page 2: Know These Safety Symbols
Important Safety Know these safety symbols This ‘bolt of lightning’ indicates uninsulated material within your unit may cause an electrical shock. For the safety of everyone in your household, please do not remove product covering. The ‘exclamation point’ calls attention to features for which you should read the enclosed literature closely to prevent operating and maintenance problems. - Page 3 Follow all instructions. Do not use this apparatus near water. Clean only with dry cloth. Do not block any ventilation openings. Install in accordance with the manufacturer’s instructions. Do not install near any heat sources such as radiators, heat registers, stoves, or other apparatus (including amplifiers) that produce heat.
- Page 4 Battery usage CAUTION – To prevent battery leakage which may result in bodily injury, property damage, or damage to the remote control: • Install all batteries correctly, + and - as marked on the remote control. • Do not mix batteries (old and new or carbon and alkaline, etc.).
- Page 5 Hearing safety Listen at a moderate volume. • Using headphones at a high volume can impair your hearing. This product can produce sounds in decibel ranges that may cause hearing loss for a normal person, even for exposure less than a minute.
- Page 6 Notice Any changes or modifications made to this device that are not expressly approved by Philips Consumer Lifestyle may void the user’s authority to operate the equipment. This product complies with the radio interference requirements of the European Community. This product complies with the requirements of the following directives...
- Page 7 Your product contains batteries covered by the European Directive 2006/66/EC, which cannot be disposed with normal household waste.Please inform yourself about the local rules on separate collection of batteries because correct disposal helps to prevent negative consequences for the environmental and human health. Environmental information All unnecessary packaging has been omitted.
-
Page 8: Your Micro System
Your micro system Congratulations on your purchase, and welcome to Philips! To fully benefit from the support that Philips offers, register your product at www.philips. com/welcome. Introduction With this unit, you can: • Enjoy audio from discs, USB storage devices, and other external devices;... -
Page 9: What's In The Box
What’s in the box Check and identify the contents of your package: • Main unit • 2 x speakers • Remote control • MP3 link cable • Quick start guide • User manual... -
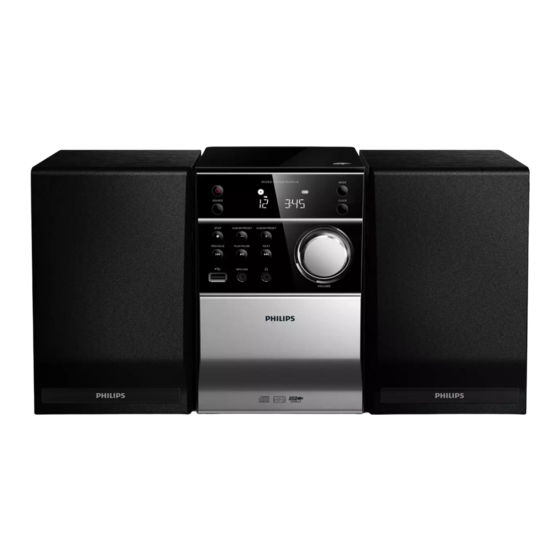
Page 10: Overview Of The Main Unit
Overview of the main unit • Turn on the main unit • Switch to standby mode SOURCE • Select a source. STOP • Stop play or erase a program. - Page 11 PLAY/PAUSE • Start or pause play. PREVIOUS/NEXT • Skip to the previous/next track. • Fast reverse or fast forward within a track or disc. • Tune to a radio station. • Adjust time. • Connect to USB storage device. MP3-LINK •...
-
Page 12: Overview Of The Remote Control
Overview of the remote control Source selection keys (CD, TAPE, TUNER, MP3 LINK, USB) • Select a source. - Page 13 CLOCK • Set clock. REPEAT • Select a repeat play mode: repeat one track or all tracks. • Skip to the previous/next track. • Tune to a radio station. • Adjust time. PROG • Program tracks. • Program radio stations. •...
- Page 14 SLEEP • Set the sleep timer. SHUFFLE • Play tracks randomly. • Start or pause play. DISPLAY • Show playback information. • Stop play or erase a program. VOL +/- • Adjust volume. • Turns on or off dynamic bass enhancement. •...
-
Page 15: Get Started
Always follow the instructions in this chapter in sequence. If you contact Philips, you will be asked for the model and serial number of this apparatus. The model number and serial number are on the bottom of the apparatus. - Page 16 Hold down the socket flap. Insert the stripped part of the wire completely. • Insert the right speaker wires to “RIGHT“, left speaker wires to “LEFT“. • Insert the red wires to “+“, black wires to “-“. Release the socket flap.
-
Page 17: Connect Power
Connect power Caution • Risk of product damage! Ensure that the power supply voltage corresponds to the voltage printed on the back or the underside of the unit. • Risk of electric shock! When you unplug the AC power cord, always pull the plug from the socket. -
Page 18: Prepare The Remote Control
Prepare the remote control Caution • Risk of explosion! Keep batteries away from heat, sunshine or fire. Never discard batteries in fire. • Risk of decreased battery life! Never mix different brands or types of batteries. • Risk of product damage! When the remote control is not used for long periods, remove the batteries. -
Page 19: Switch To Standby Mode
Turn on Press to turn on. The unit switches to the last selected source. » • In standby mode, you can also press CD, TUNER, MP3 LINK to switch on the unit. Switch to standby mode Press again to switch the unit to standby mode. The clock (if set) appears on the display panel. - Page 20 Press repeatedly to select the format. The hour digits are displayed and begin to blink. » Press to set the hour. Press CLOCK. The minute digits are displayed and begin to blink. » Press to set the minute. Press CLOCK to confirm. •...
-
Page 21: Basic Play Operations
Play Basic play operations You can control play through following operations. Function Press and hold to fast-forward/fast-reverse the track during playback, then release to resume play. To pause/resume play during playback. INFO Select different play information. REPEAT To select a repeat play mode: [REP] (repeat): play current track repeatedly. - Page 22 Place a disc face up onto the tray and press again. Play starts automatically. » • If your main unit does not start to play, press to select a track and then press...
-
Page 23: Play From Usb
Play from USB Note • Make sure that the USB storage device contains playable audio contents for supported formats. Insert the USB plug of a USB storage device into the socket on the main unit. Press USB to select the USB source. The total number of tracks displays. -
Page 24: Adjust Sound
Adjust sound During play, you can adjust volume through following operations. Function VOL +/- To increase/decrease the volume. MUTE To mute/restore sound. To turn on or off dynamic bass enhancement. If DBB is activated, [DBB] is displayed. To select your desired sound effect: [POP] (pop) [JAZZ] (jazz) [CLASSIC] (classic) -
Page 25: Listen To Radio
Press to play the programmed tracks. During play, [PROG] (program) is displayed. » To erase the program, press when play is stopped. » Listen to radio Tune to FM radio stations Note • Make sure that you have connected and fully extended the supplied FM antenna. Press TUNER. -
Page 26: Program Radio Stations Automatically
Program radio stations automatically Note • You can program a maximum of 20 preset radio stations. In FM tuner mode, press PROG for 3 seconds to activate automatic programming. [AUTO] (auto) is displayed. » The unit stores all the FM radio stations automatically and then »... -
Page 27: Show Rds Information
Note • To overwrite a programmed station, store another station in its place. Show RDS information RDS (Radio Data System) is a service that allows FM stations to show additional information. If you tune to an RDS station, an RDS icon and the station name are displayed. -
Page 28: Other Features
Note • The accuracy of the transmitted time depends on the RDS station that transmits the time signal. Other features Set alarm timer This unit can be used as an alarm clock. You can select DISC, USB, or FM TUNER as alarm source. Note •... -
Page 29: Activate/Deactivate Alarm Timer
The hour digits are displayed and begin to blink. » repeatedly to set hour, then press TIMER again to Press confirm. The minute digits are displayed and begin to blink. » to set minute, then press TIMER to confirm. Press is displayed. -
Page 30: Listen To External Audio Device
Listen to external audio device You can listen to an external audio device such as MP3 player through this unit. Connect the audio device. • For audio device with headphone sockets: Connect MP3 Link cable to the MP3-LINK socket and to the headphone socket on the audio device. -
Page 31: Product Information
Product information Note • Product information is subject to change without prior notice. Specifications Amplifier Rated Output Power 2X5W RMS Frequency Response 60 - 16 kHz, ±3dB Signal to Noise Ratio >65 dB Aux Input 0.5 V RMS 20kohm Disc Laser Type Semiconductor Disc Diameter... - Page 32 Total Harmonic Distortion <1% Frequency Response 60 Hz -16 kHz (44.1 kHz) S/N Ratio >65dBA Tuner Tuning Range FM: 87.5 - 108 MHz Tuning Grid 50 KHz Sensitivity < 22 dBf - Mono, 26 dB S/N Ratio Search selectivity < 36 dBu Total harmonic distortion <...
-
Page 33: General Information
General information AC power 100-240 V, 50/60 Hz Operation Power Consumption 10 W Standby Power Consumption < 1 W Dimensions - Main Unit (W x H x D) 150 x 227 x 208.5 mm - Speaker Box (W x H x D) 140 x 227 x 158.6 mm Weight - Main Unit... -
Page 34: Supported Mp3 Disc Formats
Unsupported formats: • Empty albums: an empty album is an album that does not contain MP3/WMA files. • Unsupported file formats are skipped. For example, Word documents (.doc) or MP3 files with extension .dlf are ignored and not played. • AAC, WAV, PCM audio files •... -
Page 35: Troubleshooting
If you encounter problems when using this apparatus, check the following points before requesting service. If the problem remains unsolved, go to the Philips web site (www.philips.com/welcome). When you contact Philips, ensure that the apparatus is nearby and the model number and serial number are available. - Page 36 Remote control does not work • Before you press any function button, first select the correct source with the remote control instead of the main unit. • Reduce the distance between the remote control and the unit. • Insert the battery with its polarities (+/– signs) aligned as indicated. •...
- Page 37 © 2012 Koninklijke Philips Electronics N.V. All rights reserved. MCM1110_12_UM_V1.0...