Table of Contents
Advertisement
Quick Links
More Information on the Radio
Visit the Motorola Solutions Web site at:
http://www.motorolasolutions.com/tetraterminals
Motorola Online
Feature User Guide and related documentation available at:
https://emeaonline.motorolasolutions.com/
Open Source Software Legal Notices
Available at: https://emeaonline.motorolasolutions.com/
and on Customer Programming Software Plus (CPS Plus) DVD
This document is copyright protected. Duplications for the purpose of the use of Motorola products are
permitted to an appropriate extent. Duplications for other purposes, changes, additions or other processing of
this document are not permitted. Only this electronically-saved document is considered to be the original.
Duplications are considered merely copies. Motorola Solutions, Inc., and its subsidiaries and affiliates do not
vouch for the correctness of such kinds of copies.
MOTOROLA, MOTO, MOTOROLA SOLUTIONS and the stylized M Logo are registered in the U.S. Patent and
Trademark Office. All other product or service names are the property of their respective owners.
© 2013 Motorola Solutions, Inc. All rights reserved.
When printed by Motorola
MTP6550
QUICK START GUIDE
68015000672-A
@68015000672@
MTP6550
QUICK START GUIDE
Advertisement
Table of Contents

Related Manuals for Motorola MTP6550


Summary of Contents for Motorola MTP6550
- Page 1 Customer Programming Software Plus (CPS Plus) DVD This document is copyright protected. Duplications for the purpose of the use of Motorola products are permitted to an appropriate extent. Duplications for other purposes, changes, additions or other processing of this document are not permitted.
-
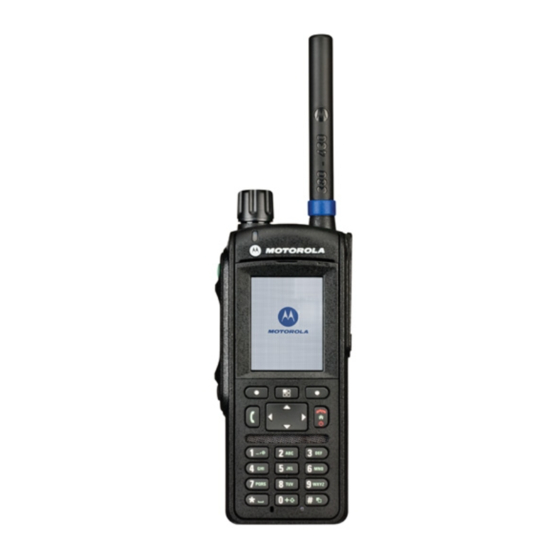
Page 2: Your Radio
Your Radio... - Page 3 Number Description Emergency button When the radio is on, press and hold to start emergency operations. When the radio is off, press and hold to power on in the Emergency Mode. Rotary Knob • Press and hold to lock/unlock it. •...
-
Page 4: Attaching The Antenna
Number Description External Antenna Connector Used with the digital car kit to connect the RF signal to the external antenna. Top Microphone Activated during simplex high audio calls such as group calls. Side Connector Provides connection for accessories. Display Provides alphanumeric text and images within 65,536 colors and 240 x 320 pixels with scalable fonts and contrast. -
Page 5: Installing The Battery
Installing the Battery 1 Insert the battery into the compartment. 2 Slide the battery towards the top of the radio until it clicks. Installing the MicroSD and SIM Cards 1 Remove the battery. 2 Open the plastic compartment cover. 3 Slide the SIM card holder and lift it up (A). 4 Slide the microSD card holder and lift it up (B). -
Page 6: Turning The Radio On/Off
5 Insert the microSD card (C) and close the microSD card holder. 6 Insert the SIM card (D) and close the SIM card holder. 7 Close the compartment cover. 8 Replace the battery. Turning the Radio On/Off To power the radio on/off, press and hold If the Covert Mode is activated, the radio powers on without visible and audible notifications. -
Page 7: Battery Capacity Information
Duplex Calls When making duplex calls (low audio), hold your radio as you would a telephone. Speak into the bottom microphone. Listen via the earpiece. Keep the antenna at least 2.5 centimeters from your head and body. Lapel/Shoulder Use For group and private calls turn your head towards your shoulder/lapel, and speak directly into the top microphone. -
Page 8: Status Icons
Icon Description 5%–15% capacity 0%–5% capacity Status Icons Icon Description In Service (TMO) – standard/extended icon No Service (TMO) – standard/extended icon Signal Strength – standard/extended icon High RF Power – standard/extended icon Direct Mode Using Gateway Repeater Mode Emergency Scan Priority Scan... - Page 9 Icon Description Battery Level Battery Charging All Rings Muted Simplex Ring Muted Duplex Ring Muted Migration Low Audio High Audio Earpiece Connected New Message Has Arrived New Message(s) Packet Data Radio Keys Locked...
-
Page 10: Led Status Indicator
Icon Description Invalid MicroSD Card USB Connected No Active Bluetooth Connection/Bluetooth Active LED Status Indicator Indication Status Charging Status In use Battery fully charged In service Battery charged at 90% Out of service Rapid charge Connecting to a network Faulty or invalid battery Entering DMO Transmit inhibit in service Channel busy in DMO... -
Page 11: Locking/Unlocking The Keypad
Locking/Unlocking the Keypad To unlock/lock the keypad, press and then Using the Radio Menu Press: 1 – to enter the menu. 2 – to select a menu item. 3 – to return to the previous level. 4 – to return to the previous level. 5 –... -
Page 12: Selecting Tmo/Dmo
Selecting TMO/DMO 1 From the home screen, select Optns. 2 Select the required mode. Making TMO/DMO Group Calls 1 Enter TMO or DMO. 2 From the home screen, use or the rotary knob to highlight the target talkgroup. 3 Select Select (if configured). 4 Press and hold PTT. -
Page 13: Making Duplex Private Calls/Phone/Pabx Calls
4 Once the call is connected, press and hold PTT to talk (wait for the talk permit tone if configured). 5 Release PTT to listen. Press to terminate the call. Making Duplex Private Calls/Phone/PABX Calls 1 From the home screen, dial a number. Press and release . -
Page 14: Sending Status Messages
Sending Status Messages 1 From the home screen, press 2 Select Messages → Send Status. 3 Perform one of the following actions: • Highlight the required status message and select Select, or press or the PTT button. • If the status list is empty, enter a 5-digit status message number and select Send. -
Page 15: Looking After Your Radio
Looking after Your Radio • Never leave your radio or battery in extreme temperatures (over +85 °C), for example, behind a windscreen in direct sunlight. • The radio is submersible (compliant with the IP67 standard) – but only with the battery and the antenna attached.