
Related Manuals for Dimplex OCR15TIF


Summary of Contents for Dimplex OCR15TIF
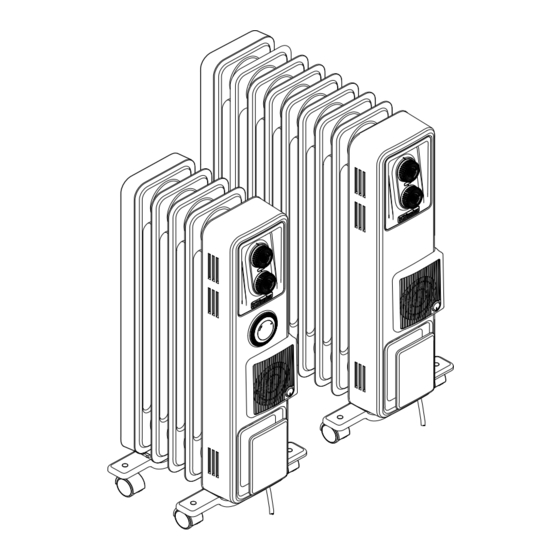
- Page 1 INSTRUCTION MANUAL Oil Filled Column Heaters Models: OCR15FA, OCR15TIF, OCR24FA & OCR24TIF For domestic household use only. 08/54538/0 Issue 2...
- Page 2 IMPORTANT THESE INSTRUCTIONS SHOULD BE READ CAREFULLY AND RETAINED FOR FUTURE REFERENCE. Note also the information presented on the appliance CAUTION: FAILURE TO FOLLOW THESE INSTRUCTIONS MAY CAUSE INJURY AND/ OR DAMAGE AND MAY INVALIDATE YOUR WARRANTY Please read the operating instructions carefully before using your product for the first time and keep them in a safe place.
- Page 3 IMPORTANT THESE INSTRUCTIONS SHOULD BE READ CAREFULLY AND RETAINED FOR FUTURE REFERENCE. Note also the information presented on the appliance • In the event of a fault, unplug the appliance. • Unplug the appliance when not required for long periods. •...
- Page 4 Exposed to the Near water If the power cable weather outdoors wires are frayed or cut Where small children No extension leads or Where the power may be left unattended power boards cable may be damaged On a slope or Where there is risk Where it may be uneven surface...
-
Page 5: Specifications
Specifications Model no. OCR15FA OCR15TIF OCR24FA OCR24TIF Power supply 230-240V~, 50Hz Rated power 1500W 2400W Heat settings Thermostat Timer Turbo Fan Weight (net) 8.2kg 8.46kg 12.6kg 12.33kg 310 x 280 x 310 x 280 x 470 x 280 x 470 x 280 x... -
Page 6: Fitting The Castors
Fitting The Castors WARNING The radiator must only be operated with the wheels and castors fitted and in an upright position. The castors must be fitted to the control panel and between the last and second last fin on the opposite end, as shown in Fig.1. 1. -
Page 7: Safety Features
Positioning Select the position for the heater ensuring there is clearance from any furniture and fittings of at least 300mm above the heater and 150mm each side and 300mm from the control and end panel. We recommend maximising the clearance where possible. NOTE: The radiator is designed for operation on an AC electricity supply, and is only suitable for domestic use and similar indoor locations. -
Page 8: Operation
Operation IMPORTANT - OBJECTS OR CLOTHING MUST NOT BE PLACED ON THIS HEATER. Before using the heater ensure that all warnings and instructions have been read carefully. To activate the heater simply plug it in. Neon indicator lights located at the control area will illuminate when the appliance is plugged into the mains. - Page 9 Operation Thermostat The Thermostat, see Fig.2 controls the heat output according to the room temperature. This ensures that the heater will not produce heat unnecessarily when the room is warm. 1. To set the temperature you require, turn the thermostat knob clockwise until the required setting is reached.
- Page 10 Timer Model ELECTROMECHANICAL TIMER (TIF models) Fig. 4 Setting the time of day To set the time of day, rotate the timer dial clockwise (indicated by the arrow) until the correct time of day is opposite the reference mark - see Fig.4. The 24-hour clock is used;...
-
Page 11: Turbo Fan
Timer Model Setting the 'Auto' ON and OFF times To set the timer: 1. Using your fingertip or tip off a pencil, push in as many segments as necessary around the dial, according to the times you don't require heat - see Fig.5. Each segment pushed in switches the heater OFF for that part of the hour All other segments will be ON. - Page 12 Cleaning Over time, dust can accumulate on the heater which can effect performance. It is recommended to clean the unit at least once a month. 1. Turn the unit OFF and disconnect the appliance from the power supply. 2. Remove any dust build up with a soft brush. 3.
-
Page 13: Maintenance
Warranty Please refer to the warranty card in the box for warranty information. For any troubleshooting advice, please contact the relative Customer Care Centre below. Glen Dimplex Australia Pty Ltd Glen Dimplex New Zealand Ltd 8 Lakeview Drive, 38 Harris Road, East Tamaki,... - Page 16 Supplied by Glen Dimplex Australia 8 Lakeview Drive, Scoresby, Victoria, 3179 © Glen Dimplex Australia. All rights reserved. Material contained in this publication may not be reproduced in whole or in part, without prior permission in writing of Glen Dimplex Australia.