Table of Contents
Advertisement
Quick Links
Advertisement
Table of Contents

Related Manuals for MSI Trident B937


Summary of Contents for MSI Trident B937
- Page 1 Trident / Creator Series Personal Computer Trident B937 Creator B937 User Guide...
-
Page 2: Table Of Contents
Contents Getting Started ......................3 Package Contents ....................3 Safety & Comfort Tips .................... 3 System Overview..................... 4 Hardware Setup ...................... 7 Placing the Device ....................9 System Operations ..................... 10 Power Management ..................... 10 Network Connection (Windows 10) ..............12 System Recovery (Windows 10) ................ -
Page 3: Getting Started
Package Contents Personal Computer Trident B937 / Creator B937 User Guide (Optional) Documentation Quick Guide (Optional) Warranty Card & Warranty Book (Optional) -
Page 4: System Overview
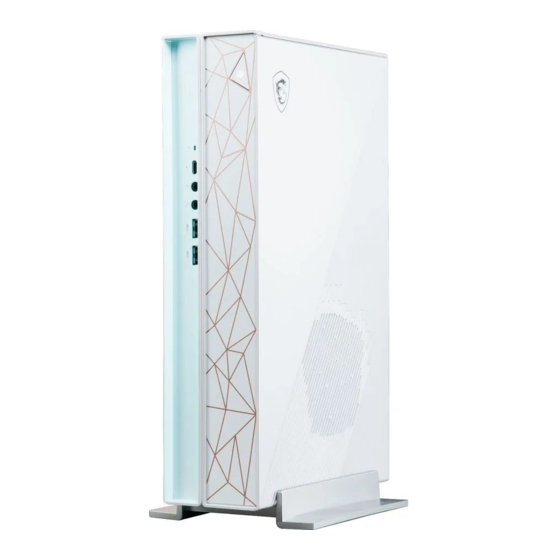
System Overview 8 11 Getting Started... - Page 5 Power Button Hard Disk Drive LED Thunderbolt™ 4 Port (USB Type-C) (Optional) ∙ Support up to 40Gbps transfer rate with Thunderbolt devices. ∙ Support up to 20Gbps transfer rate with USB 4 devices. ∙ Support up to 10Gbps transfer rate with USB 3.2 devices. ∙...
- Page 6 Line-In Line-Out Getting Started...
-
Page 7: Hardware Setup
Hardware Setup Connect your peripheral devices to suitable ports. ⚠ Important For detailed instructions on how to connect, please refer to the manuals of your ∙ peripheral devices. Reference image only. Appearance will vary. ∙ Connecting Thunderbolt Devices via Daisy-chain (Optional) Daisy-chain is a method of connecting multiple devices to a PC with only one output terminal. - Page 8 Connect the power cord to the system and electrical outlet. Power Rating • 230W: 100-240V~, 50-60Hz, 19.5V 11.8A • 330W: 100-240V~, 50-60Hz, 19.5V 16.9A ⚠ Important When unplugging the AC power cord, always hold the connector part of the cord. Never pull the cord directly.
-
Page 9: Placing The Device
Placing the Device You can place the device as the following ways. If you want to place the system vertically, please follow the steps below to install the stand: 1. Place the stand on a stable surface, such as a computer desk or a TV cabinet. 2. -
Page 10: System Operations
System Operations This chapter provides you with essential information on system operations. ⚠ Important All information is subject to change without prior notice. Power Management Power management of personal computers (PCs) and monitors has the potential to save significant amounts of electricity as well as deliver environmental benefits. To be energy efficient, turn off your display or set your PC to sleep mode after a period of user inactivity. - Page 11 Waking the System Up The computer shall be able to wake up from power saving mode in response to a command from any of the following: ∙ the power button, ∙ the network (Wake On LAN), ∙ the mouse, ∙ the keyboard. Energy Saving Tips: ∙...
-
Page 12: Network Connection (Windows 10)
Network Connection (Windows 10) Wired Network 1. Right-click [Start] and select [Network Connections] from the list. 2. Select [Ethernet] and then [Network and Sharing Center]. 3. Select [Set up a new connection or network]. 4. Choose [Connect to the Internet] and click [Next]. System Operations... - Page 13 5. Select [Broadband (PPPoE)] to connect using DSL or cable that requires a user name and password. 6. Type the information from your Internet Service Provider (ISP) and click [Connect] to establish your LAN connection. System Operations...
- Page 14 Wireless Network 1. Go to [Start] , click [Settings] and select [Network and Internet]. 2. A list of available WLAN connections pops up. Choose a connection from the list. 3. To establish a new connection, select [Network and Sharing Center]. 4.
-
Page 15: System Recovery (Windows 10)
System Recovery (Windows 10) The purposes for using the System Recovery Function may include: ∙ Restore the system back to the initial status of original manufacturer’s default settings. ∙ When some errors have occurred to the operating system in use. ∙... - Page 16 Reset this PC 1. Go to [Start] , click [Settings] and select [Update and security]. 2. Select [Recovery] and click [Get started] under [Reset this PC] to start the system recovery. 3. The [Choose an option] screen pops up. Choose between [Keep my files] and [Remove everything].
- Page 17 Keep my files 1. Select [Keep my files]. 2. The [Your apps will be removed] screen shows a list of apps that will need to be reinstalled from the web or installation discs. Click [Next] to continue. 3. The next screen will show the changes to be made during the process. Click [Reset] to start the system reset.
- Page 18 Remove everything 1. Select [Remove everything]. 2. If you have multiple hard drives, a screen will pop up, asking you to choose between [Only the drive where Windows is installed] and [All drives]. 3. Then select between [Just remove my files] and [Remove files and clean the drive]. 4.
-
Page 19: System Recovery (F3 Hotkey Recovery) (Optional)
Recovering the system with the F3 Hotkey Follow the instructions below to continue: 1. Restart the PC. 2. Press the F3 hotkey on the keyboard promptly when the MSI greeting appears on the display. 3. On the [Choose an Option] screen, select [Troubleshoot]. -
Page 20: Safety Instructions
∙ Place the power cord in a way that people are unlikely to step on it. Do not place anything on the power cord. ∙ If this device comes with an adapter, use only the MSI provided AC adapter approved for use with this device. - Page 21 California, USA: The button cell battery may contain perchlorate material and requires special handling when recycled or disposed of in California. For further information please visit: https://dtsc.ca.gov/perchlorate/ Environment ∙ To reduce the possibility of heat-related injuries or of overheating the device, do not place the device on a soft, unsteady surface or obstruct its air ventilators.
-
Page 22: Regulatory Notices
∙ ErP Directive 2009/125/EC Compliance with these directives is assessed using applicable European Harmonized Standards. The point of contact for regulatory matters is MSI, MSI-NL Eindhoven 5706 5692 ER Son. Products with Radio Functionality (EMF) This product incorporates a radio transmitting and receiving device. For computers in normal use, a separation distance of 20 cm ensures that radio frequency exposure levels comply with EU requirements. - Page 23 ∙ this device may not cause harmful interference, and ∙ this device must accept any interference received, including interference that may cause undesired operation. MSI Computer Corp. 901 Canada Court, City of Industry, CA 91748, USA (626) 913-0828 www.msi.com WEEE Statement Under the European Union (“EU”) Directive on Waste Electrical and...
- Page 24 Vietnam RoHS As from December 1, 2012, all products manufactured by MSI comply with Circular 30/2011/TT-BCT temporarily regulating the permitted limits for a number of hazardous substances in electronic and electric products.
- Page 25 Copyright and Trademarks Notice Copyright © Micro-Star Int’l Co., Ltd. All rights reserved. The MSI logo used is a registered trademark of Micro-Star Int’l Co., Ltd. All other marks and names mentioned may be trademarks of their respective owners. No warranty as to accuracy or completeness is expressed or implied.