Table of Contents
Advertisement
Quick Links
Advertisement
Table of Contents

Summary of Contents for Pyle PSTMP95
- Page 1 PSTMP95 Digital Table Top Steam Press...
-
Page 2: Table Of Contents
CONTENTS Features of the Elite.............1 Safety Reminders............2 Part Identification...........3-4 Steam Press Operation reparation for use.............5 Filling the water tank..........5 Turning on the power ..........5 Selecting the temperature...........6 Steam Control Notes...........7 Pressing..............8 Finishing Pressing............9 Cleaning..............10 Suggestion for Success..........11 Use of the Pressing Cushion........12 Techniques for Pressing.........13-14 Troubleshooting...........15-16... -
Page 3: Features Of The Elite
Digital Table Top Stream Press Ÿ 50% Faster Than Traditional Ironing Ÿ Safe for Nylon, Silk Rayon, Wool, Cotton, Linen, and more Ÿ Non-Stick and Anti-Shine Ironing Surface Coating Ÿ Even Pressure Ensures Sharp, Long-Lasting Creases Ÿ 'Steam Burst' Function Blasts Away Wrinkles Ÿ... -
Page 4: Safety Reminders
SAFETY REMINDERS WARNING Read all of the instructions and then save them for future reference. Ø To protect against the risk of electric shock, do not immerse the appliance in water. Ø Do not let the cord hang over the edge of counters. Ø... -
Page 5: Part Identification
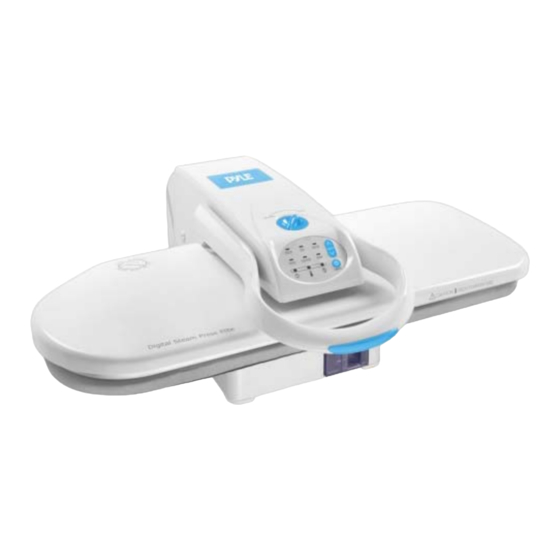
PART IDENTIFICATION 1. The Pressing Handle raises and lowers the Pressing Plate. By lowering the Pressing Handle until it reaches the lowest point possible you automatically obtain maximum pressure. 2. The Locking Knob will lock together the Pressing Plate and Ironing Board. Turn the Locking Knob to the locked position to carry or store the Steam Press. - Page 6 13. The Pressing Cushion is a fabric covered pad used for pressing gathered or contoured areas such as sleeves, darts, and yokes. 14. A plastic water Spray Bottle is used for dampening fabric before pressing. 15. A Water Container is used for filling the Water Tank. The following information is provided for service by a qualified electrician only: Rated voltage: 120V~, 60Hz, 1350W WARNING:...
-
Page 7: Steam Press Operation
STEAM PRESS OPERATION STEP1 - PREPARATION FOR USE Set the appliance on a sturdy work surface. Unlock the Locking Knob. STEP 2 - FILLING THE WATER TANK BEFORE PLUGGING IN THE APPLIANCE, fill the water tank; a. Always make sure the appliance is unplugged before filling the tank. b. -
Page 8: Selecting The Temperature
STEP 4 SELECTING THE TEMPERATURE Press the [ SELECT ] arrow buttons to choose the kind of fabric you wish to press. Press to move selection to higher setting and press to move selection to lower setting. a. Examine the garment label if unsure and look up the type on the chart. FABRIC NYLON SILK... -
Page 9: Steam Control Notes
STEP 5 - STEAM CONTROL IMPORTANT NOTE: Steam is produced only when the Yellow Steam Ready light is on. The Green Ready Light goes off when the unit has reached the desired temperature. The Yellow Steam Ready Light will come on when the unit is ready to produce steam. -
Page 10: Pressing
STEP 6 - PRESSING a. Lift the Pressing Handle (A). The Pressing Plate (B) moves to the up position. b. Carefully arrange the garment to be pressed onto the Ironing Board (C). c. Grasp the handle of the Pressing Plate(A) and lower it onto the Ironing Board (C), capturing the garment between the two halves of the Steam Press. -
Page 11: Finishing Pressing
STEP 7 - FINISHING PRESSING/STORING THE UNIT a. Water may be left in the reservoir , because it will not drip out if the machine is stored in an upright position. However, it is recommended that if the machine will be stored for some time, that all the water in the unit should be drained by pressing the Steam Burst Button until all of the water is pumped out. -
Page 12: Cleaning
STEP 8 - CLEANING (As needed) a. Cleaning the Pressing Plate: Place the Pressing Cushion in the center of the Ironing Board. Place a clean towel over the Pressing Cushion and the Ironing Board. Set the Steam Control and Temperature Control to their maximum setting. When the Ready Light comes on, gently lower the Pressing Plate onto the Pressing Cushion. -
Page 13: Suggestion For Success
SUGGESTIONS FOR SUCCESS -- USING PRESS CLOTH: Placing a press cloth ( a piece of clean fabric) between the fabric and the Pressing Plate may be desirable, especially for more delicate fabrics. OLDER STYLE BUTTONS AND ZIPPERS: While most modern buttons and zippers require no special attention, some older types may be heat sensitive. -
Page 14: Use Of The Pressing Cushion
USE OF THE PRESSING CUSHION -- Some garments have been constructed with details, such as darts, curved Seams and shoulder pads, which are not intended to be pressed flat. A Pressing Cushion is supplied with your Steam Press for use with These areas. -
Page 15: Techniques For Pressing
TECHNIQUES FOR PRESSING -- LARGE PIECES OF FABRIC: To press large pieces of fabric, place the entire piece in the storage area behind the Ironing Board. The area you want to press first is on the top of the pile. Pull the fabric towards you, over the Ironing Board and lower the Pressing Plate, pressing each section as you move the fabric forward. - Page 16 PANTS: a. Place the pressing Cushion under the waistband and press. b. Reposition the waistband and continue around the pants until the entire waistband is pressed. c. To press the in seam, place the Pressing Cushion under the area to be pressed.
-
Page 17: Troubleshooting
TROUBLE SHOOTING Below is a chart detailing the most common problems, their causes and solutions. Before shipping any appliance to a service center please check to make sure that the solution is not listed here: PROBLEM CAUSE SOLUTION Steam Press cannot Locking Knob is in Turn the Locking be opened using... - Page 18 PROBLEM CAUSE SOLUTION No Steam. Water Level is too low. Fill the water tank. Controls have not been If suitable for the fabric, properly set. make a selection to a higher temperature. Wait for the Steam Ready Light to come on. If not use spray misting bottle as directed.
- Page 19 Limited Warranty Policy All Pyle products are carefully constructed and thoroughly tested before shipment. Products purchased in the USA are warranted to be free of defects in material and workmanship for one (1) year from the date of purchase. This warranty is limited to the original retail purchaser.
- Page 20 We want you listening for a lifetime Introducing Pyle Rewards! • Get points for registering your Pyle product, posting text or video reviews online • Redeem your points for cool items like Pyle-branded t-shirts, pens, and Pyle products, including mini...