
Related Manuals for National Instruments NI PXI-6541


Summary of Contents for National Instruments NI PXI-6541
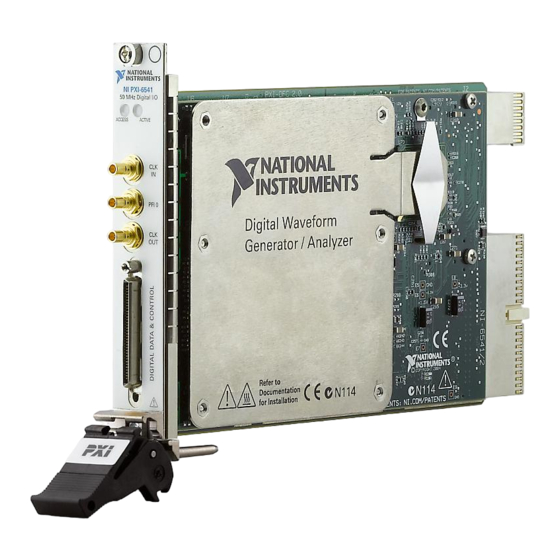
- Page 1 sales@artisantg.com artisantg.com (217) 352-9330 | Visit our website - Click HERE...
- Page 2 NI Digital Waveform Generator/Analyzer This document explains how to install, configure, and test a National Instruments digital waveform generator/analyzer and how to program it using NI-HSDIO (High-Speed Digital I/O) instrument driver software. This document applies specifically to the following devices: •...
-
Page 3: Table Of Contents
Contents 1. Verifying the System Components ..................4 2. Unpacking ..........................4 3. Verifying the Kit Contents....................4 Documentation........................5 Ferrites (NI PXIe-6544/6545/6547/6548 Only) ............... 5 EMI Gasket (NI PXI-6551/6552 Only) ................5 4. Installing the Software ......................5 Choose and Install Your ADE ..................5 Install NI-HSDIO...................... - Page 4 Performance Issues Using MXI Connection ..............36 Where to Go for Support ......................37 NI Digital Waveform Generator/Analyzer Getting Started Guide | © National Instruments | 3...
-
Page 5: Verifying The System Components
Driver Readme, which is available on the NI-HSDIO DVD. After you install NI-HSDIO, you can access the NI-HSDIO Instrument Note Driver Readme at Start»All Programs»National Instruments»NI-HSDIO» Documentation. 2. Unpacking The NI digital waveform generator/analyzer ships in an antistatic package to prevent electrostatic discharge (ESD). -
Page 6: Documentation
Using LabVIEW or LabWindows/CVI can greatly reduce your application development time. If you have not already installed the ADE, follow the instructions in the product documentation to install your ADE now. NI Digital Waveform Generator/Analyzer Getting Started Guide | © National Instruments | 5... -
Page 7: Install Ni-Hsdio
Install NI-HSDIO NI-HSDIO features a set of operations and attributes that allow you to programmatically configure and control the digital waveform generator/analyzer. To install NI-HSDIO, complete the following steps: Insert the NI-HSDIO DVD. The NI-HSDIO installer should open automatically. If not, select Start»Run, and enter x , where x is the letter of the DVD drive. -
Page 8: Installing A Pxi Module
Tighten the captive screws at the top and bottom of the module front panel. 10. Before operating the module, install all chassis covers and filler panels. Missing filler panels disrupt the necessary air circulation in the chassis. NI Digital Waveform Generator/Analyzer Getting Started Guide | © National Instruments | 7... -
Page 9: Installing A Pxi Express Module
NI recommends that you install slot blockers between modules to maximize Note air flow. NI recommends using the PXI Chassis Slot Blocker Kit, part number 778678-01, available for purchase at ni.com 11. Plug in and power on the chassis. NI PXI modules are sensitive instruments that should be handled carefully. Do not expose the module to temperatures or humidity beyond the rated maximums. -
Page 10: Installing A Two-Slot Pxi Express Module
To avoid ESD, do not touch the exposed pins of the PXI/PXI Express connector or any exposed circuitry on the module. When not in use, PXI/PXI Express modules should be stored in the original antistatic packaging to avoid damage. NI Digital Waveform Generator/Analyzer Getting Started Guide | © National Instruments | 9... -
Page 11: Installing A Pci Device
During operation, the metal surfaces of PXI/PXI Express modules Hot Surface may become hot. Be careful when removing the module from the chassis or when moving it to a different peripheral slot. When removing the module, hold it by only the ejector handle and front panel. -
Page 12: Maintaining Pci Systems
NI-HSDIO. To perform a self-test, complete the following steps: Right-click the device you want to test. Select Self-Test, shown in Figure 5. NI Digital Waveform Generator/Analyzer Getting Started Guide | © National Instruments | 11... -
Page 13: Using The Test Panel To Generate And Acquire Digital Data
Figure 5. Configuration Tree Shortcut Menu When the self-test finishes, a dialog box indicates if an error occurred. If an error occurred, refer to for troubleshooting information. ni.com/support If you need to reset the device with a hard reset, you can do so by right-clicking the device and selecting Reset Device from the shortcut menu shown in Figure 5. - Page 14 Click Play. The device acquires the digital data that you generated in the previous steps, and the data is displayed on the graph. Click Close when you are finished. NI Digital Waveform Generator/Analyzer Getting Started Guide | © National Instruments | 13...
-
Page 15: Connecting Signals
7. Connecting Signals This section discusses connections you can make to the device and how to connect signals to the device for performing dynamic acquisition and dynamic generation. For device front panel diagrams and connector descriptions, refer to Appendix A: Device Front Panels. -
Page 16: Ni 656X Cabling
DUT testing. The NI CB-2162 is specifically designed for use with single-ended NI digital waveform generator/analyzers (NI 654x/655x). For more information about the NI CB-2162, refer to the NI CB-2162 User Guide. NI Digital Waveform Generator/Analyzer Getting Started Guide | © National Instruments | 15... - Page 17 NI also offers the NI SMB-2163 breakout box for National Instruments single-ended digital waveform generator/analyzers. The NI SMB-2163 offers coaxial SMB connectors for each channel on the DDC connector, providing an easy way to connect to other devices for testing and debugging.
- Page 18 The following figure shows the parts locator diagram for the single-ended digital flying lead cable. Figure 9. Single-Ended Flying Lead Cable Parts Locator Diagram Lead Pairs Removable Sleeving 68-Pin VHDCI Connector NI Digital Waveform Generator/Analyzer Getting Started Guide | © National Instruments | 17...
- Page 19 Differential Accessories The NI SMA-2164 test fixture is a breakout box for National Instruments differential digital waveform generator/analyzer modules (NI 656x). This fixture provides an easy way to connect to other devices for testing and debugging. For more information about using the NI SMA-2164, refer to the NI SMA-2164 User Guide.
-
Page 20: Creating A Custom Accessory
Refer to the NI Digital Waveform Generator/Analyzer Help for more information about signal termination. NI Digital Waveform Generator/Analyzer Getting Started Guide | © National Instruments | 19... -
Page 21: Wiring For Common Measurements
If you are designing a custom cabling solution with connector (779157-01) Note and the NI SHB12X-B12X cable (192344-01), the NI 656x pinout is reversed at the end connector. Refer to Figure 18 for an illustration of the pinout at the end connector. -
Page 22: Programming The Digital Waveform Generator/Analyzer
NI SignalExpress LE before your 30-day trial of the Full Edition is complete, the full features are still available for the remainder of your 30-day trial. NI Digital Waveform Generator/Analyzer Getting Started Guide | © National Instruments | 21... -
Page 23: Ni-Hsdio Examples
<NIDocDir> (Windows Vista/Windows 7/Windows 8 ) Users\Public\ Documents\National Instruments Appendix A: Device Front Panels This section contains front panel connector figures and connector description tables that describe the signal connection options for NI digital waveform generator/analyzers. - Page 24 PFI 3 PFI 2 DIO 1 DIO 0 DDC CLK OUT STROBE The Digital Data & Control connector pinout is the same for PXI and PCI devices. NI Digital Waveform Generator/Analyzer Getting Started Guide | © National Instruments | 23...
- Page 25 Table 1. NI 654x DDC Connector Pins Signal Pins Signal Name Type Signal Description DDC CLK OUT Control Output terminal for the exported Sample clock. STROBE Control Terminal for the external Sample clock source, which can be used for dynamic acquisition. 1, 3, 5, 7, 9, 11, DIO <0..31>...
- Page 26 PFI 3 PFI 2 DIO 1 DIO 0 DDC CLK OUT STROBE The Digital Data & Control connector pinout is the same for PXI and PCI devices. NI Digital Waveform Generator/Analyzer Getting Started Guide | © National Instruments | 25...
- Page 27 Table 2. NI 6551/6552 DDC Connector Pins Signal Pins Signal Name Type Signal Description DDC CLK OUT Control Output terminal for the exported Sample clock. STROBE Control Terminal for the external Sample clock source, which can be used for dynamic acquisition. 13, 15, 17, 19, DIO <0..19>...
-
Page 28: Ni 6555/6556 Front Panels And Connectors
DIO 3 DIO 2 PFI 3 PFI 2 DIO 1 DIO 0 NAL FORCE PFI 4 / DDC CLK OUT PFI 5 / S NAL SENSE CAL DMM NI Digital Waveform Generator/Analyzer Getting Started Guide | © National Instruments | 27... - Page 29 Table 3. NI 6555/6556 DDC Connector Pins Signal Pins Signal Name Type Signal Description 9, 11, 13, 15, 17, DIO <0..23> Data Bidirectional PPMU-capable 19, 21, 23, 25, digital I/O data channels 0 27, 29, 31, 43, through 23. 45, 47, 49, 51, 53, 55, 57, 59, 61, 63, 65 26, 64...
- Page 30 Resource used during external calibration. EXTERNAL Analog Resource used for external SMU or SENSE DC sense functions. EXTERNAL Analog Resource used for external SMU or FORCE DC force functions. NI Digital Waveform Generator/Analyzer Getting Started Guide | © National Instruments | 29...
-
Page 31: Ni 656X Front Panels And Connectors
Table 5. NI 6556 AUX I/O Connector Pins Signal Pins Signal Name Type Signal Description External Force Analog Resource for external SMU or DC force functions. 2, 4 Guard Analog Guard connection for external SMUs or DC sources. External Sense Analog Resource for external SMU or DC sense functions. - Page 32 NI SHB12X-B12X cable (192344-01), the NI 656x pinout is reversed at the end connector. Refer to Figure 18 for an illustration of the pinout at the end connector. NI Digital Waveform Generator/Analyzer Getting Started Guide | © National Instruments | 31...
- Page 33 Table 6. NI 656x DDC Connector Pins Signal Pins Signal Name Type Signal Description DDC CLK OUT Control Positive terminal for the exported LVDS Sample clock. DDC CLK OUT Control Complementary terminal for the LVDS* LVDS exported Sample clock. DDC CLK OUT Control Positive terminal for the LVPECL LVPECL...
- Page 34 DIO 15 14 15 STROBE* STROBE 11 12 DDC CLK OUT LVDS* DDC CLK OUT LVDS RESERVED (NC) RESERVED (NC) DDC CLK OUT LVPECL* DDC CLK OUT LVPECL NI Digital Waveform Generator/Analyzer Getting Started Guide | © National Instruments | 33...
- Page 35 Table 7. NI 654x/655x/656x Front Panel SMA/SMB Connectors Connector Signal Name Signal Type Description CLK IN Reference/ Control Terminal for the external Clock Input Reference clock used for the PLL or for the external Sample clock used for dynamic generation and/or acquisition.
-
Page 36: Appendix B: Troubleshooting
Launch MAX and perform the self-test again. If the device still fails the self-test, proceed to step 3. Uninstall and reinstall NI-HSDIO. If the device still fails the self-test, contact NI support at ni.com/support NI Digital Waveform Generator/Analyzer Getting Started Guide | © National Instruments | 35... -
Page 37: I Received A Thermal Or Power Shutdown Error
NI device. If you are experiencing errors and are uncertain whether the MXI Optimization Application ran, navigate to Start»All Programs»National Instruments MXI, and select MXI Optimization to launch the application. If the application is not installed, refer to the software CD included with the MXI kit to install the software. - Page 38 Where to Go for Support The National Instruments Web site is your complete resource for technical support. At ni.com/ you have access to everything from troubleshooting and application development support self-help resources to email and phone assistance from NI Application Engineers.
- Page 39 NI product. Refer to the Export Compliance Information at ni.com/legal/export-compliance for the National Instruments global trade compliance policy and how to obtain relevant HTS codes, ECCNs, and other import/export data. © 2003–2013 National Instruments. All rights reserved.