Table of Contents
Advertisement
Quick Links
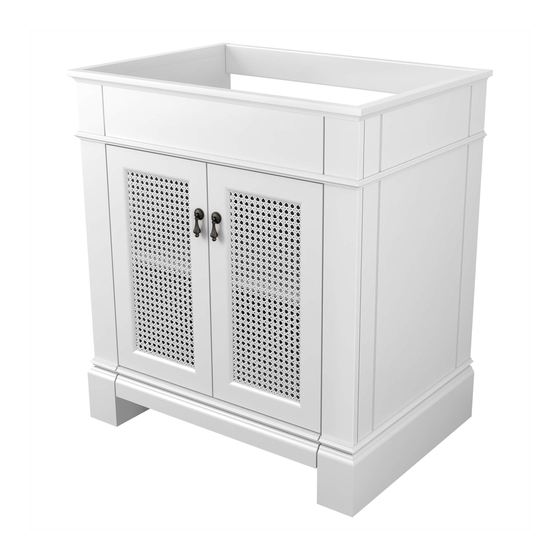
ASSEMBLY & INSTALLATION INSTRUCTIONS
Portsmouth 30" Vanity
Model: 9210.030
VANITY TOP
9210.130 Laminated 31" Marble Top
No additional top required for Portsmouth
Vanity Top
Thank you for selecting our products...products which have been the benchmarks of fine quality for over 100 years. To
help insure that the installation process will proceed smoothly, please read these instructions carefully before you begin.
Also, review the recommended tools and materials list; carefully unpack and examine your new plumbing fixture.
To maintain the beauty of the finish, avoid placing the furniture in direct sunlight, as sunlight causes fading. Also avoid
extreme changes in temperature by arranging furniture away from radiators, heat and air vents, and air conditioning
units. Avoid placing furniture directly under windows.
Recommended Tools & Materials
Adjustable Wrench
Basin Wrench
Tubing Cutter
Roughing-in
Dimensions
33-1/2"
(851mm)
27-1/4"
(692mm)
(120mm)
Product names listed herein are trademarks of AS America, Inc.
© AS America, Inc. 2011
0615.000 Portsmouth Undermount Sink
7820.400 Portsmouth Vanity Top
7820.800 Portsmouth Vanity Top
Channel Locks
Plumbers' Putty or
Caulking
30"
(762mm)
8"
(203mm)
4-3/4"
RECOMMENDED SINKS
- 4" Centers
- 8" Centers
Hacksaw
Tape
Measure
PORTSMOUTH SINK
OPTIONAL: LAMINATED
MARBLE TOP WITH
PORTSMOUTH
UNDERMOUNT SINK
SUPPLIES AS
REQUIRED
22"
1-1/4" (32mm)
(559mm)
O.D. WASTE
20"
(508mm)
FINISHED
FLOOR
- 1 -
RECOMMENDED FAUCETS
7005.201 Copeland
Center Set Faucet
7005.801 Copeland
Widespread Faucet
Pipe Wrench
Phillips Screwdriver
Putty Knife
Regular Screwdriver
21-1/2"
(546mm)
FINISHED
FLOOR
Drill
Level
FINISHED
WALL
7 70 0 11 - 10 0 R ev.C
Advertisement
Table of Contents

Summary of Contents for American Standard Portsmouth 9210.030
- Page 1 ASSEMBLY & INSTALLATION INSTRUCTIONS Portsmouth 30" Vanity Model: 9210.030 VANITY TOP RECOMMENDED SINKS RECOMMENDED FAUCETS 9210.130 Laminated 31" Marble Top 0615.000 Portsmouth Undermount Sink 7005.201 Copeland Center Set Faucet 7820.400 Portsmouth Vanity Top No additional top required for Portsmouth 7005.801 Copeland - 4"...
- Page 2 VANITY INSTALLATION Unpack unit carefully, taking care that bottom shelf does not drop and damage front legs (see Figure 2). Provide suitable reinforcement for anchoring the vanity to the wall. Centerline of reinforcement should be 31" up from the floor (see Figure 1). Rough in supply lines and waste per rough-in dimensions.
- Page 3 PORTSMOUTH VANITY SINK 7820.400 AND 7820.800 INSTALLATION onto VANITY Two people recommended for this installation Mount the drain assembly (not included) on the sink. Be certain to apply a bead of sealing putty on the underside of the drain (Part "A") in order to ensure a watertight seal between the sink and drain.
-
Page 4: Replacement Parts List
Care and Cleaning of Vanity Clean the product by using soft, slightly damp cloth. Buff the product by using a soft dry cloth. Avoid using silicone cleaners and waxes. Clean up excess water and spills immediately. Use a blotting rather than a wiping action. Water left over a long period of time will cause white spots in the finish. - Page 5 American Standard. American Standard’s option to repair or exchange the product under this limited warranty does not cover any labor or other costs of removal or installation, nor shall American Standard be responsible for any other incidental or consequential damages attributable to a product defect or to the repair or exchange of a defective product, all of which are expressly excluded from this limited warranty.
-
Page 6: Care And Cleaning
American Standard. American Standard's option to repair or exchange the product under this limited warranty does not cover any labor or other costs of removal or installation. IN NO EVENT WILL AMERICAN STANDARD BE LIABLE FOR THE COST OF REPAIR OR REPLACEMENT OF ANY INSTALLATION MATERIALS, INCLUDING BUT NOT LIMITED TO, TILES, MARBLE, ETC. - Page 7 M 9 6 5 015 R E V. 1. 7 *Your new American Standard faucet is designed to work only with the Speed Connect drain. Heplful tips for removing your current drain can be found in the Troubleshooting section of these instructions.
- Page 8 POP-UP DRAIN Fig. A. Fig. B. Remove CLEAR PLASTIC COVER (1). Remove CARDBOARD SPACER (2) from under DRAIN DRAIN POP-UP (3). BODY Tighten TAILPIECE (4) on DRAIN BODY before Fig. B. installing DRAIN BODY. REMOVE FLANGE Fig. A. Fig. B. Thread FLANGE (1) counter-clockwise and remove FLANGE (1) and FOAM GASKET (2) from drain Fig.
- Page 9 ATTACH CABLE CONNECTOR Fig. A. Fig. B. Thread CABLE CONNECTOR (1) clockwise onto DRAIN BODY CONNECTION (2) and hand tighten. Fig. A. Your new POP-UP DRAIN installation is now complete. Fig. B. Note: Tailpeice on pop-up drain is 1-1/4” O.D. Fig.
-
Page 10: Install Handles
INSTALL HANDLES Push ADAPTER (1) on VALVE STEM (2), so that the hole of the ADAPTER (1) with the spline is facing up. Fig. A. Tighten THREAD ON STEM SCREW (3) to secure ADAPTER (1). TO DECK ADAPTER Find correct position of LEVER HANDLE ASSEMBLY (4) by adjusting male teeth on ADAPTER (1) to female teeth in HANDLE (4). -
Page 11: Cable Adjustment Procedure
Speed Connect™ Drain Troubleshooting Guide If sink does not hold water even though Stopper is in the “down” position: • Follow CABLE ADJUSTMENT PROCEDURE. If Stopper does not raise up fully or sink drains too slowly: • Follow CABLE ADJUSTMENT PROCEDURE. If you need to remove the Stopper: •... - Page 12 LOGO the Drain so that the Plastic Loop is facing toward the front of the Sink and the American Standard logo is facing rear. Rotate Stopper slightly if necessary so that the Stopper slides all the way down. Fig. H.
- Page 13 PORTSMOUTH™ Spread Lavatory Faucet with Speed Connect™ Drain MODEL NUMBER 7420.801 7420.821 Series M950211-YYY0A LIFT ROD & KNOB M962946-YYY0A CROSS HANDLE M962590-YYY0A SPOUT KIT M962937-YYY0A M922881-YYY0A HANDLE AERATOR Replace the "YYY" with appropriate finish code CHROME BLACKENED BRONZE M911741-0070A OIL RUBBED BRONZE SEAL M962592-0070A SATIN NICKEL...
- Page 14 PORTSMOUTH™ Spread Lavatory Faucet with Speed Connect™ Drain MODEL NUMBER 7415.801 7415.821 M962455-YYY0A M962946-YYY0A LIFT ROD & KNOB CROSS HANDLE Series M962052-YYY0A SPOUT KIT M962947-YYY0A HANDLE M922881-YYY0A AERATOR Replace the "YYY" with appropriate finish code M962453-YYY0A CHROME SEAL & ESCUTCHEON BLACKENED BRONZE M962592-0070A OIL RUBBED BRONZE...