Advertisement
Table of Contents
Contents
Nedis FISC3650BK - Film Scanner Manual
Intended use
The product is exclusively intended for scanning negative film or slide film and converting it to digital video.
The product functions exclusively in combination with the provided DIGITNOW! software.
Any modification of the product may have consequences for safety, warranty and proper functioning.
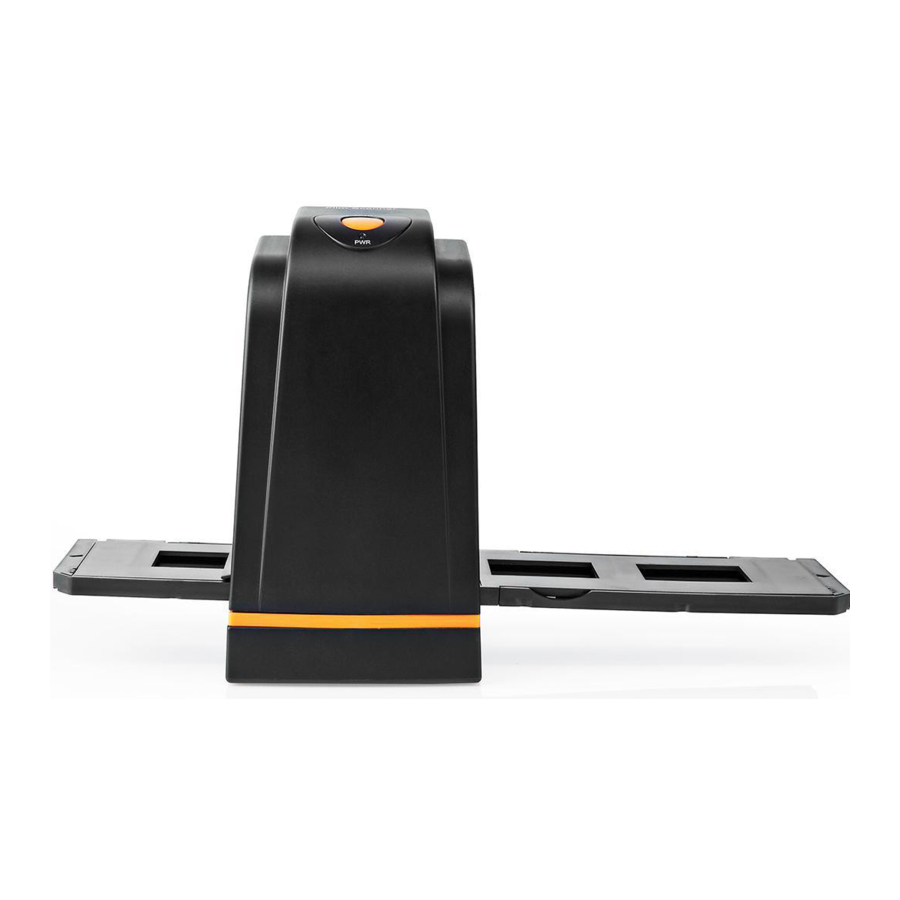
Main parts

- SCAN button
- Status indicator LED
- Casing
- Brush
- Negative film holder
- Positive slide holder
- CD-ROM with driver software
- Mini USB port
- Film holder slot
- USB cable
Safety instructions

- Only use the product as described in this manual.
- Do not use the product if a part is damaged or defective. Replace a damaged or defective device immediately.
- Disconnect the product from the electrical outlet and other equipment if problems occur.
- Do not expose the product to water or moisture.
- Do not expose the product to heat, cold or direct sunlight.
- Do not use the provided brush to clean the film.
Connecting the Film scanner
- Connect A10 to a USB 2.0 port of your computer.
- Connect the other end of A10 to A8.
![information]() The film scanner is recognised automatically by the computer and is ready for use after a few moments.
The film scanner is recognised automatically by the computer and is ready for use after a few moments. - Insert A7 into your computer.
- Install the driver software.
- Run the software. When prompted, enter the software serial number.
![information]() The serial number is printed on the CD-ROM sleeve.
The serial number is printed on the CD-ROM sleeve.
 The film scanner is recognised automatically by the computer and is ready for use after a few moments.
Feed film or slides into the scanner

- Open the film or slide holder by gently pulling the latch in the middle while firmly holding the back of the holder.
- Place film in the film holder or place framed slides in the slides holder.
- Close the holder.
- Insert the holder arrow-first into A9.
- Push until the first picture is centered.
Scanning

- In the DIGITNOW! software menu bar, click "Get Photo" and choose "From Film Scanner".
- Choose the film type (D2), resolution (D3) and the film size (D4).
- Click "Scan" (Windows) or "Take image" (Mac) (D7) or press A1 to scan the picture. It takes several seconds to save your picture and show it on screen.
- Adjustments (D5) can be made to the saturation, brightness, contrast and the level of each individual RGB channel.
- Click D6 to reset the adjustment levels to their defaults.
- Push the holder further into A9 until you reach the next frame or slide.
- Click D7.
- Repeat for all remaining frames or slides.
Troubleshooting
| Problem | Possible cause | Solution |
| No power | No USB connection | Make sure the USB cable is connected. A2 should light up. |
| Spots show up on the picture | Dirt inside the film scanner | Use A4 to clean the inside of the film scanner |
| Dirt on the film | Clean the film with a specialised product. Do not use the provided brush to clean the film. |
Specifications
| Product | Film Scanner |
| Article number | FISC3650BK |
| Dimensions (l x w x h) | 82 x 86 x 152 mm |
| Weight | 350 g |
| Interface | USB 2.0 |
| Power supply | 5 V DC / 1 A |
| Image sensor | 5 MP colour CMOS |
| Lens | Fixed focus precision glass element |
| Exposure control | Automatic with manual fine tuning |
| Colour balance | Automatic with manual fine tuning |
| Quality | Standard & interpolated (1800 & 3600 dpi) |
| Colour depth | 10 bits per colour channel |
| Scan method | Single pass |
| Light source | Backlight with 3 white LEDs |
| Software compatibility | Mac: OS X Snow Leopard 10.6 and above Windows: 7 / 8 / 10 (32 / 64 bit) |

Documents / ResourcesDownload manual
Here you can download full pdf version of manual, it may contain additional safety instructions, warranty information, FCC rules, etc.
Advertisement
Thank you! Your question has been received!

Need Assistance?
Do you have a question about the FISC3650BK that isn't answered in the manual? Leave your question here.