Philips SA178 User Manual
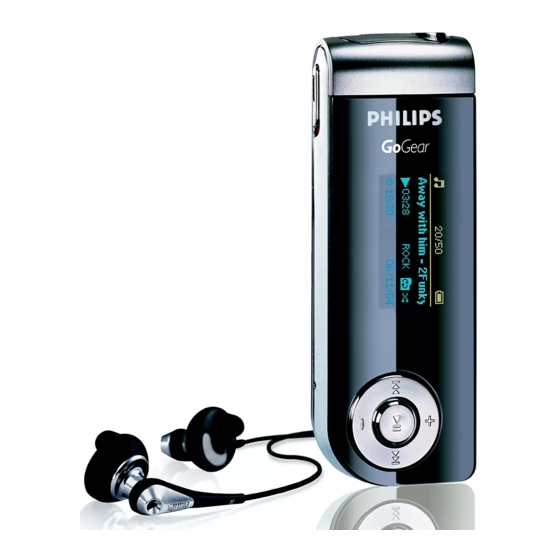
Digital audio player
Hide thumbs
Also See for SA178:
- Specifications (2 pages) ,
- User manual (20 pages) ,
- Quick start manual (9 pages)
Table of Contents
Advertisement
user manual
manuel d'utilisation
gebruikershandleiding | manuale per l'utente
användar-handbok
Digital Audio Player
Lecteur audio numérique | Digitaler Audio-Player | Reproductor de audio digital
Digitale audiospeler
Digital ljudspelare
| benutzerhandbuch
| Lettore audio digitale | Leitor Áudio Digital
| manual del usuario
| manual do usuário
Advertisement
Table of Contents

Related Manuals for Philips SA178


Summary of Contents for Philips SA178
-
Page 1: Digital Audio Player
user manual manuel d’utilisation | benutzerhandbuch gebruikershandleiding | manuale per l'utente användar-handbok Digital Audio Player Lecteur audio numérique | Digitaler Audio-Player | Reproductor de audio digital Digitale audiospeler Digital ljudspelare | manual del usuario | manual do usuário | Lettore audio digitale | Leitor Áudio Digital... -
Page 2: About Your New Product
We hope you enjoy your product Please visit www.philips.com/support - FAQ, Frequently Asked Questions - Latest user manuals - Latest PC software downloads - Firmware upgrade files Since it is possible for you to upgrade your product, we recommend that you register your product on www.philips.com/register... -
Page 3: Overview Of Controls And Connections
Overview of controls and connections HOLD RESET Display J( / )K Volume + / - A - B MENU USB slider ***FM radio is only available to some regional versions. Microphone Headphones jack Disable key press Restore the player Dynamically displays menu, options and track information Rewind / Fast forward;... - Page 4 Preparations Install software Insert the supplied CD into your computer's CD-ROM drive. If the CD does not autorun, please click the .exe file from the root directory of the CD. Select your language and follow screen instructions to complete installation of Windows Media Player and Firmware Manager.
-
Page 5: Powering On/Off
Your device will power down in less than 60 seconds. Your device will save all settings and un-finished recordings before it powers down. until the PHILIPS splash screen appears. again until there is no display on the screen. Battery two-thirds full Battery low blinks. -
Page 6: Root Menu
Root menu When your device powers up, you will see the Root menu. Otherwise, press and hold MENU to go to the root menu. Music enter to play your digital music tracks Radio enter to listen to your radio presets Recordings enter to play and manage recordings Folder... -
Page 7: Folder View
MUSIC mode: Playback (also applicable to playback of recordings) From the root menu, select MUSIC to enter the MUSIC library. Your device will play all your music alphabetically in the music library as you press 2;. Basic Operation Go to next track Go to previous track Pause music Forward search... - Page 8 Advanced features in playback A-B REPEAT To repeat or loop a sequence in a track: Press at your chosen starting point; appears on the screen. Press again at your chosen end point; appears on the screen, and the repeat sequence begins. PLAY MODES You can set your device to play music tracks randomly (Shuffle repeatedly (repeat...
- Page 9 EQUALIZERS You can set your device to play music tracks with different EQ (equalizers). Changing equalizers Press MENU. Select EQUALIZER. Use scroll controls to select Rock, Funk, Jazz, Classic, Hip Hop, Dance, Custom, or Off. Custom EQ The Equalizer custom setting provides 5 adjustable bands: Bass, Low, Mid, High and Treble. Press MENU.
-
Page 10: Radio Mode
Radio mode*** From the root menu, select RADIO to enter the radio mode. Manual tune From the root menu, select RADIO to enter the radio mode. Press MENU. Select Manual Tune. Press Press to search the station or press and hold next available station. -
Page 11: Making Recordings
Making recordings When your device is not connected to the computer, you can make voice or radio recordings. Making voice recording Make sure you are not in the radio mode and music or recordings is in stop or pause status. Press to start voice recording. -
Page 12: Customizing Settings
Customizing settings Press MENU for settings options. Press to scroll up or to scroll down for your option. Press previous levels. Press to confirm your selection. Press MENU to exit the existing settings screens. - Options for each setting are shown on the device display. - Available settings vary with selected mode. -
Page 13: About Firmware Manager
About Firmware Manager Your device is controlled by an internal program called firmware. With Firmware Manager, you can update and restore your device with a few simple clicks. Install Firmware Manager Insert the supplied CD into your computer’sCD-ROM drive. Follow screen instructions to begin and complete installation. Update and restore firmware Insert the supplied CD into your computer’s CD-ROM drive. -
Page 14: Troubleshooting
If a fault occurs, first check the points listed in the following pages. For further help and other troubleshooting tips, please also check out FAQs at www.philips.com/support. If you are unable to find a solution by following these hints, consult your dealer or service center. -
Page 15: Safety And Maintenance
Active mobile phones in the vicinity may cause interference. Backup your files. Please ensure that you retain the original files that you have downloaded to your device. Philips is not responsible for any loss of content if the product becomes damaged or not readable / legible. -
Page 16: Copyright Information
Copyright information All other brand and product names are trademarks of their respective companies or organizations. Unauthorized duplication of any recordings downloaded from the internet or made from audio CDs is a violation of copyright laws and international treaties. The making of unauthorized copies of copy-protected material, including computer programmes, files, broadcasts and sound recordings, may be an infringement of copyrights and constitute a criminal offence.This equipment should not be used for such purposes. -
Page 17: Notice For The Usa
1.This device may not cause harmful interference, and 2.This device must accept any interference received, including interference that may cause undesired operation. Notice for the European Union This product complies with the radio interference requirements of the European Union. Philips Philips SA175 SA178 Philips SA179... -
Page 18: Technical Data
Tuner / Reception / Transmission Auto store / Tuner band: FM*** Connectivity Music transfer Data transfer System Requirements PHILIPS reserves the right to make design and specification changes for product improvement without prior notice. 40 dB customizable Rock / Funk / Jazz / Classic / Hip Hop / Dance /... -
Page 19: About Windows Media Player
About Windows Media Player With Windows Media Player you can easily manage your digital music collection and transfer music to your device. Note: Copy protect (DRM) music that has not been transferred to your device using Windows Media Player can not be played on your device. Install Windows Media Player and Firmware Manager Insert the supplied CD into your computer's CD-ROM drive. -
Page 20: Launch Windows Media Player
Launch Windows Media Player 10 Connect your device to your computer using the supplied USB cable. The USB connection screen will automatically appear. Please refer to your computer’s manual for the exact position of your USB port. Look for the USB symbol on the processing unit of your computer. Launch Windows Media Player. -
Page 21: Search And Add Tracks To The Library
Search and add tracks to the Library Go to File menu. Click Add to Library > By Searching Computer. Click Browse in the dialog box to point to the folder you want to add to. Complete the information in the dialog box, and then click Search. Files will be added to the Library. -
Page 22: Transfer Tracks To Your Device
Transfer tracks to your device Simply connect your device to your computer, choose the synchronization method you want, and you're ready to synchronize your library to your device. Choose a synchronization method: Automatic. With this option, the Player synchronizes content to the device when you connect it to your computer or when you change synchronization settings.The Player synchronizes your entire library if it can fit, or the Player synchronizes your favorite content first. - Page 23 In the Items on Device pane, show the device that you want to copy files to, i.e. GoGear Audio / Philips GoGear . Clear the check boxes next to any files you do not want to copy.. Click the Start Sync button For further details of music transfer on WMP 10, go to the help section of Windows Media Player and click Help >...
-
Page 24: Add Tracks To A Playlist On Your Pc Using Wmp
Add Tracks to a Playlist on your PC using WMP Click to highlight an item. Right click on the item and select Add to > Additional Playlist. From the Add to Playlist pop-up window, select an existing playlist or add new one. The selection is added to playlist. -
Page 25: Delete Tracks And Playlists
Delete Tracks and Playlists Click to highlight an item. Right click and select Delete to delete. Press and hold <Ctrl> on your keyboard and click to select more than one item. To select consecutive items, click the first item, press and hold <Shift> on your keyboard, and then click the last item. -
Page 26: Edit Track Information
Edit Track Information Click on a track. Right click and select Edit. Click on the text boxes to edit relevant information. *Actual display varies with use. -
Page 27: Search For Tracks
Search for Tracks Type a search string in the Search field. Click on Search to start searching. You will see tracks that contain the search string. You can play, transfer, delete or add these tracks. *Actual display varies with use. -
Page 28: Firmware Upgrade
Your device is controlled by an internal program called firmware. You can install the latest firmware from the bypacked CD and download it from www.philips.com/support to keep your device updated. Please charge your device fully before firmware upgrade. This will ensure steady power supply for completing the whole process. - Page 29 Specifications are subject to change without notice. Trademarks are the property of Koninklijke Philips Electronics N.V. or their respective owners 2005 © Koninklijke Philips Electronics N.V. All rights reserved. www.philips.com Printed in China...