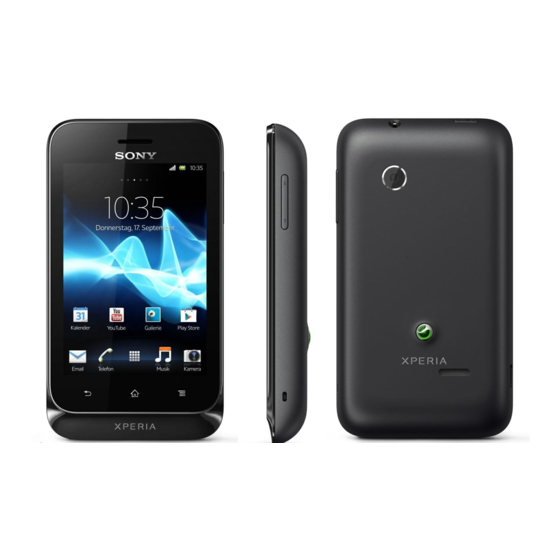
Sony Xperia tipo ST21i Test Instructions
Hide thumbs
Also See for Xperia tipo ST21i:
- User manual (120 pages) ,
- Troubleshooting manual (44 pages) ,
- Working instructions (39 pages)
Summary of Contents for Sony Xperia tipo ST21i
- Page 1 Test Instructions - mechanical - Xperia tipo ST21i, ST21a, ST21i2, ST21a2 1266-1689 Rev 4 © Sony Mobile Communications AB – Company Internal...
-
Page 2: Table Of Contents
2.4 Network Test..................19 2.4.1 On-the-air call to mobile (no UMTS network available) ......19 2.4.2 On-the-air call to mobile (UMTS network available) ....... 19 Revision History ................20 1266-1689 Rev 4 © Sony Mobile Communications AB – Company Internal 2(20) - Page 3 Test Instructions (mech) For general information about test procedures, refer to 1220-1333: Generic Repair Manual - mechanical 1266-1689 Rev 4 © Sony Mobile Communications AB – Company Internal 3(20)
-
Page 4: Pre-Test Preparations
Battery Cover is removed. If affected (red color) - handle the phone according to your local directives. If not affected by liquid, proceed to the ‘Pre-Test Preparation’ below. 1266-1689 Rev 4 © Sony Mobile Communications AB – Company Internal 4(20) -
Page 5: Software
• Press and hold the Volume Down key down on the phone, connect the phone to the USB cable and then release the Volume Down key. • Select the appropriate service and follow the on-screen instructions. 1266-1689 Rev 4 © Sony Mobile Communications AB – Company Internal 5(20) -
Page 6: Tests
For more information, refer to 1220-1333: Generic Repair Manual - mechanical XPERIA The following pictures will show a simplified basic phone for a general visualization of the service tests! 1266-1689 Rev 4 © Sony Mobile Communications AB – Company Internal 6(20) -
Page 7: Service Tests
Rainbow colors on full screen. Make sure that there are no missing segments and that the colors and contrast are OK. Press the Back key to return to the Service Test Menu. 1266-1689 Rev 4 © Sony Mobile Communications AB – Company Internal 7(20) -
Page 8: Led
Press the Volume up/Volume down key to adjust the speaker volume. Press the Back key to return to the Service Test Menu. 1266-1689 Rev 4 © Sony Mobile Communications AB – Company Internal 8(20) -
Page 9: Earphone
2.2.9 Vibrator Press the Menu key or Side keys to start the vibrator test. Press the Back key to return to the Service Test Menu. XPERIA 1266-1689 Rev 4 © Sony Mobile Communications AB – Company Internal 9(20) -
Page 10: Camera
If a link can be established, the Bluetooth function is regarded to be fully functional. Press the Back key to return to the Service Test Menu. XPERIA 1266-1689 Rev 4 © Sony Mobile Communications AB – Company Internal 10(20) -
Page 11: Wlan
Go to Wi-Fi and search for any available Wi-Fi; Step 3: Access points Found list; Step 4: Select the target Wi-Fi network; XPERIA Step 5: Input the password to get connection with the available Wi-Fi; XPERIA 1266-1689 Rev 4 © Sony Mobile Communications AB – Company Internal 11(20) -
Page 12: Gps
Manual - mechanical Accelerometer Accelerometer 2.2.14 Accelerometer X: 0,1234 Y: 6,7890 The accelerometer test displays the actual position of the Z: 0,1234 phone as a 3D coordinate X:Y:Z. XPERIA 1266-1689 Rev 4 © Sony Mobile Communications AB – Company Internal 12(20) -
Page 13: Proximity Sensor
‘4 seconds start’ and then a message stating whether the test was OK or not. 4 seconds start Press the Back key to return to the Service Test Menu. XPERIA 1266-1689 Rev 4 © Sony Mobile Communications AB – Company Internal 13(20) -
Page 14: Total Call Time
Press the Back key to return to the Service Test Menu. XPERIA Security No Data 2.2.19 Security No data. Press the Back key to return to the Service Test Menu. XPERIA 1266-1689 Rev 4 © Sony Mobile Communications AB – Company Internal 14(20) -
Page 15: Fm Radio
• Remove the charger from the system connector and cerify that the display shows the phone is discharged and also the info about the battery health and battery level. Connect a Sony charger (to secure correct result) XPERIA Press the Back key to return to the Service Test Menu. -
Page 16: Verify Certificates
The phone should detect that the USB connecting status is connected. Press the Back key to return to the Service Test Menu. XPERIA 1266-1689 Rev 4 © Sony Mobile Communications AB – Company Internal 16(20) -
Page 17: Manual Tests
2.3.3 Home key test 15:35 Whatever the phone shows now during operation, press the 2010-03-15 Home key for the phone go directly back to the Stand by screen. XPERIA 1266-1689 Rev 4 © Sony Mobile Communications AB – Company Internal 17(20) -
Page 18: Charging Via Usb (Charger Or Computer)
LED and the Battery icon in the display. • Remove the USB cable from the connector and verify that the notification LED and Battery icon no longer indicates charging. 1266-1689 Rev 4 © Sony Mobile Communications AB – Company Internal 18(20) -
Page 19: Network Test
Ensure that the UMTS/3G icon now is visible at the top of the display. To verify the radio functions (UMTS) of the phone, follow the ‘2.4.1.1 Procedure’ above. 1266-1689 Rev 4 © Sony Mobile Communications AB – Company Internal 19(20) -
Page 20: Revision History
Test Instructions (mech) Revision History Rev. Date Changes / Comments 2012-Jul-23 Released 2012-Jul-24 2.2.20 Text update 2012-Aug-24 ST21i2 & ST21a2 Added 2012-Sep-7 Chapter 2.2.24 updated 1266-1689 Rev 4 © Sony Mobile Communications AB – Company Internal 20(20)


