Table of Contents
Advertisement
Quick Links
Advertisement
Table of Contents

Related Manuals for Agilent Technologies AA Series


Summary of Contents for Agilent Technologies AA Series
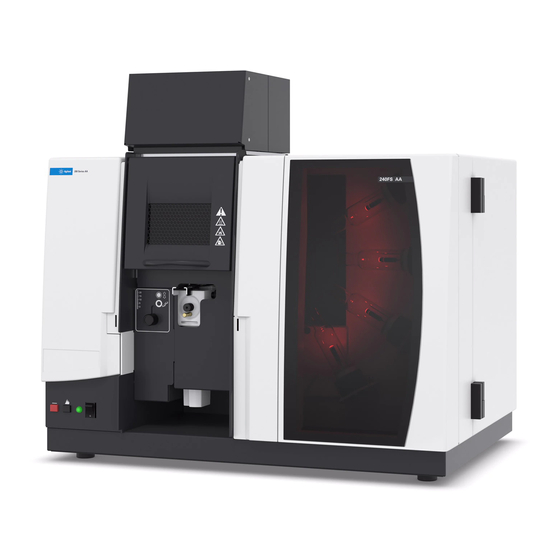
- Page 1 Agilent 240/280 Series AA (including Zeeman) User’s Guide...
- Page 2 Use, duplication or disclosure of Software is subject to The material contained in this Agilent Technologies’ standard © Agilent Technologies, Inc. 1997, document is provided “as is,” and is commercial license terms, and non- 2000-2004, 2010-2012 subject to being changed, without DOD Departments and Agencies of the notice, in future editions.
-
Page 3: Table Of Contents
Contents Contents 1. Safety Practices and Hazards General Electrical Hazards Heat, Vapors and Fumes Compressed Gases and Cylinders Gas Hoses and Connections Ultraviolet Radiation Other Warning and Caution Messages Warning Symbols Color Coding CE Compliance Electromagnetic Compatibility EN55011/CISPR11 ICES/NMB-001 Flame Operation Flammable Solvents Compressed Gases and Cylinders for Flame Operation Acetylene... - Page 4 Contents Heat Hazards Perchloric Acid Flashbacks Furnace and Zeeman Operation Gases Heat Hazards Vapors and Fumes UV Radiation Magnetic Field (Zeeman only) 2. Introduction Installation Requirements Agilent AA Documentation Conventions Specifications Environmental Power Gas supplies Weights and Dimensions 3. Installation PC Requirements Recommended PC Configuration Installation Procedure Overview...
- Page 5 Contents Installing the SpectrAA CFR Software Installing the SpectrAA Base Software Installing the SpectrAA CFR Software GPIB Communications Installing the PCI-GPIB Communications Card Configuring the PCI-GPIB Communications Card Installing the USB-GPIB-HS Converter Setting Up for Agilent AA-DUO Operation Starting the SpectrAA Software SpectrAA Release Notes and Software Status Bulletin Installing the Drivers for the Tube-CAM Furnace Camera Option Driver Installation...
- Page 6 Contents Help Searching for Help Printing Help Viewing Help While You Work Quitting Help 5. Getting Started Instrument Setup Connections Power Moving Your Instrument Starting the System Pre-analysis Checklist Agilent 240/280 Series AA User’s Guide...
-
Page 7: Safety Practices And Hazards
Safety Practices and Hazards 1. Safety Practices and Hazards General Electrical Hazards Heat, Vapors and Fumes Compressed Gases and Cylinders Gas Hoses and Connections Ultraviolet Radiation Other Warning and Caution Messages Warning Symbols Color Coding CE Compliance Electromagnetic Compatibility Flame Operation Flashbacks Furnace and Zeeman Operation General... -
Page 8: Electrical Hazards
Safety Practices and Hazards Operation of an atomic absorption spectrometer can involve the use of compressed gases, flames, and hazardous materials including corrosive fluids and flammable liquids. Unskilled, improper, or careless use of this instrument can create explosion hazards, fire hazards, or other hazards which can cause death, serious injury to personnel, or severe damage to equipment and property. -
Page 9: Heat, Vapors And Fumes
Safety Practices and Hazards Do not connect the instrument to the mains power supply until you have made sure that the operating voltage is correctly set for the mains power supply in the specific outlet in your laboratory to which the equipment is connected. -
Page 10: Compressed Gases And Cylinders
Safety Practices and Hazards Compressed Gases and Cylinders All compressed gases (other than air) can create a hazard if they leak into the atmosphere. Even small leaks in gas supply systems can be dangerous. Any leak (except that of air) can an explosion hazard, a fire hazard, or result in an oxygen–deficient atmosphere. -
Page 11: Gas Hoses And Connections
Safety Practices and Hazards Gas Hoses and Connections Even small leaks in gas supply systems can be dangerous. Any leak can create an explosion hazard, a fire hazard, or can result in an oxygen-deficient atmosphere. Such hazards can cause death, serious injury, asphyxiation, anesthetic effects, and serious damage to equipment and property. -
Page 12: Other
Safety Practices and Hazards Other Other specific warnings and cautions appear in the manual and in the online Help where appropriate, and detail the specific hazard, describe how to avoid it, and specify the possible consequences of not heeding the warning or caution. Warning and Caution Messages WARNING Name of Warning... - Page 13 Safety Practices and Hazards A triangular symbol indicates a warning. The meanings of the symbols that may appear alongside warnings in the documentation or on the instrument itself are as follows: Corrosive liquids Electrical shock Explosion hazard Heavy weight Eye hazard Fire hazard (danger to feet) Heavy weight...
-
Page 14: Color Coding
Safety Practices and Hazards The following symbols appear on the instrument for your information. Mains power on Mains power off Fuse Single phase alternating current When attached to the rear of the instrument, it indicates that the product complies with the requirements of one or more EU directives. -
Page 15: Ce Compliance
Safety Practices and Hazards CE Compliance Your Agilent AA instrument has been designed to comply with the requirements of the Electromagnetic Compatibility (EMC) Directive and the Low Voltage (electrical safety) Directive (commonly referred to as the LVD) of the European Union. Agilent has confirmed that each product complies with the relevant Directives by testing a prototype against the prescribed EN (European Norm) standards. -
Page 16: Ices/Nmb-001
Make sure that all peripheral devices are also certified. Make sure that appropriate cables are used to connect the device to peripheral equipment. Consult your equipment dealer, Agilent Technologies, or an experienced technician for assistance. Changes or modifications not expressly approved by Agilent Technologies could void the user’s authority to operate the... - Page 17 Safety Practices and Hazards To reduce the possibility of fire or explosion: When initially selecting an organic solvent, choose a solvent having the highest flash point consistent with your analytical requirements. Never use a solvent having a specific gravity lower than 0.75. ...
-
Page 18: Compressed Gases And Cylinders For Flame Operation
Safety Practices and Hazards Keep the burner slot, spray chamber and liquid trap clean. Always use the internal igniter to light the flame as the flame will not operate unless all the safety interlocks are satisfied. Figure 1. System setup diagram Compressed Gases and Cylinders for Flame Operation This spectrometer is to be used only with air, nitrous oxide, and acetylene for flame operation. - Page 19 Safety Practices and Hazards Use acetylene at pressures lower than 105 kPa (15 psig). At pressures above this level, acetylene can explode spontaneously. Your Agilent AA is designed to operate at fuel supply pressures between 65 and 100 kPa (9.5-14.5 psig). Refer to the Specifications section or the rear of the instrument for the exact range and recommended pressure.
-
Page 20: Nitrous Oxide
Safety Practices and Hazards To reduce the possibility of fire or explosion: Test the supply ‘plumbing’ regularly for leaks with a brush and soapy water or a proprietary leak-detecting solution (never use a naked flame when testing for leaks) ‘Crack’... -
Page 21: Nebulizer
Safety Practices and Hazards Burner interlocks are incorporated to minimize the possibility of using the wrong burner. Never interfere with or attempt to bypass any interlock fitted to this instrument. To minimize the rate of burner blockage, the burner slot must be cleaned and polished as described in the Maintenance section. -
Page 22: Liquid Trap
Safety Practices and Hazards Liquid Trap Improper use of the liquid trap can create explosion hazards, fire hazards, and toxic vapor hazards which can result in death or serious personal injury. The liquid trap interlock is incorporated to minimize the possibility of attempting to operate the instrument with an empty trap or with the drain tube missing. -
Page 23: Perchloric Acid
Safety Practices and Hazards When operating a flame system, always operate your spectrometer with the flame shield closed, and the sample compartment front panel in place. Keep your hands out of the sample compartment while a flame is burning. When operating a flame system make sure the chimney is in place with the cutaway skirt (if present) to the back. -
Page 24: Flashbacks
Safety Practices and Hazards When solvent extractions of perchloric solutions are performed, some of the acid NOTE may dissolve in the organic solvent that is subsequently aspirated. Also, if the organic solution is aspirated while floating on the surface of the acid, do not allow the capillary tube to drop below the organic layer and suck up aqueous perchloric acid. - Page 25 Safety Practices and Hazards Ensure that the spray chamber and liquid trap are kept clean. If dirty solutions are being analyzed (for example, engine oils), ensure that the spray chamber, liquid trap, float and drain tube are regularly cleaned and flushed with a suitable solvent so that sludge does not build up in the parts.
-
Page 26: Furnace And Zeeman Operation
Safety Practices and Hazards As free acetylene is unstable at elevated pressure, it has to be stored in the cylinder by dissolving it in acetone. If the gas is withdrawn too quickly, or the cylinder pressure is allowed to drop below 700 kPa, acetone may be drawn off in sufficient quantities to affect analytical performance, damage seals, O-rings and hoses, or even cause a flashback. -
Page 27: Vapors And Fumes
Safety Practices and Hazards Allow the furnace atomizer to cool before removing it from the sample compartment. Vapors and Fumes Never place your head over the graphite tube atomizer while it is operating. This could cause inhalation of hazardous or toxic fumes, or your skin and eyes could be injured by corrosive vapors or fumes. - Page 28 Safety Practices and Hazards This page is intentionally left blank. Agilent 240/280 Series AA User’s Guide...
-
Page 29: Introduction
Introduction 2. Introduction Installation Requirements Agilent AA Documentation Conventions Specifications Environmental Power Gas supplies Weights and Dimensions The Agilent 200 series AA spectrometers are controlled by Agilent’s innovative AA worksheet software. The Agilent series AA includes the following instruments: 240/240FS AA, 240Z AA, 280 AA and 280Z AA. This documentation is appropriate for all of the instruments listed above. -
Page 30: Installation Requirements
Introduction “Tool Tips” state the allowed range for each field Comprehensive error system The capacity to simultaneously operate one flame and one furnace (deuterium or Zeeman) spectrometer simultaneously from one computer (requires SpectrAA PRO version software) Features to assist users to achieve compliance with US FDA 21 ... -
Page 31: Specifications
Introduction Specifications Your Agilent AA instrument is designed for indoor use. It is suitable for the following categories: Installation category II Pollution degree 2 Equipment Class I Environmental Condition Altitude Temp Humidity (%RH) t (°C) non-condensing Non-operating (transport) 0-2133 m 5-45 20-80... -
Page 32: Power
Introduction Power System unit Required supply voltage Rating 240 AA 100 VAC +10% -5% 170 VA 120, 220 or 240 VAC ±10% 230 VAC +14% -6% 230 VAC +6% -14% 50 or 60 Hz ±1 Hz 280 AA 100 VAC +10% -5% 230 VA 120, 220 or 240 VAC ±10% 230 VAC +14% -6%... - Page 33 Introduction Power Connections Agilent AA instruments are supplied with different power plugs to suit the area into which they are sold: AA instrument GTA 120, Zeeman Area - code Plug supplied Australia -00 10 A, 250 VAC Clipsal 439D15M Complies with AS3112 USA -01 Complies with NEMA 5-15P Complies with NEMA L6-30P...
- Page 34 Introduction Other Electrical Connections Rear of instrument: IEEE 488 Accessory, 9-way female D-range type Accessory, MCA, 6 way DIN type (AA280FS and AA280Z only) USB port, optional UltrAA lamp connections: Burndy circular 6-way, optional (actual number depends on the model and option selected) WARNING Shock Hazard High voltage–...
- Page 35 Introduction Lamp bay: Deuterium lamp: Molex 3-way connection, in lamp compartment (behind lamp panel in lamp compartment on 240/280 series AA instruments). WARNING Shock Hazard To maintain safety, only the deuterium lamp should be used at these connections. Hollow cathode lamps: ...
- Page 36 Introduction Fuses Non-Zeeman 240 series AA T2.5 A H250 V, IEC 127 sheet 5, 5 x 20 mm (100-120 & 220-240 VAC) 280FS AA T4 A H250 V, IEC 127 sheet 5, 5 x 20 mm (100-120 & 220-240 VAC) Zeeman 240Z/280Z AA 15 A long delayed-action circuit breaker with a thermal cutout.
-
Page 37: Gas Supplies
Introduction Gas supplies Air Purge Instrument grade Must be clean & Instrument grade >99.5% pure dry. (Air filter to be >99.5% pure used if required) Allowed range 65-100 kPa 245-455 kPa 245-455 kPa 245-455 kPa (9.5-14.5 psi) (35-65 psi) (35-65 psi) (35-65 psi) Recommended 75 kPa (11 psi) - Page 38 Introduction This page is intentionally left blank. Agilent 240/280 Series AA User’s Guide...
-
Page 39: Installation
Installation 3. Installation PC Requirements Installation Procedure Overview Guidelines for Software Installation Installing the SpectrAA Base Software Installing the SpectrAA PRO Software Installing the SpectrAA CFR Software GPIB Communications Setting Up for Agilent AA-DUO Operation Starting the SpectrAA Software SpectrAA Release Notes and Software Status Bulletin Installing the Drivers for the Tube-CAM Furnace Camera Option... -
Page 40: Recommended Pc Configuration
Installation Recommended PC Configuration IBM compatible PC with 2.66 GHz processor 4 GB RAM 500GB Hard disk drive 256MB Graphics card supporting 1024 x 768 resolution 16 speed DVD drive Integrated audio/sound card and speakers ... -
Page 41: Installation Procedure Overview
Installation Installation Procedure Overview There are three software installation scenarios: SpectrAA Base (for use with SpectrAA Base version 5.2 or greater and Windows 7 Professional 64-bit SP1 operating systems) SpectrAA PRO (for use with SpectrAA PRO version 5.2 or greater ... -
Page 42: Installing The Spectraa Base Software
Installation Installing the SpectrAA Base Software This procedure is for SpectrAA version 5.2 or greater and Microsoft Windows 7 NOTE Professional 64-bit SP1 operating systems only. Close down all Microsoft Windows applications. Insert the SpectrAA Base CD-ROM into your CD-ROM drive. The installation program should start automatically. - Page 43 Installation If you are running an Agilent AA-DUO system (simultaneous flame and furnace operation): You must now set up the second instrument. To do this: Select the DUO check box. Select the Instrument #2 tab. Select the instrument type from the drop-down list. It does not matter which instrument is assigned to which page, however, ‘Instrument #1’...
- Page 44 Installation If you select Agilent SPS 3 flame autosampler, click Edit COM port parameters to define the COM port and the settings to be used for communicating with the autosampler. Refer to the SPS 3 operation manual for details of the required communications parameters.
-
Page 45: Installing The Spectraa Pro Software
Installation Installing the SpectrAA PRO Software Installation of the SpectrAA Base version 5.2 or greater must be completed prior NOTE to installing the SpectrAA PRO version 5.2 or greater software. Refer to Page 42 for details. The selections entered during installation of the Base software (such as User NOTE Information, Directory Location) will be used for the PRO installation. - Page 46 Installation The SpectrAA Instrument Configuration window will be displayed again. Check that the selections are correct and click OK. Take note of which instrument is listed in ‘Instrument #2’ if running an Agilent AA-DUO system. 10 During installation, you will be asked whether or not to delete the files ‘Workgrp.ini’...
-
Page 47: Installing The Spectraa Cfr Software
Installation Installing the SpectrAA CFR Software This procedure is only for use with Windows XP SP3 systems and SpectrAA CFR IMPORTANT version 5.1 (27) software. If you are not using SpectrAA CFR software version 5.1 (27), please see Page 42 for software installation instructions. Because the CFR version is an upgrade to the base installation, the SpectrAA Base version 5.1 (27) must be installed before any installation of the CFR version. - Page 48 Installation From the ‘Choose Destination Location’ window, select the drive or sub-directory where the SpectrAA software will be installed. If you wish to install the file in a directory other than the default location, select Browse. From the Select Program Folder window choose the name the program shortcut will use on the Windows Start menu.
- Page 49 Installation If you are using any accessories, click the Accessories tab in the ‘SpectrAA Instrument Configuration’ window. Select your GTA (Graphite Tube Atomizer), Flame Autosampler and /or ETC 60 from the drop-down lists. If you select GTA 120, the option for High capacity racks is enabled.
-
Page 50: Installing The Spectraa Cfr Software
Installation 11 When requested, remove the installation CD and replace it in the CD drive with the SpectrAA Help and Videos CD ROM. Click OK to install the Help. 12 From the ‘Install Videos’ window, you can select to copy the Help videos to your hard disk (recommended). -
Page 51: Gpib Communications
Installation Once the installation program commences, follow the prompts, selecting Yes, Next or OK on each page. The SpectrAA Instrument Configuration window will be displayed again. Check that the selections are correct and click Once the installation is complete, restart your computer. Shutdown the PC and install the National Instrument PCI card. - Page 52 Installation The components on the communications card and in the PC are highly static- CAUTION sensitive. To avoid damaging these components you must drain any static charges from your body before installing the board, and prevent the generation of any new static charges during the installation. This can be done by wearing an ESD (electrostatic discharge) wrist strap attached to a grounding point.
- Page 53 Installation Remove a blanking plate from one of the empty slots in the computer. Remove the card from its static-shielded packaging. Do not touch the gold edge connectors. Press the card firmly into the empty PC slot. The gold edge connectors should slide firmly into the matching sockets of the PC slot.
-
Page 54: Configuring The Pci-Gpib Communications Card
Installation Replace the computer cover. Connect the cable between the instrument and the computer (one end plugs into the interface board in the computer, and the other plugs into the socket in the rear of the instrument). Connect the computer to the mains power. 10 Turn the computer on. -
Page 55: Installing The Usb-Gpib-Hs Converter
Installation Installing the USB-GPIB-HS Converter To install a National Instruments USB-GPIB-HS converter: Ensure that the SpectrAA software has been installed. NOTE Turn off the computer. Connect one end of the converter to the instrument and the other end to the USB connection on the back of the computer. Turn on the computer. -
Page 56: Starting The Spectraa Software
Installation In the Run dialog, for Windows 7 type C:\Program Files (x86)\Agilent\sp100\Run\DUAL.EXE or for Windows XP type C:\SP100\RUN\DUAL.EXE and then select OK to start the program. A window displays asking you to turn on the instrument you wish to reconfigure. You must select ‘Instrument 2’ in the configuration. -
Page 57: Spectraa Release Notes And Software Status Bulletin
Installation The Product Key is found on the cover of the Agilent SpectrAA software CD NOTE case which was delivered with the instrument. Complete all the fields on the ‘Product Details’ page. Click Next. Complete all the fields on the ‘Work Environment Details’ page. Click Register. -
Page 58: Driver Installation
Installation Driver Installation To install the drivers: Ensure the SpectrAA software has been installed and the computer has been restarted. Do not open the SpectrAA software and do not connect the camera. Insert the Logitech Quickcam CD-ROM into your CD-ROM drive. Navigate to the installation CD and double-click ‘Setup.exe’. - Page 59 Installation Figure 2. Logitech Webcam Drivers installation window If an ‘Update’ screen is displayed, click Next. The ‘Installing Software’ screen will be displayed. After the installation has completed the ‘Check Settings’ screen will be displayed. Click Next. 10 The software is now installed. Click Checkout my webcam. The Logitech Webcam Software will be displayed.
-
Page 60: Printer Setup
Installation 13 On the ‘Controls’ screen: Deselect ‘RightSound’ Deselect ‘RightLight’. Deselect ‘Autofocus’. Select ‘Advanced Settings’. 14 When ‘Advanced Settings’ are displayed: Deselect ‘Auto’ to the right of the ‘Gain’ slider. Set the ‘Exposure’ and ‘Gain’ sliders to maximum. Click Save. The camera image will appear black because the SpectrAA is turned off. -
Page 61: Software Overview
Software Overview 4. Software Overview Starting the SpectrAA Software SpectrAA Windows Index Page Worksheet Window Reports Window Administration Window Working With the SpectrAA Software Menu Bar Toolbar Dialog Boxes Help Searching for Help Printing Help Viewing Help While You Work Quitting Help The Agilent AA system software (SpectrAA) is a powerful interface that provides high levels of spectrometer control and is easy to use. -
Page 62: Starting The Spectraa Software
Software Overview Starting the SpectrAA Software To start the SpectrAA software click Start > Programs > SpectrAA. Alternatively, double-click on the desktop SpectrAA icon (created during the installation of the software). SpectrAA Windows Index Page When you start the SpectrAA software, the first screen to appear is the introductory screen. -
Page 63: Worksheet Window
Software Overview Worksheet Window The Worksheet window allows you to develop and edit methods, sequences and labels, and initiate sample analysis. Figure 3. The Analysis page of the Worksheet window The worksheet is the fundamental file type for SpectrAA, containing one or more methods, sample labels, sequence information and analytical results. - Page 64 Software Overview The Develop Page Use the Develop page to add, delete, review and modify methods, modify sequence parameters, change the order of methods and copy methods to the Method Library. The Labels Page Use the Labels page to set up solution labels, weights, volumes and dilution factors and to configure SPS or PSD samplers.
-
Page 65: Reports Window
Software Overview Not all menu items are available on all pages of the Worksheet window. If an NOTE item or menu is grayed it is unavailable on that page. Menu items can be accessed by clicking on the desired item with the mouse, or pressing Alt and the active (underlined) letter in the menu name (e.g. -
Page 66: Administration Window
Software Overview The Worksheet Page Use the Worksheet page to select the worksheet results to include in the report. You can use the “Filter” and “Search” buttons to refine your search. The Select Page Use the Select page to choose methods and solutions to include in the report. -
Page 67: Working With The Spectraa Software
Software Overview Working With the SpectrAA Software Menu Bar The Worksheet window contains a menu bar directly beneath the window title bar. This bar displays a number of menu items. For more information on these menus see Page 64. When menu items or options appear grayed they are unavailable for selection. NOTE Toolbar The Toolbar appears on the Index page and the Worksheet window... -
Page 68: Searching For Help
Software Overview The contextual help is accessed from any window, page or dialog box in the SpectrAA software by pressing F1 (the Help function key), the ‘Help’ button (where available), or by selecting ‘On-line Help’ from the Help menu at the top of any page in the Worksheet window, and provides help specific to that screen. -
Page 69: Printing Help
Software Overview Printing Help To obtain a printed copy of the current Help topic: Select the Print icon at the top of the SpectrAA Help window. From the Print Topics dialog, select whether you want to print the selected topic or a range of topics and then select OK. The topics you selected will be printed on the nominated printer. - Page 70 Software Overview This page is intentionally left blank. Agilent 240/280 Series AA User’s Guide...
-
Page 71: Getting Started
Getting Started 5. Getting Started Instrument Setup Connections Power Moving Your Instrument Starting the System Pre-analysis Checklist This chapter describes how to set up the Agilent AA system for analysis and get you started using the instrument. You should have already: Prepared your PC and installed the SpectrAA software as ... -
Page 72: Connections
Getting Started Connections Your Agilent AA instrument is supplied with a set of gas hose fittings and a mains cable which suits the common utility standard in the local region. A Country Kit must be ordered with the Agilent AA instrument. -
Page 73: Moving Your Instrument
Getting Started Connection Before connecting the instrument to the power supply, ensure that both the spectrometer and the mains power supply are turned off. Check that the two voltage selector switches on the instrument rear panel (if present) are set to the correct mains power supply voltage— refer to the table on the rear panel. -
Page 74: Pre-Analysis Checklist
Getting Started Pre-analysis Checklist The general preparation procedure is as follows: Install all the required hardware, including any associated accessories such as SIPS, according to the instructions in the Help (see Page 67) and any accessory manuals. Turn on the instrument and any peripheral accessories as described in the previous section. - Page 76 In This Guide The guide describes the following: Safety Practices and Hazards Introduction Installation Software Overview Getting Started © Agilent Technologies 1997, 2000- 2004, 2010-2012 Printed in Malaysia 01/12 *8510154700* *8510154700* 8510154700 Issue 9...