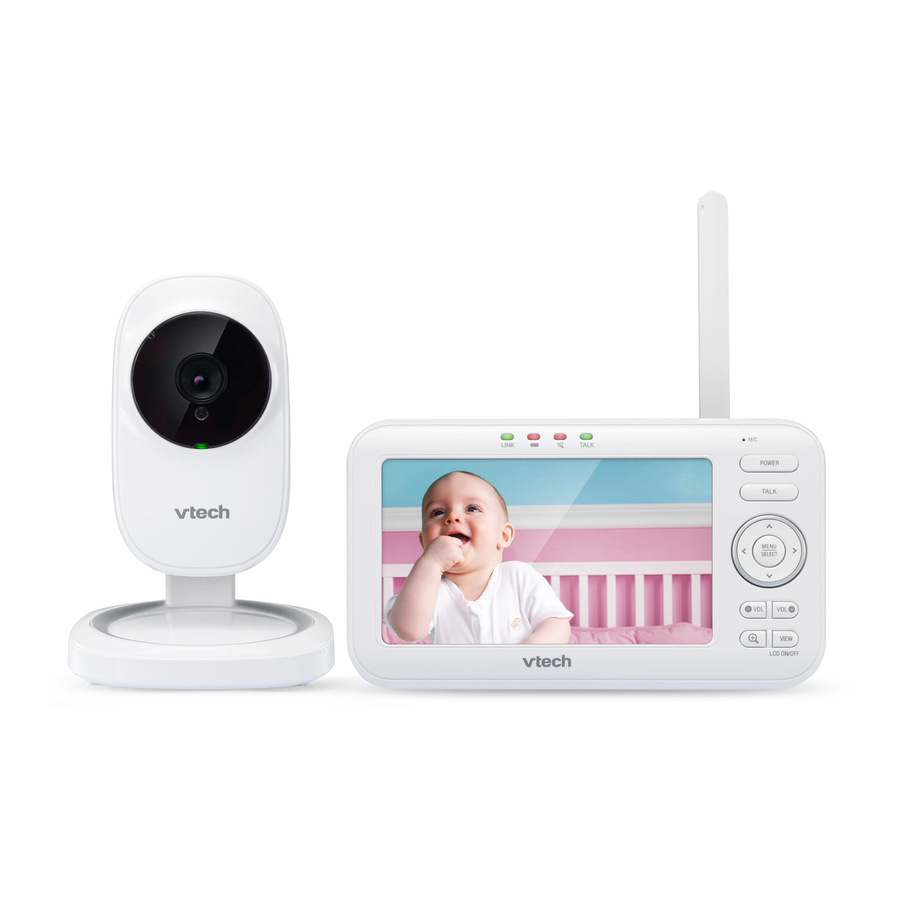
VTech VM5251, VM5251-2 - Full Color Video Monitor Manual
- Quick start manual (2 pages) ,
- Quick start manual (2 pages)
Advertisement
- 1 Introduction
- 2 What's in the box
- 3 Connect and charge the battery
- 4 Before use
- 5 Using the baby monitor
- 6 Baby unit overview
- 7 Parent unit overview
- 8 Parent unit lights
- 9 Parent unit icons
- 10 Night vision
- 11 Mount the baby unit (optional)
- 12 General product care
- 13 Storage
- 14 Frequently asked questions
- 15 Technical specifications
- 16 Documents / Resources
Introduction
Go to www.vtechphones.com to register your product for enhanced warranty support and the latest VTech product news.
Before using this product, please read Important safety instructions. This manual has all the feature operations and troubleshooting necessary to install and operate your new VTech product. Please review this manual thoroughly to ensure proper installation and operation of this innovative and feature-rich VTech product. For support, shopping, and everything new at VTech, visit our website at www.vtechphones.com.
What's in the box

Connect and charge the battery
Install the parent unit battery
The parent unit runs on rechargeable battery or AC power. To continuously monitor your baby, keep the parent unit connected to AC power. With the battery alone, the parent unit can cordlessly run for a short time only.
 NOTES
NOTES
- Use only the battery supplied with this product.
- If the parent unit will not be used for a long time, disconnect and remove the battery to prevent possible leakage.
- Press down on the battery compartment cover to pull it out.
![]()
- Make sure the label THIS SIDE UP is facing up while inserting the battery.
![]()
![]()


Replace the battery
To replace the battery, press down on the battery compartment cover and pull it out, then follow the steps above to install the battery.
Connect the baby monitor

NOTES
- Use only the power adapters supplied with this product.
- Make sure the baby monitor is not connected to a switch-controlled electric outlet.
- Connect the power adapters in a vertical or floor mount position only. The adapters' prongs are not designed to hold the weight of baby monitor, so do not connect them to any ceiling, under-the-table, or cabinet outlets. Otherwise, the adapters may not properly connect to the outlets.
- Make sure the parent unit, the baby unit and the power adapter cords are out of reach of children.
Charge the parent unit battery
When you have connected the parent unit and installed its battery for the first time or after power outage, the parent unit powers on automatically. The battery icon indicates the battery status (see the following table).
Notes
- The parent unit battery is fully charged after 3 hours of continuous charging.
- It takes longer to charge the battery when the parent unit is turned on. To shorten the charging time, turn the parent unit off while charging.
- The standby time varies depending on the sensitivity level you set, your actual use and the age of the battery.
| Battery indicators | Battery status | Action |
The battery icon is off and displays  . . | No battery is installed but operates using AC power, or the battery has been installed incorrectly. | Install the parent unit battery. Charge without interruption (at least 30 minutes). |
The screen displays  Battery low at Parent Unit and Battery low at Parent Unit and  . The . The  light flashes. light flashes. | The battery has very little charge and may be used for only a short time. | Charge without interruption (about 30 minutes). |
The battery icon becomes solid  . . | The battery is fully charged. | To keep the battery charged, connect it to AC power when not in use. |
Before use
Note
- This baby monitor is intended as an aid. It is not a substitute for proper adult supervision, and should not be used as such.
Test your baby monitor
You may test the baby monitor before initial use, and at regular times thereafter.

- For hearing protection, make sure the parent unit is more than 3 feet (1 meter) away from both baby units. If you hear any high-pitched noise, move the parent unit further until the noise stops. You can also press
![]() on the parent unit to reduce the noise.
on the parent unit to reduce the noise.
![]()
 on the parent unit
- Make sure your baby unit and parent unit are on.
- The parent unit displays images from the baby unit.
- Speak towards the microphone of the baby unit. You will hear the sound at the parent unit.
- If you have two baby units, press VIEW on your parent unit. The screen switches to the other baby unit. Then, repeat step 2.
Note
- When the parent unit displays
![]() and then
and then ![]() No Link to CAM # (# represents the baby unit number), and the LINK LED light flashes, move the parent unit closer to the baby unit (observe the minimum distance of 3 feet / 1 meter). You can also check if the baby unit is connected to a live power socket and switched on.
No Link to CAM # (# represents the baby unit number), and the LINK LED light flashes, move the parent unit closer to the baby unit (observe the minimum distance of 3 feet / 1 meter). You can also check if the baby unit is connected to a live power socket and switched on.
 Tip
Tip
- Increase the speaker volume of the parent unit if you cannot hear the sounds transmitted from the baby units.
Positioning the baby monitor
- Keep the baby unit out of the reach of your baby. Never place or mount the baby unit inside the baby's crib or playpen.
![]() Note
Note
- To avoid interference from other electronic devices, place your baby monitor at least 3 feet (1 meter) away from devices such as wireless routers, microwaves, cell phones and computers.
![]()

- Place the baby unit more than 3 feet (1 meter) away from your baby.
![]()
- Adjust the angle of the baby unit camera to aim at your baby.
![]()
- Bend down the temperature sensor so that it stays away from baby unit to avoid deviation of temperature detection.
![]()
- Place the parent unit more than 3 feet (1 meter) away from the baby units to avoid screeching noise.
![]()


- The default volume of your parent unit is level 4, and the maximum volume is level 7. If you experience high-pitched screeching noise from your baby monitor while positioning:
- Make sure your baby unit and parent unit are more than 3 feet (1 meter) apart, OR
- Lower the volume of your parent unit.
Operating range
The operating range of the baby monitor is up to 1000 feet (300 meters) outdoors. The actual operating range may vary depending on the environmental conditions and other interferences such as walls, doors and other obstructions.
Using the baby monitor
Power on or off the baby unit
- Slide the ON/OFF switch to ON to turn on the baby unit. The ON/OFF LED light turns on.
- Slide the ON/OFF switch to OFF to turn off the baby unit. The ON/OFF LED light turns off.
Power on or off the parent unit
- Press and hold POWER to turn on the parent unit. The screen turns on.
- Press and hold POWER again to turn off the parent unit. The screen turns off.
Turn on or off the parent unit screen
You can turn on or off the parent unit screen without powering off the parent unit. You can still hear sound from the baby units.
- Press and hold LCD ON/OFF on the parent unit to turn off the screen.
- Press any keys on the parent unit to turn on the screen again.
Adjust speaker volume
For parent unit:
- Press
![]() on the parent unit at any time when viewing images.
on the parent unit at any time when viewing images.
 on the parent unit at any time when viewing images.
For baby unit:
The baby unit speaker volume determines the lullaby volume and talkback volume transmitted from parent unit. It can be adjusted in the parent unit.
- Press MENU when the parent unit is idle.
- Press
![]() or
or ![]() to choose Volume on CAM, then press SELECT.
to choose Volume on CAM, then press SELECT. - Press
![]() or
or ![]() to choose the desired volume level, Level 1 is the softest while Level 5 is the loudest. Then, press SELECT to confirm your selection.
to choose the desired volume level, Level 1 is the softest while Level 5 is the loudest. Then, press SELECT to confirm your selection.


Note
- Volume adjustment with the parent unit menu is available in Single CAM and Patrol mode only.
Lullaby
The baby monitor has five lullabies and four soothing sounds for you to comfort your baby. You can play lullabies or soothing sounds on the baby unit by controlling remotely with the parent unit.
To play lullabies:
- Press MENU when the parent unit is idle.
- Press
![]() or
or ![]() to choose Lullaby on CAM, then press SELECT.
to choose Lullaby on CAM, then press SELECT. - Press
![]() or
or ![]() to choose Play Melodies, then press SELECT.
to choose Play Melodies, then press SELECT. - Press
![]() or
or ![]() to choose a lullaby, or choose Play All, then press SELECT.
to choose a lullaby, or choose Play All, then press SELECT.
- If Play All is selected, the five lullabies will be played one after the other, until all of them are played.
- When the desired lullaby is selected, press
![]() or
or ![]() to choose Play, then press SELECT.
to choose Play, then press SELECT.
To play soothing sounds:
- Press MENU when the parent unit is idle.
- Press
![]() or
or ![]() to choose Lullaby on CAM, then press SELECT.
to choose Lullaby on CAM, then press SELECT. - Press
![]() or
or ![]() to choose Play Soothing Sounds, then press SELECT.
to choose Play Soothing Sounds, then press SELECT. - Press
![]() or
or ![]() to choose a soothing sound, then press SELECT.
to choose a soothing sound, then press SELECT. - Press
![]() or
or ![]() to choose Play, then press SELECT.
to choose Play, then press SELECT.
Notes
- Lullaby playback control is available in Single CAM and Patrol mode only.
- The lullaby playback on the baby unit will be paused when receiving talkback from the parent unit.
To stop lullabies or soothing sounds:
- Press MENU when the parent unit is idle.
- Press
![]() or
or ![]() to choose Lullaby on CAM, then press SELECT.
to choose Lullaby on CAM, then press SELECT. - Press
![]() or
or ![]() to choose Stop, then press SELECT.
to choose Stop, then press SELECT.
To set auto timer for lullabies:
While the baby unit is playing a lullaby or soothing sound, the auto timer feature automatically stops the lullaby or soothing sound after playing for 15/30/45/60 minutes. You can set auto timer for lullabies with the parent unit.
- Press MENU when the parent unit is idle.
- Press
![]() or
or ![]() to choose Lullaby on CAM, then press SELECT.
to choose Lullaby on CAM, then press SELECT. - Press
![]() or
or ![]() to choose Auto Timer, then press SELECT.
to choose Auto Timer, then press SELECT. - Press
![]() or
or ![]() to choose the desired lullabies duration, then press SELECT to confirm your selection. After 15/30/45/60 minutes, the lullaby or soothing sound will stop automatically.
to choose the desired lullabies duration, then press SELECT to confirm your selection. After 15/30/45/60 minutes, the lullaby or soothing sound will stop automatically.
Set the language
You can select a language (English, French or Spanish) to be used in all screen displays.
- Press MENU when the parent unit is idle.
- Press
![]() or
or ![]() to choose Language, then press SELECT.
to choose Language, then press SELECT. - Press
![]() or
or ![]() to choose English, Français or Español, then press SELECT to confirm your selection.
to choose English, Français or Español, then press SELECT to confirm your selection.
Adjust LCD brightness
You can change the brightness of the parent unit screen from Level 1 to Level 5. The LCD brightness is preset to Level 3.
- Press MENU when the parent unit is idle.
- Press
![]() or
or ![]() to choose LCD, then press SELECT.
to choose LCD, then press SELECT. - Press SELECT again to choose Brightness.
- Press
![]() or
or ![]() to choose the desired level of brightness, then press SELECT to confirm your selection.
to choose the desired level of brightness, then press SELECT to confirm your selection.
Turn on and off the dim mode
The dim mode is preset to on to help you save the parent unit power. Your parent unit display will dim automatically after 10 minutes of inactivity, in which there is neither key pressed nor alert received from the baby unit.
- Press MENU when the parent unit is idle.
- Press
![]() or
or ![]() to choose LCD, then press SELECT.
to choose LCD, then press SELECT. - Press
![]() or
or ![]() to choose Dim mode, then press SELECT.
to choose Dim mode, then press SELECT. - Press
![]() or
or ![]() to choose On or Off, then press SELECT to confirm your selection.
to choose On or Off, then press SELECT to confirm your selection.
Note
- While the screen is dimmed, any keypress or alert message will trigger the screen to return to the preset brightness level. After 10 minutes of inactivity, it will dim again.
Monitoring mode
* for VM5251-2 only
Every time the parent unit is turned on, it displays a baby unit in Single CAM mode. If there are two baby units in your system, you can also monitor your baby in Patrol or Split mode.
| Single CAM | The screen displays image of a single baby unit in full screen. |
| Patrol | A single cam view that transitions to a different baby unit every 10 seconds. |
| Split | The screen displays all baby units. |
You can choose the desired monitoring mode.
- Press MENU when the parent unit is idle.
- Press
![]() or
or ![]() to choose Monitoring Mode, then press SELECT.
to choose Monitoring Mode, then press SELECT. - Press
![]() or
or ![]() to choose Single CAM, Patrol or Split, then press SELECT.
to choose Single CAM, Patrol or Split, then press SELECT.
In Single CAM or Patrol mode:
- Press VIEW to view the next baby unit.


In Split mode:
- Press
![]() or
or ![]() to select a baby unit.
to select a baby unit. - Press
![]() or VIEW to view the selected baby unit temporarily in Single CAM mode. It returns to Split mode after 10 seconds.
or VIEW to view the selected baby unit temporarily in Single CAM mode. It returns to Split mode after 10 seconds.
 or
or  to select a baby unit.
Note
- The parent unit is muted while in Split mode.
Adjust the sound sensitivity of the baby unit
You can choose to hear sounds from the baby unit all the time, or to hear sounds that exceed a certain level. You can use the parent unit to adjust the microphone sensitivity of your baby unit. The higher the sensitivity level, the more sensitive the baby unit is in detecting sounds for transmitting to the parent unit. The VOX sensitivity level is preset to HIGHEST.
| VOX Sensitivity level | Highest | High | Medium | Low | Lowest |
| Description | The parent unit speaker is constantly on, and you will hear all sounds (including background noises) from your baby's room. | The parent unit speaker turns on for soft babbling and louder sounds from your baby. It remains quiet when your baby sleeps soundly. | The parent unit speaker turns on for loud babbling and louder sounds from your baby. It remains quiet when your baby makes soft sounds. | The parent unit speaker turns on for crying and louder sounds from your baby. It remains quiet when your baby makes soft sounds. | The parent unit speaker turns on for loud crying or screeching sounds from your baby. It remains quiet when your baby makes soft sounds. |
- Press MENU when the parent unit is idle.
- Press
![]() or
or ![]() to choose VOX Sensitivity, then press SELECT.
to choose VOX Sensitivity, then press SELECT.
- If you have two baby units, the system prompts you to choose the desired baby unit or both baby units, press
![]() or
or ![]() to choose ALL CAM or CAM #, then press SELECT.
to choose ALL CAM or CAM #, then press SELECT.
- Press
![]() or
or ![]() to choose the desired sensitivity level, then press SELECT to confirm your selection.
to choose the desired sensitivity level, then press SELECT to confirm your selection.
Note
- As long as the Sound-activated Screen setting is On, the screen will turn on automatically when VOX sensitivity is triggered, despite it was off earlier.
Tips
- You can adjust the baby unit placement to improve the sound detection.
- If you want to use a sound machine or white noise machine for natural white noise while using this babymonitor to check on your baby, you can:
- Lower the volume of your sound machine or white noise machine; or
- Lower the sensitivity level of your baby monitor to medium (level 3) or below. Default level is the highest level.
Turn on or off the sound activation
When sound activation is on, as long as no sound is detected within 50 seconds, the parent unit screen will turn off automatically to save power.
When your baby unit detects a sound, which exceeds the selected sensitivity level, the sound activation triggers the parent unit screen to turn on automatically. When no sound is detected within 50 seconds, the screen will be off again.
- Press MENU when the parent unit is idle.
- Press
![]() or
or ![]() to choose Sound-activated Screen, then press SELECT.
to choose Sound-activated Screen, then press SELECT. - Press
![]() or
or ![]() to choose On or Off, then press SELECT to confirm your selection. The screen returns to main menu.
to choose On or Off, then press SELECT to confirm your selection. The screen returns to main menu.
Notes
- Sound activation is available in Single CAM and Patrol mode only.
- If the sound sensitivity is set to Highest, the parent unit screen may remain on continuously even though sound activation is on. This depends on whether the baby unit detects any sounds.
Zoom
You can zoom in while viewing images from the baby unit in Single CAM and Patrol mode.
- Press
![]() to zoom in.
to zoom in. - Press
![]() or
or ![]() to move the zoomed image downward or upward.
to move the zoomed image downward or upward. - Press
![]() or
or ![]() to move the zoomed image leftward or rightward.
to move the zoomed image leftward or rightward. - Press
![]() again to zoom out.
again to zoom out.
 to zoom in.
Talk
You can use the TALK function of the parent unit to comfort your baby in Single CAM and Patrol mode.
- Press and hold TALK on the parent unit. The TALK light turns on.
- Speak towards the microphone on the parent unit. Your voice is broadcast to the baby unit.
- Release the TALK key to stop the broadcast.
Notes
- The parent unit speaker is muted during voice broadcast. Sound transmission from the baby unit resumes after TALK is released.
- After around 20 seconds of sound re-transmission, the speaker returns to mute if you had set it to mute before pressing TALK.
- The baby unit's talkback volume can be adjusted via the parent unit menu.
Set alert tone Low battery tone
You can set the parent unit to beep when the parent unit operates in low battery condition.
- Press MENU when the parent unit is idle.
- Press
![]() or
or ![]() to choose Alert Tone, then press SELECT.
to choose Alert Tone, then press SELECT. - Press SELECT again to choose Low Battery Tone.
- Press
![]() or
or ![]() to choose On or Off, then press SELECT to confirm your selection.
to choose On or Off, then press SELECT to confirm your selection.
No link alert
You can set the parent unit to beep when the link between the parent unit and the baby unit is lost.
- Press MENU when the parent unit is idle.
- Press
![]() or
or ![]() to choose Alert Tone, then press SELECT.
to choose Alert Tone, then press SELECT. - Press
![]() or
or ![]() to choose No Link Alert, then press SELECT.
to choose No Link Alert, then press SELECT. - Press
![]() or
or ![]() to choose On or Off, then press SELECT to confirm your selection.
to choose On or Off, then press SELECT to confirm your selection.
Sound alert in split-view
You can turn on the sound alert feature so that, while in Split mode, the parent unit beeps and displays Sound detected at CAM # whenever the baby unit detects sounds.
- Press MENU when the parent unit is idle.
- Press
![]() or
or ![]() to choose Alert Tone, then press SELECT.
to choose Alert Tone, then press SELECT. - Press
![]() or
or ![]() to choose Sound Alert in Split-view, then press SELECT.
to choose Sound Alert in Split-view, then press SELECT. - Press
![]() or
or ![]() to choose On or Off, then press SELECT to confirm your selection.
to choose On or Off, then press SELECT to confirm your selection.
Note
The sound alert feature is only available in Split mode.
Monitor the temperature
Your baby unit monitors the temperature of your baby's room with its built-in temperature sensor. If the detected temperature is out of the preset temperature range, the parent unit will display an alert message.
Set temperature range
You can set the desired room temperature alert range. The minimum temperature can be set between 52 oF (11 oC) and 69 oF (20 oC). The maximum temperature can be set between 70 oF (21 oC) and 86 oF (30 oC).
- Press MENU when the parent unit is idle.
- Press
![]() or
or ![]() to choose Temperature, then press SELECT.
to choose Temperature, then press SELECT. - Press
![]() or
or ![]() to choose Minimum or Maximum, then press SELECT.
to choose Minimum or Maximum, then press SELECT.
- If you have two baby units, the system prompts you to choose the desired baby unit or both baby units, press or to choose ALL CAM or CAM #, then press SELECT.
- Press
![]() or
or ![]() to choose the desired minimum or maximum temperature, then press SELECT to confirm your selection.
to choose the desired minimum or maximum temperature, then press SELECT to confirm your selection.
Temperature alert tone
You can turn on the temperature alert tone so that the parent unit will emit an alert tone if the detected temperature is out of range.
- Press MENU when the parent unit is idle.
- Press
![]() or
or ![]() to choose Temperature, then press SELECT.
to choose Temperature, then press SELECT. - Press
![]() or
or ![]() to choose Alert tone, then press SELECT.
to choose Alert tone, then press SELECT.
- If you have two baby units, the system prompts you to choose the desired baby unit or both baby units, press
![]() or
or ![]() to choose ALL CAM or CAM #, then press SELECT.
to choose ALL CAM or CAM #, then press SELECT.
- Press
![]() or
or ![]() to choose On or Off, then press SELECT to confirm your selection.
to choose On or Off, then press SELECT to confirm your selection.
Temperature format
You can choose to display the temperature in Fahrenheit (ºF) or Celsius (ºC).
- Press MENU when the parent unit is idle.
- Press
![]() or
or ![]() to choose Temperature, then press SELECT.
to choose Temperature, then press SELECT. - Press
![]() or
or ![]() to choose Format, then press SELECT.
to choose Format, then press SELECT. - Press
![]() or
or ![]() to choose o F or o C, then press SELECT to confirm your selection.
to choose o F or o C, then press SELECT to confirm your selection.
Rename the baby unit
You can rename the baby unit. Once the baby unit is renamed, its new name together with the baby unit number will appear in the sub-menu of below options:
- VOX Sensitivity
- Rename
- Temperature
- Press MENU when the parent unit is idle.
- Press
![]() or
or ![]() to choose Rename, then press SELECT.
to choose Rename, then press SELECT. - Press
![]() or
or ![]() to choose the desired baby unit, then press SELECT.
to choose the desired baby unit, then press SELECT. - Press
![]() or
or ![]() to choose the desired name for the baby unit, then press SELECT to confirm your selection.
to choose the desired name for the baby unit, then press SELECT to confirm your selection.
Baby unit overview

- Microphone
- Camera
- Light sensor
- ON/OFF LED light
- On when the baby unit is turned on and is paired to the parent unit.
- Flashes when the baby unit is not being viewed; or when the link to the parent unit is lost.
- Infrared LEDs
- Pair hole
- Your baby units and parent unit provided are already paired.
- Speaker
- Temperature sensor
![]() ON/OFF switch
ON/OFF switch
- Slide to turn on or off the baby unit.
- Power jack
- Wall mount holes for upright mounting
- Wall mount holes for lateral mounting
Parent unit overview

- LED lights
Indicate the different statuses of the parent unit. For details, refer to Parent unit lights.
- LCD display
- VOL
![]()
![]() VOL
VOL
![]() Zoom
Zoom
- Press to zoom in or out.
- VIEW / LCD ON/OFF
- Microphone
- POWER
- TALK
- Press and hold to talk to the selected baby unit.
-
- While in a menu, press to return to the main menu or idle screen.
- While viewing zoomed image, press and hold to move the zoomed image leftward.
- While in Split mode, press to move the selection box leftward.
- While in a menu, press to return to the main menu or idle screen.
- While viewing zoomed image, press and hold to move the zoomed image leftward.
- While in Split mode, press to move the selection box leftward.
- While in a menu, press to scroll up.
- While viewing zoomed image, press and hold to move the zoomed image upward.
- While in a menu, press to choose an item.
- While viewing zoomed image, press and hold to move the zoomed image rightward.
- While in Split mode, press to move the selection box rightward.
- MENU/SELECT
- Press to enter the menu.
- While in a menu, press to choose an item, or save a setting.
- While in a menu, press to scroll down.
- While viewing zoomed image, press and hold to move the zoomed image downward.
- Antenna
- Stand
- Speaker
- Power jack
- Battery compartment cover
Parent unit lights
| LINK |
|
 |
|
 | It turns on:
|
| TALK |
|
Parent unit icons
Status icons
 | Connection status
|
 | Lullaby
|
 | Current view status
|
 | Patrol mode
|
 | Split mode
|
 | Night vision
|
 | Zoom
|
 | Temperature alert tone
|
| ºF or ºC | Real-time temperature
|
 | Mute alert
|
 | 9-level sound indicator
|
 | Speaker volume
|
| | Battery status |
| | AC power without battery
|


Main menu icons
 | Monitoring Mode
|
 | Alert Tone You can set the parent unit to beep when
|
 | Language
|
 | LCD
|
 | Rename
|
 | VOX Sensitivity
|
 | Sound-activated Screen
|
 | Temperature
|
 | Lullaby on CAM
|
 | Volume on CAM
|
Warning icons and messages
 No link to CAM # No link to CAM # | The selected baby unit is out of range or is turned off. |
| Battery low at Parent Unit | The battery level of the parent unit is very low and needs to be recharged. |
| Battery empty. Powering off... | The battery is empty and needs to be recharged. |
 Sound detected at CAM # Sound detected at CAM # | The sound level exceeds the threshold at CAM # in Split mode. |
 Temperature too high at CAM # Temperature too high at CAM #or Temperature too low at CAM # | The temperature detected by the baby unit is higher/lower than the desired temperature alert range. |
| Powering on... | The parent unit is turning on. |
 | The parent unit is searching for baby units. |
| Auto Timer of lullaby is reset | The timer that determines the remaining play time for the lullabies is restarted. |
| | The parent unit has just been connected to AC power. |
* # represents the baby unit number.
Night vision
The baby unit has infrared LEDs that allow you to see your baby clearly at night or in a dark room. When the baby unit being viewed detects low light levels, the infrared LEDs are switched on automatically. The images from the baby unit are in black and white, and appears on the screen.
![]() Notes
Notes
- It is normal if you see a short white glare on your parent unit screen as the baby unit is adapting to the dark environment.
- When the infrared LEDs are on, the images are in black and white. This is normal.
Tip
- Depending on the surroundings and other interfering factors, like lightings, objects, colors and backgrounds, the video quality may vary. Adjust the baby unit's angle or place the baby unit at a higher level to prevent glare and blurry display.
Mount the baby unit (optional)
Your baby monitor comes ready for tabletop use. You can also choose to mount your baby monitor on the wall. See Mount the baby unit on dry wall (optional) in the Quick Start Guide for the wall mounting instructions.
General product care
To keep this product working well and looking good, follow these guidelines:
- Avoid putting it near heating appliances and devices that generate electrical noise (for example, motors or fluorescent lamps).
- DO NOT expose it to direct sunlight or moisture.
- Avoid dropping the product or treating it roughly.
- Clean with a soft cloth.
- DO NOT immerse the parent unit and the baby unit in water and do not clean them under the tap.
- DO NOT use cleaning spray or liquid cleaners.
- Make sure the baby unit and parent unit are dry before you connect them to the mains again.
Storage
When you are not going to use the baby monitor for some time, remove the rechargeable battery from the parent unit. Store the parent unit, the baby unit and the adapters in a cool and dry place.
Frequently asked questions
Below are the questions most frequently asked about the baby monitor. If you cannot find the answer to your question, visit our website at www.vtechphones.com, or contact 1 (800) 595-9511 for customer service.
| Why does the baby monitor not respond normally? | Try the following (in the order listed) for common cure:
|
| Why don't the power-on light of the baby unit and parent unit go on when I switch on the units? | Perhaps the parent unit is not connected to the power. Insert the appliance plug into the parent unit and put the adapter in a wall socket. Then, press and hold POWER to switch on the parent unit and to establish connection with the baby unit. |
Perhaps the baby unit is not connected to the power. Insert the appliance plug into the baby unit and put the adapter in a wall socket. Then, slide the  ON/OFF switch to ON to switch on the baby unit and to establish connection with the parent unit. ON/OFF switch to ON to switch on the baby unit and to establish connection with the parent unit. | |
| Why doesn't my parent unit charge while connected to AC power? | Make sure the power is not controlled by a wall switch. |
| Make sure the battery is correctly installed in your parent unit. | |
| You may have used the battery for a long time. Replace a new battery. | |
| Why is my screen in black and white? | The screen is in black and white during night-time or in a dark room when the night vision feature is activated. This is normal. |
| Why do I get glare or blurry display on my screen when viewing my baby at night? | During night-time or in a dark room, the surroundings and other interfering factors, like lightings, objects, colors and backgrounds may affect the image quality on your parent unit screen. Adjust the baby unit's angle or place the baby unit at a higher level to prevent glare and blurry display. |
| Why does the baby monitor produce a high-pitched noise? | The parent unit and baby units may be too close to each other.
|
| Why does the parent unit beep? | The baby units may be out of range. Move the parent unit closer to the baby units (but not less than 3 feet). |
| The parent unit may not have enough charge for the parent unit to perform normally. Charge the battery in the parent unit for up to 3 hours. | |
| If your parent unit is in Split mode, some of your baby units may detect sounds. | |
| The temperature of your baby's room may be too high or too low. | |
| Why does the parent unit beep frequently in Split mode? | You may have set the VOX sensitivity level to Highest when the sound alert feature is turned on. The parent unit notifies you of all sounds including background noise with beeps. Adjust the VOX sensitivity to a lower level. |
| Why does the parent unit react too quickly to other sounds? | The baby unit also picks up other sounds than those of your baby. Adjust the VOX sensitivity level to a lower level or lower the parent unit speaker volume. |
| Why don't I hear a sound/ Why can't I hear my baby cry? | The parent unit speaker volume may be too low. Press VOL  to increase the volume. to increase the volume. |
| You may have set a low VOX sensitivity level. See Adjust the sound sensitivity of the baby unit to set to a higher level. | |
| Why can't I establish a connection? Why is the connection lost every now and then? Why are there sound interruptions? | The baby units may be out of range. Move the parent unit closer to the baby units (but not less than 3 feet). |
| Other electronic and wireless products may cause interference with your baby monitor. Try installing your baby monitor as far away from these devices as possible. | |
| If you power on only one baby unit, your parent unit may display and No link to CAM #, and the LINK LED light flashes. Press VIEW to switch to the baby unit you have powered on. |
Technical specifications
| Frequency control | Crystal controlled PLL synthesizer |
| Transmit frequency | Baby unit: 2405 - 2475 MHz Parent unit: 2405 - 2475 MHz |
| Channels | 32 |
| LCD | 5" Color LCD (WQVGA 480x272 pixel) |
| Nominal effective range | Maximum power allowed by FCC and IC. Actual operating range may vary according to environmental conditions at the time of use. |
| Power requirements | Parent unit: 3.7V Li-polymer battery Baby unit power adapter: Output: 5V DC @ 600mA Parent unit power adapter: Output: 5V DC @ 1A |
Credits:
The Background Noise sound file was created by Caroline Ford, and is used under the Creative Commons license.
The Stream Noise sound file was created by Caroline Ford, and is used under the Creative Commons license.
The Crickets At Night sound file was created by Mike Koenig, and is used under the Creative Commons license.
The Heart Beat sound file was created by Zarabadeu, and is used under the Creative Commons license.

Specifications are subject to change without notice.
© 2019 VTech Communications, Inc.
All rights reserved.

Documents / Resources
References
Download manual
Here you can download full pdf version of manual, it may contain additional safety instructions, warranty information, FCC rules, etc.
Download VTech VM5251, VM5251-2 - Full Color Video Monitor Manual
Advertisement
Thank you! Your question has been received!


Need Assistance?
Do you have a question about the VM5251 that isn't answered in the manual? Leave your question here.