
Summary of Contents for Clover Z570
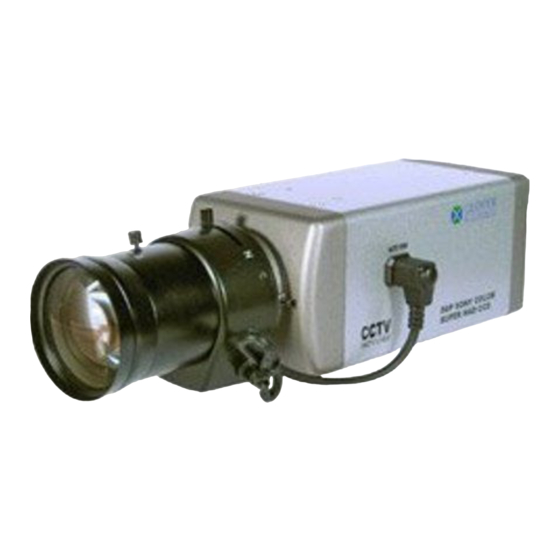
- Page 1 INSTRUCTION MANUAL PROFESSIONAL HIGH RESOLUTION COLOR CAMERA MODEL Z570 Please read this manual thoroughly before operation.
- Page 2 Safety Instructions IMPORTANT: PLEASE READ THIS MANUAL CAREFULLY BEFORE INSTALLATION AND RETAIN FOR FUTURE REFERENCE Caution For Use ◈ Do not open the camera body. ◈ Do not insert object into the camera body. ◈ Do not touch with wet hands. ◈...
-
Page 3: Table Of Contents
Contents ◈ OSD CONTROL BUTTON TYPE ....................◈ SET UP MENU ..........................3 ◈ MENU SET UP ..........................4 ◈ LENS ..............................5 ◈ SHUTTER ............................6 ◈ BLC ..............................7 ◈ AGC ..............................10 ◈ WHITE BALANCE ........................... ◈ FUNCTION ............................13 ◈... -
Page 4: Osd Control Button Type
OSD Control Button Type How To Operate the Camera Menu ◈ Setup Menu SETUP ●MANUAL ●DC ●VIDEO LENS ●FIXED ●MANUAL ●AUTO ●F L K SHUTTER ●ON ●OFF BACKLIGHT(B L C) ●ON ●OFF A G C(Auto Gain t l) ●A T W ●A W B ●FIXED ●MANUAL WHITE BAL. -
Page 5: Menu Set Up
◈ Menu Set Up 1. Press the SET UP button 2. Setup menu will be displayed on the monitor SETUP LENS SHUTTER FIXED B L C A G C WHITE BAL A T W FUNCTION ADJUST EXIT 3. Move the Cursor by using the UP or DOWN button to choose the items SETUP Choose the desired... -
Page 6: Lens
◈ LENS(Not Included) Adjustment of brightness 1. Move the Indicator to LENS by pressing the UP or DOWN button in the SET UP menu. 2. Select the desired LENS type by pressing the LEFT or RIGHT button. SETUP LENS SHUTTER FIXED B L C A G C... -
Page 7: Shutter
◈ SHUTTER SPEED 1. Move the Indicator to SHUTTER by pressing the UP or DOWN button in the SET UP menu. 2. Select the desired item by pressing the LEFT or RIGHT button. SETUP LENS SHUTTER FIXED B L C A G C WHITE BAL A T W... - Page 8 ◈ BACKLIGHT(B L C) 1. Move the Indicator to BLC by pressing the UP or DOWN button in the SET UP menu. SETUP LENS SHUTTER FIXED B L C A G C WHITE BAL A T W FUNCTION ADJUST EXIT 2.
- Page 9 4. Differential images between BLC is ON and BLC is OFF BLC ON BLC OFF 5. Selection of BLC Area - Select the BLC AREA in the BLC SETUP menu by using the UP/DOWN button. - Press the SET UP button and the above screen will be displayed. - Move the Yellow square with the UP/DOWN or the LEFT/RIGHT button to select BLC area and press the SET UP button.
- Page 10 - Choose the ALL CLEAR to clear the BLC area in the above menu. - Choose the ALL SET to set BLC area on the whole screen in the above menu. - Choose the RETURN to select BLC areas. - Choose the EXIT to adjust BLC RATIO. 6.
- Page 11 ◈ A G C(Auto Gain Control) AGC helps to increase the image brightness. SETUP LENS SHUTTER FIXED B L C A G C WHITE BAL A T W FUNCTION ADJUST EXIT 1. Move the indicator to AGC by using the UP or DOWN button and press the RIGHT or LEFT button to select the ON or OFF.
-
Page 12: White Balance
◈ WHITE BALANCE - Move the Indicator to WHITE BAL by using the UP or DOWN button and press RIGHT or LEFT button to select the ATW, AWB, FIXED and MANUAL. SETUP LENS SHUTTER FIXED B L C A G C WHITE BAL A T W FUNCTION... - Page 13 WHITE BAL. FIXED MANUAL A W B MANUAL 0 ~ 255 BLUE 0 ~ 255 RETURN Increase or decrease the value for RED(R-Gain) and BLUE(B-Gain) by pressing the LEFT or RIGHT button. - After set up the desired value, move the Indicator to RETURN in the AWB MANUAL menu by pressing the DOWN button and press the SETUP button to return to ☞...
-
Page 14: Function
◈ FUNCTION - Move the Indicator to FUNCTION in the SETUP menu by using the UP or DOWN button and press the SETUP button to display the FUNCTION menu. SETUP LENS SHUTTER FIXED B L C A G C WHITE BAL A T W FUNCTION ADJUST... -
Page 15: Camera Id
1. CAMERA TITLE Place the Cursor under the Character "C" by pressing the LEFT or RIGHT button and press the SETUP button to create the Camera title. Press the RIGHT button to place the cursor to the first place of ID SETUP CAMERA ID CURSOR... -
Page 16: Day & Night
2.MIRROR ☞ OFF : Deactivation ☞ ON: The image will be reversed as follows. MIRROR ON MIRROR OFF 3. DAY & NIGHT ① Press the RIGHT button to set up the desired mode. FUNCTION RETURN CAMERA ID MIRROR DAY & NIGHT AUTO MOTION PRIVACY... - Page 17 Press the UP or DOWN button to select desired mode. Press the LEFT or RIGHT button to set up the desired value. NIGHT AUTO DELAY 0 ~ 63 START LEVEL 0 ~ 255 END LEVEL 0 ~ 255 RETURN 4. MOTION Whenever an object's motion is detected, the motion symbol will be appeared on the upper right corner of the screen.
- Page 18 Press the SETUP button to display the MOTION menu on the screen. ADJUSTMENT WHEN MOTION "ON" MOTION AREA MOTION TH. 0 ~ 255 MOTION TRACE RETURN Choose the AREA in the MOTION menu and press the SETUP button to select the motion area on the screen and then the Motion Area SETUP window will displayed as follows.
- Page 19 MOTION AREA ALL CLEAR ALL SET RETURN - Choose the ALL CLEAR to clear the MOTION area in the above menu. - Choose the ALL SET to set MOTION area on the whole screen in the above menu. - Choose the RETURN in the MOTION AREA menu to go back to the FUNCTION 5.
- Page 20 5. PRIVACY Press the SETUP button to display the PRIVACY menu when the ON is selected. Set the"PRIVACY" to desired mode using by the LEFT or RIGHT button. PRIVACY AREA AREA SEL AREA 0 LEFT 0 ~ 255 AREA STATE RIGHT 0 ~ 255 0 ~ 255...
- Page 21 6. GAMMA Gamma value could be adjusted by pressing the LEFT or RIGHT button. FUNCTION RETURN CAMERA ID MIRROR DAY & NIGHT AUTO MOTION PRIVACY GAMMA 0.45 RESET User's adjustment: 0.00 ~ 1.00 7. RESET - Choose the RESET in the FUNCTION menu with the UP or DOWN button press the SETUP button to select the YES or NO.
- Page 22 ◈ ADJUST Choose the ADJUST in the SETUP menu with the UP or DOWN button and press the SETUP button to adjust contrast, sharpness, CB-gain and CR-gain. SETUP LENS SHUTTER FIXED B L C A G C WHITE BAL A T W FUNCTION ADJUST EXIT...
- Page 23 TROUBLE SHOOTING PROBLEM SOLUTION ●Check the power cable and line connection between the camera and monitor. Nothing appears on ● Check that you have properly connected the the screen. video cables. ●Is the camera lens stained with dirt? Clean the lens with a soft and clean cloth. The image on the ●...
- Page 24 Specifications Image Sensor 1/3" Sony Super HAD CCD, 811H x 508V Effective Pixels 768H x 494V Scanning System 525 Lines, 2:1 Interlace Horizontal Resolution 540 TV Lines Shutter Speed Auto, Manual ( 1/60 to 1/120,000 sec ) Sync. System Internal S/N Ratio more than 50db (AGC off) Minimum Illumination...
-
Page 25: Motion
* INSTALLATION * SETTINGS Settings can be made using the 5 buttons Dimensions & Cable Connection located on the back panel on the camera. FRONT BACK OSD CONTROL LENS SHUTTER AUTO WHITE BAL. SIDE FUNCTION ADJUST SIDE EXITE OSD - FUNCTION RETURN 1.Control(+) CAMERA ID... - Page 26 Available accessories LENS3508 1/3" CS mount, Vari-focal DC Auto IRIS lens, 3.5 to 8mm TV3X0310D-NB 1/3" CS mount, Vari-focal DC Auto IRIS lens, 3.0 to 8.5mm TV7X7513D-NB 1/3" CS mount, Vari-focal DC Auto IRIS lens, 7.5 to 50mm HS13 Outdoor Camera Housing, 138(W) x 117(H) x 375(L)mm HS13HB Outdoor Camera Housing, 138(W) x 117(H) x 375(L)mm w/ Heater &...
- Page 27 M E M O...
- Page 28 Copyright © 2008 Clover Electronics U.S.A. All Rights Reserved.