Table of Contents
Advertisement
Available languages
Available languages
Quick Links
NOTICE
Sections
Liste des composants----------------------------------------------------------
Instructions d'assemblage----------------------------------------------------
Guide d'utilisation--------------------------------------------------------------
Dépannage-----------------------------------------------------------------------
Consignes de sécurité importantes----------------------------------------
Programmation avancée------------------------------------------------------
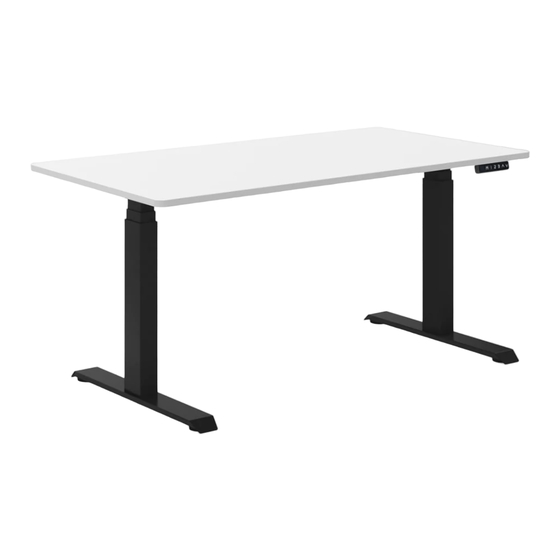
Piètement de bureau motorisé à double motorisation
IDESK 61 GRIGIO / NERO
-1-
inova-france.fr
120 Kg
3
4
6
8
9
10
inova-france.fr
contact@inova-france.fr
Advertisement
Chapters
Table of Contents

Related Manuals for Inova IDESK 61


Summary of Contents for Inova IDESK 61
-
Page 1: Table Of Contents
120 Kg NOTICE IDESK 61 GRIGIO / NERO Sections Liste des composants---------------------------------------------------------- Instructions d’assemblage---------------------------------------------------- Guide d’utilisation-------------------------------------------------------------- Dépannage----------------------------------------------------------------------- Consignes de sécurité importantes---------------------------------------- Programmation avancée------------------------------------------------------ inova-france.fr Piètement de bureau motorisé à double motorisation contact@inova-france.fr... - Page 2 I-NOVA vous remercie pour votre achat et reste à votre disposition par e-mail : contact@inova-france.fr ▪ VEUILLEZ OUVRIR LE CARTON AVEC PRECAUTION ▪ POSER LE SUPPORT SUR UNE SURFACE PROTEGEE AFIN DE NE PAS ABIMER ▪ LE PRODUIT DOIT ETRE INSTALLE EN RESPECTANT LES INSTRUCTIONS DE LA NOTICE POUR EVITER TOUT DEGATS OU BLESSURES.
-
Page 3: Liste Des Composants
Liste des composants Dénomination Dénomination Pieds de table Câble d'alimentation Colonne de levage Câble moteur Support latéral Boîtier de commande Cadre supérieur -1 Clavier de commande Rail central Attache câble Cadre supérieur -2 Clé allen (4mm) M6X10 Patin de nivellement M6X16 ST4X16... -
Page 4: Instructions D'assemblage
Instructions d’assemblage Etape 1 ajustez la longueur du cadre supérieur Etape 2 installez les 2 colonnes de levage sur le cadre supérieur pièces nécessaires: M6x16: 8 pièces Etape 3 Installez les 2 supports latéraux sur le cadre pièces nécessaires: M6x16: 4 pièces... - Page 5 Etape 4 Installez les pieds de table sur la colonne de levage pièces nécessaires : M6X16 : 8 pcs Patin de nivellement : 4 pcs Etape 5 Fixer le cadre supérieur avec des boulons M6x10 pièces nécessaires: M6x10: 8 PCS Etape 6 Montez le boîtier de commande sur le châssis Fixer le plateau ( non fourni) et le clavier de commande...
-
Page 6: Guide D'utilisation
Guide d’utilisation IMPORTANT: assurez-vous qu'aucun obstacle ne se trouve sur le chemin du bureau et que le bureau est dégagé des murs. Vérifiez que tous les câbles sont de la longueur appropriée pour la hauteur maximale du bureau. Connectez les câbles comme sur l’image ci-dessous : Liste des pièces Boîtier de commande---------------------------------------------------------- 1 PCS... - Page 7 Instructions d'utilisation et de programmation du clavier de commande 1. Assurez-vous que tous les composants sont correctement connectés (boîtier de commande, clavier de commande, câble d'alimentation et câble de raccordement, colonnes de levage). 2. Connectez le câble d'alimentation à une prise 110 / 240VAC. Une fois que le clavier de commande affichera «61,0»...
-
Page 8: Dépannage
Dépannage 1. HOT Problème: Fonctionnement du boîtier de commande, en continu pendant plus de 2 minutes. La protection moteur est enclenchée. Solution: a. Attendez 18 minutes. b. Débranchez le câble d'alimentation, attendez quelques minutes, puis branchez le câble à la source d'alimentation. Le code erreur disparaîtra. 2. -
Page 9: Consignes De Sécurité Importantes
Consignes de sécurité importantes ▪ Avant d'utiliser cet appareil, lisez attentivement ce mode d'emploi et conservez-le. ▪ Avant d'utiliser le produit, vérifiez que le bureau et les câbles d'alimentation ne présentent aucun signe visible de dommage. Si vous remarquez des coupures ou rayures profondes, ne mettez pas l'appareil sous tension. -
Page 10: Programmation Avancée
Programmation avancée HAUT Enregistrer Hauteur 1 Hauteur 2 Hauteur 3 Affichage hauteur ------------------------------------------------ UNITE DE MESURE -------------------------------------------------------- LUMINOSITE ------------------------------------------------- PARAMETRE SON- ------------------------------------------------ PHASE MONTANTE -------------------------------------------- PHASE DESCENDANTE- ------------------------------------- SENSIBILITE DE L’EQUILIBRE- NOUVELLE HAUTEUR MINIMALE ET MAXIMALE--------------- PARAMETRE TOUCHE------------------------------------------------- PARAMETRE DE RAPPEL---------------------------------------------- HAUTEUR DE REBOND------------------------------------------------ RESTAURATION PARAMETRE D’USINE---------------------------- TEST DE FATIGUE-------------------------------------------------------... -
Page 11: 1Un Unite De Mesure
1UN – UNITE DE MESURE Afficher la hauteur en cm ou inch Appuyez sur la touche « M » maintenez la touche enfoncée pendant 3 secondes, l’écran affiche « S- - », relâchez la touche « M », Appuyez « M » pour entrer, l’écran affiche « 1UN », appuyez «... -
Page 12: 4Fu Phase Montante
4Fu – PHASE MONTANTE ANTICOLLISION Le support motorisé possède une sensibilité anticollision qui arrêtera le mouvement s’il heurte quelque chose en montant. Vous pouvez modifier Ce niveau de sensibilité en procédant de cette façon. Appuyez sur la touche « M » pendant 3secondes, l’écran affiche « S - - », relâchez la touche «... -
Page 13: 6Fs Sensibilite De L'equilibre
6FS – SENSIBILITE DE L’EQUILIBRE Le bureau a une sensibilité d'équilibre pour s'assurer que les 2 colonnes fonctionnent toujours dans la même position. Vous pouvez modifier ce niveau de sensibilité en procédant comme suit: Appuyez sur la touche « M » pendant 3secondes, l’écran affiche « S - - », relâchez la touche « M », appuyez sur la touche «... -
Page 14: 8Hc Parametre Touche
PARAMETRE TOUCHE – Appuyez sur la touche « M » pendant 3 secondes, l’écran affiche « S - - », relâchez la touche « M », appuyez de nouveau sur la touche « M »pour entrer, l’écran affiche « 1Un » 1. -
Page 15: Restauration Parametre D'usine
PARAMETRE D’USINE – Appuyez sur la touche « M » pendant 3 secondes, l’écran affiche « S - - », relâchez la touche « M », appuyez de nouveau sur la touche « M »pour entrer, l’écran affiche « 1UN » 1. - Page 16 120 Kg USER MANUAL IDESK 61 GRIGIO / NERO inova-france.fr Electric height adjustable dual motor desk frame contact@inova-france.fr...
- Page 17 I-NOVA thanks you for your purchase and remains at your disposal by e-mail: contact@inova-france.fr PLEASE OPEN THE CARTON CAREFULLY PLACE THE SUPPORT ON A PROTECTED SURFACE TO PREVENT DAMAGE THE PRODUCT MUST BE INSTALLED ACCORDING TO THE INSTRUCTIONS IN THE INSTRUCTIONS TO AVOID DAMAGE OR INJURY.
- Page 18 Component parts Component Name Component Name Table feet Power cable Lifting Column Motor cable Side Bracket Control box Top frame-1 Handset Centre rail Cable Tie Top frame -2 Allen Wrench(4mm) M6X10 Leveling pad M6X16 ST4X16...
- Page 19 Assembly Instructions Step 1 Adjust the length of the top frame Step 2 Install the two lifting columns to the top frame Parts required: M6x16: 8 pièces Step 3 Install the two side brackets on the frame Parts required: M6x16: 4 pièces...
- Page 20 Step 4 Install the table feet on the lifting column Parts required : M6X16 : 8 pcs Leveling pad: 4 pcs Step 5 Fix the top frame with M6x10 bolts Parts required: M6x10: 8 PCS Step 6 Mount the control box to the frame Fix the tabletop (not include) and handset with ST4x16 screws Parts required: ST4x16 : 13 pcs...
- Page 21 Use instructions IMPORTANT: Make sure no obstacles are in the desk’s path and the desk is clear of walls. Verfiy all cables are the appropriate length to accomodate the max height. Connected cables like below photo : Parts list Control Box-------------------------------------------------------------------------------- 1 PCS Handset-------------------------------------------------------------------------------------1 PCS Power cord---------------------------------------------------------------------------------1 PCS Lifting Column-----------------------------------------------------------------------------2 PCS...
- Page 22 Control Panel Operation and Programming Instructions 1. Make sure all components are connected correctly ( control box, control panel, power cable and connecting cable, lifting columns). 2. Connect the power cable to a 110/240VAC outlet. After the control panel will display ’’61.0’’ sign for a few seconds, the system is turn on and the desk is ready for use.
- Page 23 Troubleshooting 1. HOT Issue: Operation of the control box, continuously, for more than 2 minutes. Solution: a. Wait 18 minutes. b. Disconnect the power cable, wait a few minutes, and then plug the cable to the power source. The error code will disappear. 2.
- Page 24 Important Safety Instructions ▪ Before using this device, read these operationg instructions carefully and keep this user manual for future reference. ▪ Before using this product, check the desk and power cables for any visible signs of damage. If you notice cuts or deep scratches, do not turn on the device. ▪...
- Page 25 Advanced programming DOWN SAVE HEIGHT 1 HEIGHT 2 HEIGHT 3 HEIGHT DIPLAY ------------------------------------------------- DISPLAY UNITS SETTING --------------------------------------- HANDSET BRIGHTNESS SETTING ---------------------------------------------------------- VOICE SETTING- ----------------------- GO UP ANTI-COLLISION SENSITIVITY SETTING ------------------ GO DOWN ANTI-COLLISION SENSITIVITY SETTING --------------------------------------------------- BALANCE SENSITIVITY -------- SETTING THE NEW LOWEST DISPLAY AND HEIGHT RANGE ------------------------- SETTING CONSTANT-TOUCH &...
-
Page 26: 1Un Display Units Setting
1UN – DISPLAY UNITS Change the numeric display to show heights in either inches or centimeters Press « M » button and hold 3 seconds, handset display « S- - », Release « M » button, Press « M » button to enter, Display « 1UN », Press « M » button again to confirm the first programming setting. -
Page 27: 4Fu Go Up Anti-Collision Sensitivity Setting
4Fu – GO UP ANTI-COLLISION SENSITIVITY The desk has an Anti-Collission Sensitivity that will stop the desk’s movement if it hits something on the way up. You can change this Sensitivity level by doing the following : Press « M » button and hold 3 seconds, handset display « S - - », Release« M », button, Press «... -
Page 28: 7Fs Setting The New Lowest Display And Height Range
6FS – SENSIBILITE DE L’EQUILIBRE The desk has a balance sensitivity to make sure the 2 columns always work in the same position. You can change this Sensitivity level by doing the following : Press « M » button and hold 3 seconds, handset display « S— », Release « M » button, Press « M » button again to enter, Display «... -
Page 29: 8Hc Setting Constant-Touch & One Touch
SETTING CONSTANT TOUCH & ONE TOUCH FOR GO UP OR DOWN – Press « M » button and hold 3 seconds, handset display « S— », Release « M » button, Press « M » button again to enter Display « 1Un » 1. -
Page 30: Restore Factory Defaults
–RESTORE FACTORY DEFAULTS Press « M » button and hold 3 seconds, handset display « S- - »,Release « M » button, Press « M » button again to enter, Display « 1Un » 1. Press UP or DOWN, it will display « 11r » 2.