Advertisement
Quick Links
Advertisement

Related Manuals for Tiger SHIPLAP APEX WINDOWLESS SHED


Summary of Contents for Tiger SHIPLAP APEX WINDOWLESS SHED
- Page 1 INS08 TIGER APEX BUILDINGS GENERAL ASSEMBLY INSTRUCTIONS...
-
Page 2: Before You Get Started
BEFORE YOU GET STARTED PLEASE READ INSTRUCTIONS CAREFULLY • Check the pack and make sure you have all the parts listed. • When you are ready to start, make sure you have the right tools at hand (not supplied). • Ensure there is plenty of space and a clean, dry area for assembly. TIMBER As with all natural materials, timber can be affected during various weather conditions. - Page 3 Please retain instructions for future reference CRAFTED BY US, CONFIGURED BY YOU! The innovative modular design of the TIgerFlex range means that you can position the door and window panels (if ® applicable) where you want them to get the best light, best view, best access or most secure setting possible. As there are so many options, please note that while these instructions only show one popular configuration, the window, door and blank panels are interchangeable.
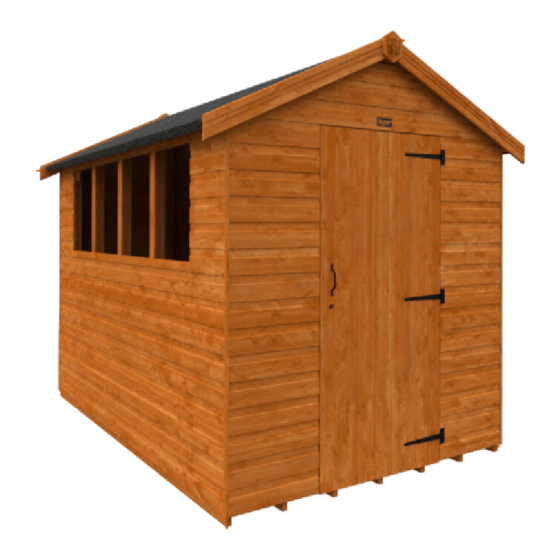
- Page 4 TIGER SHIPLAP APEX BUILDING RANGE GUIDANCE: This guide provides assembly information for the Tiger Apex Building range. Images are for reference only and may vary from the product you have supplied. If you have any issues, please contact your supplier.
- Page 5 Please retain instructions for future reference TIGER HEAVYWEIGHT WORKSHOP TIGER SUMMER SHED TIGER WORKMAN APEX TIGER SUMMER BREEZE SUMMERHOUSE TIGER SECURITY APEX SHED TIGER ELITE PRESSURE TREATED APEX SHED...
- Page 6 BEFORE YOU GET STARTED - PRE ASSEMBLY TOOLS REQUIRED: We recommend using the following tools (not supplied): HAMMER RUBBER MALLET DRILL LADDER TAPE MEASURE SHARP KNIFE SPIRIT LEVEL SCREWDRIVER + WOOD SAW SEALANT GUN SEALANT FIXING KIT GUIDES: FX02 - NAIL KIT SMALL FX04 - NAIL KIT LARGE For Products Up To 6ft Sides: For Products Between 10ft - 13ft Sides:...
- Page 7 Please retain instructions for future reference FX06 - NAIL KIT HEAVY DUTY For All HD Framing Products: CN13 Clout Nails (13mm Galvanised - QTY 450) PP25 Panel Pins (25mm - QTY 200) Nail (40mm Galvanised - QTY 85) Nail (65mm Bright - QTY 20) N100 Nail (100mm Galvanised - QTY 100)
- Page 8 BEFORE YOU GET STARTED - PRE ASSEMBLY Make sure transport blocks have been removed. (Detail A) NOTE - Hammer off sideways. Do not prise off. Hit outwards with a hammer to remove block tigersheds.com 0113 205 4189 sales@tigersheds.com...
-
Page 9: Floor Panel Installation
Please retain instructions for future reference Step 1: FLOOR PANEL INSTALLATION Lay out floor panels supplied as shown. • Single Floor - Lay floor down in the desired position – all floors up to 10x7w • Multi Floor - Lay floors down in the desired position and butt together and join using 65mm (N65) nails through floor joists at an angle –... -
Page 10: Side Panel Installation
TIGER APEX RANGE GENERAL ASSEMBLY INSTRUCTIONS Step 2: SIDE PANEL INSTALLATION (See Page 08) Make sure transport blocks have been removed. • Position one end gable and side panel as shown. (Detail B) NOTE - Check that all sides are at right angles to each other and the floor. (N40) (Detail C) • Secure side panels together using 40mm nails. - Page 11 Please retain instructions for future reference Step 3: CB80 SIDE PANEL INSTALLATION (Detail E) • Pre-drill holes in gable ends as shown. (CB80) (Detail F) • Use 4x 80mm coach bolts per gable, through the pre-drilled holes in each gable, from the outside. NOTE - For HD framing buildings, use CB100 (N65) •...
- Page 12 TIGER APEX RANGE GENERAL ASSEMBLY INSTRUCTIONS Step 4: APEX TRUSS INSTALLATION • Before fitting roof panels, if supplied, fit apex truss. Products 10ft – 18ft are supplied with x1 Truss (inc. clips). 20ft models are supplied with 3x Truss’ (inc. clips).
- Page 13 Please retain instructions for future reference Step 5: APEX ROOF PANEL INSTALLATION (Detail K) • Attach roof panels as shown. (N65) (Detail L) • Secure inner roof spars using 65mm nails. (N65) • Secure roof panes to the sides using 65mm nails through upright framing in sides.
- Page 14 TIGER APEX RANGE GENERAL ASSEMBLY INSTRUCTIONS Step 6: CN13 FELT INSTALLATION • Roll out felt along lower part of roof, leaving sufficient overhang to fold down onto roof purlin, approx 75mm/3”. Do not fold underneath roof. • Use clout (CN13) nails to tack top of felt into the roof panel.
- Page 15 Please retain instructions for future reference Step 8: COVER LAT & CORNER STRIP INSTALLATION • Secure the corner strips at each corner of the shed with 3x N40 per corner strip. NOTE - These corner strips may need cut to size. •...
- Page 16 INS08 Display Agent Woodlands DIY Store Station Yard, Horsforth, Leeds, LS18 5NZ Telephone: 0113 205 4189 Website: tigersheds.com Email: customersupport@tigersheds.com...