Advertisement
Quick Links
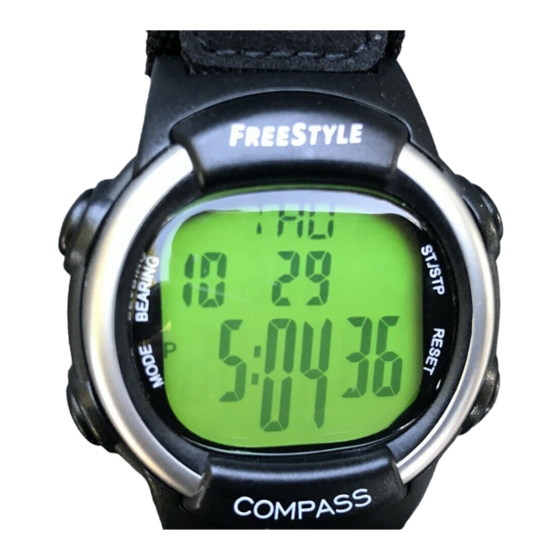
889 COMPASS
WATCH INSTRUCTIONS
FEATURES
• INDICATES BEARING IN FIVE
DEGREE INCREMENTS
•16 POSITION ELECTRONIC
COMPASS
• NORMAL TIME MODE WITH
HOUR, MINUTE, SECOND,
MONTH, DATE, AND DAY OF THE
WEEK
• 12 OR 24-HOUR DISPLAY
FORMAT
• DAILY ALARM WITH HOUR AND
MINUTE
• OPTIONAL HOURLY CHIME
• CHRONOGRAPH WITH 1/100
SECOND ACCURACY
• CHRONOGRAPH WITH SPLIT
TIMER
• 60 MINUTE COUNTDOWN TIMER
WITH ONE-SECOND
RESOLUTION
• USER KEY OPTION FOR
COUNTDOWN STOP OR
COUNTDOWN REPEAT MODE
•NIGHT VISION™ BACKLIGHT
WITH THREE-SECOND DELAY
•WATER RESISTANT TO 200 FT.
GENERAL OPERATION
REFERENCES
A - RESET
B - ST/STP
C - MODE
D - BEARING
"Normal time mode"l display shows
hour, minute, second, month, date,
and day of the week.
ELECTRONIC COMPASS
The compass function will provide
an indication of magnetic north
direction according to the pointer
in the upper right side of the display,
i.e. "ESE-125 degrees" indicates
pointer direction is east, southeast
at 125 degrees.
From normal time mode, press
BEARING button D to activate
compass function.
The compass MUST be calibrated
according to the "calibration"
segment of this instruction. The
bearing direction indicator will be
displayed after pressing BEARING
button D from the "normal time
mode.
HOW TO CALIBRATE THE
ELECTRONIC COMPASS
IMPORTANT! Failure to follow the
calibration process precisely could
result in incorrect bearing readings.
Calibration allows the user to align
the magnetic sensor in the watch
with the earth's magnetic field so
the watch compass can indicate
correct direction.
When to calibrate the electronic
compass:
• Before using the watch for the first
time;
• After replacing the watch battery;
• If the indicated direction is
incorrect;
• If the word "CAL" is displayed;
• If the word "ERR" is displayed;
• When you have traveled more than
100 miles from the point where you
last calibrated the
compass
NOTE:The word "CAL" will
automatically appear after the
battery is replaced, necessitating
calibration.
The following steps should be taken
to calibrate the watch to your region.
1. Select an area free from any
electronic or magnetic fields, such
as computers, television,
speakers, etc. IMPORTANT -
calibration is best done outdoors,
at least 10 feet from any vehicles
or structures.
2. From the "normal time mode",
press BEARING button D to enter
bearing mode.
3. Press & hold RESET button A for
three seconds, until the word
"CAL" is displayed.
4. Hold the watch horizontally (do
not place on a table), and slowly
rotate the entire watch AT LEAST
four complete revolutions about
its center (approx. 10 seconds
per revolution). This rotation
should be as continuous as
possible in a clockwise direction,
avoiding movement in a
counterclockwise direction.
5. Press the RESET button A once
to stop the calibration.
6. If "ERR" is displayed, repeat
calibration steps 1-5.
Note: the compass watch is very
sensitive to electronic and magnetic
fields. Please keep your watch away
from any electronic or magnetic
devices at all times.
HOW TO USE THE ELECTRONIC
COMPASS
While in "normal time mode", press
BEARING button D for
approximately three seconds to
activate the compass function. The
current direction is indicated on the
upper portion of the display. Different
bearings may be determined by
slowly rotating the watch (held
approximately horizontally) in any
direction until a desired bearing is
achieved. This can be done for
approximately 10 seconds after
depressing BEARING button D for
three seconds. After 10 seconds,
the bearing reading will "fix" on the
last bearing, in the direction of the
triangle arrow.
Press BEARING button D as often
as needed to update direction. Press
MODE button C to return to "normal
time mode", or wait 30 seconds; the
display will automatically return.
NORMAL TIME MODE
Normal time mode" displays hour,
minute, second, month, date, and
day of the week. In 12-hour mode,
"A" or "P" will be displayed, indicating
a.m. or p.m.
SETTING NORMAL TIME
While in "normal time mode", press
and hold RESET button A until
seconds digits begin flashing.
Press ST/STP button B to reset
seconds digits to 0. Press RESET
button A once; hours digits will flash.
Advance hour by pressing ST/STP
button B. Press RESET button A
once; minutes digits will flash.
Advance minutes by pressing
ST/STP button B. Press RESET
button A once; month digits will flash.
Advance month by pressing ST/STP
button B . Press RESET button A
once; day of the week will flash.
Advance day of the week by
pressing ST/STP button B. Press
RESET button A once; 12h or 24h
will flash. This setting allows the
user to select 12-hour or 24-hour
time mode, and will automatically
update the display when selection
is made. Toggle between 12-hour
and 24-hour mode by pressing
ST/STP button B.
To exit the setting sequence at any
time, press MODE button C. The
setting sequence will automatically
end if no button selections are made
after 30 seconds. During
setting, digits may be rapidly
advanced by pressing and holding
ST/STP button B for approximately
five seconds.
ALARM TIME MODE
"Alarm time mode" displays set
alarm hour and minute, and is
identified by "ALM" displayed in the
upper viewing window of the display.
This mode allows the user to
program and activate an alarm time,
and activate or deactivate the hourly
chime feature.
SETTING ALARM TIME
From "normal time mode", press
MODE button C once; "ALM"
should be displayed in upper viewing
window of the display. Press RESET
button A once; hours digits will flash.
Advance hours by pressing ST/STP
button B. Press RESET button A
once; minutes digits will flash.
Advance minutes by pressing
ST/STP button B.
To exit the setting sequence at any
time, press MODE button C. The
setting sequence will automatically
end if no button selections are made
after 30 seconds. After exiting the
setting sequence in "alarm time
mode," the alarm is automatically
armed and the mark ( ) displayed.
During setting, digits may be rapidly
advanced by pressing and holding
ST/STP button B for approximately
five seconds.
HOW ARM OR DISARM ALARM
AND HOURLY CHIME
While in "alarm time mode," press
ST/STP button B to arm or disarm
the alarm and hourly chime in the
sequence shown below:
=alarm only
=chime only
=both alarm and chime
on
CHRONOGRAPH MODE
The chronograph can be used as
a stopwatch timer with a split timer,
and will count up to 23 hours, 59
minutes and 59 seconds at 1/100-
second accuracy. This mode can be
identified by "CH" displayed in the
center viewing window.
From "normal time mode," press
MODE button C twice. "STP" should
be displayed in the upper viewing
window of the display.
To begin the timer, press ST/STP
button B. "RUN" will be displayed
in the upper viewing window, and
the display will indicate the time in
minutes, seconds, and 1/100
seconds. To stop the timer, press
ST/STP button B. "STP" will be
displayed in the upper viewing
window, and the display will indicate
the time when stopped. To clear the
timer, press RESET button A when
timer is stopped.
To begin the split timer, start the
timer by pressing ST/STP button B.
"RUN" will be displayed in the upper
viewing window.
Press RESET button A to end a split
time. The display will show the
recorded split time, and is identified
by "SPL" displayed in the upper
viewing window. The timer will
continue running, and can be
displayed by pressing RESET button
A. Press RESET button A to display
the next recorded split time, and
continue this operation until split
timing is complete.
To clear the split timer, press RESET
button A until "RUN" is displayed in
upper viewing window. Press
ST/STP button B once; "STP"
should be displayed in upper viewing
window. Press RESET button A once
to clear the display.
USING THE COUNTDOWN TIMER
The countdown timer can be
programmed in one-minute intervals,
for up 60 minutes. There is a
countdown with stop after one
sequence, and countdown repeat,
which will repeat the countdown
sequence until programmed to stop.
The programmed time, and "stop"
or "repeat" mode can be seen along
the top row of the main window
display, and the real time countdown
in minutes and seconds can be seen
Advertisement

Related Manuals for Freestyle 889


Summary of Contents for Freestyle 889
- Page 1 D from the “normal time Press BEARING button D as often sequence shown below: mode. as needed to update direction. Press 889 COMPASS MODE button C to return to “normal =alarm only HOW TO CALIBRATE THE WATCH INSTRUCTIONS time mode”, or wait 30 seconds; the...
- Page 2 WEBBING BAND CARE All FreeStyle® watch bands are made from the highest quality materials. They are washable in warm water and a mild liquid soap.