Table of Contents
Advertisement
Quick Links
CONVERTIBLE TYPE AIR CONDITIONER
OPERATION MANUAL AND INSTALLATION MANUAL
No. 0150544329
y This product must only be installed or serviced by qualified personnel.
Please read this manual carefully before installation. This appliance is filled with
R32. Keep this manual for future reference.
Original instructions
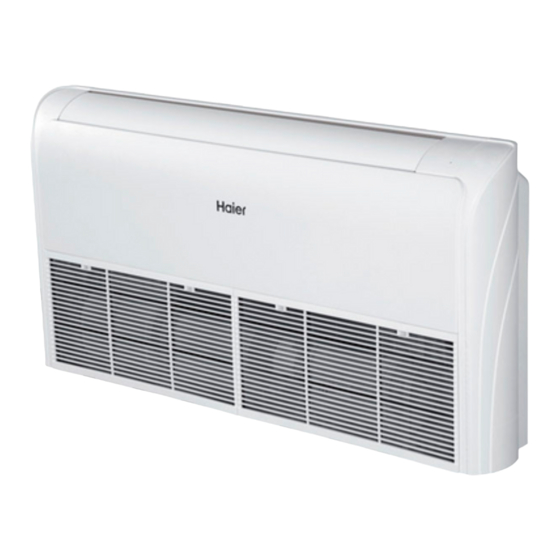
AC160S2SK1FA
Contents
Cautions ....................................................... 1
Move and scrap the air conditioning ............ 5
Safety Precautions ....................................... 6
Features and Functions ................................ 9
Parts and Functions.................................... 10
Maintenance ............................................... 11
Troubleshooting .......................................... 12
Installation Procedure ................................. 16
Test Run ..................................................... 25
Advertisement
Table of Contents

Related Manuals for Haier AC160S2SK1FA


Summary of Contents for Haier AC160S2SK1FA
-
Page 1: Table Of Contents
OPERATION MANUAL AND INSTALLATION MANUAL Contents Cautions ............1 Move and scrap the air conditioning .... 5 Safety Precautions ........6 AC160S2SK1FA Features and Functions ........ 9 Parts and Functions........10 Maintenance ..........11 Troubleshooting .......... 12 Installation Procedure ......... 16 Test Run ............. - Page 3 Read the precautions in This appliance is filled with this manual carefully before R32. operating the unit. Service indicator; Read Read the operator’s manual technical manual Keep this manual where the user can easily find it. WARNING y Do not use means to accelerate the defrosting process or to clean, other than those recommended by the manufacturer. y The appliance must be stored in a room without continuously operating ignition sources (for example: open flames, an operating gas appliance or an operating electric heater).
- Page 4 WARNING y A brazed, welded, or mechanical connection shall be made before opening the valves to permit refrigerant to flow between the refrigerating system parts. A vacuum valve shall be provided to evacuate the interconnecting pipe and/or any uncharged refrigerating system part. y The maximum working pressure is 4.3 MPa.
- Page 5 Haier Industrial Park, No.1 Haier road, Qingdao,P.R.China EUROPEAN REGULATIONS IMPORTANT INFORMATION REGA- CONFORMITY FOR THE MODELS RDING THE REFRIGERANT USED Contains fluorinated greenhouse gases All the products are in conformity with the following covered by the Kyoto Protocol European provision:...
-
Page 6: Cautions
Cautions Disposal of the old air conditioner Before disposing an old air conditioner that goes out of use, please make sure it’s inoperative and safe. Unplug the air conditioner in order to avoid the risk of child entrapment. It must be noticed that air conditioner system contains refrigerants, which require specialized waste disposal. The valuable materials contained in a air conditioner can be recycled. - Page 7 Cautions The installation of pipe-work shall be kept to a minimum. Pipe-work shall be protected from physical damage and shall not be installed in an unventilated space, if that space is smaller than Amin(2m2). Compliance with national gas regulations shall be observed. Mechanical connections shall be accessible for maintenance purposes.
- Page 8 Cautions Checks to electrical devices Repair and maintenance to electrical components shall include initial safety checks and component inspection procedures. If a fault exists that could compromise safety, then no electrical supply shall be connected to the circuit until it is satisfactorily dealt with.
- Page 9 Cautions Become familiar with the equipment and its operation. Isolate system electrically. Before attempting the procedure, ensure that: • mechanical handling equipment is available, if required, for handling refrigerant cylinders; • all personal protective equipment is available and being used correctly; •...
-
Page 10: Move And Scrap The Air Conditioning
Cautions Specifications y The refrigerating circuit is leak-proof. y For all the models in this manual, the all-pole discon-nexion connection method should be applied in the power supply. Such means for disconnection must be incorporation in the fixed wiring. Temperature and Humidity Range 32/23 °C max. -
Page 11: Safety Precautions
Safety Precautions y Before starting to use the system, read carefully this “SAFETY PRECAUTIONS” to ensure a proper operation of the system. y Safety precautions described here are classified to “ WARNING” and “ CAUTION”. Precautions which are shown in the column of “... - Page 12 Safety Precautions CAUTIONS FOR TRANSFER OR REPAIR WARNING When the air conditioner is relocated, contact your dealer or a Modification of the system is strictly prohibited. When the system needs a repair, consult your dealer. professional installer. Improper practice of repair could cause water leakage, electric shock or Improper practice of installation could cause water leakage, electric fire.
- Page 13 Safety Precautions WARNING y The breaker of the air conditioner should be all-pole switch, and the distance between its two contacts should be no less 3 mm. Such means for disconnection must be incorporation in the fixed wiring. y Use copper wire only. All the cables shall have got the European authentication certificate. y The power supply connects from the outdoor side.
-
Page 14: Features And Functions
Features and Functions AUTOMATIC OPERATION y COOLING TYPE Merely press the ON/OFF button, and the unit will begin automatic operation in the Cooling or dry modes as appropriate, in accordance with the thermostat setting and the actual temperature of the room. y HEAT &... -
Page 15: Parts And Functions
Parts and Functions Indoor Unit Operating Control Panel 1 Operating Control Panel 1 (1) Operation Control Panel (2) Cover Plate (3) Front Panel (4) Inlet Grill(Filter inside) (5) Human Sensor (6) RUNNING Indicator Lamp (7) TIMER Indicator Lamp (8) POWER Indicator Lamp (9) Emergency Switch (10) Remote Receiver Operating Control Panel 2... -
Page 16: Maintenance
Parts and Functions “HOT KEEP” function “HOT KEEP” is operated in the following cases. y When heating is started: In order to prevent blowing out of cool wind, the indoor unit fan stopped according to the room temperature which heating operation is started. -
Page 17: Troubleshooting
Troubleshooting Followings are not problems Sound of water flowing is not a problem. During unit operation or at stop, a swishing or gurgling noise may be heard. This noise is generated by refrigerant flowing in the system. Sound of cracking is heard. During unit operation, a cracking noise may be heard. - Page 18 Troubleshooting Before ask for services, please first check your unit against the following. Air conditioner won’t start. Is power supply switch turned on? Is city power supply normal? Is leakage current breaker activated? This is very dangerous, please disconnect Power supply switch is not set at ON. Power power supply immediately and contact failure?
- Page 19 Troubleshooting When failure happens,the fan of indoor unit stop running.The method of check failure code as follow. For outdoor failure,the failure code is outdoor failure LED flash times + 20. For example,the failure code of outdoor unit is 2. the wired controller of indoor unit will display 16(using hexadecimal method). Ta: ambient temperature sensor Tm: coil temoerature sensor OUTDOOR UNIT TROUBLE SHOOTING...
- Page 20 Troubleshooting Error Malfunction Description Diagnosis and Analysis Remark code AC power supply of the driver module get voltage lower than DC voltage or AC voltage low 155VAC or driver module get high DC-BUS voltage lower than Resumable 180VDC. Indoor pipe temperature Tm over 63°C, error clear within Indoor pipe temperature too high 3 minutes if temperature goes down and lower than Resumable...
-
Page 21: Installation Procedure
installation Procedure Please ask the dealer or specialist to install, never try by the users themselves. After the installation please be sure of the following conditions. WARNING y Please call dealer to install the air-conditioner. Incorrect installation may cause water leaking, shock and fire hazard. CAUTION y Air-conditioner can’t be installed in the environment with inflammable gases because the inflammable gases near air- conditioner may cause fire hazard. - Page 22 installation Procedure SELECTING THE MOUNTING POSITION WARNING y Install at a place that can withstand the weight of the indoor unit and install it positively so that the unit will not topple or fall. CAUTION y Do not install the unit where there is the danger of combustible gas leakage. y Do not install near heat sources.
- Page 23 Model Maximum length (between indoor Liquid side Gas side and outdoor) AC160S2SK1FA 9.52mm 19.05mm Install the room air conditioner as follows 1. Remove the intake grill and side cover (1) Open the intake grill (2) Remove the Side cover(Right and left side) (3) This air conditioner can be set up to intake fresh air.
- Page 24 Installation Procedure Cut intake grill for drain pipe (1) Tools:Knife or Pliers. (2) Cut the intake grill before installing the drain pipe,Then,pass the drain pipe through the hole.As the following schematic. After removal Location of the cut Installing the drain pipe and the connecting pipe (1) When the unit is installed in the ceiling,Installing them as below.
- Page 25 Installation Procedure 2. Location of ceiling supension bolts Dimensions (Space Required MODEL for installation) Suspension bolt pitch AC160S2SK1FA 1530 INDOOR UNIT (TOP VIEW) Suspension bolt should extend outward 30 to 50mm. For half-concealed installation Supension-bolt pitch should be as shown below...
- Page 26 Installation Procedure 4. Installing the indoor unit (1) Lift unit so that suspension bolts pass through suspension fittings at Ceiling panel Ceiling the sides (four places),and slide the unit back. (2) Fasten the indoor unit into place by tightening-up the special “B” bolts and the M10 nuts.
- Page 27 Installation Procedure INSTALLING THE DRAIN HOSE y Install the drain pipe with downward gradient (1/50 to 1/100) and so there are no rises or traps in the pipe. y Use general hard polyvinyl chloride pipe (VP25) (outside diameter 38 mm) y During installation of the drain pipe, be careful to avoid applying pressure to the drain point of the unit.
- Page 28 Installation Procedure B. For solid core wiring (or F-cable) (1) Cut the wire end with a wire cutter orwire-cutting pliers, then strip the insulation to about 15/16”(25mm) to expose the solid wire. (2) Using a screwdriver, remove the terminal screw(s) on the terminal board. (3) Using pliers, bend the solid wire to form a loop suitable for the terminal screw.
- Page 29 Installation Procedure Wiringadiagram Indoor unit terminal 1 2 3 Outdoor unit block terminal block Outdoor unit R S T N 1 2 3 Indoor unit terminal block terminal block Power supply Power supply 1PH, 220-240V~, 50/60Hz 380-415V, 3N~,50/60Hz The specification of cable between indoor unit to outdoor unit is HO5RN-F4G 2.5mm WARNING y The power cable and connecting cable are self-provided.
-
Page 30: Test Run
Test Run Check items 1. Indoor unit y Is operation of each button on the remote control unit normal? y Does each lamp light normally? y Do not air flow direction louvers operate normally? y Is the drain normal? 2. Outdoor unit y Is there any abnormal noise and vibration during operation? y Will noise, wind, or drain water from the unit disturb the neighbors? y Is there any gas leakage? - Page 32 Address: Haier Industrial Park,Qianwangang Road,Eco-Tech Development Zone,Qingdao 266555, Shandong, P.R.C. Contacts: TEL +86-532-88936943; FAX +86-532-8893-6999 Website: www.haier.com...