Table of Contents
Advertisement
For USA assistance, please call: 1-800-272-7033 or send e-mail to : consumerproducts@panasonic.com
For Canadian assistance, please call: 1-800-561-5505 or visit us at www.panasonic.ca
Operating Instructions
DMC-LC20PP
Model No.
Before use, please read these
instructions completely.
Digital Camera
VQT9904-1
Advertisement
Table of Contents

Related Manuals for Panasonic Lumix DMC-LC20


Summary of Contents for Panasonic Lumix DMC-LC20
-
Page 1: Digital Camera
For USA assistance, please call: 1-800-272-7033 or send e-mail to : consumerproducts@panasonic.com For Canadian assistance, please call: 1-800-561-5505 or visit us at www.panasonic.ca Operating Instructions DMC-LC20PP Model No. Before use, please read these instructions completely. Digital Camera VQT9904-1... -
Page 2: Information For Your Safety
Dear Customer, We would like to take this opportunity to thank you for purchasing this Panasonic Digital Camera. Please read these Operating Instructions carefully and keep them handy for future reference. Information for Your Safety WARNING TO REDUCE THE RISK OF FIRE OR... - Page 3 Trade Name: Panasonic Model No.: DMC-LC20 Responsible party:Matsushita Electric Corporation of America One Panasonic Way, Secaucus, NJ 07094 Support Contact:Panasonic Consumer Electronics Company 1-800- 272-7033 This device complies with Part 15 of the FCC Rules. Operation is subject to the...
-
Page 4: Usb Driver End User License Agreement
USB Driver End User License Agreement You (“Licensee”) are granted a license for the Software defined in this End User Soft Agreement (“Agreement”) on condition that you agree to the terms and conditions of this Agreement. If Licensee does not agree to the terms and conditions of this Agreement, promptly return the Software to Matsushita Electric Industrial Co., Ltd (“Matsushita”), its distributors or dealers from which you made the purchase. -
Page 5: Table Of Contents
Contents Safety Information for Your Safety ... 2 USB Driver End User License Agreement ... 4 Preparation Standard Accessories ... 7 Names of the Components ... 8 LCD Monitor Display ... 10 Quick Guide ... 11 Inserting the Battery ... 12 Charging the Battery ... - Page 6 Troubleshooting ... 72 Specifications ... 73 Digital Camera Accessory System ... 75 Digital Camera Accessory Order Form ... 76 Request for Service Notice ... 77 Limited Warranty (For USA Only) ... 78 Customer Services Directory (For USA Only) ... 80 Index ...
-
Page 7: Standard Accessories
Standard Accessories Before using your camera, check the contents. SD Memory Card (8MB) RP-SD008B AA Ni-MH (nickel-metal hydride) Battery Battery Charger DE-893 USB Connection Kit USB Connection Cable K1HA05CD0001 Video Cable VJA1153 Strap VFC3886 Metal Plate VHD1110 CD-ROM VFF0144... -
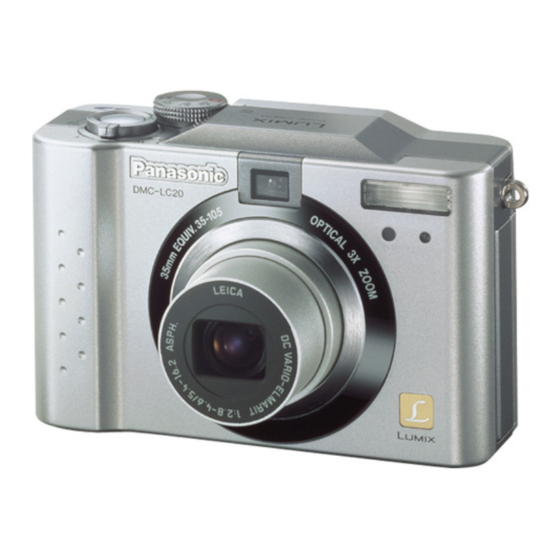
Page 8: Names Of The Components
Names of the Components 10 11 12 Ø 1819 [Front View] [Top View] [Back View] POWER ≥ ≥ DISPLAY MENU REVIEW 21 22 Lens Optical Finder (P26) Flash Flash Sensor (P33) Self-timer Indicator (P34) Zoom Lever (P30, P31) Shutter Button (P22) Mode Dial (P23) Microphone Flash Mode Button (P32) - Page 9 V.OUT DC IN 27 28 [Left Side View] Strap Eyelet (P18) V.OUT (Video Output) Socket (P64) DC IN Socket USB Socket (P66) [Bottom View] Battery Door (P12) Memory Card Door (P12) Tripod Receptacle (P19)
-
Page 10: Lcd Monitor Display
LCD Monitor Display The LCD monitor indicates the operation status. [In recording] REC mode (P23) Flash mode (P32) White balance (P39) Audio REC Picture size (P35) Quality (data compression ratio) (P36) Battery indicator (P14) Recordable number/time • When recordable number is 1,000 or more, “999”... -
Page 11: Quick Guide
Quick Guide 7,10 Prepare following items. • Camera • Batteries • Memory Card Check that the power switch is set to [OFF]. Charge batteries with the charger. (P13) Open the memory card door. Slide the battery door and open it. Insert batteries into the camera. -
Page 12: Inserting The Battery
• When the card is being read, do not open the battery door or the memory card door because the card data may be deleted. • Use Panasonic AA Ni-MH (nickel-metal hydride) Batteries. • Do not mix new batteries and old batteries. -
Page 13: Charging The Battery
An error cannot be cancelled by turning the power off/on. If after charging again the charge lamp still blinks, consult your nearest servicentre. • Use Panasonic AA Ni-MH (nickel-metal hydride) Batteries. -
Page 14: Battery Indicator
ª Battery indicator The remaining battery power is displayed on the LCD monitor. (approximation) : The battery power is sufficient : The remaining power is low : Replace or recharge the battery (Beep sounds): The battery is empty ª Available recording time Taking pictures every 30 seconds using flash light for every other pictures. -
Page 15: Inserting The Card
• If you cannot insert the card smoothly, verify whether the direction of the card is correct. • We recommend that you use the Panasonic brand card. (Use only the genuine card) - Page 16 ª Access to the card When you access the card, the red flash/access indicator 1 lights. When the flash/access indicator lights, do not remove the battery. Do not open the memory card door and do not pull the card out. The card and the card contents could be destroyed and the camera may not operate normally.
-
Page 17: Turning Power On/Off
Turning Power on/off • When switching the power on/off, do not put any obstacle in front of the lens. Slide the power switch and set to [ON]. • The status indicator lights. Set the power switch to [OFF]. -
Page 18: Attaching The Strap
Attaching the Strap Remove the triangular metal piece from the strap. Open with the metal plate and attach it to the eyelet 1 of the camera. Attach the strap. Attach the strap to the other side of the camera in the same way. -
Page 19: Using The Tripod
Using the Tripod When using a tripod, you can take pictures in slow shutter speed or zoom in tele position. Attach the camera holder 2 to make it match with the tripod receptacle 1 of the camera. Install the camera holder into the tripod. -
Page 20: Using The Lcd Monitor
Using the LCD Monitor DISPLAY • When setting the auto review to [ON], it is available, even if the display of the LCD monitor is set to [OFF]. (After finishing the auto review, the display is returned to [OFF]) • After recording, if you press the [REVIEW/SET] button, the review is displayed, even if the LCD monitor is set to [OFF]. -
Page 21: The Indicators
The Indicators ª Status Indicator (Green) 1 [Blinking] • Warning indication [Lighting] • When turning the power switch to [ON] ª Flash/Access Indicator (Red) 2 [Blinking] • When charging the flash • The flash indicator blinks quickly when the flash is being charged. If the flash indicator blinks slowly, it is an alert for the shutter jiggle. -
Page 22: The Shutter Button (Pressing Halfway/Pressing Fully)
The Shutter Button (Pressing halfway/Pressing fully) • You can adjust the beep sound in menu. (P60) • When pressing the shutter button fully at a stroke, the captured picture may be unclear due to camera shake, or out of focus. The shutter button is pressed in 2 steps: “pressing halfway”... -
Page 23: The Mode Dial
The Mode Dial You can set modes by this dial, as shown below. : Playback (P46) Play back recorded images. You can choose among 5 REC modes, as shown below. : Normal Picture (P26) When taking pictures, the shutter speed and the aperture value are automatically adjusted. -
Page 24: Operating The Menu
Operating the Menu W. BALANCE PICT. SIZE QUALITY SENSITIVITY D. ZOOM D. ZOOM W. BALANCE PICT. SIZE QUALITY SENSITIVITY D. ZOOM W. BALANCE PICT. SIZE QUALITY SENSITIVITY By operating the menu, it is possible to set the settings of the REC or playback mode. It is also possible to set the date and time, the beep sound and other settings. -
Page 25: Setting The Date/Time (Clock Set)
Setting the Date/Time (Clock Set) 1,4 2,3 CLOCK SET MONITOR AUTO REVIEW BEEP POWER SAVE CLOCK SET CLOCK SET YEAR 2002 MONTH TIME 00 : 00 STYLE • Even if the battery is not inserted, the camera, with a built-in power source for back-up, can store the set time for about 6 hours. -
Page 26: Taking Pictures
Taking Pictures By pressing the shutter button, the exposure (shutter speed and aperture value) will be automatically adjusted and the picture is taken. [Preparations] • Insert the card. (P15) • Set the power switch to [ON]. (P17) Set the mode dial. (P23) From the optical finder 1, centre the subject in the AF target A inside the optical finder and press... - Page 27 • When power saving time is set, if you do not operate the camera, it is automatically turned off depending on the set time (approx. 2 / 5 / 10 minutes). To operate the camera again, turn the power switch first to [OFF] and then to [ON].
-
Page 28: Checking The Last Picture (Review)
Checking the Last Picture (Review) 1,3,4 REVIEW DELETE REVIEW CANCEL: DELETE After taking a picture, when auto review (P59) is set to [ON], the captured picture is displayed on the LCD monitor for about 1 second, but you can also check the picture following the method shown below. -
Page 29: Recording Motion Images
Recording Motion Images 2,3,4 • After recording the motion image, the status indicator blinks while recording it in the memory card and after recording it, the status indicator lights. Do not operate the camera while recording to the memory card. •... -
Page 30: Using The Optical Zoom
Using the Optical Zoom With this function, you can make people and subjects appear closer and landscapes can be captured in wide angle, because they can be further zoomed by 3 times. [Preparation] • Set the mode dial. (P23) Aim the camera at the subject and adjust the size with the zoom lever. -
Page 31: Using The Digital Zoom
Using the Digital Zoom 1,4 2,3 D. ZOOM W. BALANCE PICT. SIZE QUALITY SENSITIVITY It is possible to magnify a subject to 3 times by the optical zoom, to 2 further times by the digital zoom, until reaching a maximum of 6 times. [Preparation] •... -
Page 32: Taking Pictures With The Built-In Flash
Taking Pictures with the Built-in Flash : AUTO The flash fires automatically according to the recording situation. : AUTO/Red-eye reduction The flash fires automatically according to the recording situation and simultaneously it reduces the red-eye phenomenon (when a subject’s eyes appear red in flash light). Use it when a subject is recorded in dark places. - Page 33 Take a picture. The recording method is the same as in “Taking Pictures”. (P26) • The available flash range is about 0.66 feet (20 cm) - 7.87 feet (2.4 m) at a maximum wide angle and about 0.66 feet (20 cm) - 4.92 feet (1.5 m) at a maximum telephoto setting.
-
Page 34: Taking Pictures With The Self-Timer
Taking Pictures with the Self-timer • In motion image mode [ • In burst mode [ ], the self-timer setting covers only the first picture. When you set the self-timer, the picture is automatically taken after 10 seconds (or 2 seconds). -
Page 35: Changing The Picture Size
Changing the Picture Size 1,4 2,3 PICT. SIZE W. BALANCE 1600 1024 QUALITY SENSITIVITY D. ZOOM • In motion image mode [ • If you set the picture size to small, the memory card can record more pictures. Moreover, because the data volume is small, you can easily attach the picture to an e-mail or use it in a web site. -
Page 36: Changing The Quality (Data Compression Ratio)
Changing the Quality (Data Compression Ratio) 1,4 2,3 QUALITY W. BALANCE PICT. SIZE SENSITIVITY D. ZOOM • In motion image mode [ • Due to the characteristics of JPEG compression pictures recorded in standard mode may contain mosaic noise depending on the subjects you photographed. •... -
Page 37: Compensating The Exposure
Compensating the Exposure 1,2,3 EXPOSURE CANCEL SELECT • In motion image mode [ If there is a difference between the subject and background brightness, since you cannot set the correct exposure, you can compensate it. [Preparation] • Set the mode dial. (P23) Press [ Press 2/1 to compensate the exposure. -
Page 38: Using The Af/Ae Lock
Using the AF/AE Lock If the subject is out of the AF target and you press the shutter button, the subject’s focus is not adjusted. After locking focus and exposure (AF/AE lock), you can take a clear picture with adjusted focus. AF: Auto focus AE: Auto exposure [Preparation]... -
Page 39: Setting The White Balance
Setting the White Balance 1,4 2,3 W. BALANCE PICT. SIZE QUALITY SENSITIVITY D. ZOOM With the auto white balance, the camera automatically adjusts the white balance to get the natural color tone, but in some particular situations, depending on light and environmental conditions, you can adjust the white balance manually. - Page 40 Setting the White Balance (Continued) W. BALANCE PICT. SIZE QUALITY SENSITIVITY D. ZOOM FRAME THE CAMERA AT THE WHITE SURFACE AND PRESS SHUTTER CANCEL Here the white set mode of white balance is explained. Press the [MENU] button. Press 3/4 to select [W.BALANCE].
-
Page 41: Setting Iso Sensitivity
Setting ISO Sensitivity 1,4 2,3 SENSITIVITY W. BALANCE PICT. SIZE QUALITY D. ZOOM • In motion image mode [ ISO sensitivity is a value that corresponds to the sensitivity to light. The higher it is, the better the camera performs in dark places. -
Page 42: Taking Pictures With Macro Mode
Taking Pictures with Macro Mode • In motion image mode [ • When selecting the macro mode, optical finder functionality is limited. Use the LCD monitor. If the camera lens is at a distance from 15 cm to 70 cm from the subject, set macro mode [ Set the mode dial to [ •... -
Page 43: Taking Pictures With The Landscape Mode
Taking Pictures with the Landscape Mode You can easily capture sharp and crisp landscape photos. Please note that this mode is suitable for landscape photos farther than 13.12 feet (4 m) and in daylight situations. Set the mode dial to Landscape mode [ Take a picture. -
Page 44: Taking Pictures With The Night Portrait Mode
Taking Pictures with the Night Portrait Mode • When the auto focus is not adjusted, the focus range becomes 8.04 feet (2.45 m). When you take a picture of, for example, your friends in front of beautiful night illumination scenery, this mode ensures the appropriate exposure for your subject as well as the background, using flash and slow shutter. -
Page 45: Taking Pictures With Burst Mode
Taking Pictures with Burst Mode Continuously pressing the shutter button, it is possible to record in burst mode. (maximum of 5 frames) [Preparation] • Set the mode dial. (P23) Press [ • [ ] will appear. Press the shutter button halfway to lock the focus, then press it fully to take pictures in sequence. -
Page 46: Playing Back Still Pictures
Playing Back Still Pictures • This camera is based on the DCF standards (Design rule for Camera File system) which were established by the Japan Electronic Industry Technology Association (JEITA). • The file format that can be played back with this camera is JPEG. (There are also pictures that cannot be played back in JPEG format) •... -
Page 47: Image Multi Playback
9 Image Multi Playback SELECT: CANCEL: SELECT: CANCEL: It is possible to display 9 images at once. [Preparation] • Set the mode dial to play back [ During playback, rotate the zoom lever towards [ • Multi playback (9 frames) starts. Press 3/4/2/1 to select images. -
Page 48: Using The Playback Zoom
Using the Playback Zoom CANCEL: DELETE • In motion image playback, it is not possible to magnify. • The more the zoom magnification increases, the more the picture quality deteriorates. • The playback zoom may not work with pictures recorded with other equipment. -
Page 49: Playing Back Motion Images
Playing Back Motion Images PLAY MOTION IMAGE: • The file format that can be played back with this camera is QuickTime Motion JPEG. • It could happen that the Motion JPEG files recorded by other equipment cannot be played back with this camera. •... -
Page 50: Deleting Images
Deleting Images 2,3,4 DELETE DELETE PROTECT DPOF SLIDE SHOW DELETE SELECT FORMAT CANCEL Images recorded on the card can be deleted. Once deleted, images cannot be recovered. [Preparations] • Set the mode dial to playback [ • When an image is protected, it cannot be deleted. - Page 51 2,3,4 DELETE DELETE PROTECT DPOF SLIDE SHOW DELETE SELECT FORMAT CANCEL • Do not take out the memory card while deleting. It may cause a malfunction. [Delete all images] Once deleted images cannot be recovered. Press the [MENU] button. Press 3/4 to select [DELETE] and then press 1.
-
Page 52: Writing The Print Information In The Card (Dpof Setting)
Writing the Print Information in the Card (DPOF Setting) 1,6 2,3,4,5 DPOF DELETE PROTECT DPOF SLIDE SHOW DPOF SELECT INDEX RESET CANCEL It is possible to write information on the card (DPOF data) about the images that you want to print and the number of sheets. - Page 53 1,5 2,3,4 DPOF DELETE PROTECT DPOF SLIDE SHOW DPOF SELECT INDEX RESET CANCEL [ALL] Press the [MENU] button. Press 3/4 to select [DPOF] and then press 1. Press 3/4 to select [ALL] and then press 1. Press 3/4 to select the number of sheets to be printed.
- Page 54 Writing the Print Information in the Card (DPOF Setting) (Continued) 1,5 2,3,4 DPOF DELETE PROTECT DPOF SLIDE SHOW DPOF SLECT INDEX RESET CANCEL [Index setting] Press the [MENU] button. Press 3/4 to select [DPOF] and then press 1. Press 3/4 to select [INDEX] and then press 1.
-
Page 55: Protecting Images On The Card
Protecting Images on the Card 1,6 2,3,4,5,7 PROTECT DELETE PROTECT DPOF SLIDE SHOW PROTECT SELECT ALL OFF CANCEL • Even if an image is protected, it will be erased in case of formatting. • When trying to delete a protected file, these messages are displayed “THIS PICTURE IS PROTECTED”... -
Page 56: Playing Back With Slide Show (Automatic Playback)
Playing Back with Slide Show (Automatic Playback) 2,3,4,5 SLIDE SHOW DELETE PROTECT DPOF SLIDE SHOW SLIDE SHOW DPOF CANCEL INTERVAL : CANCEL All pictures selected in the card can be played back one-by-one automatically. [Preparation] • Set the mode dial to playback [ Press the [MENU] button. -
Page 57: Formatting The Card
Formatting the Card 2,3,4 DELETE DELETE PROTECT DPOF SLIDE SHOW DELETE SELECT FORMAT CANCEL Usually, it is not necessary to format (initialize) the memory card. Format the card when this message is displayed on the LCD monitor “MEMORY CARD ERROR”. [Preparation] •... -
Page 58: Adjusting The Lcd Monitor Brightness
Adjusting the LCD Monitor Brightness 1,4 2,3 MONITOR BEEP POWER SAVE CLOCK SET LANGUAGE Press the [MENU] button. Press 3/4 to select [MONITOR]. Press 2/1 to adjust the brightness. Press the [MENU] button. • The menu will disappear. -
Page 59: Using The Auto Review
Using the Auto Review 1,4 2,3 AUTO REVIEW MONITOR BEEP POWER SAVE CLOCK SET • In burst mode [ ], only the first recorded picture is displayed. • Even if the auto review is set to [ON], it is not available in motion image mode Recording with the auto review set to [ON], the recorded picture is automatically displayed on the LCD monitor for about 1... -
Page 60: Setting Up The Beep Sound
Setting up the Beep Sound 1,4 2,3 BEEP MONITOR POWER SAVE CLOCK SET LANGUAGE It is possible to set the electronic sound when the menu operation is done and the shutter button is pressed. Press the [MENU] button. Press 3/4 to select [BEEP]. Press 2/1 to select [ON]. -
Page 61: Setting Up The Power Save Mode
Setting up the Power Save Mode 1,4 2,3 POWER SAVE MONITOR BEEP CLOCK SET LANGUAGE • If you want to cancel the power save mode, set the power switch to [OFF] and then set it to [ON] again. • When using the AC adaptor (optional, DMW-AC1), the power save mode is not available. -
Page 62: Memorizing The Settings
Memorizing the settings 1,4 2,3 MEMORY VIDEO • Even if you set [MEMORY] to [OFF], settings of clock set and video are memorized. If [MEMORY] is set to [ON], the status of the following settings can be memorized after the camera has been switched off. •... -
Page 63: Resetting The File Number
Resetting the File Number 1,4 2,3 NO. RESET LANGUAGE MEMORY Since the file numbers are recorded sequentially by the camera, when you use some cards, it is possible that the file numbers on your cards are not in order. Use this function when you insert a new card and you want to start recording from the file number 0001. -
Page 64: Playing Back Images On A Tv Monitor
Playing Back Images on a TV Monitor Viewing images in other countries When setting [VIDEO] on the menu, you can view images on the TV in other countries (regions) which use the NTSC or PAL system. • Even if you set menu selection for [VIDEO] to [PAL], the output signal is still NTSC system. -
Page 65: After Use
After Use After using the camera, it is recommended that you complete the following steps: Turn the power switch to [OFF]. (P17) Open the memory card door. Slide the battery door and open it. Eject the card. (P15) Remove batteries. (P12) •... -
Page 66: Connecting To Pc
Connecting to PC • For further information, read the supplied operating instructions for the USB connection kit. • When connecting to PC, it is recommended that you use the AC adaptor (optional, DMW-AC1) as the power source. [Preparation] Only if using Windows 98 or 98SE, start the supplied CD from PC and install the USB driver. -
Page 67: The Menu Items
The Menu Items REC mode menu W.BALANCE (P39) PICT. SIZE (P35) QUALITY (P36) SENSITIVITY (P41) D. ZOOM (P31) MONITOR (P58) AUTO REVIEW (P59) BEEP (P60) POWER SAVE (P61) CLOCK SET (P25) NO. RESET (P63) LANGUAGE MEMORY (P62) Playback mode menu •... -
Page 68: Cautions For Use
Keep the digital camera away from magnetized equipment (such as a microwave oven, TV, video game equipment, etc.). • If you use the digital camera on or near a TV, images may be disturbed due to electromagnetic wave radiation. • Do not use near a cell phone because doing so may cause noise to adversely affect the images. - Page 69 ª Condensation When the condensation has taken place: Set the power switch to [OFF] and leave the digital camera in this condition for about 1 hour. When the camera becomes close to the ambient temperature, the fog disappears naturally.
- Page 70 LCD monitor. Wipe it with soft dry cloth. • If the digital camera is extremely cold when you turn the power on, the image on the LCD monitor is slightly darker than usual at first.
-
Page 71: Warning Indication
Warning Indication [MEMORY CARD FULL] The capacity of the memory card is full. Change the new memory card or delete unnecessary images for increasing recordable number. [PLEASE SET THE DATE/TIME] The date has not been set up. Set the date. [THIS MEMORY CARD IS PROTECTED] The card is write-protected. -
Page 72: Troubleshooting
The power does not turn on. 1-1: Check whether batteries are inserted. 1-2: Check whether batteries are charged. 1-3: Use Panasonic AA Ni-MH (nickel-metal hydride) batteries. When the power is turned on, it turns off immediately. 2-1: Check whether batteries are charged. -
Page 73: Specifications
Specifications Digital Camera Power Source: Power Consumption: Effective number of pixels 2.0 M Image sensor Lens Focus Recording range Shutter system ISO sensitivity Shutter speed White balance Exposure (AE) Metering mode LCD monitor Optical finder Flash Microphone Recording media Recording size... - Page 74 Analog video DC IN Dimensions (W a H a D) 3.93 a 2.59 a1.58 inch / 99.8 a 65.9 a 40.1 mm Weight Power Source Charger (Panasonic DE-893) Information for your safety Input Output NTSC/PAL Composite output 5 pin Mini USB ‡...
-
Page 75: Digital Camera Accessory System
Digital Camera Accessory System Accessory# RP-SDH512 RP-SDH256 RP-SD128 RP-SD064B RP-SD032B RP-SD016B RP-SD008B BN-SDCAPU/1B BN-SDABPU/1B DMW-AC1 HHR-3UPA/2B HHR-3UPA/4B Figure 512 MB SD Memory Card 256 MB SD Memory Card 128 MB SD Memory Card 64 MB SD Memory Card 32 MB SD Memory Card... -
Page 76: Digital Camera Accessory Order Form
CALL PANASONIC’S ACCESSORY ORDER LINE AT 1-800-332-5368 [6 AM-5 PM M-F, 6 AM-10:30 AM SAT, PACIFIC TIME] MAIL THIS ORDER TO: PANASONIC SERVICES COMPANY ACCESSORY ORDER OFFICE 20421 84th Avenue South Kent, WA. 98032 In CANADA, please contact your local Dealer for more information on Accessories. -
Page 77: Request For Service Notice
(Failure to due so will delay your repair.) • To further speed your repair, please provide an explanation of what wrong with the unit and any symptom it is exhibiting. Panasonic Services Company 1705 N. Randall Road Elgin, IL. 60123-7847 Attn: Digital Camera Repair... -
Page 78: Limited Warranty (For Usa Only)
Limited Warranty Coverage If your product does not work properly because of a defect in materials or workmanship, Panasonic Consumer Electronics Company or Panasonic Sales Company (collectively referred to as “the warrantor”) will, for the length of the period indicated on the chart below, which starts with the date of original purchase (“warranty period”), at its option either (a) repair your product with... - Page 79 Carry-In or Mail-In Service For Carry-In or Mail-In Service in the United States call 1-800-272-7033. For assistance in Puerto Rico call Panasonic Sales Company (787)-750-4300 or fax (787)-768-2910. This warranty ONLY COVERS failures due to defects in materials or workmanship, and DOES NOT COVER normal wear and tear or cosmetic damage.
-
Page 80: Customer Services Directory (For Usa Only)
Customer's in Puerto Rico, please ship or carry in to location below (“Service in Puerto Rico”). Matsushita Electric of Puerto Rico, Inc. Panasonic Sales Company/ Factory Servicenter: Ave. 65 de Infanteria, Km. 9.5, San Gabriel Industrial Park, Carolina, Puerto Rico 00985... -
Page 81: Index
Index AF/AE lock ...38 Auto Review ...59 Battery indicator ...14 Beep Sound ...60 Built-in Flash ...32 Burst Mode...45 Clock Set...25 Condensation ...69 Digital Zoom ...31 DPOF ...52 Exposure Compensation...37 File Number...63 Flash/Access Indicator ...21 Formatting ...57 ISO Sensitivity ...41 Landscape Mode...43 LCD Monitor Brightness ...58 Macro Mode ...42 Memory Setting ...62... -
Page 82: Spanish Quck Use Guide/Guía Española Para El Uso Rápido
Spanish Quck Use Guide/Guía española para el uso rápido 7,10 Prepare las siguientes piezas. • Cámara • Baterías • Tarjeta de memoria Verifique que el interruptor de alimentación esté en [OFF]. Cargue las baterías usando un cargador. Abra la tapa de la tarjeta de memoria. - Page 83 MEMO...
- Page 84 Panasonic Consumer Electronics Company, Division of Matsushita Electric Corporation of America One Panasonic Way, Secaucus, NJ 07094 Panasonic Sales Company ("PSC") Division of Matsushita Electric of Puerto Rico, Inc. Ave. 65 de Infanteria, Km. 9.5, San Gabriel Industrial Park, Carolina, Puerto Rico 00985 Panasonic Canada Inc.