Table of Contents
Advertisement
Quick Links
SERVICE MANUAL
PRODUCT CODE
1 122 087 00
(M4GA)
1 122 088 00
(P4GA)
1 122 088 02
(P4GC)
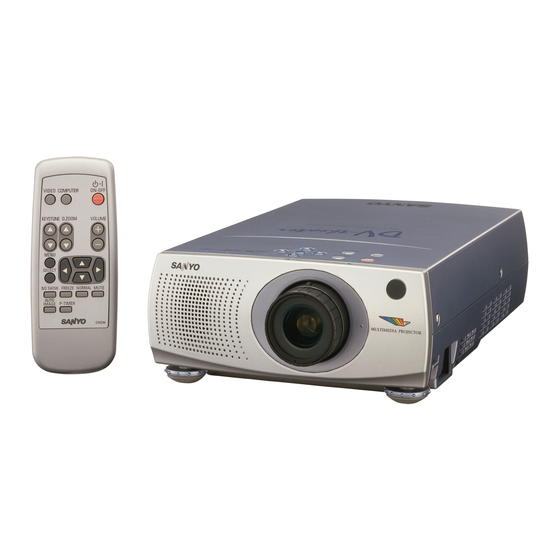
Multimedia Projector
FILE NO.
Model No. PLV-30
Original Version
Chassis No. M4G-3000
NOTE: Match the Chassis No. on the unit's
back cover with the Chassis No. in the
Service Manual.
If the Original Version Service
Manual Chassis No. does not match
the
unit's,
additional
Literature is required.You must refer to
"Notices" to the Original Service
Manual prior to servicing the unit.
REFERENCE NO.
U.S.A., Canada,
Europe, Asia, Africa
U.K
Service
SM
5110166
Advertisement
Table of Contents

Related Manuals for Sanyo M4G-3000


Summary of Contents for Sanyo M4G-3000
- Page 1 Multimedia Projector Model No. PLV-30 U.S.A., Canada, Europe, Asia, Africa Original Version Chassis No. M4G-3000 NOTE: Match the Chassis No. on the unit’s back cover with the Chassis No. in the Service Manual. If the Original Version Service Manual Chassis No. does not match unit’s,...
-
Page 2: Table Of Contents
■ Contents ■ Safety instructions ________________________________________________3 ■ Specifications __________________________________________________ 4 ■ Note on Servicing ______________________________________________ 5 ■ Adjustments after parts replacement ________________________________ 5 ■ Circuit protections ______________________________________________ 6-7 Fuse ______________________________________________________ 6 Thermal switch ______________________________________________ 7 Warning temperature and power failure protection ____________________ 7 ■... -
Page 3: Safety Instructions
■ Safety Instructions SAFETY PRECAUTIONS WARNING: The chassis of this projector is isolated (COLD) from AC line by using the converter transformer. Primary side of the converter and lamp power supply unit circuit is connected to the AC line and it is hot, which hot circuit is iden- tified with the line ( ) in the schematic diagram. -
Page 4: Specifications
■ Specifications Projector Type Multi-media Projector Dimensions (W x H x D) 7.44” x 2.93” x 11.42” (189mm x 74.5mm x 290mm) Net Weight 5.51 lbs (2.5 kg) LCD Panel System 0.7” TFT Active Matrix type, 3 panels Panel Resolution 800 x 600 dots Number of Pixels 1,440,000 (800 x 600 x 3 panels) -
Page 5: Note On Servicing
■ Note on Servicing When you carry out the electrical, optical service adjustment or repairing with cabinet top removal, it should be done under the service conditions listed below. If you can not keep the one of following conditions, the projector turns off automatically by operating the protection circuit. -
Page 6: Circuit Protections
■ Circuit Protections This projector is equipped with the following circuit protections to operate in safety. If the abnormality occurs inside the projector, it will automatically turn off by operating one of the following protection circuits. Fuse The fuse is located inside of the projector. When either the LAMP indicator or the READY indicator is not illuminat- ed, fuse may be opened. -
Page 7: Warning Temperature And Power Failure Protection
Circuit Protections Warning temperature and power failure protection The TEMP WARNING indicator flashes red and the projector will automatically turn off when the internal tempera- ture of the projector exceeds the normal temperature or when stopping cooling fans or when the internal power supply lines are failed. -
Page 8: Mechanical Disassemblies
■ Mechanical Disassemblies Mechanical disassemble should be made following procedures in numerical order. Following steps show the basic procedures, therefore unnecessary step may be ignored. Caution: The parts and screws should be placed exactly the same position as the original otherwise it may cause loss of performance and product safety. - Page 9 Mechanical Disassemblies 3. MAIN BOARD REMOVAL Remove 9 screws and remove the main board upward. Main Board Fig.3 FUSE REMOVAL Remove a screw and pull the line filter cover upward and then replace the fuse if required. Line Filter Cover Fuse Fig.4...
- Page 10 Mechanical Disassemblies 4. AV AND COMPONENT BOARD REMOVAL 1) Remove 3 screws and FPC cables, and then take the component board off upward. 2) Remove a screw and a grounding lead, and then take the AV board ass’y Component Board off upward.
- Page 11 Mechanical Disassemblies 6. LAMP BALLAST UNIT FAN REMOVAL (FN905) 1) Disconnect the thermal switch sockets. 2) Remove a screw and disconnect the lamp socket. 3) Remove 2 screws (bottom side) and a screw , and the remove the lamp ballast unit upward. 4) Take the cover off from the lamp ballast unit and remove 4 screws and take the lamp ballast board off from the...
- Page 12 Mechanical Disassemblies 8. OPTICAL UNIT AND FAN REMOVAL (FN901) 1) Remove 2 screws A and the thermal switch. 2) Remove a screw B and disconnect the lamp socket. 3) Remove 7 screws and pull the optical unit upward. 4) Remove 2 screws D and fan (FN901). Thermal Switch Optical Unit Lamp Socket...
- Page 13 Mechanical Disassemblies 10. FANS REMOVAL (FN902, FN903, FN904) Remove 4 screws A and 3 screws B and remove the duct cover and fans (FN902, FN903 and FN904) Duct Cover FN902 FN903 FN904 Fig.11 11. AC INLET ASS’Y REMOVAL 1) Remove a screw A and a grounding lead. 2) Remove 2 screws B and pull the AC inlet ass’y upward.
-
Page 14: Optical Parts Disassemblies
■ Optical Parts Disassemblies 1. PROJECTION LENS REMOVAL 1) Remove the Cabinet top and cabinet front following to “Mechanical Disassemblies”. 2) Remove 4 screws and remove the Projection Lens. Fig.1 2. OPTICAL UNIT TOP REMOVAL 1) Remove the Cabinet top, front, main board, component boards and power unit cover following to “Mechanical Disassemblies”. - Page 15 Optical Pats Disassemblies 3. INTEGRATOR LENS ASS’Y DISASSEMBLY 1) Remove the cabinet top, front and main board following to “Mechanical Disassemblies”. 2) Remove 2 screws and take the integrator lens ass’y off upward. 3) Release 4 hooks on the holder and remove the integrator lens. Hooks *Should be place the rugged surface of lens...
- Page 16 Optical Parts Disassemblies 5. POLARIZED GLASS-IN ASS’Y DISASSEMBLY 1) Remove the cabinet top, front, main and component boards following to “Mechanical Disassemblies”. 2) Remove each screw and take the each polarized glass-in ass’y off upward. 3) Release 2 hooks and remove the polarized glass-in. Phase Sheet Polarized Glass-In Hook...
- Page 17 Optical Parts Disassemblies Locations and Directions When the optical parts mounting or assembling, the parts must be mounted in the specified location and direction. Please follow to the figure below. Part name Part name Prism ass’y Relay lens (OUT) Integrator lens (IN) Relay lens (IN) Integrator lens (OUT) Dichroic mirror (G)
-
Page 18: Lcd Panel/Prism Ass'y Replacement
■ LCD Panel/Prism Ass’y Replacement IMPORTANT NOTICE on LCD Panel/Prism Ass'y Replacement LCD panels used for this model can not be replaced separately. Do not disassemble the LCD Panel/Prism Ass’y. These LCD panels are installed with precision at the factory. When replacing the LCD panel, should be replaced whole of the LCD panels and prism ass’y at once. -
Page 19: Lamp Replacement
■ Lamp Replacement WARNING: ORDER REPLACEMENT LAMP - For continued safety, replace with a lamp assembly of the same type. Type No. Service Parts No. - Allow the projector to cool for at least 45 minutes before you open the POA-LMP25 610 287 5386 lamp cover. -
Page 20: Optical Adjustments
■ Optical Adjustments CONTRAST ADJUSTMENT [Before Adjustment] - Adjustment requires a 2.0mm hex wrench and a slot screwdriver. - Remove cabinet top following to “Mechanical Disassemblies”. - Input a 100% of black raster signal. Note: Do not disconnect the connectors on main and component boards otherwise the projector can not be turned on. -
Page 21: Integrator Lens Adjustment
Optical Adjustments INTEGRATOR LENS ADJUSTMENT [Before Adjustment] - Adjustment requires a 2.0mm hex driver and a slot screwdriver. - Remove cabinet top following to “Cabinet Disassemblies”. Note: Do not disconnect the connectors on main and component boards otherwise the projector can not be turned on. Yellow [ADJUSTMENT] 1. -
Page 22: Relay Lens Adjustment
Optical Adjustments RELAY LENS ADJUSTMENT [Before Adjustment] - Adjustment requires a 2.0mm hex driver and a slot screwdriver. - Remove cabinet top following to “Cabinet Disassemblies”. Note: Do not disconnect the connectors on main and component boards otherwise the projector can not be turned on. [ADJUSTMENT] White 1. -
Page 23: Electric Adjustments
■ Electrical Adjustments ● Service Adjustment Menu Operation To enter the service mode To enter to the “Service Mode”, press and hold the MENU and NORMAL button on the projector at the same time for more than 3 seconds. The service mode display appears on the screen as follows. To adjust service data Select the adjustment item no. -
Page 24: Circuit Adjustments
Electrical Adjustments ● Circuit Adjustments CAUTION: The each circuit has been made by the fine adjustment at factory. Do not attempt to adjust the follow- ing adjustments except requiring the readjustments in servicing otherwise it may cause loss of perfor- mance and product safety. - Page 25 Electrical Adjustments PC GAIN ADJUSTMENT COMPONENT GAIN ADJUSTMENT 1. Receive the 16-step grey scale computer signal. 1. Receive the 16-step grey scale component video sig- 2. Set to COMPUTER mode. nal. 2. Set to VIDEO (Component) mode. [PC-R GAIN ADJUSTMENT] 3.
- Page 26 Electrical Adjustments NRS ADJUSTMENT PC/AV GAMMA OFF ADJUSTMENT 1. Receive the 16-step grey scale computer signal. PC-GAMMA OFF ADJUSTMENT 2. Set to COMPUTER mode. 1. Receive the 16-step gray scale computer signal. 3. Connect an oscilloscope to test point “TP3581” (+) 2.
- Page 27 Electrical Adjustments PC/AV-VIDEO ADJUSTMENT-1 PC/AV-VIDEO ADJUSTMENT-2 Presetting [PC-VIDEO ADJUSTMENT-2] 1. Input the 16-step gray scale video signal and com- 1. Receive the 16-step grey scale computer signal. puter signal. 2. Set to COMPUTER mode. 3. Connect an oscilloscope to test point “TP512” (+) and [PC/AV-VIDEO ADJUSTMENT] chassis ground (-).
- Page 28 Electrical Adjustments COMMON CENTER ADJUSTMENT BLACK BALANCE ADJUSTMENT 1. Receive the 1 dot line computer signal. [PC BLACK BALANCE ADJUSTMENT] 2. Set to COMPUTER mode. 1. Receive the 16-step grey scale computer signal. 2. Set to COMPUTER mode. [R-COMMON CENTER ADJUSTMENT] 3.
-
Page 29: Service Adjustment Data Table
Electrical Adjustments ● Service Adjustment Data Table These initial values are the reference data written from the CPU ROM to the memory IC when the new memory IC replaced. The adjustment items indicated with “✻” are required to readjust fol- lowing to the “Electrical adjustments”. - Page 30 Electrical Adjustments Initial Value Adjustment Item Range Description For Fan Control 0 - 31 2 - 5 Temperature checking period, 0.5/1.0/1.5/2.0/2.5/3.0 sec. 0 - 255 0 - 255 0 - 255 0 - 255 0 - 255 Not used Sub Sharpness (YCbCr) 0 - 15 Refer to User control spec Sub Tint (Video)
-
Page 31: Test Points And Locations
Electrical Adjustments Test Points and Locations ● Main Board TP3331 IC3301 VR2581 TP3581 TP3322 TP513 VR531 VR581 TP6603 VR521 VR3561 IC561 TP6602 TP562 TP511 TP531 TP561 TP532 IC501 IC531 VR561 VR2561 TP512 TP802 VR551 TP801 TP3582 VR2571 TPDHS VR6601 TPDVS IC301 TP5111 TP6601... -
Page 32: Troubleshooting
■ Troubleshooting NO POWER Refer to next page IIC BUS PSDA PSDA KEY SWITCHES ON/OFF BUTTON 17-18 KEY SW INDICATOR POWER LED Check that the LAMP LAMP indicator and READY IC1803 indicator are lighting. READY LED IC301 If both of indicators READY SYSTEM are not lighting,check... - Page 33 Troubleshooting IIC BUS PSDA PSDA TEMP. BOARD TEMP. TEMP. SENSOR SENSOR IC2831 IC2832 Abnormal temperature detection on the Main board. Abnormal temperature detection inside of the projector. Is projection of lamp cover inside broken or not fitting correctry ? Check the interlock switch (SW904) SW904 and lamp cover.
- Page 34 Troubleshooting NO POWER PERIPHERY OF CHASSIS MAIN BOARD 1. Is fuse (F601) blown? 1. Check that the 15.5V is observed at pins 1-3 of K3C. Fuse may be opened when either the LAMP indica- 2. Check that the 6V is observed at pins 6-8 of K3C. tor or the READY indicator isn't Illuminated.
-
Page 35: No Picture
Troubleshooting NO PICTURE 2. Check that the PC/AV switching signal is correct. AV BOARD Pin 16 of IC5201 ...........AV: H, PC: L Pin 5 of IC5282 ..........AV: H, PC: L 1. Check that the Vcc-voltages(+5V, -5V) are applied to 3. Check that the RGB signals are observed at follow- AV circuits. -
Page 36: No Sound
Troubleshooting NO SOUND MAIN BOARD AUDIO BOARD 1. Check that the PC/AV switching signal is correct. 1. Check that sound volume control signal is correct. Pins 10 and 11 of IC5001 ......AV : L Pin 4 of IC001 PC : H 2. -
Page 37: Control Port Functions
■ Control Port Functions ● System Control & I/O Port Functions IC Ref. No Pin/Name Signal Name Function Note IC301 PortA0 ROMWEL For ICE PortA1 ROMWEH For ICE PortA2 BOOTWE For ICE PortA3 Not used Fixed High PortA4 5V_SW Power ON/OFF MainPower-ON: High PortA5 LAMP_BST_SW... -
Page 38: Waveforms
■ Waveforms TP207 TP218 TP7223 TP208 AV VIDEO H-SYNC TP7224 TPDHS TP3322 V-SYNC TPDVS TP3581 TP3321 for R/B TP2211R TP3582 TP2212R for G R-OUTPUT -38-... - Page 39 Waveforms TP2221G TP2231B TP2222G TP2232B G-OUTPUT B-OUTPUT TP501 TP531 S&H S&H R-INPUT G-INPUT TP502 TP532 S&H S&H R-OUTPUT G-OUTPUT TP511 TP512 S&H S&H R-OUTPUT G-OUTPUT -39-...
- Page 40 TP561 S&H B-INTPUT TP562 S&H B-OUTPUT TP513 S&H B-OUTPUT -40-...
-
Page 41: Cleaning
AIR MOUSE CONT.1 MOUSE RHCLK RHCLK I/O EXPAND AIR MOUSE KEY SW CONTROL RC SIGNAL IN RC INPUT TEMP WARR PORT D0-D7 LAMP ERR IC1808 IC3871 IC3861 RS232C SUB CPU I/O EXPAND DRIVER S-SW SEL0 CB-SW SEL1 D7-D15 CR-SW IC1809 PREAMP. M4G-3000... -
Page 42: Ic Block Diagrams
D003 IC2661 P-FAIL 53-56 12V3 D2661 REG.&SW K5RR IC2691 D6612 ASSY PWB, AUDIO R-LCD Q6612 PANEL D2691 REG.&SW IC2681 K5GG G-LCD D2681 PANEL REG.&SW D6611 D1831 K5BB Q6611 B-LCD ASSY PWB, COMPONENT PANEL ASSY PWB, MAIN ASSY PWB, TEMP M4G-3000... -
Page 43: Schematic Diagrams
2 Do not shorten the circuit between hot and cold sides. 1SS355 1/16GJ O.S. 10KC J10EG 5V_SW C1871TM 050G R1874 3 The grounding lead must be connected to the ground of the same CJ120C C1872TM 1/16GZ LAMP_BST-SW INT OUT CJ33CGQY circuit when measuring of voltages and waveforms. P-FAIL M4GA-01 (M4G-3000) - Page 44 (IC3861 15P) DATA/ADB (IC3861 5P) POWER_FAIL (IC1808 6P) AV BOARD VOL_CONT (IC431 4P) MAIN BOARD ASSY,PWB AV MK6A K5A1 K5A2 K5A3 K5A4 K5A5 K5A6 1AA0B10C2820A J10EG030G J10EP030G J10EG080G AUDIO AMP. AUDIO AMP. SPEAKER AUDIO BORD "K6T" BOARD "K6P" MK6A-02 (M4G-3000)
- Page 45 R5139 1/16GJ47C 100C TE5101 VPEN (IC301 155P) R5141 1/16GJ47C R5142 J30A VCLK (IC301 213P) 1/10GZ0.0 00102 R5143 SW480I R5110 R5115 1/16GJ 1/16GJ R5144 1/16GJ47C RTS0(VHS) LLC(CLK) GND2 VHDREN (IC1804 13P) TE6101 R6154 R5146 1/10GZ0.0 1/10GZ0.0 GND4 MAIN BOARD MK6A-03 (M4G-3000)
- Page 46 (IC1601) R1827 (IC6101 56P) R1828 1/16GJ R329 1/16GJ 1/16GJ 22KC MATRIX 68KC 1.7V VFIELD 10KC R371 (IC5101 49P) PORTB1 S3.3V1 1/16GJ Q371 (IC1601) R328 (IC301 147PIN) VFIELD_SW (IC1804 14P) 5V_SW MAIN BOARD R372 C371 (K3D)(IC451) R373 1/16GJ 2.2KC M4GA-04 (M4G-3000)
- Page 47 R569 R576 B_IROMURA UNIFORMITY 1/16GJ CJ56 1/16 DOUT00 AOUT2 330C CGQY GZ0C C568 DOUT01 DACI2 CORRECTION DOUT02 DACO2 R570 1/16GZ DOUT03 DVSS1 DVDD1 R573 R574 C483 25KZ MAIN BOARD 0.1GQFY (IC3331 9P) C484 C481 25KZ CJ47 0.1GQFY CGQY MK6A-05 (M4G-3000)
- Page 48 D6613 POWER_FAIL 1/16GJ 10KC 4.6V KZ0.01 102SG DCB015P DCB015P R6607 J30A GQFY FAN_CONT2_5 1/16 00102 Q6612 GZ0C R2582 C2582 R6621 TP3581 25KZ 1/16GJ 1/16GJ 0.1GQFY 820C 5.6KC 4.6V C2581 C3581 VR2581 25EM10WR CJ100CGQY R6622 1/16GZ DRIVER MAIN BOARD MK6A-06 (M4G-3000)
- Page 49 K3A43 K3A47 K3A55 K3B1 K3A5 K3A9 K3A13 K3A17 K3A25 K3A29 K3A37 K3A41 K3A49 K3A53 K3A1 C2681 C2682 C2508 C2516 16EM100D KZ0.01 25KZ GQFY 25EM ;16EM100F1 0.1GQFY J11LP600G 10WR C2517 25KZ0.1 GQFY 15.5V1 12V1 12V2 15.5V 12V3 COMPONENT BOARD MK6A-07 (M4G-3000)