Table of Contents
Advertisement
Handbook
for the
Palm VII
Palm.Net Discontinued: The Palm.Net service is
discontinued as of August 31, 2004. Any
information in this manual pertaining to Palm.Net,
PQAs (web clipping applications), MyPalm and
the WAP Browser is not applicable after that
date. For wireless email and web browsing, we
recommend you migrate to a palmOne
smartphone.
We can help you do this: Click here to learn how
to upgrade to a new solution.
™
Handheld
Advertisement
Table of Contents

Related Manuals for Palm VIIX


Summary of Contents for Palm VIIX
- Page 1 Palm VII Palm.Net Discontinued: The Palm.Net service is discontinued as of August 31, 2004. Any information in this manual pertaining to Palm.Net, PQAs (web clipping applications), MyPalm and the WAP Browser is not applicable after that date. For wireless email and web browsing, we recommend you migrate to a palmOne smartphone.
- Page 2 Copyright © 1998-2000 Palm, Inc. or its subsidiaries. All rights reserved. Graffiti, HotSync, iMessenger, Palm OS, PalmConnect, and PalmModem are registered trade- marks, and the HotSync logo, Palm, the Palm logo, Palm VII, the Palm VII logo, and Palm.Net are trademarks of Palm, Inc. or its subsidiaries. Other product and brand names may be trademarks or registered trademarks of their respective owners.
-
Page 3: Table Of Contents
Opening applications ...19 Using menus ...22 Four ways to enter data...24 Customizing your handheld ...28 Chapter 2: Entering Data in Your Palm VII™ Handheld Using Graffiti writing to enter data...31 Writing Graffiti characters ...31 Graffiti tips ...33 The Graffiti alphabet...34 Writing capital letters ...35... - Page 4 Sorting lists of records... 75 Making records private... 76 Attaching notes ... 78 Choosing fonts ... 79 Application-specific tasks ... 81 Date Book... 81 Address Book ... 95 To Do List... 100 Memo Pad... 105 Page iv Handbook for the Palm VII™ Handheld...
- Page 5 Application Your handheld is a wireless device ...121 Web clipping applications ...121 Wireless Internet messaging: the iMessenger application ...124 The Palm.Net wireless communication service...124 Improving signal strength ...127 Using web clipping applications ...129 Opening web clipping applications ...129 Working with web clipping applications ...130 Web clipping application menus ...136...
- Page 6 Digitizer preferences ... 213 Formats preferences ... 213 Country default... 213 Time, date, week start, and numbers formats ... 214 General preferences... 214 Auto-off delay ... 214 System, alarm, and game sounds... 215 Page vi ® Operations Handbook for the Palm VII™ Handheld...
- Page 7 Beam Receive ...215 Connection preferences...216 Sample connection for remote IR HotSync operations...217 Network preferences and TCP/IP software ...218 Selecting a service ...219 Entering a user name ...219 Entering a password ...220 Selecting a connection ...220 Adding telephone settings...221 Connecting to your service ...223 Creating additional service templates ...224 Adding detailed information to a service template ...224 Login scripts...227...
- Page 8 Appendix D: Non-ASCII Characters for Login Scripts Use of ^char... 275 Carriage return and line feed... 275 Literal characters ... 276 Palm.Net™ Service Agreement and Other Product Information Palm.Net service agreement ... 277 Product regulatory information ... 285 FCC Statement... 285 Battery Warning...
-
Page 9: About This Book
Welcome to the Palm VII™ handheld. This handbook is designed to help you get up and running quickly on your handheld. It describes all you need to know about how to use handhelds in the Palm VII product series and the applications that come with them. - Page 10 Page 2 About This Book...
-
Page 11: Getting To Know Your Palm Vii Handheld
Handheld ™ This chapter explains the physical buttons and controls on your Palm VII™ handheld, how to set up your handheld and charge the transmitter, how to use your handheld for the first time, and how to use HotSync technology to synchronize your handheld and Palm™... -
Page 12: System Requirements
PalmModem accessory Windows-compatible printer Infrared communication device Macintosh compatibility You can connect your Palm VII handheld to your Macintosh using the PalmConnect Serial Kit or PalmConnect USB Kit (sold separately). ® For more information about Macintosh compatibility, visit the web site http://www.palm.com... -
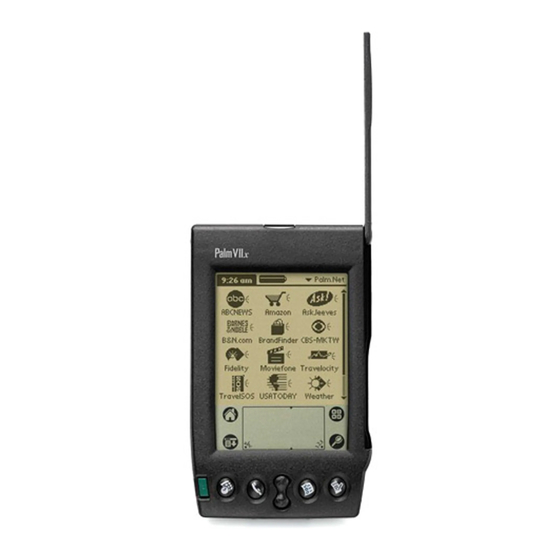
Page 13: Palm Vii Components
Power button/ Backlight control IR port Uses infrared technology to transmit data to and receive data from other Palm OS perform HotSync operations. See “Beaming information” in Chapter 6 and “IR HotSync operations” in Chapter 7 for more information. Screen Displays the applications and information stored in your handheld. - Page 14 Antenna Gives you access to the Palm.Net service. See Chapter 5 for more information. See “Buttons preferences” in Chapter 8 to learn how to open a specific application when you raise the antenna. Whenever you use the wireless features of your...
- Page 15 Locating back panel components Stylus Battery door Stylus Slides in and out of the slot in the back panel of the handheld. To use the stylus, remove it from the slot and hold it as you would a pen or pencil. Unscrew the top of the stylus to access the reset tool.
- Page 16 HotSync technology to do a two-way exchange of the data on your handheld and your computer. Plug the connector of the cradle into the serial (COM) port, as shown in the following illustration. Introduction to Your Palm VII™ Handheld...
-
Page 17: Installing The Batteries
Installing the batteries To use your handheld, you must install two AAA alkaline batteries. The batteries fit behind the battery door on the back of your handheld. To install the batteries: 1. Press the tab on the battery door and lift the battery door away from your handheld. -
Page 18: Setting Up Your Handheld And Charging The Transmitter
See Chapter 4 for the list of your basic applications. Upgrade information If you already own a Palm OS handheld, we recommend that you install the version of Palm Desktop software that comes with your new Palm VII handheld into the same folder as your current Palm Desktop software. - Page 19 3. (Optional) To ensure against any data loss, go to the folder that stores Palm Desktop software, copy the folder and all its contents, rename it (for example, Palm Backup), and store the copy outside the Palm Desktop software folder.
-
Page 20: Palm Desktop Organizer Software
It is a good idea to back up your data in case something happens to the data on your handheld. Changes you make on your handheld or Palm Desktop software appear in both places after you synchronize. - Page 21 Installing Palm Desktop software The following instructions guide you through installing Palm Desktop software. After installation, refer to the online Help in Palm Desktop software for information about how to use the software. To ensure a safe and uninterrupted installation of Palm Desktop software, please do the following before installing: Turn off your computer and connect the cradle to it.
-
Page 22: Using Your Handheld With Another Pim
Using your handheld with another PIM If you prefer to use another personal information manager (PIM), such as Microsoft Outlook, you still need to install Palm Desktop software in order to add HotSync Manager, connection software, and other features of Palm Desktop software to your computer. The connection software, called a conduit, lets you synchronize the data between your handheld and your PIM. - Page 23 To activate the Palm.Net service: 1. Read the brochure, Choosing a Palm.Net Service Plan, included in the handheld package, describing the monthly service plans. Decide on a plan. (You can switch plans at any time.) 2. Prepare to enter the following information: your name, firm,...
- Page 24 Your handheld, like a cellular phone, uses a radio frequency to transmit and receive information. Your handheld is part of the Palm.Net network, which receives and stores messages sent to you at your @ address, and delivers messages you send from palm.net...
-
Page 25: Tapping And Typing
Tapping and typing Tap with the stylus to get things done Like using a mouse to click elements on a computer screen, using the stylus to tap elements on your handheld screen is the basic action that gets things done on your handheld. The first time you start your handheld, setup instructions appear on the screen. -
Page 26: Elements Of The Interface
Tap the arrow to display a list of choices, and then tap an item in the list to select it. Page 18 Menu Check Command buttons Over-the-air icon , and to find text in the data of your basic Introduction to Your Palm VII™ Handheld Pick list , menus , and... -
Page 27: Opening Applications
Scroll bar Drag the slider, or tap the top or bottom arrow, to scroll the display one line at a time. To scroll to the previous page, tap the scroll bar just above the slider. To scroll to the next page, tap the scroll bar just below the slider. - Page 28 The Applications Launcher scrolls to the first application with a name that begins with that letter. You can also assign applications to different categories. See “Categorizing applications” in Chapter 3. Page 20 Introduction to Your Palm VII™ Handheld...
- Page 29 Chapter 8 for details. When you install web clipping applications, they appear by default in the Palm.Net category of the Applications Launcher. The icons of web clipping applications and all applications that use the antenna are easy to recognize: They all have a dark diamond shape as their background...
-
Page 30: Using Menus
Also, the menus and menu commands vary depending on which part of the application you’re currently using. For example, in Memo Pad, the menus are different for the Memo list screen and the Memo screen. Page 22 Introduction to Your Palm VII™ Handheld... - Page 31 Graffiti menu commands Most menu commands have an equivalent Graffiti Command stroke, which is similar to the keyboard shortcuts used to execute commands on computers. The command letters appear to the right of the command names. Menu commands Draw the Command stroke anywhere in the Graffiti area. When you draw the Command stroke, the Command toolbar appears just above the Graffiti writing area to indicate that you are in Command mode.
-
Page 32: Four Ways To Enter Data
Four ways to enter data There are four ways to enter data into your handheld: Using the onscreen keyboard Using Graffiti writing Entering or importing data in Palm Desktop software and then synchronizing with your handheld Using an external keyboard Onscreen keyboard... - Page 33 After a keyboard is open, you can tap to open any of the other keyboards, including the international keyboard. See “Using the onscreen keyboard” in Chapter 2 for more information. Note: You cannot enter Graffiti characters while using the onscreen keyboard.
- Page 34 If you have new records you want to add to your handheld and prefer to use the computer keyboard rather than Graffiti writing or the onscreen keyboard, enter the data in the Palm Desktop software or the PIM you have installed to use with your handheld.
- Page 35 Importing data If you already have data in a database on your computer, you can import it into Palm Desktop software. You can import data stored in computer applications such as spreadsheets and databases, or from another Palm OS handheld. When you import data, you transfer the records to your handheld without having to enter them manually.
-
Page 36: Customizing Your Handheld
4. Tap AM or PM. Note: Your handheld can also display time based on a 24-hour clock. See “Formats preferences” in Chapter 8 for more information. 5. Tap OK. Page 28 Tap here Introduction to Your Palm VII™ Handheld... - Page 37 To set the current date: 1. Tap the Set Date box. 2. Tap the arrows to select the current year. 3. Tap a month. 4. Tap the current date. Chapter 1 Tap arrows to select year Tap to select month Tap to select date Page 29...
- Page 38 Page 30 Introduction to Your Palm VII™ Handheld...
-
Page 39: Using Graffiti Writing To Enter Data
Palm VII Handheld ™ This chapter explains how to enter data into your Palm VII™ handheld, by writing with the stylus in the Graffiti using the onscreen keyboard, by using the computer keyboard, or by importing data from another application. - Page 40 Start stroke at heavy dot As you’ll see later, you use the same shape to create both the uppercase and lowercase version of a letter. Page 32 Write numbers here Lift stylus here Entering Data in Your Palm VII™ Handheld...
-
Page 41: Graffiti Tips
3. Position the stylus in the left-hand side of the Graffiti writing area. 4. Start your stroke at the heavy dot and draw the stroke shape as it appears in the tables. 5. Lift the stylus from the screen at the end of the stroke shape. That’s all there is to it! When you lift the stylus from the screen, your handheld recognizes your stroke immediately and prints the letter at the insertion point on the screen. -
Page 42: The Graffiti Alphabet
® The Graffiti alphabet Letter Strokes Space Carriage Return Page 34 Letter Strokes Back Space tap twice Period Entering Data in Your Palm VII™ Handheld... -
Page 43: Writing Capital Letters
Writing capital letters You make capital letters with the same stroke shapes as the basic alphabet characters. To make capital letters, you must first “shift” to caps — just as you press the Shift key on a keyboard — and then write the character strokes. -
Page 44: Graffiti Numbers
Tip: When Punctuation Shift is active, you can make a symbol stroke anywhere in the Graffiti writing area (the letters or numbers side). Page 36 Number Strokes Punctuation Shift Entering Data in Your Palm VII™ Handheld... -
Page 45: Additional Graffiti Punctuation
Symbol Period Comma Apostrophe Question Exclamation Additional Graffiti punctuation Writing symbols and extended characters All symbols and extended characters begin with the stroke in the Graffiti writing area of your handheld: Symbol Shift When the Symbol Shift is active, a slanted shift symbol appears in the lower-right corner of the screen. -
Page 46: Writing Accented Characters
Additional non-English characters You can write the following characters without any special punctuation or shifting: Note: You must write these non-English characters in the left side of the Graffiti writing area. Page 38 Entering Data in Your Palm VII™ Handheld... -
Page 47: Navigation Strokes
Navigation strokes In addition to character symbols, Graffiti writing includes special strokes that you can use to navigate within text or fields in your applications. Command Move cursor right Move cursor left Previous field Next Field Open Address Record (Address Book only) Graffiti ShortCuts Graffiti ShortCuts make entering commonly used words or phrases quick and easy. -
Page 48: Using The Onscreen Keyboard
5. After you finish, tap Done to close the onscreen keyboard and place the text in the record. Page 40 ShortCut Tap here for numeric keyboard Entering Data in Your Palm VII™ Handheld... -
Page 49: Using Your Computer Keyboard
All the main applications on your handheld are also available in Palm Desktop software and in most PIMs, so you don’t need to learn different applications. - Page 50 4. From the File menu, choose Import. 5. Select the file you want to import. 6. Click Open. 7. To import data into the correct Palm Desktop fields, drag fields in the left-hand column so that they are opposite the corresponding imported field on the right.
-
Page 51: Chapter 3: Managing Your Applications
Managing Your Applications This chapter explains how to switch between applications on your Palm VII™ handheld, how to change application settings so they are personalized to your work methods, and how to categorize applications so you view them in related groups. -
Page 52: Changing The Applications Launcher Display
To categorize an application: 1. Tap the Applications icon 2. Tap the Menu icon 3. Tap App, and then tap Category. 4. Tap the pick list next to each application to select a category. Tip: To create a new category, tap Edit Categories from the pick list. -
Page 53: Choosing Preferences
To change the Applications Launcher display: 1. Tap the Applications icon 2. Tap the Menu icon 3. Tap Options, and then tap Preferences. 4. Tap the View By pick list and select List. 5. Tap OK. To open the Applications Launcher to the last opened category: 1. -
Page 54: Installing And Removing Applications
To install add-on software on your handheld: 1. Using your desktop computer, copy or download the application you want to install into the Add-on folder in your Palm Desktop directory. If the software you download is compressed, you need to Note: decompress it into this folder. - Page 55 3. Click Install. Tip: You can also access the Install Tool dialog box by selecting Install Tool from the Palm Desktop program group or by double-clicking any file with a PDB, PRC, PNC, or PQA file extension. 4. In the User drop-down list, select the name that corresponds to your handheld.
-
Page 56: Installing Games
The CD-ROM also includes several games that you can install with the Install Tool: Giraffe HardBall MineHunt Puzzle SubHunt During Install, these games are automatically copied to the \Add-on folder in your Palm Desktop directory on your computer. Page 48 Managing Your Applications... -
Page 57: Removing Applications
Note: Giraffe is a fun, easy way for you to practice Graffiti writing. ® After you install and start a game, the instructions appear in the Game menu. Depending on the game, the Game menu may also contain commands to show high scores, to start a new game, or to set preferences for the game. -
Page 58: Removing Palm Desktop Software
Removing Palm Desktop software If you no longer want to use Palm Desktop software, you can remove it from your computer. To remove Palm Desktop software: 1. From the Windows Start menu, choose Settings, and then Control Panel. 2. Double-click the Add/Remove Programs icon. -
Page 59: Changing Or Deleting A Password
To assign a password: 1. Tap the Applications icon 2. Tap the Security icon. 3. Tap the Password box. 4. Enter a password. Tap here 5. Tap OK. 6. Enter the same password a second time, and tap OK. Changing or deleting a password Once you define a password for your handheld, you can change or delete it at any time. -
Page 60: Locking Your Handheld
To change the password, enter the new password, and tap OK. To delete the password, tap Delete. Locking your handheld You can also lock your handheld so that you need to enter your password to operate it. Important: If you lock your handheld, you must enter the exact password to re-activate your handheld. -
Page 61: Recovering From A Forgotten Password
Recovering from a forgotten password If you did not activate the Off & Lock feature and you forget your password, you can delete the password from your handheld. Deleting a forgotten password also deletes all entries and files marked as Private. - Page 62 Page 54 Managing Your Applications...
-
Page 63: Chapter 4: Using Your Basic Applications
Chapter 4 Using Your Basic Applications Your Palm VII™ handheld includes these basic applications: Date Book Address Book To Do List Memo Pad Calculator Expense See Chapter 5 for information on web clipping applications and the ® iMessenger application. See Chapter 6 for information on Mail. -
Page 64: Overview Of Basic Applications
Overview of basic applications Date Book Date Book lets you quickly and easily schedule appointments or any kind of activity associated with a time and date. In Date Book, you can do the following: Enter a description of your appointment and assign it to a specific time and date. -
Page 65: Address Book
Address Book Address Book enables you to keep names, addresses, phone numbers, and other information about your personal or business contacts. In Address Book, you can do the following: Quickly look up or enter names, addresses, phone numbers, and other information. Enter up to five phone numbers (home, work, fax, mobile, etc.) or e-mail addresses for each name. -
Page 66: To Do List
To Do List To Do List is a convenient place to create reminders and prioritize the things that you have to do. In To Do List, you can do the following: Make a quick and convenient list of things to do. Assign a priority level to each task. -
Page 67: Memo Pad
Take notes or write any kind of message on your handheld. Drag and drop memos into popular computer applications like Microsoft Word when you synchronize using Palm™ Desktop organizer software and HotSync Assign memos to categories so that you can organize and view them in logical groups. -
Page 68: Expense
Sort your expenses by date or expense type. Transfer your expense information to a Microsoft Excel spreadsheet (version 5.0 or later) on your computer. (Microsoft Excel is not included in the Palm VII™ handheld package.) To open Expense: 1. Tap the Applications icon 2. -
Page 69: Common Tasks
Common tasks The tasks described in this section use the term “records” to refer to an individual item in any of the basic applications: a single Date Book event, Address Book entry, To Do List item, Memo Pad memo, or Expense item. - Page 70 Entering text For information on how to enter text using Graffiti writing, the onscreen keyboard, or the keyboard attached to your computer, see Chapter 2. Edit menu The Edit menu is available with any screen where you enter or edit text.
-
Page 71: Deleting Records
A confirmation dialog box appears. If you want to save a copy of the deleted item to an archive file in Palm Desktop software, be sure that the check box is checked. If you don’t want to save a copy, tap the check box to remove the check. -
Page 72: Purging Records
Purging records Over time, as you use Date Book, To Do List, and Expense, you’ll accumulate records in these applications that have outlived their usefulness. For example, events that occurred months ago remain in the Date Book, and To Do List items that you marked as completed remain in the list, as do Expense items. -
Page 73: Exchanging And Updating Data: Hotsync Operations
Exchanging and updating data: HotSync operations The HotSync process automatically synchronizes — that is, exchanges and updates — the data on your handheld and Palm Desktop software. Changes you make on your handheld or Palm Desktop software appear in both places after a HotSync operation. HotSync technology synchronizes only the needed portions of files, thus reducing synchronization time. - Page 74 2. If the HotSync Manager is not running, start it: on the Windows desktop, click Start, and then choose Programs. Navigate to the Palm Desktop software program group and choose HotSync Manager. Alternatively, you can start the Palm Desktop software which automatically opens the HotSync Manager. 3. Press the HotSync button Page 66 on the cradle.
-
Page 75: Categorizing Records
Important: The first time you perform a HotSync operation, you must select a user name in the New User dialog box and click OK. Every handheld must have a unique name. To prevent loss of a user’s records, never try to synchronize more than one handheld to the same user name. - Page 76 Address Book contains the QuickList user-defined category, in which you can store the names, addresses, and phone numbers you might need in emergencies (doctor, fire department, lawyer, etc.). Expense contains two user-defined categories, New York and Paris, to show how you might sort your expenses according to different business trips.
- Page 77 Note: In the Date Book Agenda view, the pick list is in the upper right of the To Do list. 2. Select the category you want to view. The list screen now displays only the records assigned to that category. Tip: Pressing an application button on the front panel of the handheld toggles through all the categories of that application.
- Page 78 4. Enter the name of the new category, and then tap OK. 5. Tap OK. You can assign any of your records to the new category. To rename a category: 1. Tap the category pick list in the upper-right corner of the screen or list.
-
Page 79: Finding Records
5. Tap OK. Tip: You can group the records in two or more categories into one category by giving the categories the same name. For example, if you change the name of the Personal category to Business, all records formerly in the Personal category appear in the Business category. - Page 80 To look up an Address Book record: 1. Display the Address list screen. 2. Enter the first letter of the name you want to find. The list scrolls to the first entry that begins with that letter. If you write another letter, the list scrolls to the first entry that starts with those two letters.
- Page 81 During the search, you can tap Stop at any time if the entry you want appears before your handheld finishes the search. To con- tinue the search after you tap Stop, tap Find More. 4. Tap the text that you want to review. Using Phone Lookup Phone Lookup displays the Address list screen and lets you add information from that list to a record.
- Page 82 5. Tap Add. The name you selected, along with the other information associated with it, is pasted into the record you selected in step 1. In Mail and iMessenger, Phone Lookup inserts only the e-mail address. Phone Lookup tips Write the Graffiti Command stroke /L to activate the Phone Lookup feature.
-
Page 83: Sorting Lists Of Records
4. Tap Lookup. The Attendees Lookup screen displays all the names in your Address Book that have data in the Company field. 5. Select the name you want to add, and then tap Add. The name appears in the Attendees screen. 6. -
Page 84: Making Records Private
To sort the Memo list manually, tap and drag a memo to a new location in the list. Note: To make the list of your memos appear in Palm Desktop software as you manually sorted it on your handheld, open Memo Pad in Palm Desktop software and click List by. - Page 85 To hide all private records: 1. Tap the Applications icon 2. Tap Security. 3. Tap the Current Privacy pick list and select Hide Records. 4. Tap OK to confirm that you want to hide private records. To mask all private records: 1.
-
Page 86: Attaching Notes
To display private records: 1. Do one of the following: Tap the Applications icon rent Privacy pick list and select Show Records. If you do not have a password, hidden and masked records be- come visible. If you have a password, the Show Private Records dialog box appears. -
Page 87: Choosing Fonts
6. Tap Done. A small note icon appears at the right side of any item that has a note. To review or edit a note: 1. Tap the Note icon To delete a note: 1. Tap the Note icon 2. Tap Delete. 3. - Page 88 To change the font style: 1. Open an application. 2. Tap the Menu icon 3. Tap Options, and then tap Font. 4. Tap the font style you want to use. Tap here for bold font Tap here for large font Tap here for small font 5.
-
Page 89: Application-Specific Tasks
Application-specific tasks Date Book When you open Date Book, the screen shows the current date and a list of times for a normal business day. Scheduling an event A record in Date Book is called an “event.” An event can be any kind of activity that you associate with a day. - Page 90 2. Enter a description of the event. You can enter up to 255 characters. 3. If the event is one hour long, skip to step 7. If the event is longer or shorter than an hour, tap the time of the event to open the Set Time dialog box.
- Page 91 6. Tap a blank area of the screen to deselect the event. A vertical line appears next to the time, indicating the duration of the event. Note: If an event has the same start and end time, the time only appears once.
- Page 92 To schedule an untimed event: 1. Select the date that you want for the event as described in “To schedule an event for another day.” 2. Tap New. 3. Tap OK, so that no start or end times are defined for the new event. Tip: You can also create a new untimed event by making sure no event is selected and then writing letters in the Graffiti...
- Page 93 Rescheduling an event You can easily make changes to your schedule with your handheld. To reschedule an event: 1. Tap the event you want to reschedule. 2. Tap Details. 3. To change the time, tap the Time box and select a new time. 4.
- Page 94 7. When the reminder message appears on screen, do one of the following: Tap OK to permanently dismiss the reminder and return to the current screen. Tap Snooze to dismiss the reminder and return to the current screen. The reminder message appears again five minutes after you tap Snooze.
- Page 95 3. Tap the Repeat box to open the Change Repeat dialog box. 4. Tap Day, Week, Month, or Year to set how often the event repeats. For a continuous event, tap Day. 5. Enter a number that corresponds to how often you want the event to repeat on the Every line.
- Page 96 Tap Current to delete only the current event item. Tap Future to delete the current and all future event items and reset the end date of the repeating event to the last shown date. Tap All to delete all occurrences of the repeating event. 5.
- Page 97 Changing the Date Book view In addition to displaying the time list for a specific day, you can also display a whole week, a month, or an agenda. You can also display the current time. To cycle through Day, Week, and Month views: Press the Date Book application button repeatedly to display the next view.
- Page 98 Previous week 3. Tap an event to show a description of the event. Tips for using Week View To reschedule an event, tap and drag the event to a different time or day. Tap a blank time on any day to move to that day and have the time selected for a new event.
- Page 99 Spotting event conflicts With the ability to define specific start and end times for any event, it’s possible to schedule events that overlap (an event that starts before a previous event finishes). An event conflict (time overlap) appears in the Week View as overlapping bars.
- Page 100 Tips for using Month View Tap a day in the Month View to display that day in the Day View. Tap the scroll arrows in the upper-right corner to move forward or backward a month. Tap Go to in order to open the date selector and select a different month.
- Page 101 Note: You can also change the category of To Do List items shown. Tap the pick list to choose another category. See “To Do List” later in this chapter for more information on working with To Do List items. Date Book menus, preferences, and display options Date Book menus are shown here for your reference, and Date Book features that are not explained elsewhere in this book are described here.
- Page 102 Preferences About Date Shows version information for Date Book. Book Page 94 Controls how times appear in Compress Day View: the Day View. When Compress Day View is off, all time slots display. When it is on, start and end times display for each event, but blank time slots toward the bottom of the screen disappear to minimize scrolling.
-
Page 103: Address Book
Creating an Address Book entry A record in Address Book is called an “entry.” You can create entries on your handheld, or you can use Palm Desktop software to create entries on your computer and then download the entries to your handheld with your next HotSync operation. - Page 104 4. Use the Next Field Graffiti stroke to move to the First Name field. Tip: You can also move to any field by tapping it directly. 5. Enter the person's first name in the First Name field. 6. Enter the other information that you want to include in this entry. Note: As you enter letters in the Title, Company, City, and State fields, text appears for the first logical match that exists in...
- Page 105 Selecting types of phone numbers You can select the types of phone numbers or e-mail addresses that you associate with an Address Book entry. Any changes you make apply only to the current entry. To select other types of phone numbers in an entry: 1.
- Page 106 Show in List Select which type of phone or other information appears in the Address list screen. Your options are Work, Home, Fax, Other, E-mail, Main, Pager, and Mobile. The identifying letters W, H, F, O, E, M, or P appear next to the record in the Address list, depending on which information is displayed.
- Page 107 Options menus Address list Preferences Rename Custom These custom fields appear at the end of the Fields Address Edit screen. Rename them to identify the kind of information you enter in them. The names you give the custom fields appear in all entries. About Address Shows version information for Address Book.
-
Page 108: To Do List
To Do List A To Do List item is a reminder of some task that you have to complete. A record in To Do List is called an “item.” To create a To Do List item: 1. Press the To Do List application button handheld to display the To Do list screen. - Page 109 To set the priority of a To Do List item: 1. Tap the Priority number on the left side of the To Do List item. 2. Tap the Priority number that you want to set (1 is most important). Checking off a To Do List item You can check off a To Do List item to indicate that you’ve completed it.
- Page 110 To display the To Do Item Details dialog box: 1. Tap the text of the item whose details you want to change. 2. Tap Details. Setting a due date You can associate a due date with any To Do List item. You can also sort the items that appear in the list based on their due date.
- Page 111 To Do Show Options The Show Options dialog box enables you to control the appearance of To Do List and To Do List items in Date Book Agenda view. To change the Show Options settings: 1. In To Do List, tap Show. 2.
- Page 112 To Do List menus To Do List menus are shown here for your reference, and To Do List features that are not explained elsewhere in this book are described here. See “Using menus” in Chapter 1 for information about choosing menu commands.
-
Page 113: Memo Pad
Memo Pad A memo can contain up to 4,000 characters. The number of memos you can store is dependent only on the memory available on your handheld. A record in Memo Pad is called a “memo.” To create a new memo: 1. - Page 114 To review a memo: 1. In the Memo list, tap the text of the memo. 2. Review or edit the text in the memo. 3. Tap Done. Memo Pad menus Memo Pad menus are shown here for your reference, and Memo Pad features that are not explained elsewhere in this book are described here.
- Page 115 Go to Top of Moves to the top (first) line of the memo. Page Go to Bottom of Moves to the bottom (last) line of the memo. Page Preferences Displays the Memo Preferences dialog box, where you define the sort order for memos. About Memo Shows version information for Memo Pad.
-
Page 116: Calculator
Calculator The Calculator includes several buttons to help you perform calculations. Clears the last number you entered. Use this button if you make a mistake while entering a number in the middle of a calculation. This button enables you to re-enter the number without starting the calculation over. - Page 117 3. After you finish reviewing the calculations, tap OK. Calculator menus Calculator menus are shown here for your reference, and Calculator features that are not explained elsewhere in this book are described here. See “Using menus” in Chapter 1 for information about choosing menu commands.
-
Page 118: Expense
Expense Expense enables you to record the date, expense type, and the amount that you spent. A record in Expense is called an “item.” You can sort your Expense items into categories or add other information that you want to associate with the item. To create an Expense item: 1. - Page 119 Tip: Another quick way to create a new Expense item is to make sure that no Expense item is selected in the Expense list, write the first letter(s) of the expense type, and then write the numerical amount of the Expense item. This technique takes advantage of the automatic fill feature.
- Page 120 3. Select any of the following options: : See “Categorizing records” earlier in this chapter. Category : Opens a pick list of expense types. Type : Lets you choose the payment method used to pay the Payment Expense item. If the item is prepaid (such as airline tickets sup- plied by your company), you can choose Prepaid to place your expense in the appropriate company-paid cell of your printed expense report spreadsheet.
- Page 121 2. Tap each Currency pick list and select the country whose currency you want to display on that line. 3. Tap OK to close the Select Currencies dialog box. 4. Tap OK. To change your default currency: 1. Open Expense. 2.
- Page 122 5. Tap OK to close the Currency Properties dialog box. 6. Tap OK. Note: If you want to use your custom currency symbol as the default for all Expense items, select the symbol in the Preferences dialog box. If you want to use your custom currency symbol only for a particular Expense item, select the symbol in the Receipt Details dialog box associated with that item.
- Page 123 Transferring your data to Microsoft Excel After you enter your expenses into the Expense application on your handheld, Palm Desktop software enables you to view and print the data with your computer. Note: You need Microsoft Excel version 5.0 (or later) to view and print your Expense data using one of the provided templates.
- Page 124 (if allowed). Creating or printing an expense report You can use Palm Desktop software to view and print your Expense data in a Microsoft Excel spreadsheet. To create or print an expense report: 1.
- Page 125 Microsoft Excel. The templates have the extension .xlt and are stored in the template folder in the Palm Desktop software directory on your computer. To see what a template looks like before you use it, open the template in Microsoft Excel.
- Page 126 If you want to streamline or customize your expense reports, you can change these templates. For example, you can add your company name to a template. See Appendix C for information on changing templates. To view your expense data using a Microsoft Excel template: 1.
- Page 127 3. Enter name, department, and other information as necessary for your expense report. 4. Click the Templates menu; then select an expense template. Note: If you want to create your own custom expense template and have it appear in the Templates menu, see Appendix C for more information.
- Page 128 Preferences About Expense Shows version information for Expense. Page 120 Lets you select an expense Use automatic fill: type by writing the first letter of an expense type in the Graffiti writing area. For example, if you write the letter “T,” it enters the “Taxi” expense type.
-
Page 129: Chapter 5: Web Clipping Applications And The Imessenger ® Application
Your handheld is a wireless device Your Palm VII™ handheld is equipped with an internal transmitter and an antenna. These components enable your handheld, like a cellular phone, to use a radio frequency to transmit and receive information over the airwaves. - Page 130 For example, the web clipping applications available to you when you set up your handheld and install Palm™ Desktop organizer software give you access to the following kinds of information: traffic and weather conditions; airline, hotel, and restaurant information;...
- Page 131 So when you’re near a desktop computer and have some time, you can take advantage of the elaborate graphics, variety, and many choices offered by a web site — But when you’re in a car or on the street and need information fast, a web clipping application on your handheld makes it easy to find the specific information you need —...
-
Page 132: Wireless Internet Messaging: The Imessenger Application
Your handheld is part of the Palm.Net network. This network receives and stores messages sent to you at your Palm.Net address, and it delivers any message you send directly from your handheld to the Internet e-mail address you specify. - Page 133 The Internet is often described as a “network of networks,” and the Palm.Net network is just another network tied into the Internet. The advantage of the Palm.Net network is that your handheld has a wireless, over-the-air connection to it. So long as one of the radio transmitter/receivers of the network can pick up the signal sent by your handheld —...
- Page 134 The Palm.Net web site: The Palm.Net web site is an important source of information about the wireless features of your handheld and about your use of the wireless communication service. The following features are available on the web site: : Review detailed maps that show where Palm.Net...
-
Page 135: Improving Signal Strength
InSync Online, an e-mail service that distributes new web clipping applications, tips about your handheld, and news about Palm OS handheld compatible products. Use the links on this site to visit hundreds of other sites related to Palm OS handhelds. - Page 136 To monitor signal strength in the Diagnostics application: Tap the Diagnostics icon Both the bar graph and the number represent the signal strength: The graph represents signal strength as a series of bars. The more bars displayed, the stronger the signal. The number represents signal strength as a percentage.
-
Page 137: Using Web Clipping Applications
Opening web clipping applications When you install web clipping applications, they appear by default in the Palm.Net category of the Applications Launcher. The icons of web clipping applications are easy to recognize: They all have a dark diamond shape as their background and include the over-the-air icon:... -
Page 138: Working With Web Clipping Applications
Raising the antenna automatically opens the Applications Launcher to the Palm.Net category. When the transmitter suc- cessfully connects to the network, your handheld beeps. 2. Tap the web clipping application that queries the Internet for the kind of information you want. - Page 139 4. Tap the button or other object that displays the over-the-air icon to submit your query to the Internet. The response — your clipping— typically appears onscreen within seconds. Chapter 5 or the Palm.Net web clipping Over-the-air icon Page 131...
- Page 140 Stop icon appears onscreen. Important: You incur a cost for any data that is downloaded to your handheld or sent to the Palm.Net server. Reviewing current queries and clippings: Back arrow Your handheld stores the queries and clippings of your current session so that you can review them.
- Page 141 To find a phone number and an address: 1. Raise the antenna. Raising the antenna automatically opens the Applications Launcher to the Palm.Net category. If you moved the Yahoo! People Search web clipping application, go to that category. 2. Tap the Yahoo! People Search icon.
- Page 142 Within seconds, your clipping appears. In this case, the web clipping application found two items that satisfy your query. How big was that clipping? After you receive a clipping, you can find out the size of the clipping. If you see two exclamation points (!!) in the title area, the clipping is larger than 1,000 bytes.
- Page 143 To review the History list: 1. Open the web clipping application that has clippings you want to review. 2. Tap the History pick list. 3. Select the clipping you want to review. Saving information from a web clipping application You can copy the text in a clipping or a page of a web clipping application and paste it into another application.
-
Page 144: Web Clipping Application Menus
data, your handheld appends the word “truncated” to the end of the pasted text. The Copy Page command does not copy images or icons; table structures; or text formatting such as bold, italics, and so on. Sending e-mail from a page If a web clipping application or clipping gives you the opportunity to reply to an e-mail address, you can do so. -
Page 145: Using The Imessenger Application
Internet messaging. By activating the Palm.Net wireless communication service, you acquire an address and mailbox on the Palm.Net network. You can then use the iMessenger application to send and receive short text messages. Whenever you’re within coverage of the network, you can use the iMessenger application to be in contact with anyone who has an Internet e-mail account. -
Page 146: Opening The Imessenger Application
Mail are transferred to your desktop E-Mail application and sent out through that application. Mail does not use the transmitter or the Palm.Net wireless communication service. See Chapter 6 for complete information about Mail. -
Page 147: Checking For And Viewing Messages
Checking for and viewing messages The iMessenger list screen of the Inbox lists your downloaded messages, who sent them, and optionally, the date they were received. (See “Date column” later in this chapter.) Unread messages have a dash ( — ) next to them. Messages you’ve already read have a check mark ( them. -
Page 148: Opening And Reading Messages
To cancel a wireless transaction: In the Transaction Progress message box, tap Cancel. Any messages that were downloaded to your handheld before you tapped Cancel appear in the Inbox. Important: You incur a cost for the number of kilobytes you sent to the server or downloaded before you tapped Cancel. - Page 149 You can download as much of the rest of the message as you want or ignore what’s left. Palm.Net service returns the message to the sender as undeliverable. Marks the end of a message Tap right arrow to view the...
- Page 150 Downloading the remainder of a long message You download long messages in separate segments so that you can choose how much of the message you want to read (and pay for). To download more of a long message: 1. At the bottom of the screen, tap More. The Retrieve More dialog box appears.
- Page 151 From the time you download the first 500 characters, you have a maximum of 30 days to download the remainder of the message. Then it’s deleted from your mailbox on the Palm.Net network. Displaying header information Complete header information includes the distribution lists and the From:, Subj:, and Date: fields.
- Page 152 There is no way to retrieve the truncated part of the list. Your address (username@ ) always appears as the first address in palm.net the distribution list you are part of. After your address is downloaded, as much of the remaining information in the distribution lists is downloaded, up to the maximum 300 characters, in the following order: the To:, CC:, and BCC: fields.
-
Page 153: Creating Messages
To prevent attachments from taking up space in your Palm.Net mailbox, delete the message as soon as you can. One way to retrieve attachments sent to you is to have all messages delivered to your Palm.Net mailbox also delivered to your e-mail... - Page 154 2. Enter the e-mail address of the recipient. You have two ways to enter the at sign (@): Tap once in the Graffiti writing area to activate Punctuation Shift. A dot appears Then make this stroke Or, tap “123” in the Graffiti writing area.
- Page 155 Tap the name of the field to open To reply to a message: 1. Tap a message in the iMessenger list to display it onscreen. 2. Tap Reply. 3. Select whom you want to reply to: Sender only or Forward (for someone who didn’t see the original message).
- Page 156 Looking up an address To identify the recipient of a message, you need to enter that person’s e-mail address. You can do this either by entering the data directly into the field or by using the Look Up command to access the information in your Address Book.
-
Page 157: Rerouting Replies To Your Messages
Tap here to enter address in field Rerouting replies to your messages The From: field of your outgoing iMessenger messages contains your address. If you don’t want people who receive your palm.net messages to reply to you at your @ address, you can specify a palm.net different address for recipients to use. -
Page 158: Adding A Signature To Your Message
Adding a signature to your message Adding a signature to your message is a two-part process. First, you create your signature. Then, every time you want to add your signature to a message, you must tap Add Signature. The signature for your wireless Internet messages can be different from the signature you define in the Mail application. -
Page 159: Sending Messages
Sending messages You can send wireless Internet messages anytime the handheld antenna is raised and you are located within coverage of the Palm.Net wireless communication service. To send messages: Tap Check & Send. Tapping Check & Send sends the current message and all messages in the Outbox. -
Page 160: Editing An Unsent Message
Editing an unsent message You can make changes to a message that has not yet been sent. When you edit a message, your handheld removes the message from the Outbox folder and takes you back to the New Message screen, where you can edit the message and resend it, save it as a draft, or delete it. -
Page 161: Draft Messages
Draft messages Sometimes you may not want to send a message immediately; for example, you may want to add additional information before sending it. Your handheld stores such messages in the Draft folder until you are ready to edit them again. Note: When you’re creating or editing a message, you can also save the item as a draft by canceling it. -
Page 162: Filing A Message
See “Purging deleted messages” later in this chapter to learn how to manage the size of the Deleted folder. See “Your Palm.Net mailbox” later in this chapter to learn about the storage and deletion of messages in your mailbox on the network. -
Page 163: Removing A Message From The Deleted Folder
Removing a message from the Deleted folder You can remove a message from the Deleted folder and work with it again. To remove a message from the Deleted folder: 1. In the iMessenger list screen, tap Deleted from the pick list in the upper-right corner. - Page 164 To select a folder: 1. Tap the pick list in the upper-right corner to open the list of folders: : Contains messages downloaded from the network. Inbox : Contains messages for which you tapped Outbox when Outbox you created them. Messages in the Outbox are sent out when- ever you tap Check &...
-
Page 165: Your Palm.net Mailbox
Subj: field. 4. Tap OK. Your Palm.Net mailbox Your mailbox on the Palm.Net network has a storage capacity of up to 2 MB; that’s more than two million readable characters. Attachments of messages in your mailbox take up storage space even though most attachments cannot be downloaded to your handheld. -
Page 166: The Imessenger Application And Hotsync Operations
Identifying a forwarding address You can have all messages that are delivered to your Palm.Net mailbox also delivered to another address. Go to the web site and follow the instructions onscreen for identifying a http://www.palm.net forwarding address. This can be useful if you want to be able to retrieve attachments that are sent to you. -
Page 167: Imessenger Menus
To enable synchronization of the iMessenger application with a Macintosh computer, Macintosh users need a special version of Palm Desktop software. Go to the web site about this software. iMessenger menus iMessenger menus are shown here for your reference, and features that are not explained elsewhere in this book are described here. - Page 168 Options menus The Options menu varies depending on whether you are viewing a message, creating, or viewing the iMessenger list. iMessenger list About Shows version information for the iMessenger iMessenger application. Page 160 Web Clipping Applications and the iMessenger® Application New Message View Message...
-
Page 169: Chapter 6: Managing Desktop E-Mail And Beaming Information
Managing Desktop E-Mail and Beaming Information In addition to web clipping and wireless Internet messaging, your Palm VII™ handheld offers features to help you stay connected: Managing desktop E-Mail to, compose, and delete e-mail from your desktop E-Mail application while you’re away from your desk. -
Page 170: Setting Up Mail On The Desktop
Setting up Mail on the desktop Before you use Mail for the first time, make sure your desktop E-Mail application is up and running. You must also set up Palm™ Desktop organizer software for use with your desktop E-Mail application. - Page 171 2. Choose Custom. Tip: You can also choose Custom from the HotSync menu in Palm Desktop software. 3. Select Mail in the list box. 4. Click Change. 5. Click one of the following settings: Synchronize the files your desktop E-Mail application.
-
Page 172: Synchronizing Mail With Your E-Mail Application
1. Click the HotSync icon 2. Choose Custom. Tip: You can also choose Custom from the HotSync menu in Palm Desktop software. 3. Select Mail in the list box. 4. Click Change. 5. Modify your settings as needed. 6. Click OK. -
Page 173: Creating E-Mail Items
To open an e-mail item: Tap an e-mail item to open it. Recipient Subject To close an e-mail item: Tap Done to close the e-mail item. Displaying full header information By default, Mail displays abbreviated header information, which comprises only the From: and Subj: fields. The full header provides complete information about the sender, receiver, and copied recipients, in addition to the subject and date the e-mail item was created. - Page 174 To create an e-mail item: 1. Tap New. You can also create an e-mail item by tapping New from Tip: the Message menu. 2. Enter the e-mail address of the recipient. Tip: Enter the address as if you were entering it from your desktop E-Mail application.
- Page 175 Tip: If the address, CC, subject, or body exceeds the capacity of the screen display, tap the name of the field (for example, tap “To:”) to expand that field. Tap the Done button to return to the New Message screen. Tap the name of the field to open To reply to an e-mail item: 1.
-
Page 176: Looking Up An Address
Looking up an address To identify the recipient of an e-mail item, you need to enter that person’s e-mail address. You can do this either by entering the data directly into the field or by using the Look Up command to access the information in your Address Book. -
Page 177: Adding Details To E-Mail Items
Tap here to enter address in field Adding details to e-mail items Before you send your e-mail item, you can attach additional attributes to it, such as a signature or a priority level. These features are dependent on the desktop E-Mail application you use. If your application does not support the attribute you select, your handheld cannot attach that attribute to the e-mail item. - Page 178 Setting a priority To set a priority for your e-mail item: 1. In the New Message screen, tap Details. Tap here 2. Tap the Priority pick list and select the priority you want. Tap here Tap to select priority 3. Tap OK. Tip: Your handheld can flag e-mail items with a specific priority only if your desktop E-Mail application supports this feature.
- Page 179 Adding a signature to your e-mail item A signature consists of information about yourself that is appended to your e-mail item as its closing. For example, a signature can contain your name, address, phone and fax numbers, and any other text you want to include.
-
Page 180: Storing E-Mail To Be Sent Later
To add a signature to your e-mail item: 1. In the New Message screen, tap Details. 2. Tap the Signature check box to select it and add your signature to the e-mail item. Note: The check box stays selected, so all subsequent e-mail items you create will also contain your signature until you deselect the Signature option. -
Page 181: Editing Unsent E-Mail
Editing unsent e-mail You can make changes to an e-mail that has not yet been sent, as long as you have not yet performed a HotSync operation. When you edit an e-mail item, your handheld removes the item from the Outbox folder and takes you back to the New Message screen, where you can edit the item and resend it, save it as a draft, or delete it. -
Page 182: Draft E-Mail
Draft e-mail Sometimes you may not want to send an e-mail item immediately; for example, you may want to add additional information before sending it. Your handheld stores such e-mail items in the Draft folder until you are ready to edit them again. Note: When you’re creating or editing an e-mail item, you can also save the item as a draft by canceling it. -
Page 183: Filing E-Mail
Filing e-mail Your handheld can store e-mail you receive or create in the Filed folder. The contents of this folder do not automatically synchronize with your desktop E-Mail application during a HotSync operation. Your handheld, however, stores a backup copy of the Filed folder on your computer hard disk. -
Page 184: Purging Deleted E-Mail
To remove an e-mail item you received from the Deleted folder: 1. In the Message list, tap Deleted from the pick list in the upper-right corner. 2. Tap the e-mail item you want to restore. 3. Tap Undelete to move the selected item to the Inbox and mark it as read. - Page 185 To select a folder: 1. Tap the pick list in the upper-right corner to open the list of folders: : Contains the e-mail from your desktop E-Mail application Inbox Inbox, minus any that you have excluded using filtering op- tions. See “Creating special filters” later in this chapter. : Contains the e-mail you created and sent on the hand- Outbox held since the last HotSync operation.
-
Page 186: Hotsync Options
To sort the Message list: 1. In the Message list, tap Show. 2. Tap the Sort by pick list and select one of the following options: : Sorts e-mail by date and displays the most recent e-mail Date item at the top of the screen. : Sorts e-mail by sender’s user name and displays items in Sender ascending alphabetical order, based on the first word of the... -
Page 187: Creating Special Filters
4. Tap the filtering option you want to apply: : During synchronization, all e-mail items in your desktop E- Mail Inbox synchronize with your handheld, and all e-mail items in your handheld Outbox are sent to your desktop E-Mail application. : During synchronization, only the e-mail items in your Send only handheld Outbox are sent to your desktop E-Mail application;... - Page 188 To access the special filter settings: Tap the Filter box in the HotSync Options dialog box. Ignoring or receiving e-mail The first step in establishing a special filter is to determine if you want to ignore or retrieve e-mail that matches the information you specify. To define whether to ignore or receive e-mail: Tap the pick list in the center of the HotSync Options dialog box and select one of the following settings:...
- Page 189 Defining filter strings E-mail items are filtered based on the information contained in their To:, From:, and Subj: fields. The information that defines what your handheld is looking for is called a filter string. You create a filter string by listing the words you want your handheld to find and separating them with either a comma or a space.
- Page 190 2. Enter your filter string with commas or spaces between the words. Do not add connectors, such as AND or OR, in a string. 3. If your string exceeds the length of the field, tap the name of the field to display the Notes screen for that header field. For more information about header field Notes screens, see “Creating e-mail items”...
-
Page 191: Truncating E-Mail Items
Truncating e-mail items The Truncate feature lets you set a point at which long e-mail items truncate when downloading to your handheld. By default, this Truncate value is 4,000 characters. By truncating long messages, you reduce the time it takes to synchronize your desktop E-Mail and Mail, as well as the amount of storage space e-mail uses on your handheld. - Page 192 Message menus The Message menu varies depending on whether you are viewing an e-mail item, creating an e-mail item, or viewing the Message list. Message list New Message View Message Options menus The Options menu varies depending on whether you are creating or editing an e-mail item.
-
Page 193: Beaming Information
Your handheld is equipped with an IR (infrared) port that you can use to beam information to another Palm OS handheld that’s close by and also has an IR port. The IR port is located at the top of the handheld, behind the small dark shield. - Page 194 Tip: For best results, Palm VII handhelds should be between 10 centimeters (approximately 4 inches) and 1 meter (approximately 39 inches) apart, and the path between the two devices must be clear of obstacles. Beaming distance to other Palm OS handhelds may be different.
- Page 195 4. Tap Yes. Tips on beaming information You can press the Address Book application button two seconds to beam your business card. You can set the full-screen pen stroke to beam the current entry. See “Pen preferences” in Chapter 8 for more information. You can draw the Graffiti Command stroke to activate the Command toolbar, and then tap the Beam icon.
- Page 196 Page 188 Managing Desktop E-Mail and Beaming Information...
-
Page 197: Chapter 7: Advanced Hotsync
Palm™ Desktop organizer software or another PIM such as Microsoft Outlook. To synchronize data, you must connect your Palm VII™ handheld and Palm Desktop software. You can synchronize your data either directly or indirectly. Direct methods include placing your handheld in the cradle attached to your computer, or using infrared communications. - Page 198 Always available and constantly monitors the communication port for synchronization requests from your handheld. With this op- tion, the HotSync Manager synchronizes data even when Palm Desktop software is not running. Available only when Palm Desktop software is running Manager and monitors requests automatically when you open Palm Desktop software.
-
Page 199: Customizing Hotsync Application Settings
In general, you should leave the settings to synchronize all files. The only reason you might want to change these settings is to overwrite data on either your handheld or Palm Desktop software, or to avoid synchronizing a particular type of file because you don’t use it. - Page 200 3. Select the appropriate user name from the list. 4. Select an application in the Conduit list. 5. Click Change. 6. Select the direction in which you want to write data, or click Do Nothing to skip data transfer for an application. Note: Changing the HotSync setting from the default affects only the next HotSync operation.
-
Page 201: Ir Hotsync Operations
IrCOMM implementation of the standards for infrared communication established by the Infrared Data Association (IrDA). This means that not only can you beam data to another Palm OS handheld that’s equipped with an IR port, but you can also beam data to a cell phone and any other device that supports the IrCOMM implementation of the IrDA standards. - Page 202 3. In the Control Panel, look for the Infrared icon. If the icon is there, your computer is enabled for infrared communication. If it isn’t there, you need to install an infrared driver. Note: If you have an external infrared device attached to your computer, a driver is probably included with the device.
- Page 203 To check the ports used for infrared communication: 1. In the Windows taskbar, click Start, choose Settings, and then choose Control Panel. 2. Double-click Infrared. 3. Click the Options tab. 4. Select Enable infrared communication. The COM port displayed in the drop-down box is the port where your infrared device is attached.
-
Page 204: Configuring Hotsync Manager For Infrared Communication
Configuring HotSync Manager for infrared communication Next, you need to go to the HotSync Manager and specify the simulated port used for infrared communication. To configure HotSync Manager for infrared communication: 1. Click the HotSync Manager icon 2. Make sure Local is checked on the menu. 3. -
Page 205: Performing An Ir Hotsync Operation
Performing an IR HotSync operation After you complete the steps to prepare for performing an IR HotSync operation, it is easy to perform the actual operation. To perform an IR HotSync operation: 1. In the Applications Launcher, tap the HotSync icon. 2. -
Page 206: Conducting A Hotsync Operation Via Modem
After that, you can perform a modem HotSync operation. To perform a HotSync operation via modem, you need the following: A modem connected to your computer Palm Desktop software configured for use with the modem A modem, for example, a PalmModem accessory, connected to your handheld A configuration for the kind of modem connection (Serial to Modem or IrCOMM to Modem) you want to make. - Page 207 Speed the As Fast As Possible rate first, and adjust downward if you experience problems. This setting allows Palm Desktop soft- ware and your handheld to find and use the fastest speed. : Identifies the modem type or manufacturer. Refer to Modem your modem manual or face plate for its type or settings.
-
Page 208: Preparing Your Handheld
Preparing your handheld There are a few steps you must perform to prepare your handheld for a modem HotSync operation. To prepare your handheld for a modem HotSync operation: 1. Tap the Applications icon 2. Tap the HotSync icon 3. Tap Modem. 4. -
Page 209: Selecting The Conduits For A Modem Hotsync Operation
Note: If you plan to connect to your company’s dial-in server (network modem) instead of connecting to a computer modem, see “Conducting a HotSync operation via a network” later in this chapter. 6. Enter the telephone number to access the modem connected to your computer. -
Page 210: Performing A Hotsync Operation Via A Modem
3. Tap the Modem icon synchronize the applications. 4. Wait for the HotSync operation to complete. See “HotSync problems” in Appendix B if you have any problems conducting a successful HotSync operation. Page 202 to dial the Palm Desktop modem and Advanced HotSync® Operations... -
Page 211: Conducting A Hotsync Operation Via A Network
Everything you need to connect to your company’s dial-in server (network modem) is included with Palm Desktop software and your handheld. You need to activate the feature, however, on both Palm Desktop software and your handheld. To prepare your computer for a network HotSync operation: 1. - Page 212 4. Click the Network tab and make sure your user name has a check mark next to it. If the check mark is not there, click the check box next to your user name. 5. Click OK. 6. Place your handheld in the cradle and perform a HotSync operation.
- Page 213 6. Tap OK. 7. Tap Select Service. Note: See “Network preferences and TCP/IP software” in Chapter 8 for information on creating a network connection. 8. Tap Service and select a service. Tap here 9. Tap Done. 10. Tap the Menu icon 11.
-
Page 214: Performing A Network Hotsync Operation
With File Link, you can import data stored in any of the following formats: Comma delimited (.csv) Tab delimited (.tsv) Memo Pad archive (.mpa) Address Book archive (.aba) Text (.txt) For information on how to set up a file link, see the Palm Desktop online Help. Page 206 Advanced HotSync® Operations... -
Page 215: Creating A User Profile
Creating a user profile If you use the File Link feature to configure several Palm OS handhelds with specific information (such as a company phone list) before distributing them to their actual users, you can create a user profile to load the data into an handheld without associating that data with a user name. - Page 216 4. Select the profile you want to load on the handheld, and click OK. 5. Click Yes to transfer all the profile data to the handheld. The next time you perform a HotSync operation, Palm Desktop software prompts you to assign a user name to the handheld.
-
Page 217: Chapter 8: Setting Preferences For Your Handheld
ShortCuts Define a list of Graffiti Wireless View your Palm.Net™ address; change the proxy server IP address; and receive a warning when a wireless transaction is about to transmit your identification or location. Chapter 8 button on the cradle;... -
Page 218: Viewing Preferences
Viewing preferences To open the Preferences screens: 1. Tap the Applications icon 2. Tap the Preferences icon 3. Tap the pick list in the upper-right corner of the screen. 4. Select the Preferences screen you want to view. Buttons preferences The Buttons Preferences screen enables you to assign different applications to the buttons on the front panel of your handheld and the HotSync button on the cradle. -
Page 219: Pen Preferences
To identify the application that opens when you raise the antenna: 1. Tap the pick list next to the Applications button. 2. Tap the application you want to open whenever you raise the antenna. Tip: Tap Default to have the Wireless category of the Applications Launcher open when you raise the antenna. -
Page 220: Hotsync Buttons Preferences
Turn Off & Lock sign a password to lock the handheld. When locked, you need to enter the password to use your handheld. : Beams the current record to another Palm OS Beam Data held equipped with an IR port. -
Page 221: Digitizer Preferences
Digitizer preferences The Digitizer Preferences screen opens the digitizer calibration screen. This is the same screen that appears when you go through the Setup process for your handheld. You can recalibrate your screen after a hard reset, or if your digitizer drifts. -
Page 222: Time, Date, Week Start, And Numbers Formats
Time, date, week start, and numbers formats The Time setting defines the format for the time of day. The time format that you select appears in all applications on your handheld. To select the time, date, week start, and numbers format: 1. -
Page 223: System, Alarm, And Game Sounds
System, alarm, and game sounds Your handheld uses a variety of sounds. The System, Alarm, and Game Sound settings enable you to turn the sounds on or off, and to adjust the volume level. To set the system and alarm sounds: 1. -
Page 224: Connection Preferences
(and network connection — if required) to complete the configuration. Note: You can purchase a modem for use with your handheld. See http://www.palm.com. You can also create custom configurations. There are four possible kinds of connections. -
Page 225: Sample Connection For Remote Ir Hotsync Operations
Sample connection for remote IR HotSync operations The following sample configuration would enable you to perform an IR HotSync operation by sending data through the IR port of a modem attached to a cell phone, which then dials a modem attached to your desktop computer, to synchronize with your Desktop application. -
Page 226: Network Preferences And Tcp/Ip Software
Network preferences and TCP/IP software The Network Preferences settings enable you to use the TCP/IP software that is included in the Palm OS software. You can use the TCP/IP software to connect with Internet Service Providers (ISPs) or dial-in (remote access) servers. Because the TCP/IP software is a feature of the operating system, you configure all parameters relating to it from the Preferences application. -
Page 227: Selecting A Service
Selecting a service Use the Service setting to select the service template for your Internet Service Provider or a dial-in server. Service templates are a set of ISP and dial-in server configuration settings that you can create, save, and reuse. To select a service: 1. -
Page 228: Entering A Password
Entering a password The Password box identifies the password you use to log into your server or ISP. Your entry in this field determines whether your handheld prompts you to enter a password each time you log into your network: If you do not enter a password, your handheld displays the word “Prompt”... -
Page 229: Adding Telephone Settings
To select a connection: 1. Tap the Connection pick list. 2. Tap the connection you want to use. Adding telephone settings When you select the Phone field, your handheld opens a dialog box in which you define the telephone number you use to connect with your ISP or dial-in server. - Page 230 Entering a prefix A prefix is a number that you dial before the telephone number to access an outside line. For example, many offices require that you dial “9” to dial a number outside the building. To enter a prefix: 1.
-
Page 231: Connecting To Your Service
Note: If you are connecting to an ISP, you need a third-party application, such as a web browser or news reader, to take advantage of this connection. For information about third- party applications that support TCP/IP, check the web site http://www.palm.com Chapter 8 Enter your calling card... -
Page 232: Creating Additional Service Templates
To establish a connection: In the Network Preferences screen, tap Connect to dial the current service and display the Service Connection Progress messages. Tip: To see expanded Service Connection Progress messages, press the lower half of the Scroll button. To close a connection: Tap Disconnect to terminate the connection between your handheld and your service. - Page 233 3. Tap the Connection type pick list and select one of the following connection types: : Point-to-Point protocol : Serial Line Internet Protocol SLIP : Compressed Serial Line Internet Protocol CSLIP Note: If you are not sure, try PPP; if that doesn’t work, ask your Internet Service Provider or your System Administrator for the correct connection type.
- Page 234 Defining primary and secondary DNS The Domain Naming System (DNS) is a mechanism in the Internet for translating the names of host computers into IP addresses. When you enter a DNS number (or IP address), you are identifying a specific server that handles the translation services.
-
Page 235: Login Scripts
To identify dynamic IP addressing: Tap the IP Address check box to select it. To enter a permanent IP address: 1. Tap the IP Address check box to deselect it and display a permanent IP address field below the check box. 2. -
Page 236: Creating A Login Script On Your Handheld
In the Login Script dialog box on your handheld, accessed from the Details dialog box in Network Preferences Note: You can also use non-ASCII and literal characters in your login script. See Appendix D for more information. Creating a login script on your handheld You can create login scripts by selecting commands from the Command pick list in the Login Script dialog. - Page 237 Wait For Tells your handheld to wait for specific characters from the TCP/IP server before executing the next command. Detects a challenge-response prompt coming Wait For from the server and then displays the dynamically Prompt generated challenge value. You then enter the challenge value into your token card, which in turn generates a response value for you to enter on your handheld.
-
Page 238: Plug-In Applications
Compiled into a device executable Called properly from a login script Able to return control to a login script after it terminates Created using a development environment that supports Palm OS software, such as Metrowerks CodeWarrior for Palm Computing Platform. -
Page 239: Tcp/Ip Troubleshooting
Service menu Options menu TCP/IP troubleshooting If you are having a problem establishing a network connection using TCP/IP, check this section and try the suggestions listed. Displaying expanded Service Connection Progress messages It’s helpful to identify at what point in the login procedure the connection fails. -
Page 240: Owner Preferences
Adding a DNS number If your ISP or dial-in server requires a DNS number and you did not enter that information in the Network Preferences screen, it will appear that you successfully logged into your network. When you try to use an application or look up information, however, the connection fails. -
Page 241: Shortcuts Preferences
ShortCuts preferences The ShortCuts Preferences screen enables you to define abbreviations for entering text with Graffiti strokes. This section describes how to create, edit, and delete a ShortCut. See “Graffiti ShortCuts” in Chapter 2 for more information on the use of ShortCuts. Creating a ShortCut You can create a ShortCut for any words, letters, or numbers. -
Page 242: Editing A Shortcut
Proxy The IP address that appears by default in this screen is the address of the Palm.Net proxy server. You do not need to identify a different proxy server unless your organization has its own proxy server and supplies you with an IP address for that proxy server. -
Page 243: Sending Id Or Location Information
To change the IP address of your proxy server: 1. Tap the Proxy field. 2. Tap the dot to the right of the first section of the Proxy field, and then enter the first section of the IP address. Each section must be a number from 0 to 255. Note: 3. - Page 244 Page 236 Setting Preferences for Your Handheld...
-
Page 245: Appendix A: Maintaining Your Handheld
Appendix A Maintaining Your Handheld This chapter provides information on the following: Caring for your handheld About the AAA batteries Automatic recharging of the transmitter Proper use of the antenna Resetting your handheld Caring for your handheld Your handheld is designed to be rugged and reliable and to provide years of trouble-free service. -
Page 246: About The Aaa Batteries
About the AAA batteries Please note the following considerations when replacing the batteries in your handheld: Under normal conditions, depending on your usage pattern, the AAA batteries of your handheld should provide weeks of use. You can conserve battery life by minimizing the use of the backlight feature, and changing the Auto-off setting that automatically turns the handheld off after a period of inactivity. -
Page 247: Automatic Recharging Of The Transmitter
Automatic recharging of the transmitter The transmitter used by your handheld for web clipping and wireless Internet messaging contains a rechargeable storage battery. It is a NiCad (nickel-cadmium) battery. When you first set up your handheld, the initial charging of the transmitter takes about 70 minutes. - Page 248 Please call 1-800-8-BATTERY for information on NiCad battery recycling in your area. Palm, Inc.’s involvement in this program is part of our commitment to preserving our environment and conserving our natural resources.
-
Page 249: Proper Use Of The Antenna
If the antenna is damaged, you can remove it and replace it with another antenna. For information on ordering a new antenna, visit the web site http://www.palm.net Important: Do not remove the antenna until you have a new antenna ready to install. Using the wireless features without an antenna can damage your handheld. - Page 250 To be sure the antenna is raised to 180 down on a flat surface and flatten the antenna against the sur- face. 4. Grasp the antenna close to the pivot point with your thumb and index finger. 5. Using your thumb, firmly push the antenna out of the pivot point. Note: After you remove the antenna, be careful not to change the alignment of the pivot point.
-
Page 251: Resetting Your Handheld
Resetting your handheld Under normal circumstances, you will not have to use the reset button. On rare occasions, however, your handheld may no longer respond when you press buttons or tap the screen. In this case, you need to reset your handheld so that it will work again. Performing a soft reset A soft reset tells your handheld to stop what it’s doing and start over again. -
Page 252: Performing A Hard Reset
With a hard reset, all records stored in your handheld are erased. Never perform a hard reset unless a soft reset does not solve your problem. After performing a hard reset, you can transfer the data in Palm™ Desktop software to your handheld by performing a HotSync operation. - Page 253 2. From the HotSync Manager menu, choose Custom. 3. Select the appropriate user name from the list. 4. Select an application in the Conduit list. 5. Click Change. 6. Select Desktop overwrites handheld. Note: Changing the HotSync setting from the default affects only the next HotSync operation.
- Page 254 Page 246 Maintaining Your Handheld...
-
Page 255: Appendix B: Frequently Asked Questions
Support until you have reviewed the following list of frequently asked questions, and you have also reviewed the following: The README file and HelpNotes located in the folder where you installed Palm™ Desktop software on your computer (or on your installation CD) The Palm Desktop online Help The “Palm Support Assistant”... -
Page 256: Software Installation Problems
2. Press CTRL-ALT-DELETE tasks except Systray and Explorer. 3. Make sure your computer has at least 20MB disk space. 4. Delete all temporary files. 5. Run ScanDisk on your computer. 6. Reinstall Palm Desktop software. Frequently Asked Questions and end all... -
Page 257: Operating Problems
Operating problems Problem I don’t see anything on my handheld’s screen. I get a warning message telling me my handheld memory is full. My handheld keeps turning itself off. My handheld is not making any sounds. My handheld has frozen. Appendix B Solution Try each of these in turn:... -
Page 258: Tapping And Writing Problems
Tapping and writing problems Problem When I tap the buttons or screen icons, my handheld activates the wrong feature. When I tap the Menu icon , nothing happens. I can’t get my handheld to recognize my handwriting. Page 250 Solution Calibrate the screen. -
Page 259: Wireless Problems
Wireless problems Problem The signal strength is weak. I forgot the password to my Palm.Net™ service account. Appendix B Solution Make sure the antenna is pointing straight up, perpendicular to the ground: If you hold your handheld in your hand, raise the antenna to 135... -
Page 260: Application Problems
Memo Preferences setting. In other words, the sort settings you use with Palm Desktop software are not transferred to your handheld. In the Week View, you cannot select overlapping events that have the same start time. -
Page 261: Hotsync Problems
Appendix B Solution Check the Windows system tray to make sure the HotSync Manager is running. If it is not, open Palm Desktop software. Click the HotSync Manager, choose Setup, and click the Local tab. Check that the Serial Port setting displays the correct serial (COM) port where your cradle is attached. - Page 262 Make sure HotSync Manager is running. If HotSync Manager is running, exit and restart it. Make sure you selected Local from the HotSync Manager menu or the Palm Desktop software menu. Check the cable connection between the cradle and the serial port on your computer.
- Page 263 I tried to do a modem HotSync operation, but it did not complete successfully. Appendix B Check the following on your computer: Make sure your computer is turned on and that it does not shut down automatically as part of an energy- saving feature.
- Page 264 I tried to do a modem HotSync operation, but it did not complete successfully. (continued) I can’t perform an IR HotSync operation. Page 256 Check the following on your handheld: Confirm that the telephone cables are securely attached to your modem. Make sure the dialing instruction dials the correct phone number.
- Page 265 3. Click the Device Manager tab. 4. Double-click Ports. 5. Make sure each accessory is using a different port. Make a copy of your Palm folder. Uninstall, then reinstall Palm Desktop software. Turn on your handheld and tap the Applications icon. Tap the HotSync icon, then tap Local.
- Page 266 If you are using Windows 98, move your handheld away from the computer’s infrared port. If the computer running Palm Desktop software synchronizes with more than one handheld, each handheld must have a unique name. Assign a user name to your handheld the first time you perform a HotSync operation.
-
Page 267: Beaming Problems
(approximately 4") and one meter (approximately 39") apart, and that the path between the two handheld must be clear of obstacles. Beaming distance to other Palm OS handhelds may be different. Move your handheld closer to the receiving handheld. Perform a soft reset. See “Performing a soft reset”... -
Page 268: Password Problems
In this case, the following procedure restores your private entries and lets you access them: 1. Use the Palm Desktop software and the cradle or infrared communica- tion to synchronize your data. 2. Tap Forgotten Password in Security to remove the password and delete all private records. -
Page 269: Technical Support And Customer Care
Note: Thousands of third-party add-on applications have been written for Palm OS handhelds. Unfortunately, we are not able to support such a large number of third-party applications. If you are having a problem with a third-party application, please contact the developer or publisher of that software. - Page 270 Page 262 Frequently Asked Questions...
-
Page 271: Appendix C: Creating A Custom Expense Report
Payment Method When you perform a HotSync Palm Desktop software on your computer, the Expense data is stored on your computer (in a file named Expense.txt). When you open the Expense application in Palm Desktop software, an Excel macro starts, and populates an expense template with your data based on the rules specified in a spreadsheet file named Maptable.xls. -
Page 272: Customizing Existing Sample Templates
Customizing existing sample templates Four sample Expense Report templates come with Palm Desktop software. These templates are stored in the Template folder (which is in the same folder as Palm Desktop software). If the layout of one (or more) of these templates is appropriate for your reporting needs, you can easily customize the templates with your company name and other information. -
Page 273: Determining The Layout Of The Expense Report
4. From the File menu, choose Save As. 5. Click the Save as type drop-down list and choose Template (*.xlt). 6. Navigate to the Template folder (in the Palm Desktop software directory). If you do not need to change the Maptable.xls file, save the Note: template file with its original file name (e.g., Sample2.xlt). -
Page 274: Sections
Sections A Section is an area of the report that has common formatting. It is common for an Expense report to have more than one Section. For example, the following sample Expense Report named Sample3.xlt contains several Sections. Because your Expense data maps to row and column areas of your final report, different Sections require different definitions for the data mapping. -
Page 275: Analyzing Your Custom Expense Report
Fixed or Variable Label for columns. Place a copy of your custom Expense Report in the Template folder (in the Palm Desktop software directory). Change the file name so it has the file extension .xlt (which defines it as a Microsoft Excel template). -
Page 276: Programming The Mapping Table
To program a new custom mapping table: 1. Open a copy of the Maptable.xls file in Microsoft Excel. This file is located in the same folder as the Palm Desktop Note: software application. Make a backup copy of this file before you make your modifications. - Page 277 5. Scroll down to a blank area of the Maptable.xls file (below the rows used for Sample4.xlt), and click on a row number to select a blank row. 6. From the Edit menu, choose Paste. A copy of the rows you selected in step 3 is pasted into the Maptable.xls file.
- Page 278 Define the dimensions of the Section. appear in the green columns (10–13). : Represents the total number of rows in the Section, ex- # of Rows cluding any header or total rows. In other words, this includes only the number of rows in the Section where your handheld data will be placed.
- Page 279 Define whether the Section is in list format. light purple columns (18–19). If the Section will present the data in a list format, enter the word “yes”. Otherwise, enter the word “no”. The following diagram shows data presented in a list format: Only if your section is in list format: number of the row or column where the expense description will be placed.
-
Page 280: Using Applications Other Than Microsoft Excel
Mark a Section for prepaid expenses (yellow column). table is for prepaid (company paid) expenses, type a “yes” in the cell on that Section’s row. Type “no” in all the cells of this column that do not pertain to prepaid expenses. 16. -
Page 281: Expense File Details
Expense file details The Expense.txt file contains four groups of data. It will be easier to see these four distinct groups of data if you open the file with a spreadsheet application. Trips Shows the number of Expense application categories, and lists each one followed by an “end”... - Page 282 Page 274 Creating a Custom Expense Report...
-
Page 283: Appendix D: Non-Ascii Characters For Login Scripts
Appendix D Non-ASCII Characters for Login Scripts The following information enables you to create custom login scripts that require non-ASCII characters. It is provided for advanced users who understand the use and requirements of such characters in a custom login script. Use of ^char You may use the caret ( ^ ) to transmit ASCII command characters. -
Page 284: Literal Characters
Literal characters The backslash ( \ ) character defines that the next character is transmitted as a literal character, and is not subject to any special processing ordinarily associated with that character. Examples: Includes a caret as part of the string Includes a <... -
Page 285: Palm.net™ Service Agreement And Other Product Information
Palm, Inc. (“Wireless Service Provider”). The “Network” is the method by which a Palm VII™ device connects to the Service. A Venue Host is a third party content provid- er to the Service. By subscribing to the Service, you have accepted the terms of this Agreement. - Page 286 “use” means to transfer data over the Network. 1.4 Lost or Stolen Units. You agree to notify Palm, Inc. immediately if your Palm VII device is lost or stolen. If you fail to do so, any charges incurred on your ac- count will be your responsibility.
- Page 287 You release Palm, Inc. from all liabilities and claim of loss resulting from any error or discrepancy that is not reported to Palm, Inc. within sixty (60) days of its first appearance on an in- voice or credit card statement.
- Page 288 Service. This Agreement shall remain in effect until terminated as set forth herein. Palm, Inc. reserves the right, in its sole discretion, to suspend or terminate your access to and use of Service without further notice if you breach any of the terms and conditions of this Agreement.
- Page 289 Disclaimer of Service Warranties. 8.1 Subscription to Service does not affect the warranty that came with your Palm VII device. No additional warranty is provided as a result of subscribing to the Service. Palm, Inc. SPECIFICALLY DISCLAIMS ANY RESPONSIBILITY FOR ANY...
- Page 290 Limitation Of Liability For The Service. 9.1 Palm, Inc. shall not be liable for any loss, injury, claim, liability or damage of any kind resulting in any way from (i) your use of the Service, (ii) your use of any equip-...
- Page 291 Messaging Service with or without notice. Palm, Inc. shall not be liable to you or any third party should Palm, Inc. exercise its right to modify or discontinue the Messaging Service. You agree that Palm, Inc. has no obligation to monitor or regulate the transmissions sent by you.
- Page 292 12.3 Notices. You may send notices to Palm, Inc. by postal mail or by express deliv- ery, addressed to Palm, Inc. at 5400 Bayfront Plaza, Santa Clara, CA 95052-8145, Atten- tion: Palm VII Customer Care or at such other address as Palm, Inc.
-
Page 293: Product Regulatory Information
Increase the separation between the equipment and receiver. Connect the equipment into an outlet on a circuit different from that to which the receiver is connected. Consult the dealer or an experienced radio/TV technician for help. Palm.Net™ Service Agreement and Other Product Information Page 285... -
Page 294: Battery Warning
Waarschuwing! Bij dit produkt zijn batterijen geleverd. Wanneer deze leeg zijn, moet u ze niet weggoo- ien maar inleveren als KCA. Page 286 Palm VII Product Family Tested to Comply With FCC Standards FOR HOME OR OFFICE USE... - Page 295 Uwaga Palm.Net™ Service Agreement and Other Product Information Page 287...
- Page 296 Page 288...
-
Page 297: Index
AAA batteries. See Batteries ABA (Address Book archive file) 41 Accented characters Graffiti writing 38 onscreen keyboard 40 Account on Palm.Net service 126 Activating the Palm.Net service 14, Add-on applications 46–49, 244 Address Book *If Found Call* entry 96 adding custom fields 99 archive files (.aba) 41... - Page 298 Attachments iMessenger application 145, 157 Mail 179 Automatic fill, in Expense 120 Auto-off delay 214 Autotext. See Graffiti ShortCuts Backlight 5, 211 Bar graph showing signal strength 128 Batteries backup power when removed 238 battery door 7, 9 battery life 238 conserving power 214 gauge 20 installing 9, 10...
- Page 299 86 Contrast control 7 Copy Page command in web clipping applications 135 Copying text 62 Country default setting 213 Coverage of Palm.Net service 125, Cradle connecting to serial port 8 for local HotSync operations 66, Creating Address Book entries 95–96 categories 43–44, 69–70...
- Page 300 Sunday or Monday to start week 214 switching views 89 untimed events 81, 84 Week view 89, 214, 252 Dates Expense item 111 setting current 29, 252 showing in iMessenger list 156 showing in Mail list 177 To Do List record due 102 Day (Date Book view) 81, 94 DBA (Date Book archive file) 41 Decimal point 214...
- Page 301 Entering data 24–27 importing from other applications 41–42 problems with 250 using Graffiti writing 31–40 using the computer keyboard 41 using the onscreen keyboard 40 Entries. See Address Book Eudora 162 Euro displaying on desktop computer 115 in Expense 113 printing 116 problems with 252 Events.
- Page 302 menu commands 23 moving the cursor 39 numbers 35 online Help 63, 211 problems using 250 punctuation marks 36 ShortCuts for entering data 39, 233–234 symbols 37 tips 33 writing 31–40 writing area 6, 32 Handheld interface elements 18 locking 52 problems with 247–261 setting up 10 turning on and off 5...
- Page 303 Graffiti writing 38 onscreen keyboard 40 Internet. See iMessenger application and Web clipping applications IP address for Network preferences 226 for Palm.Net proxy server 234 for service template 224 IR port 5 See also Beaming information IR. See Infrared IrCOMM 193, 216 IrDA (Infrared Data Association) 193 Items.
- Page 304 177 signature 169, 171–172 sorting e-mail 177 synchronizing 164 Page 296 truncating e-mail 183 viewing e-mail 164 Mailbox on Palm.Net network 157 Main applications 19 Maintenance information 237 MapQuest 123 Maps of Palm.Net coverage 126 Masking records 76 Memo Pad adding Address Book data to records 73–74...
- Page 305 Outbox iMessenger application 151, 156 Mail 172, 177 Outlook, connecting to 14, 162, 253 Overlapping events 91 Owner preferences 232 Palm Desktop software. See Desktop software Palm.Net service account status 126 activating 14 mailbox on 157 maps of coverage 126...
- Page 306 Private records displaying and creating 76–78, lost with forgotten password 53 See also Security Problems with handheld 247–261 Profiles 207 Proxy server for Palm.Net service 234 Punctuation marks Graffiti writing 36 onscreen keyboard 40 Purging deleted e-mail (Mail) 176 deleted messages (iMessenger...
- Page 307 Date Book 81 defined 61 deleting 63, 87 displaying a category of 68 duplicating address 98 editing 61–63 Expense 110 fonts 79 hiding private 50, 76 lost 252 masking private 50, 76 Memo Pad 105 notes for 78–79 number of 261 private 76–78 purging 64 sorting 75–76...
- Page 308 136 queries to Internet 131 Separators between addresses 146, Serial connections 216 Serial port 8, 190, 198 Service agreement, Palm.Net 277 Service templates 224, 230 Service, Palm.Net 124 Service, selecting for network 219 Setting up handheld 10 Settings. See Preferences...
- Page 309 Upgrading 10–12 User profiles 207 User-defined categories 67 Username identifying handheld 232 for ISP 219 for Palm.Net service 15, 234 unique for each handheld 12 Vendor for Expense item 112 Web clipping 136 example 133–134 overview 16, 121–123 Web clipping applications downloading new 124 example 133–134...
- Page 310 Wireless preferences 234 Writing area 6 Writing. See Entering data Page 302 XLT (Expense report template in Excel) 117 Yahoo! People Search 133 Index...