Table of Contents
Advertisement
Quick Links
Advertisement
Table of Contents

Related Manuals for Sonos Era 300


Summary of Contents for Sonos Era 300
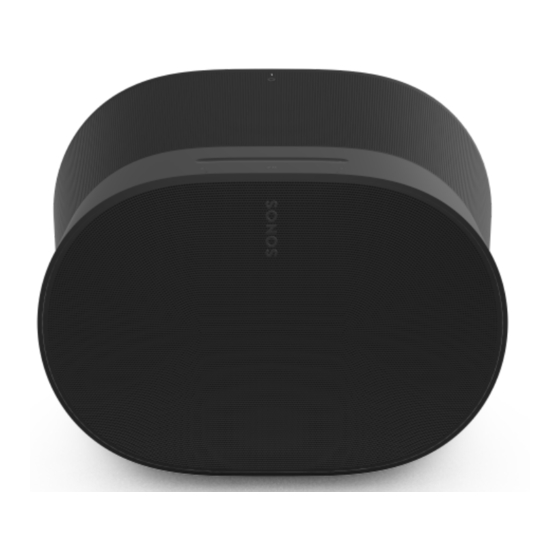
- Page 1 Era 300 Guides Era 300...
- Page 2 Pair two Era 300 speakers with Sonos Arc or Beam (Gen 2) for multichannel surround sound. Compatible with your other Sonos S2 speakers for multi- room listening. See Setup when you’re ready to add a Sonos Era 300 to your system.
-
Page 3: Controls And Lights
Controls and lights Button Control Description Volume up (slide right, or tap + ) Volume down (slide Volume control left, or tap - ) Note: To quickly change the volume, press and hold + or - . Press once to play or pause audio. - Page 4 Button Control Description Press the microphone icon to turn voice services on or off. When the indicator light is on, voice control is available (the Voice services on/off microphone switch on the back must also be on). When the indicator light is off, voice control is off.
-
Page 5: Connector Panel
Connector panel AC power (mains) input Use only the supplied power cord (using a third-party power cord will void your warranty). Bluetooth button Press and hold to pair a new device. Press once to reconnect. - Page 6 Universal microphone switch Toggle to turn all product microphones on or off. When the switch is off (down), the microphones are disabled so microphone-enabled features like Trueplay quick tuning and voice services are unavailable. When the switch is on (up), microphone-enabled features like Trueplay are available.
- Page 7 Ethernet: Use the Sonos Combo Adapter and an Ethernet cable to connect Era 300 directly to your router if you want to hardwire your speaker (helpful if your WiFi is unstable). Line-in: Use either the Sonos...
-
Page 8: Select A Location
If you are mounting Era 300 within 2 ft (.61 m) of a ceiling, place it upside down for the best sound. When Era 300 is placed next to a wall or on a shelf, leave at least 1" (2.5 cm) clearance in back and 8” (20.32 cm) on each side of the speaker. -
Page 9: Microphone On/Off
Microphone on/off There are two ways to control the microphones on Era 300: A universal microphone switch on the back turns all microphones on and off. A voice services button on top turns voice services on and off without affecting the microphones needed for Trueplay and other microphone-enabled features. - Page 10 Trueplay™ Trueplay tuning measures how sound reflects off walls, furnishings, and other surfaces in a room, then fine tunes your Sonos speaker to make sure it sounds great no matter where you place it. During setup, choose the Trueplay option that works best for you and your space. To retune later, go to Settings >...
-
Page 11: Set Up Stereo Pair
Set up stereo pair Pair two Sonos speakers in the same room for an even wider, stereo experience. One speaker serves as the left channel and one serves as the right channel. Note: The Sonos speakers in a stereo pair must be the same type. - Page 12 Set up surrounds It’s easy to turn two Sonos speakers (same model), or a Sonos Amp and your favorite non- Sonos speakers, into separate right and left channels for your home theater. 1. Place each surround speaker about 10 ft from your favorite listening position, angling them toward the seating area.
-
Page 13: Voice Services
Line-in Connect an audio device, like a projector, CD player, or turntable (with a built-in phono preamp), to any Sonos product that has a line-in port (Era 300, Era 100, Amp, Port, or Five). Then go to > Line-In to select the source and start playback. -
Page 14: Product Settings
Product settings You can customize Sonos products for your surroundings. Go to > System and select a product. If you move your speaker to a new room, Room Name you can change its name in Settings. You can turn off your speaker’s WiFi when it’s connected to your network with an... - Page 15 Learn more To save battery life, you can set your portable speaker to power off Battery Saver automatically instead of going to sleep. It (for portable products only) won't appear in the Sonos app until it’s powered back on.
- Page 16 (Autoplay is disabled by default.) Accessories Find the perfect accessory for your Sonos system—tailored to perfectly fit your Sonos products. For a full selection of Sonos-compatible stands, wall mounts, chargers and cables, see Accessories on our website.
- Page 17 Era 300 Stand Custom designed stand for Sonos Era 300 holds speaker securely in place. Fixed height, optimal for home theater surrounds. Easy assembly. Channel in the pole hides the speaker’s power cable for simple cable management. Note: For the full selection of Sonos-compatible stands, wall mounts, and cables, see Accessories on our website.
- Page 18 Take everything out of the box and place the base in the packaging slot to stabilize it for the next few steps. Thread the end of the Sonos Era 300 power cord that attaches to the speaker through the opening in the stand base and into the pole channel.
- Page 19 Attach the speaker platform to the bottom of the speaker using 2 short screws (included). Attach the speaker platform to the stand pole using the other long screw (included). Then plug the power cord into the speaker. You may need someone to hold the speaker for this step.
- Page 20 Place the stand where you want it. Plug the speaker into a power outlet, then tuck the excess cord under the stand base.
- Page 21 Allows access to ports, buttons, and touch controls, and cleanly routes your speaker’s cable. Flexibility to position your speaker for best sound. Important: This wall mount is for use only with Sonos Era 300 (sold separately), and is designed for wall stud installation. What's in the box?
- Page 22 Choose the orientation Upright wall mounting Mounting the speaker upright is suitable for most locations. The speaker can swivel left or right, or tilt up and down. Inverted wall mounting (upside down) Mounting the speaker upside down is recommended if the speaker is installed within 2 feet of a ceiling to optimize downfiring sound.
- Page 23 Mount upright Locate a wall stud. Place the bracket against the wall using a level to make sure it’s aligned, and mark the screw holes. Remove the bracket. Pre-drill pilot holes into a stud using a 9/64” drill bit. Place the bracket against the wall with the small arrows pointing up, and secure it to the wall with 2 long wall bracket screws...
- Page 24 Rotate the speaker 180° so the screw holes are facing up. Attach the speaker platform to the speaker using 2 short speaker mount screws (included). Align the mount with the bracket keyhole, slide the mount down, and lock it into place. Make sure the wall mount and speaker are securely seated before removing your hands from the speaker.
- Page 25 Mount inverted Locate a wall stud. Place the bracket against the wall using a level to make sure it’s aligned, and mark the screw holes. Remove the bracket. Pre-drill pilot holes into a stud using a 9/64” drill bit. Place the bracket against the wall with the small arrows pointing up, and secure it to the wall with 2 long wall bracket screws...
- Page 26 Plug the power cord into the speaker. Next, attach the speaker to the mount using the 2 short speaker mount screws (included). Align the mount with the bracket keyhole, slide the mount down, and lock it into place. Make sure the wall mount and speaker are securely seated before removing your hands from the speaker.
-
Page 27: Specifications
Specifications Feature Description AUDIO Six Class-D digital amplifiers precision- Amplifier tuned for the speaker's unique acoustic architecture. Four tweeters ensure faithful playback of high and mid-range frequencies. The forward-firing mid tweeter provides a smooth center image while two side-firing Tweeters mid tweeters create stereo separation. - Page 28 Feature Description Use the Sonos app to adjust bass, treble, Adjustable EQ and loudness. This software measures the acoustics of the room then fine-tunes the EQ. Trueplay™ Compatible with iOS and Android devices. (Microphone switch must be on.) Turn two speakers into separate left and...
- Page 29 Quad Core 4xA55 1.9GHz 8 Gb DDR4 Memory 8 Gb NAND Set up and control Era 300 with the latest Sonos S2 generation of the Sonos app. With a Sonos Line-In Adapter, you can connect your devices through a 3.5 mm...
- Page 30 Operating temperature 32° to 104°F / 0° to 40°C Storage temperature -4° to 158° F / -20° to 70° C Colors: white, black Colors / Finish Finish: matte Sonos Era 300, 6 ft (2 m) power cable, Package contents quickstart guide...
- Page 31 Note: Specifications subject to change without notice.
-
Page 32: Important Safety Information
12. This product does not have any user-serviceable parts. Do not open or disassemble or attempt to repair it or replace any components. Refer all servicing to Sonos qualified service personnel. Servicing is required when the apparatus has been damaged in any... - Page 33 16. Connections between this device and external equipment must be made using a shielded cable in order to maintain compliance with FCC radio frequency emission limits.