Advertisement
- 1 Introduction
- 2 Safety precautions
- 3 About using Bluetooth
- 4 Part names
- 5 Basic functions
- 6 Mute function
- 7 USB operation
- 8 Charging the device connected to the USB CHARGE port
- 9 Bluetooth operation
- 10 AUX IN operation
- 11 MIC jack operation
- 12 Maintenance
- 13 When you suspect a failure
- 14 Specifications
- 15 Warranty Limitations
- 16 Warranty and service information
- 17 Documents / Resources
Introduction
To use this product safely, read and understand this operation manual thoroughly before using.
After reading this manual, keep it in a safe place so that it can be referred to when necessary.

Safety precautions
The information you need to prevent danger to the user and other people as well as property damage is described below. "Description of signs" shows different categories of the degree of danger or damage that may occur due to wrong handling. "Description of symbols" shows the meaning of the symbols.
Important notes
- This book is only a guide for user's operation, not a criterion for configuration.
- Only use attachments/accessories specified by the manufacturer.
 | The lightning flash with arrowhead symbol, within an equilateral triangle, is intended to alert the user to the presence of uninsulated "dangerous voltage" within the product's enclosure that may be of sufficient magnitude to constitute a risk of electric shock to persons. |
 | The exclamation point within an equilateral triangle is intended to alert the user to the presence of important operating and maintenance (servicing) instructions in the literature accompanying the appliance. |
 |  To reduce the risk of electric shock, do not remove cover (or back). NO user-serviceable parts inside. Refer RISK servicing to qualified service personnel. |
 | This symbol indicates that this product incorporates double insulation between hazardous mains voltage and user accessible parts. |

- Minimum 5cm around the apparatus for sufficient ventilation.
- The ventilation should not be impeded by covering the ventilation openings with items, such as newspapers, table-cloths, curtains, etc.
- No naked flame sources, such as lighted candles, should be placed on the apparatus.
Description of signs
| Indicates that there is a risk of death or serious injury. |
 | Indicates that there is a risk of light injury or property damage. |
Description of symbols
 | Indicates "Prohibition" or "You must not do" with pictures and text. |
 | Indicates "Mandatory Action" or "Do as indicated" with pictures and text. |
What to do in the case of an abnormality
| | |
 |
|
Power cord and power plug
| | |
|
|
 |
|
| | |
|
|
|
|
Usage
| | |
|
|
| | |
|
|
|
|

Installation
| |
|
|
|
|
Notes
- If any color shift occurs on a nearby TV or the radio of this device picks up noise from the TV, keep this device away from the TV.
Disclaimer
- Toshiba shall not be responsible for any damage caused by an earthquake, thunderstorm, flood damage, fire for which Toshiba is not responsible, acts of a third party, other accidents, or damages caused by the user's willful acts or negligence, misuse, or use in abnormal conditions.
- Toshiba shall not be responsible for any damage caused by failure to observe the information described in the operation manual.
Disposal
- When disposing of the device, observe the laws, or ordinances and rules of the local government.
About using Bluetooth®
This unit is designed for use with Bluetooth® wireless devices compatible with the A2DP and AVRCP streaming audio profiles. Refer to your Bluetooth® device's user manual or technical support to determine if your Bluetooth® device supports these profiles.
- Frequency band used
This unit uses the 2.4 GHz frequency band. However other wireless devices may use 2.4 GHz frequency band as well and may cause interference with each other. To avoid interference, please refrain from the use of the unit at the same time with other wireless devices. - Certification of this device
This unit conforms to frequency restrictions and has received certification based on frequency laws, so a wireless permit is not necessary.
However, the following action is punishable by law in some countries:- Taking apart/modifying the unit.
- Usage restrictions
- Wireless transmission and/or use with all Bluetooth® equipped devices is not guaranteed.
- A device featuring the Bluetooth® function is required to conform to the Bluetooth® standard specified by Bluetooth SIG, and be authenticated. Even if the connected device conforms to the above mentioned Bluetooth® standard, some devices may not be connected or work correctly, depending on the features or specifications of the device.
- Range of use
Use this device within an unobstructed 10 m range. The range of use or perimeter may be shortened depending on any obstructions, devices causing interference, other people in the room, or the construction of the building. Please note that the range mentioned above is not guaranteed.
The Bluetooth® word mark and logos are owned by the Bluetooth SIG, Inc. and are used under license.
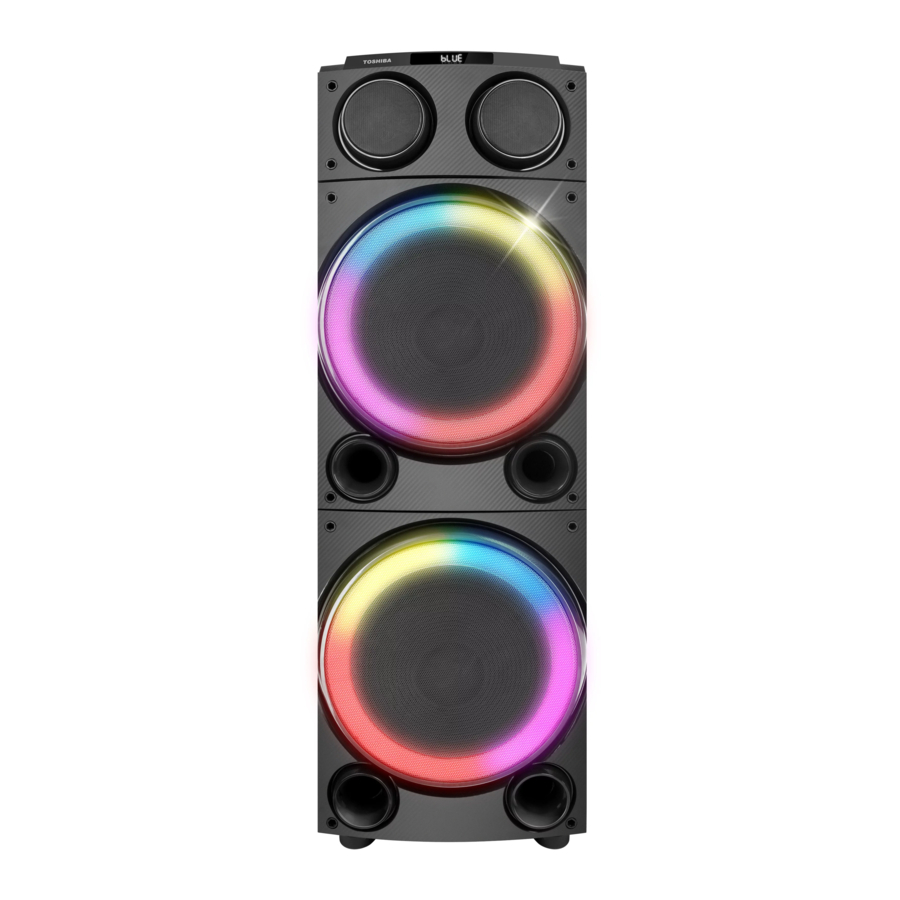
Part names

- 3.5mm AUX INPUT jack
- 6.3 mm MIC 2 jack
- 6.3 mm MIC 1 jack
- ECHO VOL. knob
- MIC. VOL. knob
- VOLUME knob
- MIC PRIORITY button
- KARAOKE button
- VOICE CHANGE button
- BASS BOOST button
- LIGHT button
- DISPLAY
- USB port
- USB CHARGE port
- TREBLE knob
- BASS knob
![]() / FOLDER / +/- 10 / REPEAT / RANDOM button
/ FOLDER / +/- 10 / REPEAT / RANDOM button![]() button
button![]() button
button- MUTE button
![]() / FUNCTION
/ FUNCTION- Wired microphone
- Fan openings
- AC Power cord
- Transport Rollers


Basic functions
- Turning on/off the power
- Press the
![]() /FUNCTION to power ON.
/FUNCTION to power ON.
Powering off:
Press and hold the![]() /FUNCTION 3 seconds to power OFF.
/FUNCTION 3 seconds to power OFF.
Notes- In USB/Bluetooth®/AUX mode, when no operation is performed for 15 minutes, the unit will automatically enter standby mode. To resume operation, press the /FUNCTION.
- Press the
- Setting the function mode
- To change the function, press the FUNCTION button to select the USB /Bluetooth®/AUX function.
- Adjusting the volume
- Rotate the VOLUME knob to increase or decrease the volume.
Current volume level will be shown on the display.
- Rotate the VOLUME knob to increase or decrease the volume.
- Lighting mode
- Press the LIGHT button repeatedly to select the different lighting mode of LED indicator light on the speaker. The display shows LEd1 to LEd7 and LEd0 (Light OFF).
"LEd1" Slow moving and slow color change
"LEd2" Fast moving sync with the music and slow color change
"LEd3" Rainbow color synce with the music
"LEd4" Circle light breathe and color change synce with the music
"LEd5" RGB color blinking Circle light sync with the music
"LEd6" One color blink with music and color chnage
"LEd7" White color blink "LEd0" Light OFF
- Press the LIGHT button repeatedly to select the different lighting mode of LED indicator light on the speaker. The display shows LEd1 to LEd7 and LEd0 (Light OFF).
- Adjusting the Treble
- Rotate the TREBLE knob to adjusting the treble.
- Adjusting the Bass
- Rotate the BASS knob to adjusting the bass.
- Bass boost function
- Press Bass boost button to switch the bass boot mode on/off.
The "H-ON" will be shown on the display when the bass boost is switched on and "H-OF" will be shown when off.
- Press Bass boost button to switch the bass boot mode on/off.
- Microphone echo
- Rotate the ECHO VOL knob to adjusting the echo.
- MIC PRIORITY
- Press MIC Priority button to switch the MIC Priority mode on and off.
The "P-ON" will be shown on the display when the MIC Priority is switched on and "P-OF" will be shown when off.
If you speak with a microphone when MIC Priority is on, the sound of the music being played will be reduced.
- Press MIC Priority button to switch the MIC Priority mode on and off.
- KARAOKE
- Press KARAOKE button to switch the KARAOKE mode on and off.
The "ACON" will be shown on the display when the KARAOKE mode is switched on and "ACOF" will be shown when off.
When KARAOKE mode is on, the center vocal voice of the song is cancelled orreduced and becomes smaller.
- Press KARAOKE button to switch the KARAOKE mode on and off.
- VOICE CHANGER
- Press the VOICE CHANGE button to change 4 types of voice effect.
The display shows EFE1 to EFE4 and EFE0 (VOICE CHANGE OFF). EFE1 Female, EFE2 Cartoon, EFE3 Male, EFE4 Transformer.
- Press the VOICE CHANGE button to change 4 types of voice effect.
Mute function
- Press the MUTE button to mute the sound. The "U-00" will be shown on the display when switched on.
Press again to restore the sound.
USB operation
- Listening to a USB device
This unit provides a USB port for music playback.- Connect a USB memory stick or Press the function button.
Connect the USB Memory Stick into the USB playback port. If you already have a memory stick connected into the port, press the function button repeatedly to select the USB function. - The display will show the total number of folders for 2 seconds and then show the total number of playable tracks for 2 seconds and automatically start to play 1st track of the USB device. The elapsed time will be shown on the display.
- To pause playback press the
![]() button.
button.
The "PAUS" will be shown on the display. - To resume play, press the
![]() button.
button.
The elapsed time will be shown on the display. - To select a desired track, press the
![]() or
or ![]() button either while playing or while paused until the desired track appears on the display. The unit will start playing automatically.
button either while playing or while paused until the desired track appears on the display. The unit will start playing automatically. - To search for a particular passage during playback, press and hold the
![]() or
or ![]() button to fast forward and fast backward until the desired point (passage) is reached, then release the button for normal playback.
button to fast forward and fast backward until the desired point (passage) is reached, then release the button for normal playback.
Playback will start again from this point.
![]()
- To prevent harmful interference, always connect USB devices directly to the unit. Do not use a USB extension cable to connect USB devices to the unit.
- USB FOLDER, +/-10/REPEAT/RANDOM mode.
To select the USB play mode, press and hold the "FOLDER, +/- 10 / REPEAT / RANDOM" button.
The mode will be changed as following order.- FOLDER mode, the display shows "Fold".
- +/-10 Track jump mode, the display shows "ud: 10".
- One Track Repeat mode, the display shows "ONE".
- Folder Repeat mode, the display shows "FO-r".
- All track Repeat mode, the display shows "ALL".
- Random Play mode, the display shows "rAnd".
- Normal play mode, the display shows "ordE".
- Connect a USB memory stick or Press the function button.
- To select +/- FOLDER mode
- Press and hold the "FOLDER, +/- 10, / REPEAT / RANDOM" button several times until the display shows "Fold" to select FOLDER mode.
- Press the
![]() buttons to select the folder. The display will show the folder number and the unit will automatically start playing the first track in the selected folder.
buttons to select the folder. The display will show the folder number and the unit will automatically start playing the first track in the selected folder.
After a few seconds, the display will switch to elapsed time, the folder mode will be canceled and the unit will be in normal mode.
- To jump to +/- 10 Track
- Press and hold the "FOLDER, +/- 10, / REPEAT / RANDOM" button several times until the display shows "ud: 10" to select +/-10 Track jump mode.
- Press the
![]() buttons to jump to +/-10 track. The display will show the track number and the unit will automatically start playing the selected track.
buttons to jump to +/-10 track. The display will show the track number and the unit will automatically start playing the selected track.
After a few seconds, the display will switch to elapsed time, the +/-10 Track jump mode will be canceled and the unit will be in normal mode.
- To Repeat a Single Track
- Press and hold the "FOLDER, +/- 10, / REPEAT / RANDOM" button several times during play until the display shows "ONE" to select the single track repeat mode.
The display will show "ONE", then, the elapsed time. The current track will be played repeatedly. - To cancel repeat play, press and hold the "FOLDER, +/- 10, / REPEAT / RANDOM" button several times during play until the display shows "ordE" to select the normal play mode.
- Press and hold the "FOLDER, +/- 10, / REPEAT / RANDOM" button several times during play until the display shows "ONE" to select the single track repeat mode.
- To Repeat the Folder
- Press and hold the "FOLDER, +/- 10, / REPEAT / RANDOM" button several times during play until the display shows "FO-r" to select the folder repeat mode.
The display will show "FO-r", then, the elapsed time of the current track. The current folder will be repeated continuously. - To cancel repeat play, press and hold the "FOLDER, +/- 10, / REPEAT / RANDOM" button several times during play until the display shows "ordE" to select the normal play mode.
- Press and hold the "FOLDER, +/- 10, / REPEAT / RANDOM" button several times during play until the display shows "FO-r" to select the folder repeat mode.
- To Repeat all the track
- Press and hold the "FOLDER, +/- 10, / REPEAT / RANDOM" button several times during play until the display shows "ALL" to select the all track repeat mode.
The display will show "ALL", then, the elapsed time of the current track. All tracks on the USB device will be played repeatedly. - To cancel repeat play, press and hold the "FOLDER, +/- 10, / REPEAT / RANDOM" button several times during play until the display shows "ordE" to select the normal play mode.
- Press and hold the "FOLDER, +/- 10, / REPEAT / RANDOM" button several times during play until the display shows "ALL" to select the all track repeat mode.
- Random play
- Press and hold the "FOLDER, +/- 10, / REPEAT / RANDOM" button several times during play until the display shows "rAnd" to select the random play mode.
The display will show "rAnd", then, the elapsed time of the current track. The random play will start from next track automatically. - To cancel random play, press and hold the "FOLDER, +/- 10, / REPEAT / RANDOM" button several times during play until the display shows "ordE" to select the normal play mode.
- Press and hold the "FOLDER, +/- 10, / REPEAT / RANDOM" button several times during play until the display shows "rAnd" to select the random play mode.
- Normal play mode
- Press and hold the "FOLDER, +/- 10, / REPEAT / RANDOM" button several times during play until the display shows "ordE" to select the normal play mode.
The display will show "ordE", then, the elapsed time of the current track. The unit will be in normal play mode.
- Press and hold the "FOLDER, +/- 10, / REPEAT / RANDOM" button several times during play until the display shows "ordE" to select the normal play mode.
 button.
 or
or  button either while playing or while paused until the desired track appears on the display. The unit will start playing automatically.
 buttons to select the folder. The display will show the folder number and the unit will automatically start playing the first track in the selected folder.
Charging the device connected to the USB CHARGE port
You can charge a device connected to the USB CHARGE port on the unit.
- Connect the device to the USB CHARGE port on the top of the unit.
Charging of the connected device will start.
Notes
- Even if you insert a USB memory stick into the USB CHARGE port, the unit will not playback music.
Bluetooth® operation
- Press the FUNCTION button to select the Bluetooth® mode.
The display will show "bLUE" and start blinking. - Following the instructions in your device's user manual, activate Bluetooth® on your device and search for the unit "TY-ASC402" and connect. Input the password "0000" if required. The "bLUE" on the display lights up.
- Press the play button on your device or button to start to play.
- Rotate the VOLUME knob or adjust the volume on the your device to increase or decrease the volume as desired.
Notes
- Press and hold the
![]() /
/![]() button to disconnect the Bluetooth®.
button to disconnect the Bluetooth®. - You can playback and pause playback by pressing the
![]() /
/![]() button.
button. - You can select a desired track by pressing the
![]() or
or ![]() button.
button. - The Bluetooth® works best within 10 meters.
 button to disconnect the Bluetooth®.
AUX IN operation
- Press the FUNCTION button to select "AUX" mode. The display shows "LINE" on the display.
- Connect your audio device to the AUX input jack of the unit with an audio cable.
- Control playback with the your device to start to play.
- Rotate the VOLUME knob or adjust the volume on the your device to increase or decrease the volume as desired.
MIC jack operation
Microphone input is available in all function.
- Connect your microphone to the 6.3 mm MIC 1 or MIC 2 jack of the unit.
- Rotate the MIC VOL. knob to increase or decrease the volume.
Maintenance
Maintenance of the main unit
Wipe off stains lightly with a soft cloth. If a stain is severe, wipe it off with a cloth dampened with neutral detergent solution and wrung tightly, and dry it with a dry cloth.
- Do not use benzene or thinner, etc. Do not spray any volatile chemical such as insecticide on the cabinet.
When you suspect a failure
| Phenomenon | Cause | Remedy |
| Common unit | ||
No sound is output |
|
|
| USB memory section | ||
Replay does not start |
|
|
Device cannot be detected |
|
|
Notes
- If the device does not operate or display properly while the USB device is played back, press and hold the
![]() /FUNCTION 3 seconds to power OFF and remove the AC cord and connect it again. Then, set the device back to the USB mode and play back the USB device.
/FUNCTION 3 seconds to power OFF and remove the AC cord and connect it again. Then, set the device back to the USB mode and play back the USB device. - The cabinet becomes slightly hot in some parts when the device has been used for a long period of time. It is not a malfunction.
Specifications
| USB memory section | |
| Playback format | MP3 |
| Memory | 32 MB to 32 GB |
| Supported memory | USB1.1 or USB2.0 |
| Playable USB memory | USB-IF certified product |
| Bluetooth® section | |
| Bluetooth® specification | Ver. 5.0 |
| Wireless equipment classification | Class 2 |
| Supported profile | A2DP, AVRCP |
| Frequency | 2.402-2.480 GHz (2.4 GHz ISM segment) |
| Service distance | Up to 10 m |
| Terminal | |
| Input/Output |  3.5 mm AUX input jack, 6.3 mm Microphone input jack × 2 3.5 mm AUX input jack, 6.3 mm Microphone input jack × 2 |
| General | |
| Power supply | AC 100-240 V, 50/60 Hz |
| Power consumption | 170 W |
| Max. output power | 200W (50W x 2 + 50W x 2) |
| USB port DC output | 5 V, 100 mA |
| USB CHARGE port | 5 V, 1000 mA |
| Dimension | Approx. 330 (W) × 290 (D) × 1030 (H) mm |
| Weight | Approx. 8.3 kg |
| Accessories | AC cord, Wired Microphone Operation manual |
The specifications and appearance may be subject to modification without prior notice.

Correct Disposal of this product. This marking indicates that this product should not be disposed with other household wastes throughout the EU. To prevent possible harm to the environment or human health from uncontrolled waste disposal, recycle it responsibly to promote the sustainable reuse of material resources. To return your used device, please use the return and collection systems or contact the retailer where the product was purchased. They can take this product for environmental safe recycling.
Warranty Limitations
This warranty does not apply if:
- changed, deleted or illegible serial number of the Device.
This warranty is void if the Device is damaged as a result of:
- mechanical damage, ingress of liquid or other foreign objects (including insects) inside the product;
- lightning strike, fire, flooding, lack of ventilation and other reasons beyond the control of the manufacturer;
- use of products in violation of the instructions for use;
- repair or adaptation of the Device carried out by any person or organization, except for authorized service partners.
- if damages (deficiencies) are associated with non-compliance with the standard of telecommunication, cable and power supply networks, radio signal power, including due to terrain features and other external factors, at the border or outside the network coverage area, connection to other faulty or inappropriate devices.
- changing the device software: changing the internal firmware of the device, installing non-recommended software, problems when entering into the program code of the device, problems when using third-party software, including, for example, attempts to overcome any technical limitations, security system or copyright protection devices rights, etc. or use in conjunction with any unauthorized programs, infection and / or viruses.
This warranty does not cover and is not responsible for possible harm directly or indirectly caused by the product to people, property or animals, if this happened as a result of non-observance of the rules of operation, willful or negligent actions of the buyer or third parties. Likewise, no liability is accepted for possible harm directly or indirectly caused by the device as a result of loss, damage or alteration of user data or information. If the parameters of the device do not comply with local legislation, the user should not use the device or additional options. This warranty applies to Devices purchased for personal and non-profit use.
Warranty and service information

http://service.uniondistribution.eu
This device complies with the Technical Regulations for Radio Equipment according to Directive 2014 / 53EU; The full text of the declaration of conformity is available on the website at:
https://www.uniondistribution.eu/downloads/
1-1-8, Sotokanda, Chiyoda-ku Tokyo 101-0021, Japan

Documents / Resources
References
Download manual
Here you can download full pdf version of manual, it may contain additional safety instructions, warranty information, FCC rules, etc.
Advertisement
Thank you! Your question has been received!


Need Assistance?
Do you have a question about the TY-ASC402 that isn't answered in the manual? Leave your question here.