Table of Contents
Advertisement
Quick Links
Advertisement
Table of Contents

Related Manuals for AEG LWR7485M4U


Summary of Contents for AEG LWR7485M4U
- Page 1 LWR7485M4U User Manual Washer Dryer USER MANUAL...
-
Page 2: Table Of Contents
20. ENVIRONMENTAL CONCERNS..............55 FOR PERFECT RESULTS Thank you for choosing this AEG product. We have created it to give you impeccable performance for many years, with innovative technologies that help make life simpler – features you might not find on ordinary appliances. Please spend a few minutes reading to get the very best from it. -
Page 3: Safety Information
ENGLISH Subject to change without notice. SAFETY INFORMATION Before beginning the installation and use of this appliance, carefully read the supplied instructions. The manufacturer is not responsible for any injuries or damage that are the result of incorrect installation or usage. - Page 4 Children shall not carry out cleaning and user • maintenance of the appliance without supervision. 1.2 General Safety This appliance is for washing and drying domestic- • type machine-washable and dryable laundry only. Do not use the dryer function if laundry has been •...
- Page 5 ENGLISH The operating water pressure at the water entry point • from the outlet connection must be between 0.5 bar (0.05 MPa) and 10 bar (1.0 MPa). The appliance maximum load is 8.0 kg. Do not exceed • the maximum load of each programme (refer to the "Programmes"...
-
Page 6: Safety Instructions
The final part of the washer dryer cycle takes place • without heat (cool down cycle) to ensure that items reach a temperature that will not cause damage to them. Do not use high pressure water sprays and/or steam •... - Page 7 ENGLISH 2.3 Water Connection • Do not sit or stand on the open door of the appliance. • The inlet water shall not exceed 25 • Do not dry dripping wet clothes in the °C. appliance. • Do not cause damage to the water •...
-
Page 8: Product Description
Ironing will compartment dedicated to each type be easier! of detergent, including a compartment • The AEG Steam Fragrance - thanks for PODS®, equipped with a system to the steam mode - offers the perfect able to spread and mixing the... -
Page 9: Technical Data
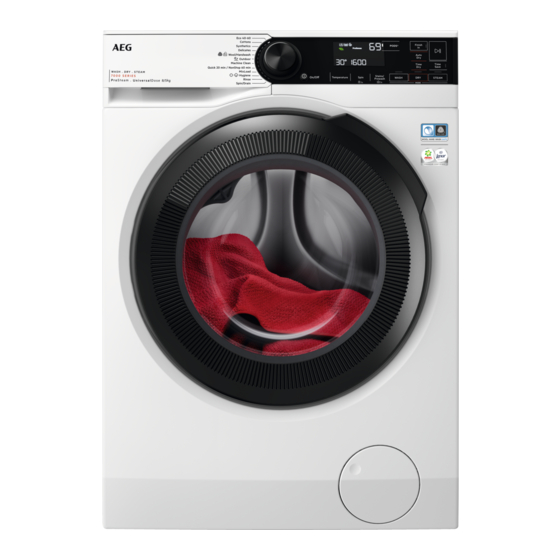
ENGLISH Worktop Drain hose Detergent dispenser Inlet hose connection Control panel Mains cable Door handle Transit bolts Rating plate Hose support Drain pump filter Feet for levelling the appliance The rating plate reports: A. model name B. product number Mod. xxxxxxxxx Prod.No. -
Page 10: Installation
5. INSTALLATION 4. Open the door and remove the WARNING! polystyrene piece from the door seal Refer to Safety chapters. and all the items from the drum. 5.1 Unpacking WARNING! Remove all the packaging and the transit bolts before installing the appliance. - Page 11 ENGLISH We recommend that you 9. Remove the power supply cable and keep the packaging and the the drain hose from the hose holders. transit bolts for any movement of the appliance. It is possible to see 5.2 Installation on suspended water flowing from the flooring drain hose.
- Page 12 If you install the appliance on a plinth that is not an accessory supplied by Do not use an extension AEG, secure the appliance with the fixing hose if the inlet hose is too plates. This spare part is available in web short.
- Page 13 ENGLISH The red sector in the window «A» shows this fault. If this occurs, close the water tap and Make sure that the drain contact the authorized service centre to hose end is not immersed in replace the hose. the water. There may be a 5.7 Water drainage return of dirty water into the appliance.
- Page 14 5. Without the plastic hose guide, to The rating plate and the 'Technical Data' a sink spigot - Put the drain hose in chapter indicate the necessary electrical the spigot and tighten it with a clamp. ratings. Make sure that they are Refer to the illustration.
-
Page 15: Control Panel
ENGLISH 6. CONTROL PANEL 6.1 Control panel description The options are not selectable with all washing programmes. Check the compatibility between options and washing programmes in the "Options compatibility with programmes" paragraph in the "Programmes" chapter. An option can exclude another one, in this case the appliance doesn't allow you to set the incompatible options together. - Page 16 6.2 Display Washing phase indicator. It flashes during pre-wash and wash phase. Rinsing phase indicator. It flashes during rinse phase. Spinning and draining phase indicator. It flashes during spin and drain phase. Drying phase indicator. Steam phase indicator. Door locked indicator.
-
Page 17: Dial And Buttons
ENGLISH Maximum load indicator. The value is shown for three seconds after programme selection, alternated with cycle duration. Maximum laundry indicator. It blinks if the laundry amount exceeds the declared load. Drying time indicator. Iron drying indicator. Cupboard drying indicator. Extra drying indicator. - Page 18 7.3 Introduction hours, the minimum selectable time will be 4h). The options/functions are After programme start, the door is locked not selectable with all and the appliance starts the ProSense washing programmes. phase. When load estimation ends, on Check the compatibility...
- Page 19 ENGLISH 7.10 Stains/Prewash Touch this button repeatedly to: • Change the spin speed. Press this button repeatedly to activate The display shows only one of the two options. the spin speeds available The relevant indicator goes on in the for the set programme. display.
- Page 20 On the display the relevant dryness The fragrance ( AEG Steam indicator goes on: Fragrance) The AEG Steam Fragrance allows you to • Iron dry: laundry to be refresh even your delicate clothes, ironed. removing wrinkles and adding freshness with a gentle fragrance developed •...
-
Page 21: Settings
• Tumble dry the garments treated with fragrance. Its benefit would The fragrance is available on evaporate. AEG web shop or by • Use the fragrance with different authorised dealer. purposes than those here described. 8. SETTINGS 8.1 Introduction... -
Page 22: Before First Use
9. BEFORE FIRST USE 3. Pour 2 litres of water into the During installation or before detergent compartment marked by first use you may observe some water in the appliance. This action activates the drain system. This is a residual water left 4. - Page 23 ENGLISH Programme Reference Maximum Programme description Default tempera‐ spin speed load ture Spin speed Temperature range range Synthetic items or mixed fabric items. 1200 rpm Normally soiled items. Synthetics 1200 rpm - 3.0 kg 40 °C 400 rpm 60 °C - Cold Delicate fabrics such as acrylics, vis‐...
- Page 24 Programme Reference Maximum Programme description Default tempera‐ spin speed load ture Spin speed Temperature range range 1200 rpm 1.0 kg Programme to treat up to 1 kg of mixed synthetic shirts load in 20 minutes only. Quick 20 min /...
- Page 25 ENGLISH Programme Reference Maximum Programme description Default tempera‐ spin speed load ture Spin speed Temperature range range 1600 rpm To spin the laundry and to drain the wa‐ 1600 rpm - 8.0 kg ter in the drum. All fabrics, except wool‐ Spin/Drain 400 rpm lens and delicate fabrics.
- Page 26 Options ■ ■ ■ ■ ■ ■ ■ ■ ■ Rinse Hold ■ ■ ■ Quiet ■ No Spin ■ ■ ■ Stains ■ ■ Prewash ■ ■ ■ ■ ■ ■ ■ Extra Rinse Auto Dry ■ ■...
- Page 27 ENGLISH Suitable detergents for each programme Programme Universal Liquid Uni‐ Liquid for Delicates Special versal coloureds woollens powder Eco 40-60 ▲ ▲ ▲ Cottons ▲ ▲ ▲ Synthetics ▲ ▲ ▲ Delicates ▲ ▲ Wool/Hand‐ ▲ ▲ wash Outdoor ▲ ▲...
- Page 28 Dryness Level Type of fabric Load Cottons and Linen up to 5 kg (bathrobes, bath towels, etc) Extra Dry For towelling materials Cottons and Linen up to 5 kg (bathrobes, bath towels, etc) Synthetics and mixed fab‐ up to 3 kg...
-
Page 29: Daily Use
ENGLISH Dryness Level Type of fabric Load (kg) Suggested Spin speed duration (rpm) (mins) 100 - 120 1600 40 - 50 1600 Synthetics and mixed fabrics 80 - 100 (jumpers, blouses, underwear, house‐ 1200 hold and bed linen) 45 - 55 1200 Delicates 100 - 120... - Page 30 11.3 Filling the detergent and default temperature, the default spin speed and the indicators of the phases additives making up the programme. 11.2 Loading the laundry 1. Open the appliance door. 2. Shake the items before you put them in the appliance.
- Page 31 ENGLISH After a washing cycle, if necessary, remove any detergent residue from the detergent dispenser. Proceed as follows 1. Open the detergent dispenser. 2. If a prewash phase is set, put the powder detergent in compartment 3. For main wash, chose the proper compartment depending on the type c) Put the tablets in the compartment of detergent:...
- Page 32 To change or cancel this declared load for the set programme (only for a few seconds), the default option: temperature, the default spin speed and the washing phase indicators (when 1. Switch the appliance off by means of available).
- Page 33 ENGLISH When the phase ends the relevant In case of in case of indicator stops flashing and is steady on. drum overload, the The next phase indicator starts flashing. maximum declared load indicator comes on again with the indicator E.g. the rinse phase is running: blinking.
- Page 34 11.11 Opening the door - When you activate the Adding garments appliance again, the display show the end of the last While a programme or the delay start selected programme. Turn operates, the appliance door is locked. the programme dial to set a new cycle.
-
Page 35: Daily Use - Washing & Drying
ENGLISH • After 5 minutes from the end of the In any case, the appliance washing programme empties the water out Press the On/Off button to activate automatically after the appliance again. approximately 18 hours. The display shows the end of the last set programme. -
Page 36: Daily Use - Drying Only
2. Touch the Start / Pause button to start the programme. The ProSense Extra dry: for cotton estimation starts. items. The time value on the display is the In the display the door locked duration of both cycles washing and indicator comes on and the indicator of drying. - Page 37 ENGLISH 13.3 Timed Drying The indicators You can also exclude the automatic appear in the display. drying mode, and choose a drying time manually: When drying a big amount of laundry, to have good drying 1. Tap on the Time Dry button performances, make sure repeatedly to set the desired time that the laundry itself is not...
-
Page 38: Fluff In The Fabrics
14. FLUFF IN THE FABRICS During the washing and/or drying phase, • Clean the drain filter. some types of fabric, (sponge, wool, • After the drying phase, clean the sweatshirt) could release fluff. empty drum, the gasket and the door with a wet cloth. - Page 39 ENGLISH 15.2 Stubborn stains other treatments without exceeding the indicated maximum level ( For some stains, water and detergent is • Do not mix different types of not sufficient. detergents. We recommend that you pre-treat these • Use less detergent if: stains before you put the items in the –...
-
Page 40: Care And Cleaning
15.6 Prepare the drying cycle • speed of the last spin • dryness level • Open the water tap. • type of laundry • Check if the drain hose is connected • weight of the load properly. Refer to installation chapter for more information. - Page 41 ENGLISH 16.3 External cleaning After each cycle, keep the door and the detergent dispenser slightly ajar to get air Clean the appliance with mild soap and circulation and dry the humidity inside warm water only. Fully dry all the the appliance: this will prevent mildew surfaces.
- Page 42 Machine Clean programme. 16.6 Door seal This appliance is designed with a self cleaning draining system, allowing light fluff fibers that fall off the clothes to be drained out with the water. Regularly examine the seal. Coins, buttons, other small items can be recovered at the end of the cycle.
- Page 43 ENGLISH CAUTION! Press the bottom cover as indicated in the picture. Make sure that it is closed properly. CLICK 6. Turn the dispenser up side down and open the bottom cover as indicated in the picture. 9. Reassembly the drawer as follows: a.
- Page 44 Clean the drain pump if: • The appliance does not drain the water. • The drum does not turn. • The appliance makes an unusual noise because of the blockage of the drain pump. • The display shows the alarm code WARNING! •...
- Page 45 ENGLISH occasionally to remove any deposit, collected over the time: 1. Remove the inlet hose from the tap and clean the filter. 11. Put the filter back into the special guides by turning it clockwise. Make sure that you tighten the filter correctly to prevent leakages.
-
Page 46: Troubleshooting
16.11 Frost precautions If the appliance is installed in an area where the temperature can reach the values around 0° C or drop below, remove the remaining water from the inlet hose and the drain pump. 1. Disconnect the mains plug from the mains socket. - Page 47 ENGLISH With some problems, the display shows an alarm code and the Start / Pause button may flash continuously: If the appliance is overloaded, remove some items from the drum and/or keep pressed the door while touching the Start / Pause button until the indicator stops flashing (see the picture below).
- Page 48 • The programme was not finished properly or the appliance stopped too early. Switch the appliance off and on again. Internal fail. No com‐ • If the alarm code appears again, contact the Authorised Serv‐ munication between ice Centre.
- Page 49 ENGLISH Problem Possible solution • Make sure that a washing programme that ends with water in tub, has not been selected. • Make sure that the washing programme is finished. • Set the drain or the spin programme if there is water in the You cannot open the drum.
- Page 50 Problem Possible solution The fabrics washed in the previous cycle released fluff of a differ‐ ent colour: The laundry is full of • The drying phase helps to eliminate some fluff. different colours fluff. • Clean the clothes with a fluff remover.
-
Page 51: Consumption Values
ENGLISH 18. CONSUMPTION VALUES 18.1 Introduction See the web link www.theenergylabel.eu for detailed information about Energy Label. 18.2 Legend Laundry load. hh:mm Programme duration. Energy consumption. °C Temperature in the laundry. Litres Water consumption. Spin speed. Remaining moisture at the end of the cycle. The higher is the spin speed, the higher is the noise and the lower is the remaining moisture at the end of washing cycle. - Page 52 Eco 40-60 pro‐ gramme and Litres hh:mm °C Cupboard dry level Half load 1.750 42.0 04:20 0.00 32.0 1600 1) Maximum spin speed. Power consumption in different modes Off (W) Stand-by (W) Delay start (W) 0.50 0.50 4.00 Time to Off/Standby mode is 15 minutes maximum.
-
Page 53: Quick Guide
ENGLISH 18.5 Common programmes - Wash and dry These values are indicative only. Programme Litres hh:mm °C Synthetics 1.800 70.0 03:25 1.00 40.0 1200 40°C 1) Maximum spin speed. 19. QUICK GUIDE 19.1 Daily use • Connect the mains plug to the mains •... - Page 54 19.2 Cleaning the drain pump filter 180˚ Clean the filter regularly and, especially, if the alarm code appears on the display. 19.3 Programmes Programmes Load Product description Low energy cycle for cottons. Decreases tem‐ 8.0 kg perature and extends time to reach good Eco 40-60 washing results.
-
Page 55: Environmental Concerns
ENGLISH Programmes Load Product description All fabrics, except woollens and very delicate 8.0 kg fabrics. Programme for rinsing and spinning. Rinse To spin the laundry and to drain the water in 8.0 kg the drum. All fabrics, except woollens and del‐ Spin/Drain icate fabrics. - Page 56 www.aeg.com/shop...