Olympus CAMEDIA C-3030 Zoom Instructions Manual
Olympus camedia c-3030 zoom: instruction manual
Hide thumbs
Also See for CAMEDIA C-3030 Zoom:
- Instruction manual (80 pages) ,
- Manual (30 pages) ,
- Brochure & specs (9 pages)
Table of Contents
Advertisement
INSTRUCTIONS
DIGITAL CAMERA
C-3030ZOOM
Before using your camera, read this manual carefully to ensure correct
use.
We recommend that you take test shots to get accustomed to your
camera before taking important photographs.
PREPARATION
BASIC FUNCTIONS
MOVIE FUNCTIONS
STORING DATA FOR PRINTING
PICTURES
USING A PERSONAL COMPUTER
CAMERA SETTINGS
MISCELLANEOUS
Advertisement
Table of Contents

Related Manuals for Olympus CAMEDIA C-3030 Zoom


Summary of Contents for Olympus CAMEDIA C-3030 Zoom
-
Page 1: Digital Camera
INSTRUCTIONS DIGITAL CAMERA C-3030ZOOM Before using your camera, read this manual carefully to ensure correct use. We recommend that you take test shots to get accustomed to your camera before taking important photographs. PREPARATION BASIC FUNCTIONS MOVIE FUNCTIONS STORING DATA FOR PRINTING... -
Page 2: Important Safety Instructlons
IMPORTANT SAFETY INSTRUCTlONS Thank you for purchasing an Olympus digital camera. Before you start to use your new camera, please read these instructions carefully to obtain optimum performance and a longer service life from the unit. Be sure to retain this manual for future reference. - Page 3 1. Read Instructions — All the safety and operating instructions should be read before the product is operated. 2. Retain Instructions — The safety and operating instructions should be retained for future reference. 3. Heed Warnings — All warnings on the product and in the operating instructions should be adhered to.
- Page 4 10. Grounding or Polarization — This product, when used with an optional AC adapter, may be equipped with a polarized alternating-current line plug (a plug having one blade wider than the other). This plug will fit into the power outlet only one way. This is a safety feature. If you are unable to insert the plug fully into the outlet, try reversing the plug.
- Page 5 16. Damage Requiring Service — If using the optional AC adapter, unplug this product from the wall outlet and refer servicing to qualified service personnel under the following conditions: a) If liquid has been spilled, or objects have fallen into the product. b) If the product has been exposed to rain or water.
- Page 6 • Connect the equipment to an outlet on a circuit different from that to which the receiver is connected. Only the Olympus RS-232C serial cable or Olympus USB cable should be used to connect the camera to a personal computer (PC).
- Page 7 • No part of this publication may be reproduced or reprinted except for personal use without the prior permission of Olympus. • Olympus makes no representations or warranties regarding any damages, or benefit expected by using this unit lawfully, or any request from a third person, which are caused by the inappropriate use of this unit.
-
Page 8: For Safe Use
BATTERY HEAT GENERATION, FIRE, EXPLOSION, ELECTRIC SHOCK OR BURNING. DANGER 1. WHEN USING NiMH BATTERIES, USE OLYMPUS BRAND NiMH BATTERIES AND CHARGER. 2. DO NOT LOAD OR USE BATTERIES WITH THEIR +/– TERMINALS UPSIDE DOWN. DO NOT LOAD BATTERIES FORCEFULLY. - Page 9 WARNING 1. DO NOT ALLOW BATTERIES TO COME IN CONTACT WITH WATER OR SEA WATER. 2. BATTERY FLUID MAY LEAK, GENERATING HEAT AND POSSIBLY CAUSING A FIRE OR EXPLOSION. • DO NOT USE NON-RECOMMENDED BATTERIES. • DO NOT THROW BATTERIES INTO A FIRE, OR EXPOSE TO HEAT. DO NOT DISASSEMBLE THE UNIT WITH BATTERIES INSIDE.
- Page 10 CAUTION 1. OLYMPUS NiMH BATTERIES ARE FOR USE WITH OLYMPUS DIGITAL CAMERAS ONLY. DO NOT USE THEM WITH OTHER EQUIPMENT. 2. DO NOT APPLY PHYSICAL SHOCK TO BATTERIES. 3. DO NOT USE CHARGEABLE AND UNCHARGEABLE BATTERIES OR BATTERIES OF DIFFERENT CAPACITIES/KINDS/BRANDS MIXED TOGETHER.
- Page 11 CONTINUOUSLY. YOU MAY GET BURNED. 7. IF YOU DROP THE CAMERA IN WATER OR GET WATER INSIDE IT, UNLOAD THE BATTERIES IMMEDIATELY AND CONTACT YOUR NEAREST OLYMPUS SERVICE CENTER. LEAVING BATTERIES IN A WET CAMERA MAY CAUSE FIRE OR ELECTRIC SHOCK.
-
Page 12: Care And Storage
AVOID BEING BURNED. (WHEN UNLOADING BATTERIES, DO IT OUTSIDE AWAY FROM FLAMMABLE OBJECTS, AND DO NOT TOUCH BATTERIES WITH YOUR BARE HANDS.) CONTACT YOUR NEAREST OLYMPUS SERVICE CENTER IMMEDIATELY. 2. NEVER ATTEMPT TO DISASSEMBLE THIS CAMERA. IT CONTAINS HIGH-VOLTAGE CIRCUITRY THAT MAY CAUSE ELECTRIC SHOCK AND INJURY. -
Page 13: Battery Handling
BATTERY HANDLING For the battery, use 2 CR-V3 lithium battery packs or 4 AA NiMH batteries, NiCd batteries, alkaline batteries or lithium batteries. Performance will be limited with alkaline batteries, especially in low temperatures. NiMH batteries are recommended. AA manganese batteries cannot be used. Use the batteries correctly. -
Page 14: Table Of Contents
CONTENTS Important safety instructlons...2 For safe use...8 Care and storage ...12 Battery handling...13 Main features...19 PREPARATION ...21 Checking the contents ...22 Names of parts ...24 Attaching the strap...27 Loading the batteries ...28 Using the AC adapter (optional) ...30 Inserting SmartMedia ...32 Adjusting the date and time ...34 Learning the basics ...36 Basic operating procedure...36... - Page 15 Shutter priority mode ...59 Manual mode...61 Zoom ...62 Exposure compensation ...63 Using the flash...64 Spot metering mode ...68 Macro mode...69 Macro + Spot metering mode ...70 Manual focus ...71 Still picture record menu...73 Sequence mode ...74 Selftimer/Remote control ...76 Auto bracket ...80 White balance...82 ISO ...84 Flash correction ...86...
- Page 16 CONTENTS (Cont.) Slide-show mode ...115 Picture information...116 Recording sound...118 Card setup ...120 All-frame erase ...120 Card format...122 Connecting to a television ...124 MOVIE FUNCTIONS ...127 [Record Mode] Recording movies...128 Recording movies using the LCD monitor ...128 Quick view ...130 Focus lock ...131 Working range ...132 Zoom ...133 Exposure compensation ...134...
- Page 17 STORING DATA FOR PRINTING PICTURES ...165 About print settings...166 Print-reserve ...168 All-frame print reserve ...168 Single-frame print reserve ...170 Trimming print reserve...174 Resetting print reserve...177 USING A PERSONAL COMPUTER ...179 Computer system requirements ...180 Installing provided software ...181 Connecting to a personal computer...182 Using a personal computer...183 Transferring data from SmartMedia...184 PC card adapter ...184...
- Page 18 CONTENTS (Cont.) CAMERA SETTINGS ...192 All reset...194 Custom settings...196 Sharpness ...199 TIFF settings...200 SQ1, SQ2 settings...202 Beep sound ...204 Full-time AF ...205 Rec view ...207 File number...212 LCD brightness...215 Meters/Feet selection ...217 Index-display adjustment...218 MISCELLANEOUS ...219 Questions and answers ...220 Troubleshooting...222 System chart...226 Error codes ...227...
-
Page 19: Main Features
Sequential shooting at high shutter speeds (max. 3.3 frames/second) is possible in all modes except TIFF. The Olympus high-resolution 3X optical zoom lens plus the Digital Zoom make possible photographs equivalent to 7.5X zoom. Movie function incorporated that lets you record up to approx. - Page 20 MAIN FEATURES (Cont.) USB-compatible. Either a serial or USB interface can be used to connect to a personal computer. Write times are shorter, enabling the camera to be ready for the next shot quicker. When the FL-40 extension flash (optional) is used, sophisticated flash photographs can be taken.
-
Page 21: Preparation
PREPARATION... -
Page 22: Checking The Contents
CHECKING THE CONTENTS Camera Remote control Warranty card Instructions/Remote control instructions Software CD’s Strap A/V cable Lens cap CR-V3 lithium battery pack (2 packs) USB cable... - Page 23 SmartMedia (SSFDC-16MB) Index labels (2 pieces) Instructions Static-free case Write-protect adhesive seals (4 pieces)
-
Page 24: Names Of Parts
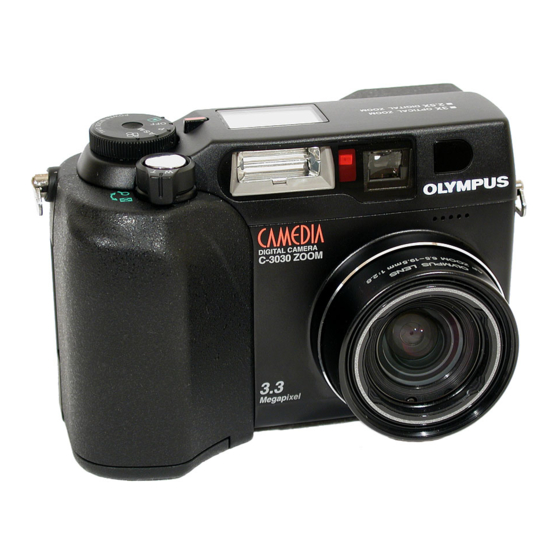
NAMES OF PARTS CAMERA Control panel (P. 26) Zoom lever (P. 62/133) Flash (P. 64) Extension flash connector cover (P. 90) (The connector is located beneath the cover.) Card compartment cover (P. 32) Selftimer/Remote control signal (P. 76/138) Remote control window (P. -
Page 25: Viewfinder Display
Flash button (P. 64) / Erase button (P. 113) Spot/Macro button (P. 68) / Print button (P. 168) Viewfinder (P. 25) LCD monitor (P. 26) Battery compartment cover (P. 28) Battery compartment open/close switch (bottom) (P. 28) VIEWFINDER DISPLAY Autofocus mark (p. 48/53/131)/ Backlighting correction mark (p. -
Page 26: Control Panel
NAMES OF PARTS (Cont.) CONTROL PANEL Slow shutter synchroniza- tion flash (P. 88) Manual focus (P. 71/135) Flash mode (P. 64) Macro mode (P. 69) Spot metering mode (P. 68) Sequential shooting (P. 74) Selftimer/ Remote control (P. 76/138) Recording mode (P. -
Page 27: Attaching The Strap
• Attach the strap correctly as shown so that the camera does not fall off. If the strap is attached incorrectly and the camera comes loose and falls off, Olympus is not responsible for any damage. Thread the strap through the... -
Page 28: Loading The Batteries
LOADING THE BATTERIES This camera uses 2 CR-V3 lithium battery packs or 4 AA NiMH batteries, NiCd batteries, alkaline batteries or lithium batteries. When using AA When using lithium batteries battery packs Make sure that the camera power is off. Slide the opening and closing switch on the battery cover in the direction of... - Page 29 Note: • CR-V3 lithium battery packs cannot be charged. • Alkaline batteries have a lot of variation in their performance and deteriorate particularly at low temperatures. It is recommended that lithium battery packs or NiMH batteries be used. • Manganese batteries cannot be used. Please read the cautions concerning batteries.
-
Page 30: Using The Ac Adapter (Optional)
USING THE AC ADAPTER (Optional) An optional Olympus AC adapter allows you to power your digital camera from a common AC wall outlet. AC wall outlet Power plug Connection cord plug AC adapter Note: • When in use for long periods, the AC adapter may get warm. This is normal. - Page 31 Warning: Incorrect use may cause a fire or electric shock. • Be sure to use an Olympus AC adapter. Olympus is not responsible for any damage caused by the use of other kinds of AC adapters. • Use an AC120V power source.
-
Page 32: Inserting Smartmedia
INSERTING SmartMedia Insert the SmartMedia card in the direction shown. Insert SmartMedia. Push the card to eject it. Make sure that the camera power is off. Open the Card compartment cover. Insert the SmartMedia card in the direction shown in the illustration. - Page 33 Note: • Use 3V (3.3V) cards only. 5V cards cannot be used. • Olympus brand cards are recommended (already formatted). Non- Olympus brand cards must be formatted by the camera. • When using a special function SmartMedia card (optional), insert it in the same way.
-
Page 34: Adjusting The Date And Time
ADJUSTING THE DATE AND TIME You can adjust the date and time. LCD monitor F2.8 1/800 + 2.0 CARD SETUP MODE SETUP SETUP A/S/M MODE 3 / 3 (Still picture record menu) Remove the lens cap. Set the Mode dial to P, A/S/M, •... - Page 35 SETUP m/ ft [ 3 / 3 ] Caution: • The adjusted date will be canceled when the camera is left without batteries for approx. one hour (based on our tests). In such a case, adjust the date again. Note: •...
-
Page 36: Learning The Basics
LEARNING THE BASICS BASIC OPERATING PROCEDURE Note: • Do not turn on the power without removing the lens cap first. • NEVER open the card cover, eject the card, remove the batteries, or pull the plug while the camera is in operation (while the Card access lamp is blinking). -
Page 37: How To Use The Mode Dial
HOW TO USE THE MODE DIAL You can easily turn the camera on or off or change the mode using the Mode dial. Aperture priority Shutter priority Manual Program Power off P or A/S/M (Still picture recording) (p. 48 ~ 107) With P, the camera selects the optimal aperture and the shutter speed automatically. -
Page 38: Holding The Camera
LEARNING THE BASICS (Cont.) HOLDING THE CAMERA Hold the camera firmly with both hands while keeping your elbows at your sides to prevent the camera from moving. Proper Improper Note: • Do not subject the lens to physical shocks. • Keep your fingers and the strap away from the lens and flash. •... -
Page 39: Adjusting The Diopter
ADJUSTING THE DIOPTER Diopter adjustment dial Viewfinder Autofocus mark PROPER SHUTTER RELESE Press the Shutter release button halfway to lock the focus and exposure. Press the Shutter release button fully to release the shutter and take the picture. Note: • Press the Shutter release button gently using the ball of your finger. •... -
Page 40: Checking The Card
LEARNING THE BASICS (Cont.) CHECKING THE CARD When the power is turned on in the Record Mode, the camera checks the SmartMedia card. Control panel Viewfinder LCD monitor CARD NO [ OFF ] SETUP When there is no SmartMedia card Card error in the camera / the card is protected: The Card error indicator on the... -
Page 41: Checking The Batteries
CHECKING THE BATTERIES When the power is turned on in the Record Mode, the remaining battery power will be displayed on the control panel. lights and turns off automatically. Batteries are OK. You can shoot. blinks and other indicators on the control panel are displayed normally. -
Page 42: Checking The Number Of Storable Pictures
LEARNING THE BASICS (Cont.) CHECKING THE NUMBER OF STORABLE PICTURES When the power is turned on in the Still Picture Record Mode, the number of storable pictures will appear on the control panel. (For movie pictures, the seconds remaining will appear.) •... - Page 43 Number of Still Pictures that can be Taken Recording mode 2048 x 1536 1600 x 1200 TIFF 1280 x 960 1024 x 768 640 x 480 2048 x 1536 2048 x 1536 HIGH (quality) 1600 x 1200 NORMAL HIGH (quality) 1280 x 960 NORMAL HIGH (quality)
-
Page 44: How To Use The Menu
LEARNING THE BASICS (Cont.) HOW TO USE THE MENU To move the cursor vertically. Jog dial To move the cursor horizontally. Set the Mode dial. Press the Menu button to display the Menu. Press the top/bottom arrows on the Jog dial to select the item to adjust. - Page 45 Scroll Scroll Note: • When the Mode dial is set to to display the Menu. • In the Record Mode, you can take pictures without pressing the OK button. The adjustment will be valid until the Menu is canceled. • Press the Menu button without pressing the OK button to cancel the adjustment and the Menu.
-
Page 47: Basic Functions
BASIC FUNCTIONS... -
Page 48: [Record Mode] Taking Pictures
TAKING PICTURES TAKING PICTURES USING THE OPTICAL VIEWFINDER Viewfinder Autofocus mark Set the Mode dial to P or A/S/M. Compose the picture by placing the subject within the autofocus viewfinder or using focus lock. (p. 53) • Turn the Diopter adjustment dial to see the Autofocus mark clearly. - Page 49 Caution: • NEVER open the card cover, eject the card, remove the batteries, or pull the plug while the Card access lamp is blinking. Note: • When the Orange lamp next to the viewfinder blinks, the flash is being charged. (p. 64) •...
-
Page 50: Taking Pictures Using The Lcd Monitor
TAKING PICTURES (Cont.) TAKING PICTURES USING THE LCD MONITOR LCD monitor P F2.8 1/800 + 2.0 Number of storable pictures Image memory blocks Shutter Set the Mode dial to P or A/S/M. With P, press the LCD monitor ON/OFF button to turn on the LCD monitor. - Page 51 LCD monitor P F2.8 1/800 + 2.0 Note: • Do not push the LCD monitor forcibly. • Pictures that appear on the LCD monitor are for composition purposes only. • It is recommended to use the optical viewfinder for less camera movement and battery consumption.
-
Page 52: Quick View
TAKING PICTURES (Cont.) QUICK VIEW You can immediately shift from the Record Mode to the Display mode, and check the picture you have just taken. When the Mode dial is set to P or A/S/M, quickly press the LCD monitor ON/OFF button twice. -
Page 53: Focus Lock
FOCUS LOCK If your main subject is not within the autofocus marks, follow the procedure below to obtain focus. This is called focus lock. Viewfinder Autofocus mark Note: • If the Green lamp blinks, the focus or exposure is not locked. Check the working distance. -
Page 54: Autofocus
AUTOFOCUS There are certain conditions where the autofocus may not work properly even when the Green lamp lights when the Shutter release button is pressed halfway. When this happens, try the procedure below or use Manual focus. (p. 71) 1 Subjects with low contrast Lock the focus on an object that is at the same distance from the camera as the subject, then aim at the subject to take the picture. - Page 55 3 Subjects in excessively bright light Lock the focus on an object that is at the same distance from the camera as the subject, then aim at the subject to take the picture. (p. 53) 4 Subjects at different distances Lock the focus on an object that is at the same distance from the camera as the subject, then aim at the subject to take the picture.
-
Page 56: Working Range
WORKING RANGE The viewfinder’s picture frame shows the area that can be shot for subjects at ∞. However, the picture area will move lower in the viewfinder as you get closer to the subject, especially with Telephoto shooting. Viewfinder Take pictures at a distance between 8" ~ •... -
Page 57: Ae Lock
AE LOCK You can take a picture of a subject with a different exposure than that set with focus lock. Green lamp Note: • If the Shutter release button is released after being pressed halfway, the exposure setting will be canceled even if it was stored in memory. •... -
Page 58: Aperture Priority Mode
APERTURE PRIORITY MODE You can set the aperture manually for the Aperture priority mode. It is especially useful for taking portrait pictures with blurred backgrounds. Aperture A F2.8 1/800 1/800 Note: • When the flash is set to fire automatically, the shutter speed will not go below 1/30 second. -
Page 59: Shutter Priority Mode
SHUTTER PRIORITY MODE You can set the shutter speed manually for the Shutter priority mode. Set it to a fast speed to capture a moving object. Set it to a slow speed to express motion. Shutter speed 1/800 + 2.0 F 2 . - Page 60 SHUTTER PRIORITY MODE (Cont.) When the Mode dial is set to A/S/M, ISO is set to 100 automatically. The ISO setting can be selected from 100, 200 or 400. (P. 84) Changing the ISO setting does not affect the shutter speed setting. Available shutter speed settings: 1 to 1/800 second.
-
Page 61: Manual Mode
MANUAL MODE You can set the aperture and shutter speed manually in the Manual mode. It is especially useful for taking portrait pictures with blurred backgrounds or expressing motion. Exposure Shutter speed differential (see the first Aperture note below) M F2.8 1/800 –3.0 Note: •... -
Page 62: Zoom
ZOOM You can select Telephoto or Wide-angle with the 3X zoom lever. Note: • When used with the Digital zoom mode, you can take an approx. 7.5X zoom photograph. (p. 96) • Unless OFF is selected in All Reset, the setting will be canceled when the power is turned off. -
Page 63: Exposure Compensation
EXPOSURE COMPENSATION In addition to automatic exposure, you can also adjust it manually by +/– 2 (approx. 1/3 steps). Adjust + to increase the exposure, and – to decrease the exposure. Confirm the settings by turning on the LCD monitor. Exposure compensation P F2.8 1/800 + 2.0 Note:... -
Page 64: Using The Flash
USING THE FLASH When the shutter button is pressed halfway, the orange lamp next to the finder lights up when use of the flash is necessary. Select a flash mode to match the photographic conditions and purpose. You can select the following flash modes with each press of the Flash mode button. - Page 65 AUTO-FLASH The flash will fire automatically in low-light and backlight conditions. Viewfinder When you take a picture that is backlit, position the subject within the backlighting correction marks to fire the flash. RED-EYE REDUCING FLASH This mode significantly reduces the phenomenon of “red-eye”. Note: •...
- Page 66 USING THE FLASH (Cont.) FILL-IN FLASH (FORCED ACTIVATION) The flash fires regardless of available light. For example, this mode can be used to brighten up the subject’s shaded face. Another use of this mode is to correct the color shift produced by artificial lights (eg. fluorescent light).
-
Page 67: Selecting The Flash Mode
SELECTING THE FLASH MODE Orange lamp Note: • Unless OFF is selected in All Reset, the setting will be canceled and reset to Auto-Flash when the power is turned off. (p. 194) Set the Mode dial to P or A/S/M. With each press of the Flash mode button, the flash mode will switch from Auto-Flash to... -
Page 68: Spot Metering Mode
SPOT METERING MODE The Spot metering mode is used to obtain the right exposure regardless of the backlight. Place the subject in the center of the autofocus marks. You can select the following modes with each press of the Spot/Macro button. Digital ESP metering/Autofocus Spot metering mode Macro mode (p. -
Page 69: Macro Mode
MACRO MODE You can get as close as 8" to your subject. An approx. 2.4" x 3" subject can be photographed almost fully within the frame. Control panel Note: • When using the flash in the Macro mode, the flash may not have the proper effect. -
Page 70: Macro + Spot Metering Mode
MACRO + SPOT METERING MODE Use this mode when you want to use the Spot metering mode and your subject is closer than 31". Control panel Note: • Unless OFF is selected in All Reset, the setting will be canceled when the power is turned off. -
Page 71: Manual Focus
MANUAL FOCUS With Manual focus, you can select a pre-adjusted focal length. It is especially useful when quick shooting is required. P F2.8 1/800 + 2.0 Control panel Set the Mode dial to P or A/S/M. Press the OK button to display the focus mode selection screen on the LCD monitor. - Page 72 MANUAL FOCUS (Cont.) P F2.8 1/800 + 2.0 Note: • The picture may become out of focus when the Zoom lever is pressed after Manual focus is selected. In such a case, readjust the distance using the Jog dial. • Unless OFF is selected in All Reset, the setting will be canceled and reset to auto focus when the power is turned off.
-
Page 73: Still Picture Record Menu
STILL PICTURE RECORD MENU * Press the Menu button to set the following items when the Mode dial is set to A/S/M or P. (p. 44) Monitor display Using the Sequence mode (p. 74), DRIVE Selftimer/Remote control (p. 76) or Auto bracket (p. 80). Selecting the white balance. -
Page 74: Sequence Mode
SEQUENCE MODE In the Sequence mode, the camera takes pictures sequentially while the Shutter release button is pressed. Sequential shooting at high shutter speeds (max. 3.3 frames/second) is possible in all modes except TIFF. F2.8 1/800 + 2.0 DRIVE SLOW 1 / 3 Control panel Set the Mode dial to P or A/S/M. - Page 75 Note: • The main flash cannot be used in the Sequence mode. • When using an extension flash, set the speed fast enough to follow the sequential shooting. • Since the LCD monitor’s picture blacks out while taking pictures in the Sequence mode, use the viewfinder to take pictures in this mode.
-
Page 76: Selftimer/Remote Control
SELFTIMER/REMOTE CONTROL Use a tripod to hold the camera securely. F2.8 1/800 + 2.0 DRIVE SLOW 1 / 3 Control panel Set the Mode dial to P or A/S/M. Press the Menu button to display the Menu. Press the top/bottom arrows on the Jog dial to select DRIVE. - Page 77 Note: • Unless OFF is selected in All Reset, the setting will be canceled when the power is turned off. (p. 194) Press the left arrow on the Jog dial to confirm the setting. Press the OK button to save the setting and cancel the Menu.
- Page 78 SELFTIMER/REMOTE CONTROL (Cont.) TAKING A PICTURE USING THE SELFTIMER Selftimer/Remote control signal Shutter release button Menu button Note: • The Selftimer/Remote control mode will be canceled after a picture is taken using the Selftimer. When the shutter is released, the Selftimer/Remote control signal lights for approx.
- Page 79 TAKING A PICTURE USING THE REMOTE CONTROL 16.4ft Remote control window Selftimer/Remote control signal Note: • The Selftimer/Remote control mode will remain after a picture is taken using the Remote control. • The working distance may be reduced in brightly lit areas, such as under direct sunlight.