Table of Contents
Advertisement
Quick Links
Baby Proofing Product Instructions
Read all instructions before using these products.
KEEP INSTRUCTIONS FOR FUTURE USE.
WARNING:
could result in death or serious injury.
• Read these warnings and instructions carefully before installing
and using these products.
• Adult installation required. Keep small parts away from children
during installation.
• Properly store any extra or unused components out of reach of
children.
• These products will not necessarily prevent all accidents and are
only a deterrent. They are not a substitute for adult supervision.
• STOP using these products when the child is old enough to
defeat them.
• These products are NOT toys. DO NOT allow children to play
with them.
• DO NOT use cabinet, drawer or multi-purpose latch products to
guard against toxic and dangerous substances or sharp-edged or
pointed objects. Such objects should be placed out of the reach
of children.
• Frequently check that these products are working properly.
• Replace these products if they become damaged, broken, or fail
to function properly.
NOTES:
• Adhesive may remove finish from some surfaces so test on small
area first.
• For best performance, the mounted adhesive must be left to fully
adhere for 48 hours before first use.
© 2023 Evenflo Company, Inc.
Failure to follow these warnings and instructions
Visit evenflo.com for more
Baby Proofing support:
25701754 01/23
Advertisement
Table of Contents

Related Manuals for Evenflo 67010001


Summary of Contents for Evenflo 67010001
- Page 1 • Adhesive may remove finish from some surfaces so test on small area first. • For best performance, the mounted adhesive must be left to fully adhere for 48 hours before first use. © 2023 Evenflo Company, Inc. 25701754 01/23...
-
Page 2: Table Of Contents
TABLE OF CONTENTS 2-PACK OUTLET COVERS ............3 (SKU# 67010001) CABINET & DRAWER LATCHES ............4 (SKU# 67010002) FINGER & HAND PINCH GUARD ............7 (SKU# 67010003) 2-PACK TV OR FURNITURE WALL STRAPS ............8 (SKU# 67010005) 2-PACK FURNITURE WALL ANCHORS ............ -
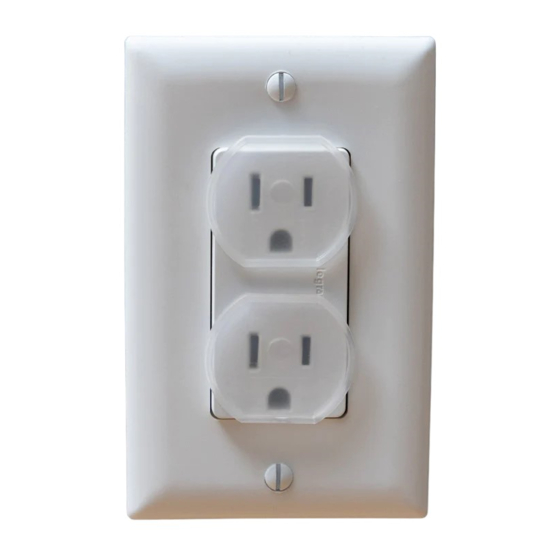
Page 3: 2-Pack Outlet Covers (Sku# 67010001)
2-PACK OUTLET COVERS WARNING: RISK OF FIRE OR ELECTRIC SHOCK. • If the Outlet Cover falls out of or fits loosely in the receptacle, the receptacle contacts may be worn or broken. • To reduce the risk of fire or injury caused by overheating, arcing or exposure of live plug blades, do not use receptacle until it has been checked by a licensed electrician. -
Page 4: Cabinet & Drawer Latches (Sku# 67010002)
CABINET & DRAWER LATCHES WARNING: Failure to follow these warnings and instructions could result in death or serious injury. • This device is intended to restrict access by young children to the contents of a cabinet or drawer, but some children may still be able to defeat it. - Page 5 CABINET & DRAWER LATCHES (continued) 4. Determine the correct position for the catch to lock the latch. The tip of the latch should grasp the tip of the catch, keeping the cabinet door secure. Place the catch following the same steps above. 5.
- Page 6 CABINET & DRAWER LATCHES (continued) 4. Determine the correct position for the catch to lock the latch. The tip of the latch should grasp the tip of the catch, keeping the drawer secure. Place the catch following the same steps above. 5.
-
Page 7: Finger & Hand Pinch Guard (Sku# 67010003)
FINGER & HAND PINCH GUARD INSTALLATION 1. Install Finger & Hand Pinch Guard to the top or the side of the door as shown. Ensure that the door guard is installed securely and cannot fall from door. 2. Make sure your child can not reach the Finger &... -
Page 8: 2-Pack Tv Or Furniture Wall Straps (Sku# 67010005)
2-PACK TV OR FURNITURE WALL STRAPS WARNING: Failure to follow these warnings and instructions could result in death or serious injury. • Secure Televisions and Furniture by fastening/anchoring the restraints to a stud in the wall. ALWAYS use 1 set (2 straps) of the TV or Furniture Wall Straps for each TV and/or each piece of furniture to be anchored. - Page 9 2-PACK TV OR FURNITURE WALL STRAPS (continued) A. Wall Strap End Bracket E. Bolts B. Adjuster (5 sizes, 2 each) C. Adjuster F. Washers (4) D. Wall Strap End Bracket G. Wood Screws (2 sizes, 4 each) TV-TO-WALL STUD INSTALLATION Attaching Straps to Wall Stud 1.
- Page 10 2-PACK TV OR FURNITURE WALL STRAPS (continued) brackets to be installed. Using the brackets, mark the wall through the 2 smaller holes for each strap. 3 (Total = 4 marks) 16 IN STUD STUD 5. Using a 1/8” drill bit, drill a pilot hole in all 4 locations as marked.
- Page 11 2-PACK TV OR FURNITURE WALL STRAPS (continued) 7. If the TV was moved to install the straps to the wall, move the TV back to its desired location and firmly tighten the straps as directed in the next step. 8. To tighten, pinch the adjuster B and pull the strap ensuring that the TV is securely supported and cannot tip forward.
- Page 12 2-PACK TV OR FURNITURE WALL STRAPS (continued) FURNITURE-TO-WALL STUD INSTALLATION Attaching Straps to Furniture 1. Position the strap end brackets on the back of the furniture. Using a pencil, mark the furniture through the 2 smaller holes. 8 WITHIN (Total = 4 marks) TOP 6 IN 2.
- Page 13 2-PACK TV OR FURNITURE WALL STRAPS (continued) 2. Using a 1/8” drill bit, drill a pilot hole in all 4 locations as marked. 3. Select the longest length wood screws G (see pg. 9). Using a Phillips Head Screwdriver, manually install the screws into the wall studs through the brackets, to securely attach the brackets to the wall.
-
Page 14: 2-Pack Furniture Wall Anchors (Sku# 67010006)
2-PACK FURNITURE WALL ANCHORS WARNING: Failure to follow these warnings and instructions could result in death or serious injury. • Secure Furniture by fastening/anchoring the restraint to a wood stud in the wall. ALWAYS use 1 set (2 anchors) of the Furniture Wall Anchors for each piece of furniture to be anchored. - Page 15 2-PACK FURNITURE WALL ANCHORS (continued) Using a 1/8” drill bit, drill a pilot hole in all 4 locations as marked. Select the longest length wood screws (a). Using a Phillips head screwdriver, manually install the screws into the wall studs through the brackets, to securely attach the brackets to the wall.
-
Page 16: Cabinet Slide Lock (Sku# 67010007)
CABINET SLIDE LOCK WARNING: Failure to follow these warnings and instructions could result in death or serious injury. • DO NOT use this product to guard against toxic and dangerous substances, or sharp-edged or pointed objects. Such objects should be placed out of the reach of children. INSTALLATION 1. - Page 17 CABINET SLIDE LOCK (continued) 3. Press the buttons on the Cabinet Slide Lock 4 and slide tightly into place as close as possible. 5 Pull on knobs/handles to ensure that lock is working as intended. 4. Release the buttons to lock the Cabinet Slide Lock into place against knobs/handles.
-
Page 18: Multi-Purpose Strap Latch (Sku# 67010008)
MULT-PURPOSE STRAP LATCH WARNING: Failure to follow these warnings and instructions could result in death or serious injury. • DO NOT use this product to guard against toxic and dangerous substances, or sharp-edged or pointed objects. Such objects should be placed out of the reach of children. INSTALLATION Tools Needed: Scissors 1. - Page 19 MULT-PURPOSE STRAP LATCH (continued) 4. Clean and dry the area where you plan to place the Multi-Purpose Strap Latch. 4 5. Remove adhesive backing on both sides of the latch, stick into position, press and hold firmly for 10 seconds. 5 NOTE: For best performance, the mounted adhesive must be left to fully adhere for 48 hours before first use.
-
Page 20: Stove Knob Covers (Sku# 67010009)
STOVE KNOB COVERS WARNING: Failure to follow these warnings and instructions could result in death or serious injury. • ALWAYS keep children away from the stove. • Assemble Stove Knob Covers so that the release button is pointed away from child. •... - Page 21 STOVE KNOB COVERS (continued) 3. Spread open the lower half of cover and place over the knob on your stove. 4. Snap together both sides of lower half. Listen for the “click” to ensure it is secure and firmly locked in position.
-
Page 22: Doorknob Covers (Sku# 67010010)
DOORKNOB COVERS WARNING: Failure to follow these warnings and instructions could result in death or serious injury. • DO NOT use product if damaged or broken. • Using this product on an exterior door can hinder your ability to open the door in an emergency. •... - Page 23 DOORKNOB COVERS (continued) 3. The doorknob will be visible on two sides of the Doorknob Cover for adults to grip and turn the knob. TO CLEAN Wipe with damp cloth and dry completely.
-
Page 24: Door Lever Handle Lock (Sku# 67010011)
DOOR LEVER HANDLE LOCK WARNING: Failure to follow these warnings and instructions could result in death or serious injury. • DO NOT use this product to guard against toxic and dangerous substances, or sharp-edged or pointed objects. Such substances or objects should be placed out of the reach of children. •... - Page 25 DOOR LEVER HANDLE LOCK (continued) 4. Stick the Door Lever Handle Lock in position as shown. Press firmly and hold for 10 seconds. 3 NOTE: For best performance, the mounted adhesive must be left to fully adhere for 48 hours before first use.
-
Page 26: 2-Pack Clear Furniture Corner Cushions
2-PACK CLEAR FURNITURE CORNER CUSHIONS WARNING: Failure to follow these warnings and instructions could result in death or serious injury. • Always check security of adhesive-backed guards to furniture. • Check frequently after initial installation and before use. • For indoor use only. •... - Page 27 2-PACK CLEAR FURNITURE CORNER CUSHIONS (continued) 3. Apply the Clear Furniture Corner Cushion onto each selected corner, pressing firmly for 10 seconds. 3 NOTE: For best performance, the mounted adhesive must be left to fully adhere for 48 hours before first use. TO CLEAN Wipe with damp cloth and dry completely.
-
Page 28: Foam Edge Guards (Sku# 67010013)
FOAM EDGE GUARDS WARNING: Failure to follow these warnings and instructions could result in death or serious injury. • Always check security of adhesive-backed guards to furniture or fireplace hearth. • Check frequently after initial installation and before use. • For indoor use only. •... - Page 29 FOAM EDGE GUARDS (continued) 3. Stick double-sided adhesive tape to edge protector. Press firmly and hold for 10 seconds. 3 4. Peel the paper backing off each adhesive strip once it is mounted to the Foam Edge Guard. 4 5. Align the Foam Edge Guards, pressing firmly on the table or hearth edge surface to secure.
-
Page 30: 2-Pack Foam Corner Cushions (Sku# 67010014)
2-PACK FOAM CORNER CUSHIONS WARNING: Failure to follow these warnings and instructions could result in death or serious injury. • Always check security of adhesive-backed guards to furniture or fireplace hearth. • Check frequently after initial installation and before use. •... -
Page 31: Notes
NOTES... - Page 32 1-800-233-5921 8 AM to 5 PM E.T.