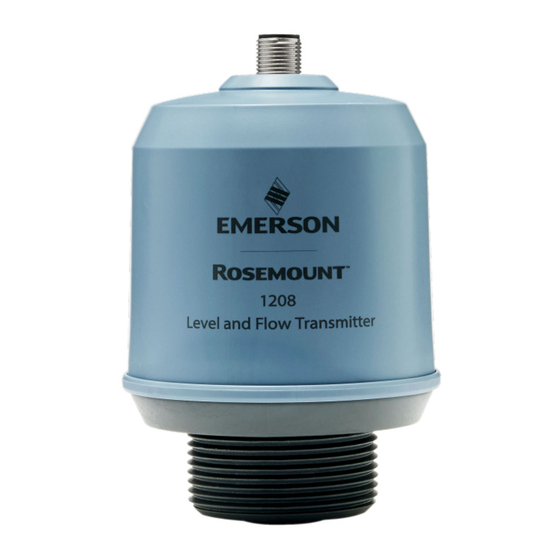
Summary of Contents for Emerson Rosemount 1208A
- Page 1 Quick Start Guide 00825-0100-7062, Rev AA June 2022 ™ Rosemount 1208A Level and Flow Transmitter Non-Contacting Radar...
-
Page 2: Table Of Contents
About this guide...........................3 Installing on a tank........................5 Prepare the electrical connections....................8 Power up transmitter......................... 10 Connect the transmitter to the IO-Link..................11 Get started with your preferred configuration tool..............12 Perform the basic setup......................14 Rosemount 1208A Level and Flow Transmitter... -
Page 3: About This Guide
June 2022 Quick Start Guide About this guide This Quick Start Guide provides basic guidelines for the Rosemount 1208A Level and Flow Transmitter. Refer to the 1208A Reference Manual for more instructions. Safety messages WARNING Failure to follow safe installation and servicing guidelines could result in death or serious injury. - Page 4 Quick Start Guide June 2022 CAUTION Hot surfaces The transmitter and process seal may be hot at high process temperatures. Allow to cool before servicing. Bracket mounting See the documentation supplied with the bracket kit. Rosemount 1208A Level and Flow Transmitter...
-
Page 5: Installing On A Tank
June 2022 Quick Start Guide Installing on a tank Mount the flange Procedure 1. Place a suitable gasket on the tank flange. 2. Place the flange over the gasket. 3. Tighten the bolts and nuts with sufficient torque for the flange and gasket choice. - Page 6 The gasket is necessary for the G threaded version only. Mount the NPT threaded adapter Procedure 1. Apply appropriate thread sealant to the outer threads. 2. Mount the threaded adapter on the tank. 60 mm Rosemount 1208A Level and Flow Transmitter...
- Page 7 June 2022 Quick Start Guide 3. Apply appropriate thread sealant to the transmitter threads. 4. Install and hand tighten the transmitter. Quick Start Guide...
-
Page 8: Prepare The Electrical Connections
OUT2 OUT1/IO-Link Table 3-1: Pin Assignment Wire color Signal Brown 24 V White OUT2 Digital output or active 4-20 mA analog output Blue Black OUT1/IO-Link Digital output or IO-Link mode According to IEC 60947-5-2. Rosemount 1208A Level and Flow Transmitter... - Page 9 June 2022 Quick Start Guide Figure 3-2: Example Circuits 2: OUT2 2: OUT2 4: OUT1 4: OUT1 2: OUT2 2: OUT2 4: OUT1 4: OUT1 A. 2 x Digital output PnP B. 2 x Digital output NpN C. 1 x Digital output PnP / 1 x Analog output D.
-
Page 10: Power Up Transmitter
Quick Start Guide June 2022 Power up transmitter Procedure Verify the power supply is disconnected. 2. Insert the M12 connector and screw tight. See the manufacturer’s instruction manual for recommended torque. 3. Connect the power supply. Rosemount 1208A Level and Flow Transmitter... -
Page 11: Connect The Transmitter To The Io-Link
June 2022 Quick Start Guide Connect the transmitter to the IO-Link IO-Link devices can be set using an IO-Link USB Communicator, through the IO-Link master, or via the PLC. Procedure Start the configuration software and connect the transmitter. Figure 5-1: Connection via the IO-Link USB Communicator Figure 5-2: Connection via the IO-Link Master Figure 5-3: Connection via the PLC Quick Start Guide... -
Page 12: Get Started With Your Preferred Configuration Tool
Alternatively, browse to an already downloaded IODD zip file, and select Open. 3. Select OK. ® /DTM framework 6.3.1 Download the IODD file Procedure 1. Download the IODD from the IODDFinder portal at Ioddfinder.io-link.com. 2. Unzip the IODD package. Rosemount 1208A Level and Flow Transmitter... - Page 13 (e.g PACTware). Prerequisites The IODD DTM Interpreter is usually included in the FDT/DTM software installation package. It can also be downloaded from Emerson.com/Rosemount1208A. Procedure 1. Start the IODD DTM Interpreter software. 2. Select Add IODD. 3. Browse to the IODD file (.xml) and select Open.
-
Page 14: Perform The Basic Setup
3. Select Write to device. 7.2.1 Reference height Distance between the Device Reference Point and Zero Level. Figure 7-1: Reference Height A. Device Reference Point B. Reference Height C. Zero Level D. 0.79 in. (20 mm) Rosemount 1208A Level and Flow Transmitter... - Page 15 June 2022 Quick Start Guide Configure the analog output The transmitter can be set to output the level or volume flow as a 4-20 mA signal. Procedure 1. Under Menu, select Parameter → OUT2 Analog Output. 2. In the OUT2 Configuration list, select Analog Output 4-20 mA. 3.
- Page 16 Quick Start Guide June 2022 3. Select Volume Flow Table/Formula, and then set the parameters as desired. 4. Select Write to device. Rosemount 1208A Level and Flow Transmitter...
- Page 17 June 2022 Quick Start Guide Quick Start Guide...
- Page 18 Quick Start Guide June 2022 Rosemount 1208A Level and Flow Transmitter...
- Page 19 June 2022 Quick Start Guide Quick Start Guide...
- Page 20 For more information: Emerson.com © 2022 Emerson. All rights reserved. Emerson Terms and Conditions of Sale are available upon request. The Emerson logo is a trademark and service mark of Emerson Electric Co. Rosemount is a mark of one of the Emerson family of companies.


