
Related Manuals for AOR AR-210

Summary of Contents for AOR AR-210
- Page 1 AR-210 MODEL TERMINAL NODE CONTROLLER OPERATING INSTRUCTIONS AOR, Ltd. Radio Communication Products & Systems...
- Page 2 "How to Identify and Resolve Radio-TV Interference Problems". This booklet is available from the U.S. Government Printing Office, Washington, D.C. 20402, Stock No. 004-000-00345-4. AR-210 Operating Instructions Copyright © 1992, AOR, Ltd. Tokyo Japan by Toshi T. Totsuka All Rights Reserved. Credits Portions of this manual was copied from the model HK-21 TNC operating manual under the accep- tance and courtesy of the Heath Company, Benton Harbour, MI., U.S.A.
-
Page 3: Table Of Contents
AR-210 Manual TABLE OF CONTENTS INTRODUCTION ................4 SPECIFICATIONS ................5 1. INSTALLATION Computer Connections ............6 Software Requirements ............9 Radio Connections ..............10 Power Source ................ 12 NiCad Battery ................ 13 2. OPERATIONAL TESTS AND ADJUSTMENT Preliminary Tests ..............14 Adjustments ................ -
Page 4: Introduction
PC/XT/AT and compatible computers. A 9 pin straight computer cable supplied with the AR-210 is for the IBM AT or compatible comput- ers, but you may need a different cable and connectors if the supplied cable does not fit your com- puter. -
Page 5: Specifications
Overall Dimensions 2½" W × 1" H × 1¼" L Net Weight 3.3 oz. AOR, Ltd. reserves the right to discontinue products and changes specifications at without incur- ring any obligation to incorporate new features in products previously sold. Page 5... -
Page 6: Installation
1. INSTALLATION Before you can perform the "Operational Test and Alignment", which follows in this section, you will have to properly connect your AR-210 (thereafter called TNC) to a terminal or a computer and run the proper terminal emulation program. - Page 7 Table 1-2 and 1-3 shows the proper cable connections for IBM PS/2, AT and compatible computers using 9-pin serial port. Use a 9-to-25 pin adaptor for connecting IBM PC, XT and compatible com- puters with a 25-pin serial port. AR-210 Signal name 9 WAY IBM COMPUTER RS232 Receive Data Transmit Data...
- Page 8 AR-210 Manual Your TNC is configured as Data Communications Equipment (DCE), while most computers are con- figured as Data Terminal Equipment (DTE). If this is true of your particular computer, you can probably connect pins 2, 3 and 5 of your TNC to pin 3, 2 and 7 respectively of your computers RS- 232C port.
-
Page 9: Software Requirements
AR-210 Manual SOFTWARE REQUIREMENTS Any software package that enables your computer to act as an ASCII terminal with an ordinary te- lephone modem should work with your TNC. If you have a program that you have successfully used with a telephone modem, and you are familiar with its operation, use that same program to communicate with the TNC. -
Page 10: Radio Connections
TAPR. SAMPLE TERMINAL SOFTWARE If you do not own any terminal software, use the sample diskette supplied with the AR-210. This sample software works under MS-DOS or PC-DOS only. The diskette also contains source code for a sample terminal program written by the MS QBasic which can be run through the QBasic pro- gram comes with MS-DOS 5.0... - Page 11 AR-210 Manual Figure 1-2 shows the connections for the RADIO socket. A cable that has a matching connector on one end fit this socket is provided. You will have to adapt the other end of the cable to fit your particular radio.
-
Page 12: Power Source
AR-210 Manual Example: YAESU (Mobile radio. - Some model requires Diode instead of pull-up resistor) Example: Mobile and Portable transceivers with multi-pin jack. Example: Portable transceiver with stereo type jack, ALINCO (Some portables) POWER SOURCE To power your TNC, you will either need the NiCad battery pack or an external power supply. An external power supply must be able to provide 10 to 13.8 VDC at 100 mA. -
Page 13: Nicad Battery
AR-210 Manual NiCad Battery The AR-210 is designed to operate on a 4.8 V NiCad battery pack. The following steps show you how to install the optional NiCad Battery pack in your TNC: 1. Turn the controller off and disconnect any external power supply. -
Page 14: Operational Tests And Adjustment
2. Turn the POWER switch ON. The PWR LED should light. Some of the other LEDs may light briefly and then extinguish. If your computers data rate is set to 1200 baud, you will see the following messages: AOR data controller AR-120 AX.25 Level 2 Version 2.0 Message board Ver 1.28E... -
Page 15: Audio Level Adjustment
The refer to Figure 2-1 and apply a small amount of solder to short the tiny foil solder pads. Rein- stall the PC board and cabinet. Figure 2-1 AR-210 CIRCUIT BOARD (1) BATT: Connector for an optional NiCad Battery. (2) JPC2: Disable Battery Back-up (Hard Reset). -
Page 16: Operation
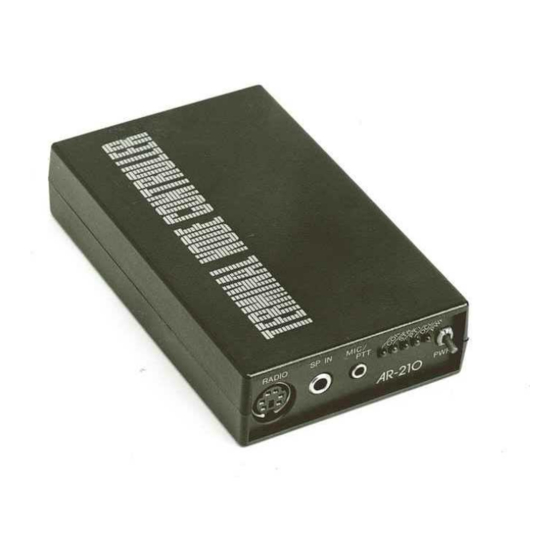
AR-210 Manual 3. OPERATION Figure 3-1 shows the front panel of your TNC and briefly describes each LED, switch and connec- tor. The following pages describe the operation of the unit and how to use the TNC to receive and transmit "packets". - Page 17 AR-210 Manual Figure 3-1 RADIO Jack Socket connection of a base or mobile radio. SP IN Jack Input connector for receiver audio from hand-held radios. MIC / PTT Jack Audio output and PTT connector for hand-held radio. Lights when the TNC is connected to another station.
-
Page 18: Terminal Characteristics
AR-210 Manual This is not intended to be an exhaustive description of every command, but rather a discussion about how the various commands are related and how you may use them. An alphabetical catalog of commands that describes the format and parameter of each is provided in the document file in the attached diskette. - Page 19 AR-210 Manual 1. The STA LED will light, indicating that the data is received from the computer. The PTT LED may also light briefly at beginning of the transmission. 2. When the transmission stops, the PTT LED will extinguish. The message you just transmitted was sent to the address specified by the UNPROTO command.
- Page 20 AR-210 Manual After an exchange of packets, you will see the message: *** DISCONNECTED This message indicates that your disconnect request packet was acknowledged by the station you were connected to. You must send a disconnect request to the station you are communicating with before you can connect to other stations or hear them (if your monitor functions are set to off).
-
Page 21: Operating Modes
AR-210 Manual Your TNC will then switch to the Converse Mode. If you now type a message, it will found into a packet and sent to W6WNE. Since you have now succeeded in getting your packet radio station on the air, read the following pages which describe the TNC operation in more detail. -
Page 22: Flow Control
AR-210 Manual will want to use the Transparent Mode (a data mode like the Converse Mode, except there are no special characters). Everything you type, or everything your computer sends to the TNC, is sent over the radio exactly as it appears to the TNC. -
Page 23: Display Options
This method of flow control is preferred, since it usually does not depend on the programming of a particular communications program. The AR-210 conforms to the TAPR TNC-2 standard which users DTR (Data Terminal Ready) instead of RTS (Request To Send). - Page 24 AR-210 Manual In the Converse Mode, it is natural to choose a line-termination character such as a <CR> or <LF> to terminate packets. For some applications, however, you may want to use an "invisible" com- mand character to force the TNC to transmit a packet.
-
Page 25: Editing Commands
The primary function on the TNC is to enable you to communicate with other stations via packet radio. The AR-210 implements the AX.25 protocol (set of rules). This protocol is designed primarily for point-to-point, two-party communications. You can also use it, however, to simulate the common amateur net or round-table type of contact. - Page 26 Automatic station identification is initially off, but you can turn it on by setting . You can make the TNC send your call sign at any time by typing The AR-210 provides a real Morse code station identifier, when you activate the CIDCON com- mand.
- Page 27 AR-210 Manual 3-12 You can specify as many as eight intermediate stations; however, keep in mind that using more than one digipeater is an extension to AX.25 and may not be compatible with other implementa- tion of this protocol. The delay between your transmission and the reception of a reply will naturally increase as more intermediate relays are used.
-
Page 28: Packet Timing Functions
If some station is monitoring beacon packets (refer to the description of the monitor mode in the document file in the floppy disk supplied with the AR-210), the operator will see this message. No beacon are sent in this mode if there is a lot of packet activity on the channel, since the required period of quiet will not occur. - Page 29 AR-210 Manual 3-14 During the time the TNC is keying the transmitter but not sending data, it will transmit a synchro- nization signal (flags). Thus the total key-up delay will only be: Key-up delay (ms) = ( TXDELAY × 10) + ( AXDELAY ×...
-
Page 30: Monitor Functions
BUDLIST commands interact, refer to their descriptions in the com- mand list on floppy disk which comes with the AR-210. To access the disk file, refer to "Commands and Messages" section of this manual for additional information. Monitored packet displayed is somewhat different from the display of connected packets. Each packet is displayed with the source and destination stations identified: W6YEY>W6UOU: Go ahead with the file transfer. -
Page 31: Using The Bulletin Board Feature
USING THE BULLETIN BOARD (BBS) FEATURE Unlike most packet TNCs that are currently available, your AR-210 has a bulletin board feature built in. This feature allows other stations to retrieve and store messages to and from them at any time in your system, which acts as a "mailbox". - Page 32 If W6WNE now connects to your BBS, for example, he will see the following message while your TNC waits for a command: WELCOME TO W6YEY-1'S MESSAGE BOARD AR-210 message board Ver. 1.28E CMD (F/K/M/R/W/B/H/?) The letter in parentheses correspond to the mnemonics of the command listed in Table 3-1.
- Page 33 AR-210 Manual 3-18 Table 3-1 Message Board Command List Command Abbreviation Parameter Default Purpose 3RDPARTY 3RD ON/OFF Inhibit 3rd party access to the BBS. Time and date stamps messages stored on DAYTIME YYMMDDHHmmss Blank the BBS. MAIL ON/OFF Turn incoming mail indicator ON/OFF.
-
Page 34: Command And Messages
AR-210 Manual 4. COMMANDS AND MESSAGES COMMAND LIST & COMMAND SYNTAX The Terminal Node Controller (TNC) uses many variable parameters, such as your call sign, termi- nal type, display preferences and the characteristics of your radio in its operation. In addition, you can command the TNC to perform several tasks, such as connecting to another station to start a conversation, disconnecting at the end of the QSO, or displaying information about itself. - Page 35 AR-210 Manual The number 10 through 15 are denoted by the hexadecimal digits A through F. For example: = 1 × 16 + 11 = 27 $120 = 1 × 16 × 16 + 2 ×16 = 288 TRACE command parameter is given as a bit-code. this means that several related values are simultaneously set in this command and the parameter is formed by adding together the numbers that correspond to each desire value.
- Page 36 AR-210 Manual KEYWORDS var A/B[C/D] This means that the command KEYWORDS requires a user supplied variable "var" and either A or B. In addition, you can optionally specify C or D. You can examine the value of any parameter by typing the command which sets this parameter ...
-
Page 37: In Case Of Difficulty
3. Improper setting of control VR3 (refer to "Tests and Adjustment" section). APPENDIX LIST OF COMMANDS AND DEFAULTS The following pages shows all commands available to the AR-210. The CLASS column indicates that: Asynchronous Port Commands and Parameters Immediate Commands... - Page 38 AR-210 Manual LIST OF COMMANDS AND DEFAULTS MNEMONIC COMMAND PARAMETER DEFAULT FUNCTION Class Note 8BITCONV On/Off The high order bit is not stripped in Converse Mode. MACRO 1 – 4 Empty Select macro channel. Up to 118 charac- ters can be stored in the macro text.
- Page 39 AR-210 Manual MNEMONIC COMMAND PARAMETER DEFAULT FUNCTIONS Class Note CMDTIME 0 – 250 Set time-out value in the Transparent Mode. CMSG On/Off Toggles the message in CTEXT when connection is established. CMSGD CMSGDISSC On/Off Toggles automatic disconnect after the TNC sends the CTEXT message.
- Page 40 AR-210 Manual MNEMONIC COMMAND PARAMETER DEFAULT FUNCTIONS Class Note DWAIT 0 – 250 0 – 250 specifies an additional durations in the digipeater operation. ECHO On/Off Toggles local echoing by the TNC when it is in the Command or Converse Mode.
- Page 41 AR-210 Manual MNEMONIC COMMAND PARAMETER DEFAULT FUNCTIONS Class Note MONITOR On/Off Packet activity is monitored when the parameter is ON. MALL On/Off Determines the class of monitored pack- ets. MAIL On/Off Enable and disable the incoming mail in- dicator. MAXFRAME 1 –...
- Page 42 AR-210 Manual NOMODE On/Off The TNC changes modes according to NEWMODE. NUCR On/Off If parameter is ON, <NULL> characters are sent to the terminal following <CR>. NULF On/Off If parameter is ON, <NULL> characters are sent to the terminal following <LF>.
- Page 43 AR-210 Manual RXBLOCK On/Off Add $FF mark in front of all incoming packets. SCREENLN 0 – 255 0 to 255 specifies a platen width, in characters, of the terminal. SENDPAC 0 – $7F Select the character used to force a packet to be sent in the Converse Mode.
- Page 44 TAPR TNC-2. The AR-210 can display the contents of the following counters in much the same way as com- mands. You can type 'DIPSP H' to see all the counters, or you can type counter name or its mnemonic.