Table of Contents
Advertisement
Electronic user's guide released subject to "Nokia User's Guides Terms and Conditions, 7th
June, 1998"
User's Guide
NOKIA and the Arrows logo are registered trademark of
Nokia Corporation, Finland.
© 1996 Nokia Mobile Phones. All rights reserved.
Nokia Mobile Phones operates a policy of continuous devel-
opment; therefore we reserve the right to make changes and
improvements to any of the products described in this guide
without prior notice.
9350586
Issue Number 6
Advertisement
Table of Contents

Related Manuals for Nokia 2110


Summary of Contents for Nokia 2110
- Page 1 Electronic user’s guide released subject to "Nokia User’s Guides Terms and Conditions, 7th June, 1998" User’s Guide NOKIA and the Arrows logo are registered trademark of Nokia Corporation, Finland. © 1996 Nokia Mobile Phones. All rights reserved. Nokia Mobile Phones operates a policy of continuous devel- opment;...
-
Page 2: Table Of Contents
Notepad Memory Locations ...40 Keying in a Name ...41 Storing a Phone Number with a Name ...44 Recalling a Phone Number from Memory ...45 Erasing the Contents of a Memory Location...47 6. Menu Functions...48 Menu Method...48 NHE-4NX (2110 model II) - Page 3 Shortcut Method... 49 Help Texts ... 50 Network Services... 51 Descriptions of Menu Functions... 51 Recent Calls (Menu 01)... 51 Dialled Calls (Menu 01 1) ... 51 Received Calls (Menu 01 2) ... 51 Missed Calls (Menu 01 3) ... 52 Erase All Recent Calls (Menu 01 4) ...
- Page 4 Restore Factory Settings (Menu 4 12) ...71 Menu List (Menu 4 13) ...72 Language (Menu 4 14) ...72 Security Options (Menu 5) ...72 PIN Code Request (Menu 5 1) ...72 Security Level (Menu 5 2) ...73 Call Barring (Menu 5 3)...75 View Fixed Dial List (Menu 5 4)...76 Fixed Dialling (Menu 5 5) ...77 Change Access Codes (Menu 5 6)...79...
-
Page 5: Important Safety Information
Users are advised to switch off the phone when at a refuelling point (service station). Users are reminded of the need to observe restrictions on the use of radio equipment in fuel NHE-4NX (2110 model II) 9350586 (en) ISSUE 5 9350637 (issue 3) - Page 6 Therefore you should never rely solely upon any cellular phone for essential communications (e.g. medical emergencies). NHE-4NX (2110 model II) 9350586 (en) ISSUE 5 9350637 (issue 3) NHK-4NX (2140) 9350693 (en)
- Page 7 The phone described in this guide is approved for use in digital cellular networks. A number of features included in this guide are called Net- work Services. They are special services provided by cellular NHE-4NX (2110 model II) 9350586 (en) ISSUE 5 9350637 (issue 3) NHK-4NX (2140)
- Page 8 NOTE ABOUT THE SECURITY CODE You can find the security code of your phone in a red enve- lope in the sales package. Keep the code in a safe place. NHE-4NX (2110 model II) 9350586 (en) ISSUE 5 9350637 (issue 3)
-
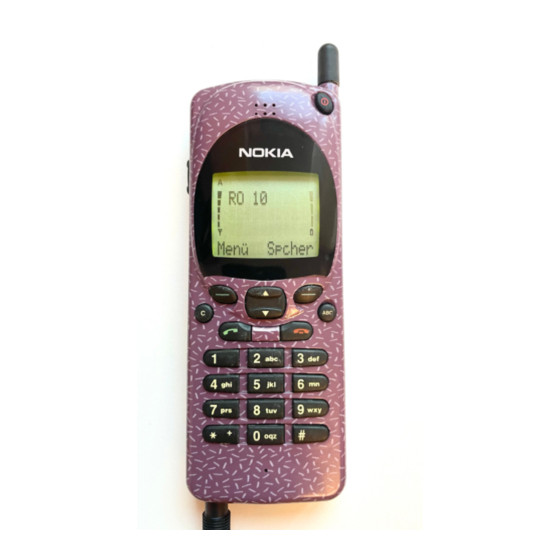
Page 9: Keys, Display And Connectors
2. Keys, Display and Connectors KEYS To operate this phone, keys are pressed one at a time. Two keys are never to be pressed simultaneously. More detailed information on each key is given later in this guide. Switches the phone on and off. Selection Keys The function of each key de- pends on the text shown on... -
Page 10: Selection Keys
Below the display there are two keys called ’selection keys’. The functions of these keys vary according to the guiding texts at the bottom of the display. Guiding texts Selection keys NHE-4NX (2110 model II) 9350586 (en) ISSUE 5 9350637 (issue 3) NHK-4NX (2140) 9350693 (en) - Page 11 For example, the Menu selection key (key under the text Menu) gains access to the menu functions and the selection key (key under the text Memory) to the memory functions. Assume you want to switch off the phone’s lights. The lights can be adjusted in the Phone Settings - Lights submenu (Menu 4 01).
-
Page 12: Display
Indicates how much charge there is left in the battery. The higher the bar, the more charge in the battery. NHE-4NX (2110 model II) 9350586 (en) ISSUE 5 9350637 (issue 3) NHK-4NX (2140) 9350693 (en) -
Page 13: Connectors
For cigarette lighter adapter and fast travel charger. Power connector for desktop charger CHH-2. System and data connector for accessories, desktop chargers and HF car kit. For external antenna. NHE-4NX (2110 model II) 9350586 (en) ISSUE 5 9350637 (issue 3) NHK-4NX (2140) 9350693 (en) -
Page 14: Getting Started
You can clear the display by pressing and holding the C key. Press the left selection key. Press four times. NHE-4NX (2110 model II) 9350586 (en) ISSUE 5 9350637 (issue 3) NHK-4NX (2140) 9350693 (en) ISSUE 3 NHE-4NY (2118) - Page 15 For more information on different menu functions, see chapter Menu Functions. NHE-4NX (2110 model II) 9350586 (en) ISSUE 5 9350637 (issue 3) NHK-4NX (2140) 9350693 (en)
-
Page 16: The Sim Card
Note: Keep all miniature SIM cards out of small children’s reach. INSTALLING THE SIM CARD Before installing the SIM card, switch off the phone (using and remove the battery. To remove the battery: NHE-4NX (2110 model II) 9350586 (en) ISSUE 5 9350637 (issue 3) NHK-4NX (2140) 9350693 (en) - Page 17 (see the picture) and that you can see the gold con- tacts of the card. Close the holder by pushing it towards the phone. NHE-4NX (2110 model II) 9350586 (en) ISSUE 5 9350637 (issue 3) NHK-4NX (2140) 9350693 (en)
-
Page 18: Charging A New Battery
To charge a new battery by using the fast travel charger ACH-4: Install the battery. Connect the lead from the charger to the bottom of your phone. NHE-4NX (2110 model II) 9350586 (en) ISSUE 5 9350637 (issue 3) NHK-4NX (2140) 9350693 (en) ISSUE 3... -
Page 19: Using The Batteries
For good operation times, discharge the battery from time to time by leaving your phone switched on until it turns itself off (or by using the battery discharge facility of any ap- NHE-4NX (2110 model II) 9350586 (en) ISSUE 5 9350637 (issue 3) - Page 20 If battery temperature exceeds 40 C the phone will not recharge the battery. Dispose of used batteries in accordance with local regula- tions. Recycle ! Do not dispose of batteries in a fire ! NHE-4NX (2110 model II) 9350586 (en) ISSUE 5 9350637 (issue 3) NHK-4NX (2140) 9350693 (en)
- Page 21 After charging, replace the cap. In some vehicles, the ignition must be on in order to charge the phone with the cigarette lighter adapter. NHE-4NX (2110 model II) 9350586 (en) ISSUE 5 9350637 (issue 3) NHK-4NX (2140) 9350693 (en)
- Page 22 The operation times are greatly affected by the signal strength of the cellular network and the parameters set by the network operator. NHE-4NX (2110 model II) 9350586 (en) ISSUE 5 9350637 (issue 3) NHK-4NX (2140)
-
Page 23: Signal Strength
The security code comes with your phone. The setting of the Security Level function in Menu 5 2 determines whether the code is requested. The security code allows access to all the NHE-4NX (2110 model II) 9350586 (en) ISSUE 5 9350637 (issue 3) - Page 24 PIN2 code is disabled and cannot be used any more. To change the code, follow the same procedure as for the PIN code. The PIN2 can be changed within Menu 5 6 3. NHE-4NX (2110 model II) 9350586 (en) ISSUE 5 9350637 (issue 3) NHK-4NX (2140)
- Page 25 The barring password is required by the Call Barring network service only. You obtain the code from your network operator when you subscribe to the service. The password can be changed within Menu 5 6 4. NHE-4NX (2110 model II) 9350586 (en) ISSUE 5 9350637 (issue 3) NHK-4NX (2140)
-
Page 26: General Functions
For more information on different security levels, see Security Options - Security Level (Menu 5 2) in chapter Menu Functions. NHE-4NX (2110 model II) 9350586 (en) ISSUE 5 9350637 (issue 3) NHK-4NX (2140) 9350693 (en) ISSUE 3... -
Page 27: Switching Off
Network Selection (Menu 7) and perform automatic or manual network selection. See Network Selection (Menu 7) in chapter Menu Functions. SWITCHING OFF Press and hold the key for a second. NHE-4NX (2110 model II) 9350586 (en) ISSUE 5 9350637 (issue 3) NHK-4NX (2140) 9350693 (en) ISSUE 3... -
Page 28: Making A Call
Name in chapter Memory Functions) you can dial the phone number by simply keying in the name and pressing Press the ABC key to enter alpha mode. NHE-4NX (2110 model II) 9350586 (en) ISSUE 5 9350637 (issue 3) NHK-4NX (2140) - Page 29 For subscription to this function, contact your network operator. During a call, key in or recall from memory the other phone number that you want to call. NHE-4NX (2110 model II) 9350586 (en) ISSUE 5 9350637 (issue 3) NHK-4NX (2140)
- Page 30 Wait until this second person answers the call. To join the first participant in the call, press and hold the selection key for a second, move the pointer with Menu NHE-4NX (2110 model II) 9350586 (en) ISSUE 5 9350637 (issue 3) NHK-4NX (2140)
- Page 31 to Join and press the selection key. Now all the participants can hear each other. If you want to include a new person, make a call to this person in the normal way, press and hold the selection key for a second, move the pointer to Join with and press the selection key.
-
Page 32: Receiving A Call
If your network allows you to view the caller’s phone number: The caller’s phone number and the text WAITING will be displayed. If the phone number is stored in your phone’s NHE-4NX (2110 model II) 9350586 (en) ISSUE 5 9350637 (issue 3) NHK-4NX (2140) - Page 33 Alternatively: Press and hold the second, move the pointer to Swap and press the lection key. The conference call is automatically put on hold. NHE-4NX (2110 model II) 9350586 (en) ISSUE 5 9350637 (issue 3) NHK-4NX (2140) 9350693 (en)
-
Page 34: Adjusting The Earpiece Volume
The phone will recall the phone number from the given location, display it briefly, and then dial it. If the memory location is empty, the message LOCATION EMPTY (in numeric mode) will be displayed. NHE-4NX (2110 model II) 9350586 (en) ISSUE 5 9350637 (issue 3) NHK-4NX (2140) -
Page 35: Last Number Redial
2 to 9 by pressing and holding the proper number key. Note: Pressing and holding the 1 mailbox. For more information, see Setting Your Voice Mail- box Number (Menu 2 5 6) in chapter Menu Functions. NHE-4NX (2110 model II) 9350586 (en) ISSUE 5 9350637 (issue 3) NHK-4NX (2140) -
Page 36: Keypad Lock (Keyguard)
To answer a call, press During a call the keypad remains unlocked and the phone can be operated in the normal way. To end the call, press NHE-4NX (2110 model 9350586 (en) ISSUE 5 9350637 (issue 3) NHK-4NX (2140) 9350693 (en) - Page 37 When the phone is removed from the car kit, without being switched off previously, the keypad will be automatically locked again. NHE-4NX (2110 model II) 9350586 (en) ISSUE 5 9350637 (issue 3) NHK-4NX (2140) 9350693 (en)
-
Page 38: Memory Functions
Memory Functions 5. Memory Functions Your phone provides numerous memory locations for storing phone numbers and corresponding names. STANDARD MEMORY LOCATIONS The phone utilises either the memory locations on the SIM card (indicated by "A" in the upper left corner of the display) or those built in the phone (indicated by "B"). - Page 39 Memory Functions phone number if this can be found in one of the standard memory locations. To delete these phone numbers, see Recent Calls - Erase All Recent Calls (Menu 01 4) in chapter Menu Functions. Last Dialled Numbers (locations L0 to L9) The phone stores the last ten phone numbers that you have dialled in memory locations L0 to L9.
-
Page 40: Notepad Memory Locations
Memory Functions your network and the calling phones provide their phone numbers. Note that you can prevent your phone number from being revealed to the receiver, if your network allows this, within Menu 4 10. If you have missed new calls since you last checked the phone numbers: With the number of new unanswered calls on the display, press the... -
Page 41: Keying In A Name
Press the Save selection key. Key in the phone number. Press the Save selection key. The message SAVE IN LOCATION and the number of the first empty memory location will appear. To store the name and phone number in the first empty notepad location: Press the key. - Page 42 Memory Functions If you miss a character, keep pressing the key until it appears again; or first press the C key and then start pressing the key again. If you want a lower case character, press and hold a key until the character appears in lower case. All further letters will appear in lower case until a key is pressed and held once again.
- Page 43 Press (for a space). Press 3def three times (for f) and hold the key until the character appear in upper case (F). Press 6mno three times (for O) and hold the key until the character appears in lower case (o). Press 9wxyz twice (for x).
-
Page 44: Storing A Phone Number With A Name
Memory Functions STORING A PHONE NUMBER WITH A NAME Press the Memory selection key. Key in the name (of up to 20 characters) that you want to store with the phone number. For details, see Keying in a Name in this chapter. Note: On some SIM cards the name length is limited to 20 or less characters. -
Page 45: Recalling A Phone Number From Memory
Press the Memory selection key Press the Save selection key. Press the selection key or first key in the desired location number and then press the Note: A name can be stored only in one location of the se- lected memory (SIM card or phone memory). However, you may have the same phone number stored with different names. - Page 46 Memory Functions Key in the location number. Press the key. Press the ABC key to view the associated name. Alternatively you may scroll the locations: Press If you want the scrolling to start from a particular location, first key in the location number and then press Press the ABC key to view the associated name.
-
Page 47: Erasing The Contents Of A Memory Location
Note: Both the names stored in the SIM card memory (mem- ory A) and those stored in the phone memory (memory B) will be displayed when the security level is set to None or Phone. The names stored in the phone memory will appear first. ERASING THE CONTENTS OF A MEMORY LOCATION You can erase single memory locations within Menu 8 4... -
Page 48: Menu Functions
Menu Functions 6. Menu Functions The phone offers a set of functions which allow you to tailor the phone to your particular use. These menu functions are arranged in menus and submenus which can be accessed through the menu facility. In each menu and submenu, you can check and alter the setting of a particular function. -
Page 49: Shortcut Method
Pressing the C key or pressing and holding the selection key will exit the menu facility. SHORTCUT METHOD All the menus, submenus and settings are numbered. This index number is shown in the upper right corner of the display. To access a menu function by its shortcut: Press the Menu selection key. -
Page 50: Help Texts
Menu Functions HELP TEXTS Most menu functions are provided with a help text which gives a brief description of the displayed function. Press the Menu selection key to enter the menu facility. Scroll the menus with until you reach the desired function. -
Page 51: Network Services
Menu Functions NETWORK SERVICES Some of the menu functions are network services. These functions can be utilised only if provided by your cellular network. To make use of a network service, you must first subscribe to it. Note that a network service is specific to the SIM card for which you have subscribed it. -
Page 52: Missed Calls (Menu 01 3)
Menu Functions Press Menu 01 2, use to scroll through the phone numbers. MISSED CALLS (Menu 01 3) This function allows you to review the ten phone numbers of people who have tried to reach you with no success. Press Menu 01 3 and use phone numbers. -
Page 53: Messages (Menu 2)
Menu Functions MESSAGES (Menu 2) As well as making and receiving voice and data calls, the phone can also be used for recording and listening to mes- sages in voice mailboxes and for sending and receiving short text messages (’SMS messages’). Voice Messages The voice mailbox feature may be either regarded as a net- work service or simply as a remote control for your personal... -
Page 54: Calling Your Voice Mailbox (Menu 2 1)
Menu Functions The maximum length of an SMS message is 160 characters. The phone has space for five SMS messages of full length. The submenus specific to SMS messages are all but Menu 2 1 and Menu 2 5 6 (see Voice Messages above). SMS Message Indicators indicator at the top of the phone display shows if your phone has received any new messages and if there is... -
Page 55: Viewing And Editing Sms Messages (Menu 2 2)
VIEWING AND EDITING SMS MESSAGES (READ MESSAGES - Menu 2 2) When you receive an SMS message and there is enough space left in the message memory, the text MESSAGE RE- CEIVED and the indicator will be displayed and a short tone will sound (if the phone’s tones have not been set off within Menu 12). - Page 56 Menu Functions phone number in memory) will be displayed at the end of the message. With a message on the display, you may press a num- ber key and then perform any memory or menu func- tions in the normal way, e.g. make a call to the sender of the message.
-
Page 57: Writing And Sending A Message (Menu 2 3)
You can dial the number or store it elsewhere in the normal way. Edit Allows you to make changes in the message. move the cursor right and left, respectively. The number of available characters is shown in the upper right-hand corner of the display. - Page 58 Menu Functions To insert a space, press the # key (in alpha mode). To move the cursor left or right, press the To scroll the message quickly, press and hold down either of these keys. Once you have written the message, press the selection key to access a further set of functions.
-
Page 59: Show Delivery Reports (Menu 2 4)
SHOW DELIVERY REPORTS (Menu 2 4) This function lets you monitor the progress of your SMS messages’ dispatch. Before you can use the function, you need to have the Delivery Reports function enabled within Menu 2 5 4. This function is a network service. Please contact your network operator for details. -
Page 60: Message Settings (Menu 2 5)
Menu Functions and the network will notify you with DELIVERED or FAILED as soon as the message is delivered or the delivery fails. In some cases, if the delivery is still in progress, the network may notify you of this with the PENDING message. MESSAGE SETTINGS (Menu 2 5) Under this submenu, a number of message options are available. -
Page 61: Reply Messages At Your Expense (Menu 2 5 3)
In order to receive a converted message, the recipient must have an appropriate terminal device available. For example, the recipient must have a telefax machine or similar device connected to the number you provide if you choose the FAX format. Reply Messages At Your Expense (ACCEPT REPLY COST - Menu 2 5 3) This network service allows the recipient of your SMS... -
Page 62: Storage Time Of Outgoing Messages (Menu 2 5 5)
Menu Functions Storage Time Of Outgoing Messages (MESSAGE VALIDITY - Menu 2 5 5) This network service allows you to set the time that the SMS messages, that you send from the phone, will be stored at the message service centre. If the receiving end cannot be reached within this period of time, the message will be deleted. -
Page 63: Call Divert (Menu 3)
CALL DIVERT (Menu 3) The Call Divert network service allows you to direct your in- coming calls to another phone number when you do not want to be disturbed, or when the phone is switched off or outside of the network service area. Press Menu 3 to enter this function. - Page 64 Menu Functions Press the selection key to select the mode. Select Note: If you selected CANCEL ALL DIVERTS, the steps which follow will not be available. Press to move the pointer to Activate (set divert mode on), Cancel (set divert mode off) or Status (shows call types which are being diverted).
- Page 65 Menu Functions receiving a response, the phone will end the call auto- matically, and the message DIVERT ACTIVE will appear. When you are diverting fax or data calls: If you keyed in a phone number before entering the Call Divert menu, this number will appear. If you didn’t key in a number before entering the menu, the number to which you diverted the fax or data calls the last time will appear.
- Page 66 Menu Functions Move the pointer with press the selection key. The phone number and the delay time will remain on the display for a while so that you can check and write them down. You can modify the phone number in this menu or by using a manual command string.
-
Page 67: Phone Settings (Menu 4)
PHONE SETTINGS (Menu 4) LIGHTS (Menu 4 01) The keypad and display of the phone are fitted with lights to make them easy to read. When the phone is used as a handportable phone or is connected to a charger: The setting determines whether the lights remain on for 15 seconds after the last keystroke or an incoming call alert (On) or remain permanently off (Off). -
Page 68: Keypad Tones (Menu 4 4)
Menu Functions Press Menu 4 3, use (a sample is sounded), press selection key. KEYPAD TONES (Menu 4 4) A short tone is sounded each time you press a key. You can select a suitable volume level or set the keypad tones off. When you have set the phone’s tones off within Menu 12, the keypad tones will not be heard. -
Page 69: One Touch Dialling (Menu 4 7)
ONE TOUCH DIALLING (Menu 4 7) When this function is set on, your phone will allow you to dial phone numbers stored in memory locations 2 to 9 by simply pressing and holding the proper number key. Press Menu 4 7, use , press the AUTOMATIC ANSWER (Menu 4 8) When this function is set on, your phone will automatically... -
Page 70: Own Number Sending (Menu 4 10)
Menu Functions OWN NUMBER SENDING (Menu 4 10) The setting of this function determines whether the phone number of your current SIM card is revealed to the receiving end. This function works only in cellular networks which allow you to view the caller’s phone number. For subscription to this service, contact your network operator. -
Page 71: Restore Factory Settings (Menu 4 12)
requests that the requested operation be performed. After receiving a response from the network, the phone will end the call automatically. If you selected Activate or Cancel, call waiting is set on or off, respectively. If you selected Status, the phone will list the call types (e.g. -
Page 72: Menu List (Menu 4 13)
Menu Functions The menu settings will be reset and the message SETTINGS RESTORED will appear. MENU LIST (Menu 4 13) If you do not need all of the menu functions frequently, you may hide some of the menus and submenus. When Complete is selected, the phone will shown all its menu functions. -
Page 73: Security Level (Menu 5 2)
Note that some SIM cards do not allow you to turn the PIN code request off. Press Menu 5 1 to enter this function. At the prompt Enter PIN code:, key in the PIN code and press the selection key. Press to move the pointer to On (turn request on) or Off (turn request off). - Page 74 Menu Functions Note: Whenever you change the security level, all temporarily stored phone numbers will be erased. Press Menu 5 2 to enter this function. Key in the security code and press the Press to move the pointer to None, Memory or Phone.
-
Page 75: Call Barring (Menu 5 3)
CALL BARRING (Menu 5 3) The Call Barring network service allows you to place restric- tions on outgoing and incoming calls. Note: When calls are barred, calls may be possible to certain emergency numbers in some networks (e.g. 112 or other offi- cial emergency number). -
Page 76: View Fixed Dial List (Menu 5 4)
Menu Functions Press the selection key. Note: If you selected CANCEL ALL BARRINGS, you can ignore the steps which follow. Press to move the pointer to Activate (set the selected barring mode on), Cancel (set the selected bar- ring mode off) or Status (show call types which are or can be barred). -
Page 77: Fixed Dialling (Menu 5 5)
Press the selection key to exit the list. Quit If you have selected Off within Menu 5 5, the message ALL NUMBERS ALLOWED will be displayed. FIXED DIALLING (Menu 5 5) You may restrict your outgoing calls to a pre-determined set of phone numbers. - Page 78 Menu Functions Press the selection key to access the following Option functions: Erase all Removes all names and phone numbers from the list. Adds a name (and a phone number) to the list. Remove Removes from the list the name (and the associated phone number) which was on the display when you pressed the Option...
-
Page 79: Change Access Codes (Menu 5 6)
If you selected Edit, first modify the name, then press selection key or the ABC key and, finally, modify the phone number. Press the the changes. CHANGE ACCESS CODES (Menu 5 6) Within this submenu you can change the following access codes: security code (Menu 5 6 1), PIN code (Menu 5 6 2), PIN2 code (Menu 5 6 3), barring password (Menu 5 6 4). - Page 80 Menu Functions You may be a member of up to 10 user groups. For details on creating a user group and activating this service, contact your network operator. Press 5 7 to enter this function Menu Press to reach one of the following options: None Calls can be made and received in the normal way.
-
Page 81: Duration And Cost Of Calls (Menu 6)
Note: If you accidentally select a wrong group, you may not be able to make any calls except for emergency calls to the number 112 or receive any calls. In that case, re-enter this submenu and enter the correct group number. DURATION AND COST OF CALLS (DURATION AND COST - Menu 6) Within this menu you can view the duration and cost of your... -
Page 82: Call Costs (Menu 6 2)
Menu Functions CLEAR TIMERS Resets all timers. If you selected CLEAR TIMERS, press the key. Next, key in the security code and press the selection key. The message TIMERS CLEARED will show up to indicate that all timers were reset. Note: There is no way to undo the reset operation. -
Page 83: Call Costs Limit (Menu 6 3)
CLEAR COUNTERS Resets all cost counters. If you selected CLEAR COUNTERS, press the tion key. Next, key in the PIN2 code and press the selection key. The message COUNTERS CLEARED will show up to indicate that cost counters were reset. Note: There is no way to undo the reset operation. -
Page 84: Show Costs In (Menu 6 4)
Menu Functions SHOW COSTS IN (Menu 6 4) Within this submenu you may select whether the call cost limits will be displayed in currency or charging units. Contact your network operator for charging unit prices. Press Menu 6 4 to enter the function Key in the PIN2 code and press the to select Currency (show limits in currency units) or Units (show limits in charging units) and press... - Page 85 with the home network. If the phone loses contact with the network it is using, it will automatically try to register on some other ’roaming’ network. When you pick up a network manually from the network list, the phone will attempt to register on that network. If the phone cannot reach or loses contact with the selected net- work (the message PLEASE SELECT NETWORK will appear), you have to select some other network.
-
Page 86: Memory Functions (Menu 8)
Menu Functions MEMORY FUNCTIONS (Menu 8) MEMORY SELECTION (Menu 8 1) The phone allows you to store phone numbers and names in the SIM card’s memory (known as "memory A") or the phone’s internal memory ("memory B"). Within this submenu you can set the phone to use either of these memories. -
Page 87: Copy Between Memories (Menu 8 3)
COPY BETWEEN MEMORIES (Menu 8 3) This function allows you to copy phone numbers (and associ- ated names) between the phone’s internal memory and the SIM card memory. You can choose to copy individual loca- tions or all locations. If a name is too long to fit in the destination memory, it will be shortened. -
Page 88: Memory Erasing Options (Menu 8 4)
Menu Functions ory locations or the Quit selection key to return to the previous menu level. MEMORY ERASING OPTIONS (Menu 8 4) This function allows you to remove phone numbers and names from some or all locations of the currectly selected memory (SIM card or phone memory). -
Page 89: Show Own Number (Menu 8 5)
To clear all of the locations of the selected memory: Press Menu 8 4 to enter this function. Press to select Erase all (all locations will be cleared). Press the selection key. At the prompt ARE YOU SURE?, press the key to clear the locations. -
Page 90: Personal Reminders (Menu 9)
Menu Functions PERSONAL REMINDERS (Menu 9) WELCOME NOTE (Menu 9 1) You can program a welcome or reminder message which will show up on the display when the phone is switched on. The maximum length of the message is 30 characters. Press Menu 9 1 to enter this function. -
Page 91: Countdown Timer (Menu 9 2)
Erase Removes the message from the display and from the memory. No message will be shown when the phone is switched on next time. Press the selection key to perform the desired operation. Next time you switch the phone on, the stored message will pop up on the display. -
Page 92: In-Call Options (Menu 10)
Menu Functions blink on the display. Press the alarm. If you want to stop the timer before the defined time has ex- pired, enter the function and turn off the timer by keying in a zero (0) four times and pressing the Note: When you have switched the ringing tone off in Menu 12, it will not be heard. - Page 93 Menu Functions The in-call options available are as follows: Mute / Unmute Switches off or on the phone’s microphone. If the phone is connected to a handsfree car kit, Mute turns off the micro- phone of this accessory. Hold / Unhold Hold allows you to put a currently active call on hold so that another call can be initiated.
-
Page 94: Fax Or Data Call (Menu 11)
Menu Functions FAX OR DATA CALL (Menu 11) Your phone supports the sending and receiving of data via an optional data adapter which connects to the base of your phone. If there is no data adapter connected to the phone when you enter this menu, the message CONNECT TERMINAL will appear. -
Page 95: Ringing Options (Menu 12)
RINGING OPTIONS (Menu 12) You can select the indication mode for incoming calls from the following options: RING AND VIBRATE The phone will sound a ringing tone, flash its lights and vibrate. The lights will not flash when the Lights function in Menu 4 01 is set to Off. -
Page 96: Number Editor (Menu 13)
Menu Functions NUMBER EDITOR (Menu 13) The phone provides a simple editor which allows you to add new digits, e.g. a + character to substitute for international access codes, in front of a phone number, or to edit the existing digits of a phone number. Recall a phone number from memory (see Recalling a Phone Number from Memory in chapter Memory Func- tions). -
Page 97: Sending Dtmf Tones
7. Sending DTMF Tones The Dual Tone Multi Frequency (DTMF) tones allow you to communicate with answering machines, computerised telephony systems, etc. DTMF tones can be transmitted even when the keypad tones are set off. (I) Manual Transmission Make a call to the desired phone number. Key in the digits you want to be sent as DTMF tones. - Page 98 Sending DTMF Tones sequence together, for instance. To link two locations (only in phone memory): Key in or recall from memory the phone number (e.g. 123 456) that you want to link with a DTMF sequence. Press the key twice quickly. This adds a + character to the end of the phone number.
- Page 99 Placing p and w characters between DTMF digits You may insert a pause of 2.5 seconds or a wait in front of, or between DTMF digits. For a pause, press the key three times quickly so that a p is displayed. All digits following the pause will be sent as DTMF tones.
-
Page 100: Care And Maintenance
Care and Maintenance 8. Care and Maintenance Your phone is a product of superior design and craftmanship and should be treated with care. The suggestions below will help you to fulfill the warranty obligations and to enjoy this product for many years. Keep the phone and all its parts and accessories out of small children’s reach.