Sony RMT-DSLR2 - Remote Commander Manual
- Operating instructions (2 pages) ,
- Specifications (2 pages) ,
- Operating instructions (2 pages)
Advertisement
Features
The RMT-DSLR2 is a Remote Commander made especially for the Sony Interchangeable Lens Digital Camera (referred below as "camera") provided a remote sensor.
You can operate the camera using the Remote Commander.
- By operating the Remote Commander, you can shoot images and play them back on a TV.*
- Shooting the image
- Playing back images
- Enlarging or reducing the playback images
- The
![]() (Slide show) button easily starts/stops a slide show on a TV.*
(Slide show) button easily starts/stops a slide show on a TV.* - Once you connect the camera to a PictBridge printer, you can easily print images while viewing them on the TV by pressing the PRINT button on the Remote Commander.**
* These functions only work when the camera is connected to a TV.
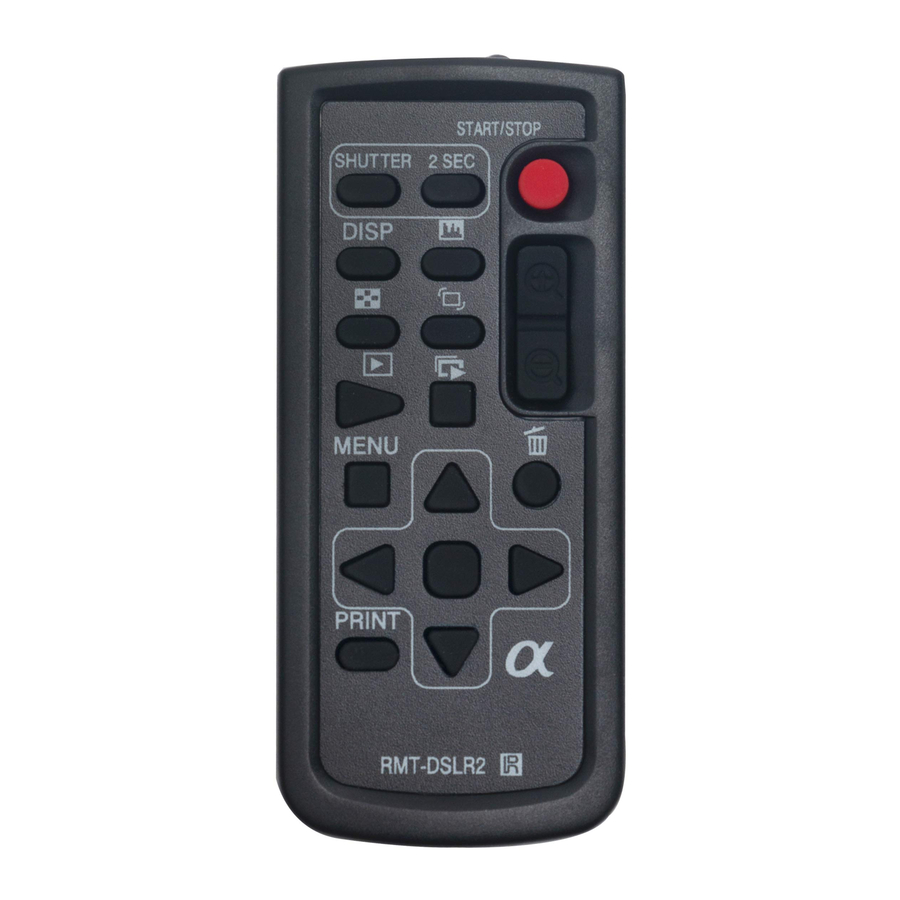
** This function only works when the camera is connected to an HDTV with an HDMI cable.Identifying the parts

- 2 SEC (shutter release in 2 seconds) button
- SHUTTER button
![]() (Histogram) button
(Histogram) button- DISP (Display) button
![]() (Index) button
(Index) button ![]() (Rotate) button
(Rotate) button ![]() (Playback) button
(Playback) button ![]() (Slide show) button
(Slide show) button- MENU button
- PRINT button
- Transmitter
- START/STOP button
![]() (Scale up/down) buttons
(Scale up/down) buttons![]() (Delete) button
(Delete) button![]() (Multi-selector)
(Multi-selector)
 (Histogram) button
 (Index) button
  (Rotate) button
  (Playback) button
  (Scale up/down) buttons
 (Delete) button
 (Multi-selector)
Notes
Except for the 2 SEC, SHUTTER and START/STOP buttons, the buttons only work when the camera is connected to a TV.
Preparation

- Remove the insulation sheet
![]() before using the Remote Commander.
before using the Remote Commander. - Point the Remote Commander at the remote sensor on the front of the camera in order to operate the camera.
 before using the Remote Commander.
Changing the battery of the Remote Commander

- While pressing on the tab
![]() , inset your fingernail into the slit to pull out the battery case.
, inset your fingernail into the slit to pull out the battery case. - Remove the old battery and place a new battery with the + side facing up.
- Insert the battery case back into the Remote Commander until it clicks.
 , inset your fingernail into the slit to pull out the battery case.
Battery may explode if mistreated. Do not recharge, disassemble or dispose of in fire.
- When the lithium battery becomes weak, the operating distance of the Remote Commander may shorten, or the Remote Commander may not function properly. In this case, replace the battery with a Sony CR2025 lithium battery.
Use of another battery may present a risk of fire or explosion.

Replace the battery with the specified type only.
Otherwise, fire or injury may result.
Dispose of used batteries according to the instructions.
Shooting
To use the Remote Commander, set the drive mode of the camera to [Remote Commander].
Verify that the subject is in focus and press the SHUTTER button, 2 SEC button or START/STOP button*.
- SHUTTER button
When the button is pressed, the shutter is released right away - 2 SEC button
After you press the button, the shutter is released about two seconds later. - START/STOP button*
Pressing the button once starts movie recording.
Pressing the button again during movie recording stops recording.
*Can only be used if the camera supports movie recording.
Depending on the model of camera that supports movie recording, you can check the START/STOP operation with the camera's AF illuminator or self-timer lamp. Check whether your camera is compatible before use.
- For details about settings, refer to the camera's Operating Instructions.
- The other buttons are used when the camera is connected to a TV.
Viewing operation with the Remote Commander by connecting the camera to a TV
Connecting the camera to a TV with a video cable or an HDMI cable and turning to the playback mode enable you to operate viewing using the Remote Commander. Most of the buttons on the Remote Commander have the same functions as the buttons on the camera.
- For details, refer to the camera's Operating Instructions.
- The SHUTTER button, 2 SEC button, START/STOP button and PRINT button are used when shooting the image or the camera is connected to a PictBridge printer.
Slide show
The  (Slide show) button on the Remote Commander easily starts/stops a slide show. During a slide show, the following operations are available from the Remote Commander.
- Displaying the previous/next image with
![]()
- Pausing/playing back the slide show with
![]()


Printing
Once you connect the camera to an HDTV with an HDMI cable, you can easily print images while viewing them on the TV.
- Connect the camera to a TV.
- Connect the camera to a PictBridge compliant printer.
- Display the image you want to print.
- Press the PRINT button on the Remote Commander.
- For details about printing, refer to the camera's Operating Instructions. Camera models with a printing function can print with the Remote Commander.
Specifications
Battery Coin type 3V lithium battery (CR2025)
Dimensions (Approx.) 41.5 mm × 94.5 mm × 13.5 mm (w / h / d) (1 11/16 in. × 3 3/4 in. × 9/16 in.)
Mass Approx. 27 g (1 oz) (excluding the battery)
Operating temperature 0 ˚C to 40 ˚C (32 ˚F to 104 ˚F)
Storage temperature -20 ˚C to +60 ˚C (-4 ˚F to +140 ˚F)
Included items
Remote Commander
RMT-DSLR2 (1)
(A coin type 3V lithium battery (CR2025) installed)
Set of printed documentation
Design and specifications are subject to change without notice.
 is a trademark of Sony Corporation.

Documents / ResourcesDownload manual
Here you can download full pdf version of manual, it may contain additional safety instructions, warranty information, FCC rules, etc.
Advertisement
Thank you! Your question has been received!


Need Assistance?
Do you have a question about the RMT-DSLR2 that isn't answered in the manual? Leave your question here.