Table of Contents
Advertisement
OWNER'S MANUAL
AIR
CONDITIONER
Please read this manual carefully before operating your set and retain it for future reference.
Ceiling Cassette
IMKG.1524.07.2022
ZTNQ18GPLE0, ZTNQ24GNLE0, ZTNQ30GNLE0, ZTNQ36GNLE0, ZTNQ18GPLA0
ZTNQ24GPLA0, ZTNQ36GNLA0, ZTNQ36LNLA0, ZTNQ48GMLA0, ZTNQ48LMLA0
ZTNQ60GMLA0, ZTNQ36GYLA0, ZTNQ48GYLA0
IMKG.1527.07.2022
ZUAA1, ZUAB1, ZUAC1, ZUAD1, ZUAD3
MFL67798213
Rev.00_102622
Copyright © 2022 LG Electronics Inc. All Rights Reserved.
www.lg.com
Advertisement
Table of Contents

Related Manuals for LG ZTNQ18GPLE0


Summary of Contents for LG ZTNQ18GPLE0
- Page 1 Please read this manual carefully before operating your set and retain it for future reference. Ceiling Cassette IMKG.1524.07.2022 ZTNQ18GPLE0, ZTNQ24GNLE0, ZTNQ30GNLE0, ZTNQ36GNLE0, ZTNQ18GPLA0 ZTNQ24GPLA0, ZTNQ36GNLA0, ZTNQ36LNLA0, ZTNQ48GMLA0, ZTNQ48LMLA0 ZTNQ60GMLA0, ZTNQ36GYLA0, ZTNQ48GYLA0 IMKG.1527.07.2022 ZUAA1, ZUAB1, ZUAC1, ZUAD1, ZUAD3 www.lg.com MFL67798213 Rev.00_102622 Copyright © 2022 LG Electronics Inc. All Rights Reserved.
- Page 2 TIPS FOR SAVING ENERGY TIPS FOR SAVING ENERGY Here are some tips that will help you minimize the power consumption when you use the air conditioner. You can use your air conditioner more efficiently by referring to the instructions below: •...
- Page 3 SAFETY INSTRUCTIONS SAFETY INSTRUCTIONS The following symbols are displayed on indoor and outdoor units. Read the precautions in this manual This appliance is filled with carefully before operating the unit. flammable refrigerant.(for R32) This symbol indicates that a service This symbol indicates that the personnel should be handling this Operation Manual should be read equipment with reference to the...
- Page 4 SAFETY INSTRUCTIONS • Use the correctly rated breaker or fuse. There is risk of fire or electric shock. • Do not modify or extend the power cable. There is risk of fire or electric shock. • Do not install, remove, or re-install the unit by yourself (customer). There is risk of fire, electric shock, explosion, or injury.
- Page 5 SAFETY INSTRUCTIONS • Ventilate the product from time to time when operating it together with a stove, etc.There is risk of fire or electric shock. • Turn the main power off when cleaning or maintaining the product. There is risk of electric shock. •...
-
Page 6: Safety Instructions
SAFETY INSTRUCTIONS • Replace all the batteries in the remote control with new ones of the same type. Do not mix old and new batteries or different types of batteries. There is risk of fire or explosion • Do not recharge or disassemble the batteries. Do not dispose of batteries in the fire. They may burn or explode. -
Page 7: Table Of Contents
TABLE OF CONTENTS TABLE OF CONTENTS TIPS FOR SAVING ENERGY SAFETY INSTRUCTIONS BEFORE USE Preparing for operation Usage Cleaning and maintenance Service PRODUCT INTRODUCTION Name and function of parts Operation Indication Lamps Wireless Remote Controller Installation of outdoor unit OUTDOOR UNIT INFORMATION Installation of indoor unit INDOOR UNIT INFORMATION OPERATING INSTRUCTION... -
Page 8: Before Use
BEFORE USE BEFORE USE Preparing for operation - Contact an installation specialist for installation. - Use a dedicated circuit. Usage - Being exposed to direct airflow for an extended period of time could be hazardous to your health. Do not expose occupants, pets, or plants to direct airflow for extended periods of time. - Due to the possibility of oxygen deficiency, ventilate the room when used together with stoves or other heating devices. -
Page 9: Product Introduction
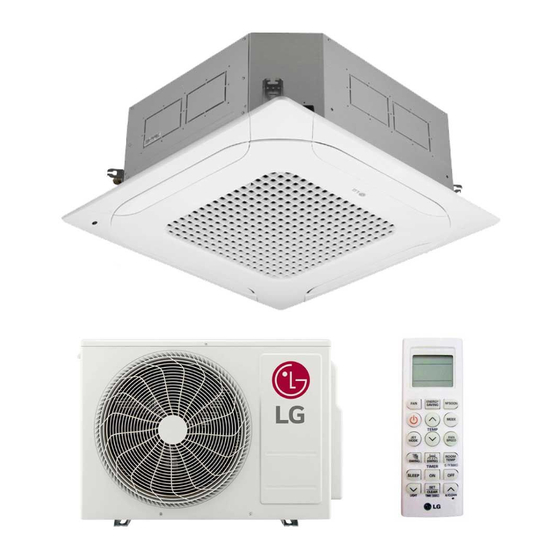
PRODUCT INTRODUCTION PRODUCT INTRODUCTION Name and function of parts Indoor unit Outdoor unit Remote controller Inlet air Discharge air Refrigerant piping, connection electric wire Drain pipe Ground wire Wire to ground outdoor unit to prevent electrical shocks. -
Page 10: Operation Indication Lamps
PRODUCT INTRODUCTION Operation Indication Lamps Lamp Forced Operation Button Description Lamp Color Cooling mode Green Heating mode Green Time to clean filter in cooling/heating mode Yellowish Green Time to clean filter when product is not opeating Orange Hot start or defrost mode before starting heating mode Green When reservation set on Yellowish Green... -
Page 11: Wireless Remote Controller
PRODUCT INTRODUCTION Wireless Remote Controller This air-conditioner is equipped with wireless remote controller basically. But if you want to be available with wired remote controller, you pay for it. Vane Angle button Used to set each vane angle. Air Purify button (Optional) Used to start or stop the air purification function. - Page 12 PRODUCT INTRODUCTION CAUTION Caution of handling the Remote Controller • Aim at the signal receiver on the wired remote controller so as to operate. • Be sure that there are no obstructions between the remote controller and the signal receptor. •...
-
Page 13: Installation Of Outdoor Unit
OUTDOOR UNIT INFORMATION OUTDOOR UNIT INFORMATION Powe Supply : 1Ø, 220-240 V~, 50/60 Hz / 3Ø, 380-415 V~, 50/60 Hz Model ZUUQ12GA0 ZUUQ18GA0 ZUUQ24GA0 Phase Refrigerant Precharged 0.75 0.98 1.25 Amount Net Weight 24.2 30.9 41.5 Dimensions 717 x 483 x 230 770 x 545 x 288 870 x 650 x 330 (W x H x D) -
Page 14: Installation Of Indoor Unit
INDOOR UNIT INFORMATION INDOOR UNIT INFORMATION Power Supply : 1Ø, 220-240 V~, 50/60 Hz Model ZTNQ18GPLE0 ZTNQ18GPLA0 ZTNQ24GPLA0 ZTNQ24GNLE0 ZTNQ30GNLE0 ZTNQ36GNLE0 Phase Net Weight 19.5 19.5 19.5 Dimensions mm 840 x 204 x 840 840 x 204 x 840 840 x 204 x 840 840 x 246 x 840 840 x 246 x 840 840 x 246 x 840... -
Page 15: Operating Instruction
OPERATING INSTRUCTION OPERATING INSTRUCTION How to insert the Batteries Wireless Remote Controller Maintenance Remove the battery cover by pulling it according to the arrow direction. Choose a suitable place where its safe & easy Insert new batteries making sure that the (+) to reach. -
Page 16: Installation Instructions
INSTALLATION INSTRUCTIONS INSTALLATION INSTRUCTIONS Installer Setting - Setting Address of Central Control With the MODE button pressed, press the RESET button. By using the temperature setting button, set the indoor unit address. - Setting range : 00 ~ FF After setting the address, press the ON/OFF button toward the indoor unit 1 time. -
Page 17: Owner's Instruction
OWNER'S INSTRUCTION OWNER'S INSTRUCTION Cooling Mode - Cooling Mode - Power Cooling Standard Operation Press the ON/OFF button. Press the ON/OFF button. The unit will respond with beep sound. The unit will respond with beep sound. Press MODE button to select Cooling Press MODE button to select Cooling Mode. -
Page 18: Auto Operation Mode
OWNER'S INSTRUCTION Auto Operation Mode ❈ Please select the code depend on your feeling. Code Feel Cold Slightly cool Neutral Slightly warm Warm During Auto Operation Mode - If the system is not operating as desired, manually switch to another mode. -
Page 19: Dehumidification Mode
OWNER'S INSTRUCTION Dehumidification Mode During Dehumidification Mode • If you select the dehumidification mode on the operation selection button, the indoor unit starts to run the dehumidification function, automatically setting the room temp. and air volume to the best condition for dehumidification based on the sensed room temp. -
Page 20: Fan Mode
OWNER'S INSTRUCTION Fan Mode Natural Wind by the auto Logic • For more fresh feeling than other fan speed, press the Indoor Fan Speed Selector and set to auto mode. In this mode, the wind blows like natural breeze by automatically changing fan speed according to the auto logic. -
Page 21: Temperature Setting / Room Temperature Checking
OWNER'S INSTRUCTION Temperature Setting / Room Temperature checking We can simply adjust the desired temperature • Press the buttons to adjust the desired temperature : Increase 1 °C or 1 °F per one time pressing : Decrease 1 °C or 1 °F per one time pressing Room temp: Indicate the current room temperature... -
Page 22: Airflow Setting
OWNER'S INSTRUCTION Airflow setting Up/down airflow direction control The SWING (up/down) airflow can be adjusted by using the remote controller. Press the ON/OFF button to start the unit. Press SWING (up/down) airflow button and the louvers will swing up and down. NOTE •... -
Page 23: Individual Vane Angle Control
OWNER'S INSTRUCTION Individual vane angle control It is the function that can control 4 vane angles individually in the ceiling type 4Way • There may be differences between cassette product group. wireless remote controller up/down/left/right buttons and the wind discharge port directions. •... -
Page 24: Timer
OWNER'S INSTRUCTION Timer Setting the Current Time Press the SET/CLEAR button for 3 seconds. Press TIME SETTING buttons until the desired time is set. Press the SET / CLEAR button. NOTE Check the indicator for A.M. and P.M. Timer Setting Press the TIMER button to turn timer on or off. -
Page 25: Sub Function
SUB FUNCTION SUB FUNCTION h Sub function may not work in some products. Air Purification (Optional) Press the button to start the unit. 3 Press t button. Air Purification will start when the button is pressed and stop when the button is pressed again. -
Page 26: Checking The Air Quality Level During Air Purification Operation (Optional)
SUB FUNCTION Checking the air quality level NOTE during air purification • The dust concentration is displayed operation (Optional) from 8 to 999 by the unit of 1. • The dust concentration referred to the Press button for 3 seconds, Air quality data sheet of the sensor manufacturer. -
Page 27: How To Set Air Quality Level Color
SUB FUNCTION How to set Air quality level color With the button pressed, press the reset button. By using the button, set function code and setting value. Function code TEMP Setting code Press the button toward the indoor unit 1 time. Each countries have different standards for indicating Overall air quality. -
Page 28: Maintenance And Service
MAINTENANCE AND SERVICE MAINTENANCE AND SERVICE Indoor Unit - Never use any of the followings: Water hotter than 40 °C. Grille, Case and Remote Control Could cause deformation and/or - Turn the system off before cleanining, To discoloration. clean, wipe with a soft, dry cloth. Do not use Volatile substances. -
Page 29: Purifying Filter(Optional)
MAINTENANCE AND SERVICE Purifying filter(Optional) Replacement The PLASMA filter behind the air filters should Cleaning be checked and cleaned once every 3 months or more often if necessary. The PLASMA filter behind the air filters should - Open front panel and remove air filter. be checked and cleaned once every 3 months or more often if necessary. -
Page 30: Operation Tips
MAINTENANCE AND SERVICE Operation Tips! Do not overcool the room. Keep blinds or curtains closed. Keep the room temperature uniform. This is not good for the health Do not let direct sunshine and wastes electricity. enter the room when the air Adjust the vertical airflow conditioner is in operation. -
Page 31: Troubleshooting Tips! Save Time And Money
MAINTENANCE AND SERVICE Troubleshooting Tips! Save time and money! Check the following points before requesting repairs or service..If the malfunction persist, please contact your dealer. The air conditioner The room has a It seems that Air conditioner does does not operate. peculiar odor.