
Related Manuals for Ariens 946154


Summary of Contents for Ariens 946154
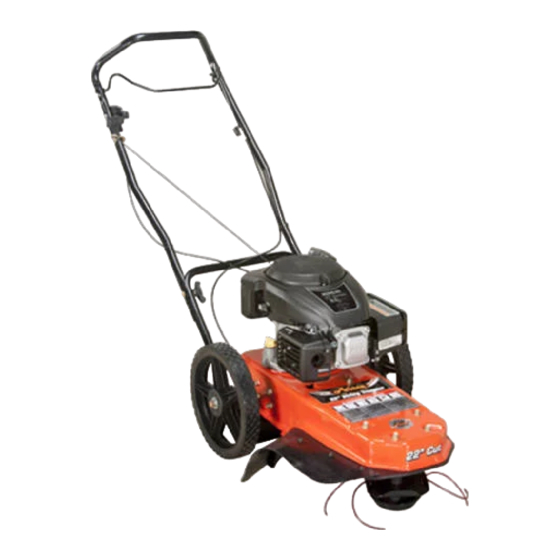
- Page 1 String Trimmer Operator’s Manual Manuel du Utilisateur Model 946154 – String Trimmer (SN 005000 +) ENGLISH • 05094700 8/16 FRANÇAIS Printed in USA...
-
Page 2: Table Of Contents
TABLE OF CONTENTS WELCOME ..... . 1 Lubricate Unit..... 15 SERVICE &... -
Page 3: Welcome
WELCOME Congratulations on your purchase and welcome to the Ariens family! Every machine in the Ariens lineup is designed for long-lasting and unsurpassed performance. We are confident your machine will be part of your family for many years to come. -
Page 4: Safety
• OBEY THE MESSAGE! Emission controls and components can only be adjusted by an Ariens Company dealer or SIGNAL WORDS an authorized engine manufacturer's service The safety alert symbol above and signal center. Contact your Ariens Company... -
Page 5: Safety Decals
4. Notice Safety Decal Descriptions NOTICE: Indicates information or procedures 1. DANGER! that are considered important but not hazard related. If not followed, property damage could result. DANGER! 5. Important IMPORTANT: Indicates general reference information worthy of special attention. SAFETY DECALS The safety decals on your machine are visual Read Operator’s Manual. -
Page 6: Safety Rules
SAFETY RULES Use extreme care when approaching blind corners, shrubs, trees, or other objects that The following safety instructions are based may block your view of a child. on the EN 14910+A1:2009 specifications in effect at the time of production. Keep children out of the trimming area and in the watchful care of a responsible adult Training... - Page 7 Keep safety devices or guards in place and Operation functioning properly. NEVER modify or When operator presence control (OPC) remove safety devices. handle is released, trimmer head must stop. ALWAYS look down and behind before and If trimmer head continues to rotate with OPC while moving backward.
- Page 8 Use only an approved gasoline container. cutting line. It can break off and become a NEVER store the machine or fuel container dangerous projectile. Use Ariens Company- where there is an open flame, spark, or pilot recommended flexible, non-metallic line, or light such as on a water or space heater or equivalent.
- Page 9 Storage NEVER store unit with fuel in fuel tank, inside a building where any ignition sources are present. Keep machine free of grass, leaves, or other debris build-up. Clean up oil or fuel spillage and remove any fuel-soaked debris. Allow machine to cool before storing.
-
Page 10: Assembly
2. Rotate handlebar to operating position ASSEMBLY and tighten wing knobs. See Figure 4. WARNING: AVOID INJURY. Read and understand the Safety section before proceeding. REQUIRED TOOLS • Box cutter REMOVE UNIT FROM BOX 1. Remove box top and packing material. 2. -
Page 11: Controls & Features
CONTROLS & FEATURES Figure 5 1. Engine / Throttle Control Lever 9. Upper Handlebar 2. Recoil Starter Handle 10. Lower Handlebar 3. Fuel Tank and Cap 11. Handlebar Wing Knob (2) 4. Oil Fill and Dipstick 12. Operator Presence Control (OPC) Lever 5. -
Page 12: Engine / Throttle Control Lever
OPERATOR PRESENCE WARNING: AVOID INJURY. CONTROL (OPC) LEVER Read and understand the Safety See Figure 7. section before proceeding. When pulled against handlebar, engages trimmer head rotation. See Figure 5 for all controls and features When released, trimmer head rotation stops. locations. -
Page 13: Swivel Head Lock
See Minimum E30 / E85 compatible. The maximum Trimming Height on page 12. recommended ethanol content is 10%. Ariens recommends using a quality fuel stabilizer in all fuel. See Short-Term Storage on page 21. EN - 11... - Page 14 Trimming Heights 6. Reinstall height guide and secure with 1 flat steel washer, lock washer and hex bolt. See Figure 10. 11.2 cm 4.4" 9.1 cm Figure 10 3.6" Minimum Trimming Height To achieve minimum trimming height (3 cm (1.2")), install 3 spacers onto hex shaft and reinstall cutter disc with angled flanges facing away from unit.
-
Page 15: Set Handlebar Height
SET HANDLEBAR HEIGHT 1. Stop engine and wait for moving parts to stop and for hot parts to cool. See Figure 12. 2. Support upper handlebar, loosen wing knobs and remove handlebar hardware. 3. Align preferred mounting hole with desired mounting location. 4. -
Page 16: Operate Unit
1. Start engine. See Start The Engine on page 13. Your Ariens dealer can provide service and 2. Push down on handlebar slightly to lift adjustments to keep your unit operating at height guide off the ground and push unit peak efficiency. -
Page 17: Service Position
SERVICE POSITION CHECK FASTENERS Check for loose or missing hardware. WARNING: AVOID INJURY. CHECK TRIMMER LINES Before placing unit in service position, drain fuel from tank and Make sure trimmer lines are secured in cutter fuel system. (Refer to engine disc. -
Page 18: Service & Adjustments
4. Insert trimmer line through bottom holes in cutter disc. See Figure 17. NOTICE: Use only 18" trimmer line (Ariens p/n 04641800) or equivalent. Figure 16 Figure 17 SERVICE & 5. Cross trimmer lines and insert the ends ADJUSTMENTS through holes in the side of the cutter disc. -
Page 19: Replace Height Guide
REPLACE HEIGHT GUIDE See Figure 20. 3. Adjust cable tension: See Figure 19. • To increase cable tension, loosen upper 1. Stop engine and wait for moving parts to jam nut and tighten lower jam nut until stop and for hot parts to cool. proper tension is achieved. -
Page 20: Replace Drive Belt
REPLACE DRIVE BELT Remove Belt 1. Stop engine and wait for moving parts to stop and for hot parts to cool. 2. Place unit in service position. See Service Position on page 15. 3. Remove hardware retaining trimmer shield and remove shield. See Figure 21. 1. - Page 21 See Figure 24. See Figure 26. 8. Place unit onto its right side. Support unit 5. Reinstall 4 hex bolts through frame top so it will not tip. and install one spacer onto each bolt. 9. Remove hardware retaining engine 6.
-
Page 22: Troubleshooting
Replace air filter or precleaner. Refer to engine manual. Carburetor out of adjustment. Refer to engine manual or see your Ariens dealer. Engine cooling system Clean debris screen and cooling fins. overloaded with debris. Allow engine to cool before operating. -
Page 23: Storage
Add the stabilizer to the container before adding fuel. a. Add Ariens fuel stabilizer (see Service Parts on page 14) or equivalent according to manufacturer's instructions to the fuel tank and any fuel containers with remaining fuel. -
Page 24: Specifications
SPECIFICATIONS Model Number 946154 Description String Trimmer Engine Kohler XT-650 Maximum RPM – No load. 3750 149 (9.1) Displacement – cm Fuel Tank Capacity – Liters (gal) 1.5 (0.4) Trimmer Trimming Width – cm (in.) 55.9 (22) Trimmer Head Speed – Max. RPM 3650 Replacement Line Length –... -
Page 25: Warranty
, Sno-Tek ® and Chore Performing Equipment Limited Warranty Warranty Ariens Company (Ariens) warrants to the original purchaser that Ariens, Gravely, Parker, and Countax ® ® brand chore performing equipment (including Sno-Thro and Sno-Tek equipment) purchased on or after 1/1/2016 will be free from defects in material and workmanship for the time period noted in the chart below. - Page 26 Register the product immediately at the time of sale. If the dealer does not register the product, the customer must complete the product registration card in the literature package and return it to Ariens Company, or register the unit online at www.ariens.com, www.gravely.com, www.countax.com or www.parkersweeper.com.
- Page 27 Exclusions – Items Not Covered by This Warranty • Parts that are not genuine Ariens, Gravely, Parker or Countax service parts are not covered by this warranty and may void the warranty. • Damages resulting from the installation or use of any part, accessory, or attachment which is not approved by the Ariens Company for use with product(s) identified herein are not covered by this warranty.
- Page 28 655 West Ryan Street Brillion, WI 54110 ariensstore.com ariens.custhelp.com parts.ariens.com...