Table of Contents
Advertisement
Quick Links
OWNER'S MANUAL
DRYER
Before beginning installation, read these instructions
carefully. This will simplify installation and ensure that the
product is installed correctly and safely. Leave these
instructions near the product after installation for future
reference.
ENGLISH
RH80T2AP6RM / RH80T2SP7RM
52415289
Rev.00_101922
Copyright © 2022 LG Electronics Inc. All Rights Reserved.
www.lg.com
Advertisement
Table of Contents

Related Manuals for LG RH80T2AP6RM


Summary of Contents for LG RH80T2AP6RM
- Page 1 This will simplify installation and ensure that the product is installed correctly and safely. Leave these instructions near the product after installation for future reference. ENGLISH RH80T2AP6RM / RH80T2SP7RM www.lg.com 52415289 Rev.00_101922 Copyright © 2022 LG Electronics Inc. All Rights Reserved.
-
Page 2: Table Of Contents
TABLE OF CONTENTS This manual may contain images or content that may be different from the model you purchased. This manual is subject to revision by the manufacturer. SAFETY INSTRUCTIONS READ ALL INSTRUCTIONS BEFORE USE............3 WARNING ......................3 INSTALLATION Parts and Specifications ..................9 Installation Location Requirements ..............11 Leveling the Appliance ..................12 Stacking Instructions ..................12... -
Page 3: Safety Instructions
SAFETY INSTRUCTIONS SAFETY INSTRUCTIONS READ ALL INSTRUCTIONS BEFORE USE The following safety guidelines are intended to prevent unforeseen risks or damage from unsafe or incorrect operation of the appliance. The guidelines are separated into ‘WARNING’ and ‘CAUTION’ as described below. Safety Messages This symbol is displayed to indicate matters and operations that can cause risks. - Page 4 SAFETY INSTRUCTIONS • This appliance contains R290, a refrigerant that is environmentally friendly but flammable. Do not damage the refrigerant circuit, keep an open frame and ignition sources away from the appliance. • This appliance is not intended for use by persons (including children) with reduced physical, sensory or mental capabilities, or lack of experience and knowledge, unless they have been given supervision or instruction concerning use of the appliance by a person...
- Page 5 SAFETY INSTRUCTIONS • Do not dry clothes stained with oil substances. Oil substances (including edible oils) stained on clothes cannot be completely removed even after washing with water. • The appliance must not be supplied through an external switching device, such as a timer, or connected to a circuit that is regularly switched on and off by a utility.
- Page 6 SAFETY INSTRUCTIONS • Tighten the drain hose to avoid separation. • If the power cord is damaged or the hole of the socket outlet is loose, do not use the power cord and contact an authorized service centre. • Do not plug multiple socket outlets, an extension power cable or adapter with this appliance.
- Page 7 Improper use can cause fire or explosion. • In case of flood, disconnect the power plug and contact the LG Electronics customer information centre. • Do not push down on the appliance door when it is open.
- Page 8 SAFETY INSTRUCTIONS • Do not spray water inside or outside the appliance to clean it. Disposal • Before discarding an old appliance, unplug it and cut off the power cable directly behind the appliance to prevent misuse. • Dispose of all packaging materials (such as plastic bags and styrofoam) away from children.
-
Page 9: Installation Parts And Specifications
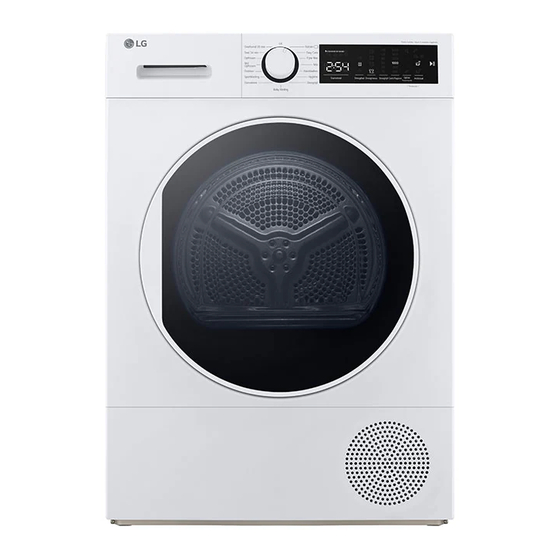
INSTALLATION INSTALLATION Parts and Specifications NOTE • Appearance and specifications may vary without notice to improve the quality of the appliance. Front View Top plate Control panel Door Plinth Plinth opening slot Ventilation grills Adjustable feet Plinth cover Type plate Lint filter Drawer cover... - Page 10 INSTALLATION Specifications Asterisk(s) means model variant and can be varied (0-9) or (A-Z). Description Value Model RH80T2AP6RM / RH80T2SP7RM Power supply 220 - 240 V~, 50 Hz Product weight 48 kg Allowable temperature 5 - 35 ℃ Dimension(mm) D’’ D’...
-
Page 11: Installation Location Requirements
INSTALLATION Installation Location • With the appliance installed, adjust all four feet using a spanner to ensure the appliance is Requirements stable, and a clearance of approximately 20 mm is left between the top of the appliance and the Before installing the appliance, check the following underside of any work-top. -
Page 12: Leveling The Appliance
In order to put the dryer machine onto the washing machine, a special stacking kit is required as an Leveling the Appliance optional extra. Please contact LG Electronics Customer Information Centre or visit the LG Website at http://www.lg.com for purchase.The Checking Leveling assembly instruction will be served together with the stacking kit. -
Page 13: Connecting The Drain Hose
Please contact LG Electronics Customer Information Centre or visit the LG Website at http:/ /www.lg.com for purchase. Pull and take out the end of the hose at the back of the dryer. -
Page 14: Operation Operation Overview
OPERATION OPERATION Operation Overview • All strings and attached belts of clothes should be well tied and fixed before being put into the drum. Using the Appliance Before the first cycle, set the appliance to dry for 5 Choose a drying programme by turning the minutes to warm up the drum. -
Page 15: Preparing The Clothes
OPERATION To help reduce odours from forming, the clothes are spun thoroughly in the washer dryer’s door can be left open or slightly ajar for before loading them in the dryer. a short period of time if possible to help •... - Page 16 OPERATION Fiberglass • Do not dry fiberglass items in the appliance. Glass particles left in the appliance may be subsequently picked up by your clothes in later cycles. Checking the Fabric Care Label The symbols on the fabric care label tell you about the fabric content of your clothes and how they should be dried.
-
Page 17: Control Panel
OPERATION Control Panel Control Panel Features Description Programme Selector • Programmes are available according to the clothing type. • The lamp will light up to indicate the selected programme. Time and Status Display • The display shows the settings, estimated remaining time, options, and status messages. When the appliance is turned on, the default settings in the display will illuminate. - Page 18 OPERATION Display symbols symbols Description symbols Description Water tank warning indicator Anti-crease 60‘ Lint filter cleaning warning Anti-crease 120‘ indicator Heat exchanger cleaning Delicate warning indicator Extra Dry Beep On/Off Cupboard Dry Delay Iron Dry Energy Consumption Display Drying level 1 The energy consumption display shows the energy consumption of the selected program.
-
Page 19: Programme Table
OPERATION Programme Table Drying programme Guide Programme Max. Load Capacity 8 kg Cotton Detail This programme dries cotton laundry including bedsheets, pillowcases, pyjamas, underwear, tablecloths etc. Programme Synthetics Max. Load Capacity 4 kg Detail This programme dries synthetics, such as shirts, t-shirts, blouses, at a lower temperature compared to the cottons programme. - Page 20 OPERATION Programme Sportswear Max. Load Capacity 4 kg Detail Sport program is used for synthetic sport laundries like shorts, t-shirts at low temperature. Programme Outdoor Max. Load Capacity 2 kg Detail This programme is suitable for outdoor clothing, waterproof jackets, jackets with inner insulation, etc.
- Page 21 OPERATION Programme Dry Target Delicate Time Dry Dry Level Spin Cotton Synthetics Delicates Mixed Fabrics Towel Hygiene Time Dry Babywear Duvet Sportswear Outdoor Wool Refresh Refresh Quick 34 Shirt 20...
-
Page 22: Extra Options And Functions
OPERATION Extra Options and Delay Functions It allows you to delay the starting time of the drying cycle from 1 hours to 23 hours. Dry Target Select a programme. It allows you to select a dry target for the drying programme. - Page 23 OPERATION active for 60 minutes. When the Anti Crease option is selected, Anti Crease will be active for 120 minutes. To turn off the option, press the Anti Crease button before you start a drying cycle. Child Lock It allows you to control the locking and unlocking of control panel.
-
Page 24: Maintenance
MAINTENANCE MAINTENANCE WARNING • Remove the power plug when you clean the appliance. Not removing the plug may result in electric shock. Cleaning after Every Dry Clean the inner filter Pull out the inner filter from the outer filter and Cleaning the Lint Filter then open the inner filter. - Page 25 MAINTENANCE Clean the outer filter Close the outer filter while pushing the side of the filter. Remove the dust or lint around the filter inlet. CAUTION • When the lint drops into the filter inlet, it may Close them, and reinsert the both lint filters. cause degradation of drying performance and increase in drying time.
-
Page 26: Cleaning The Appliance Periodically
MAINTENANCE Pull out the water container. Clean the heat exchanger after 30 drying cycles or 3 times a month even if is not lights up. Empty the water container into the sink. Open the kick plate cover as shown. CAUTION •... - Page 27 MAINTENANCE regularly to remove any build-up of lime scale on the surface of the sensor. Wipe the sensors inside the drum. CAUTION • Do not wipe the moisture sensor with abrasive materials. Always clean the sensor with a dry rough acrylic sponge.
-
Page 28: Troubleshooting
Errors and malfunctions may occur when operating the appliance. The following tables contain possible causes and notes for resolving an error message or malfunction. Read the tables below carefully in order to save time and money before calling the LG Electronics service centre. Before Calling for Service Your appliance is equipped with an automatic error-monitoring system to detect and diagnose problems at an early stage. - Page 29 The door is closed while clothes or foreign substance is caught in the door. • Check if clothes or foreign substance is caught in the door before using the appliance. If water leaks continuously, contact the LG Electronics Customer Information Centre. Appliance runs and This is how the anti crease option works.
- Page 30 TROUBLESHOOTING Symptoms Possible Cause & Solution Clothes take too long House fuse is blown, circuit breaker has tripped, or power outage has to dry. occurred. • Reset circuit breaker or replace fuse. Do not increase fuse capacity. If the problem is a circuit overload, have it corrected by a qualified electrician. Appliance is overloaded.
- Page 31 TROUBLESHOOTING Symptoms Possible Cause & Solution Lint is left on clothes. Lint filter has not been cleaned properly. • Remove the lint from the lint filter after every cycle. With the lint removed, hold the lint filter up to a light to see if it is dirty or clogged. If it looks dirty, follow the cleaning instructions.
- Page 32 TROUBLESHOOTING Odours Symptoms Possible Cause & Solution The appliance has an Are you using the appliance for the first time? odour. • The smell is caused by rubber material that is attached to the appliance inside. This kind of smell is a rubber's own smell and disappears automatically after using the appliance several times.
- Page 33 Memo...
- Page 34 Memo...
- Page 35 Memo...